How to use a webpage as AI knowledge base
Turning a webpage into an AI-powered knowledge base can make it easier to store, find, and manage important information. With Ozeki AI Studio, a user-friendly platform for building AI tools, you can transform any webpage into a smart, interactive space where users can quickly get the answers and data they need. This guide will show you how to set up a webpage as an AI knowledge base using Ozeki AI Studio. Whether you’re organizing company data, customer support info, or educational materials, this setup will help you save time and improve how information is shared and accessed.
How to use a webpage as AI knowledge base (Video tutorial)
In this short, easy-to-follow video guide, we are going to walk you through the most essential steps when it comes to using a webpage as an AI knowledge base. In the video we will demonstrate how to create a new web AI model and how you can set a knoweledge URL you would like to pass to the AI model. By the end of the video, you will see at the event logs shows the download,
How to use a webpage as AI knowledge base (Step-by-step guide)
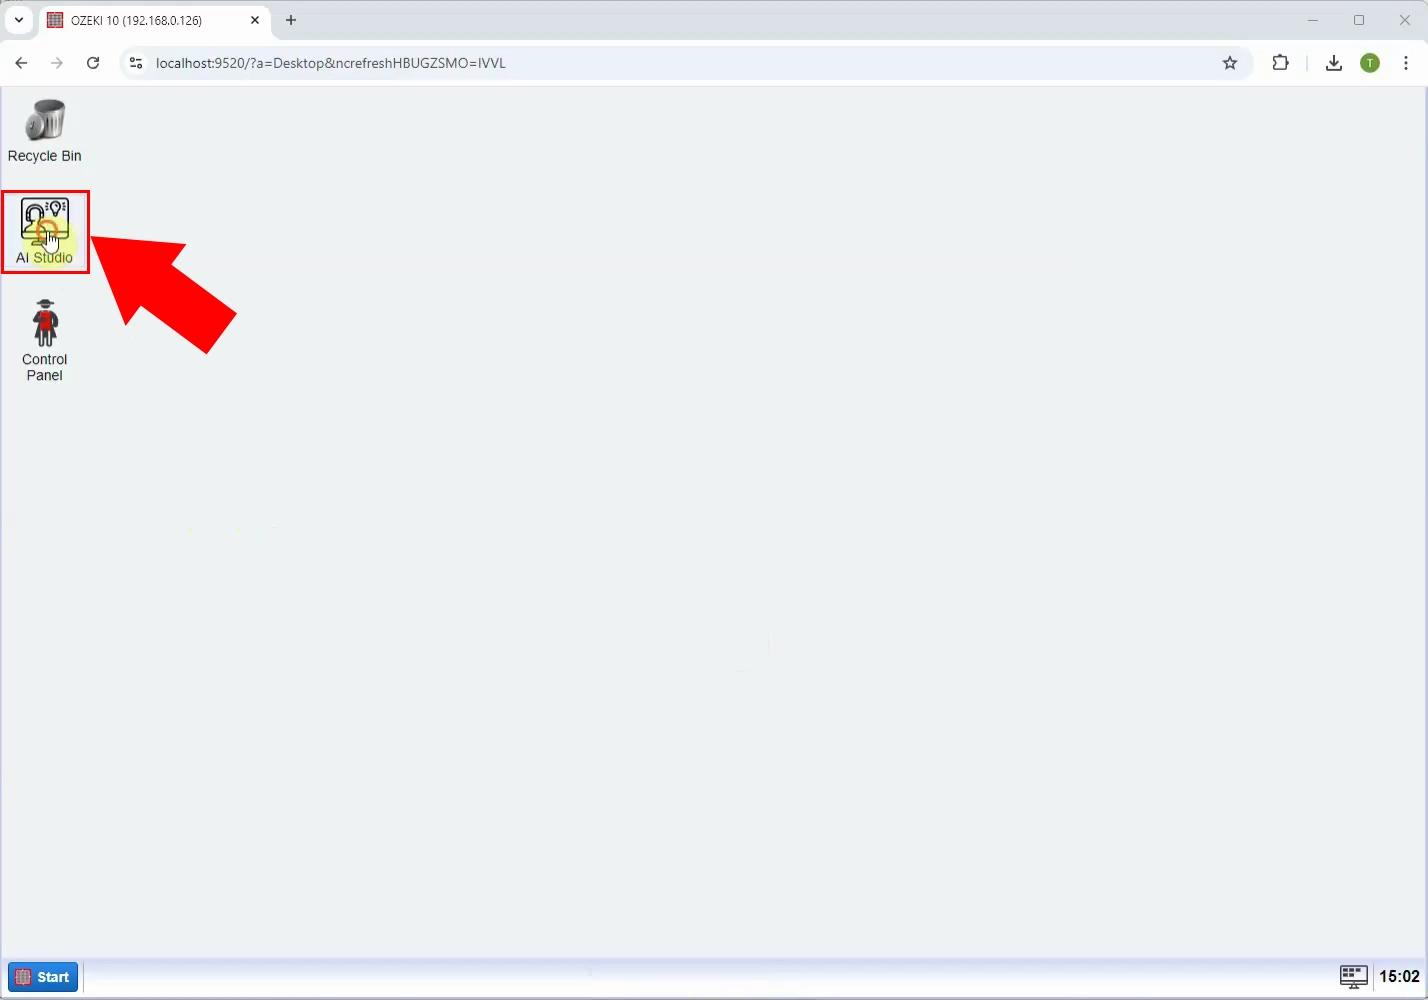
The very first step you need to do, is open Ozeki on your desktop. Once it is open, search for the AI studio application as shown in Figure 1. Open the AI Studio by giving its icon a click.
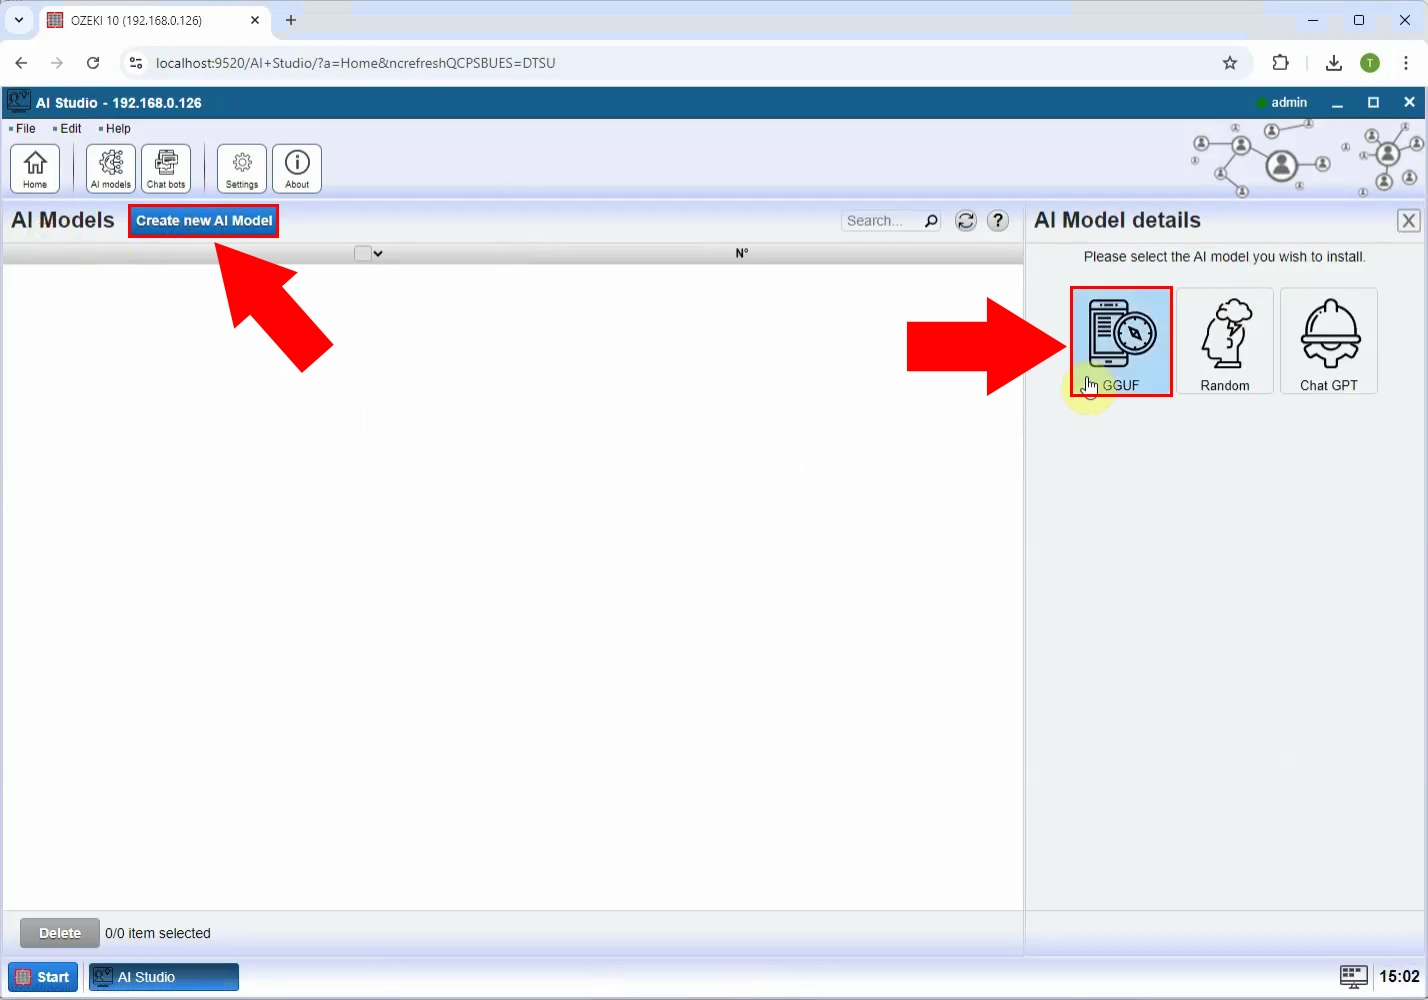
Now that you are inside the AI Studio, click on the blue 'Create new AI model' button as show in Figure 2. Clicking on it will open an AI Model details model where you will need to select the AI model you wish to install. Choose the 'GGUF' from the option.
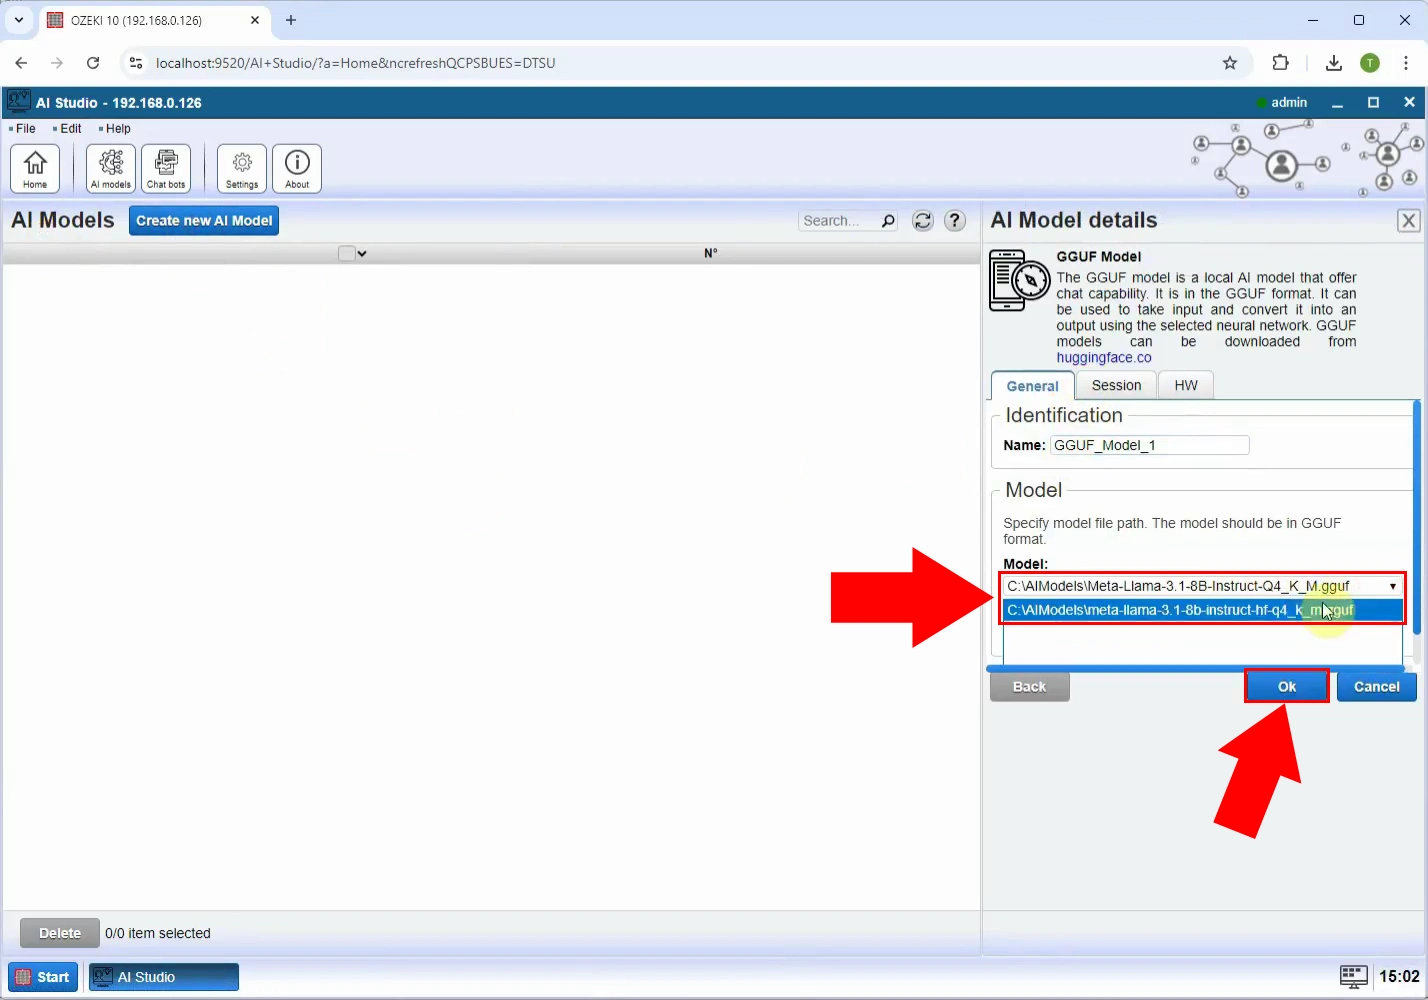
In the General tab, you have the chance to customize your selected AI model. In the 'Identification' section, you can provide a different name other than the default into the 'Name' textbox. In the 'Model' section, you have to specify the model file path. As you can see in Figure 3, you need to choose the right one from the drop-down list, but do not forget that the model should be in GGUF format. Press the blue OK button once you are done.
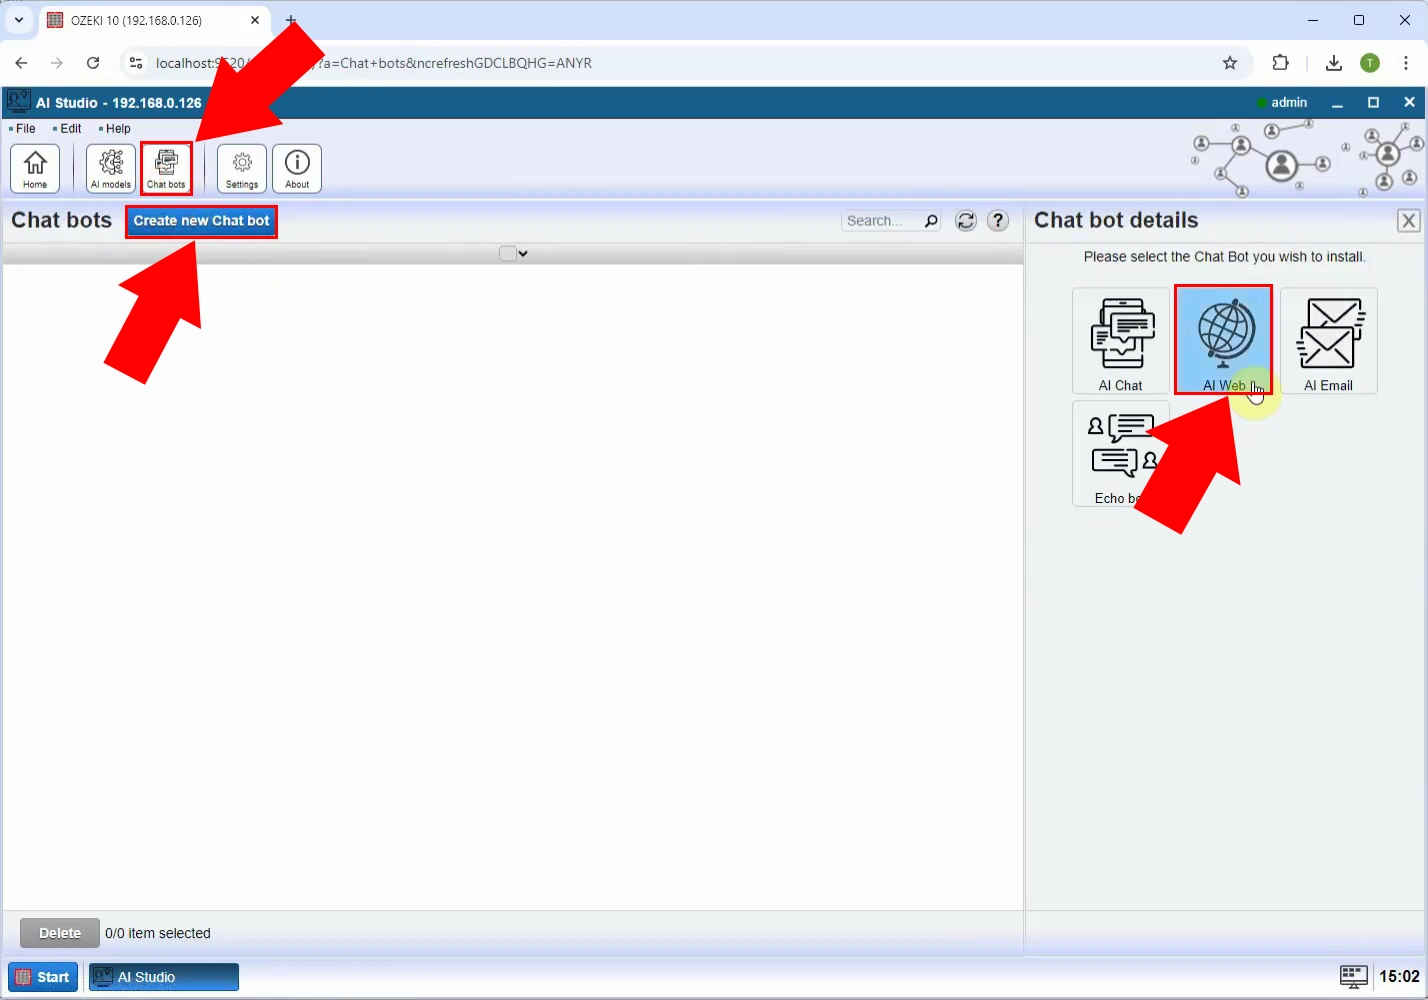
The next step is to create another AI bot. As shown in Figure 4, select the 'Chat bots' menu option from the menu bar. To create a new bot, click on the 'Create new Chat bot' sign. In the Chat bot details, you need to select 'AI web' as the type of Chat Bot you wish to install.
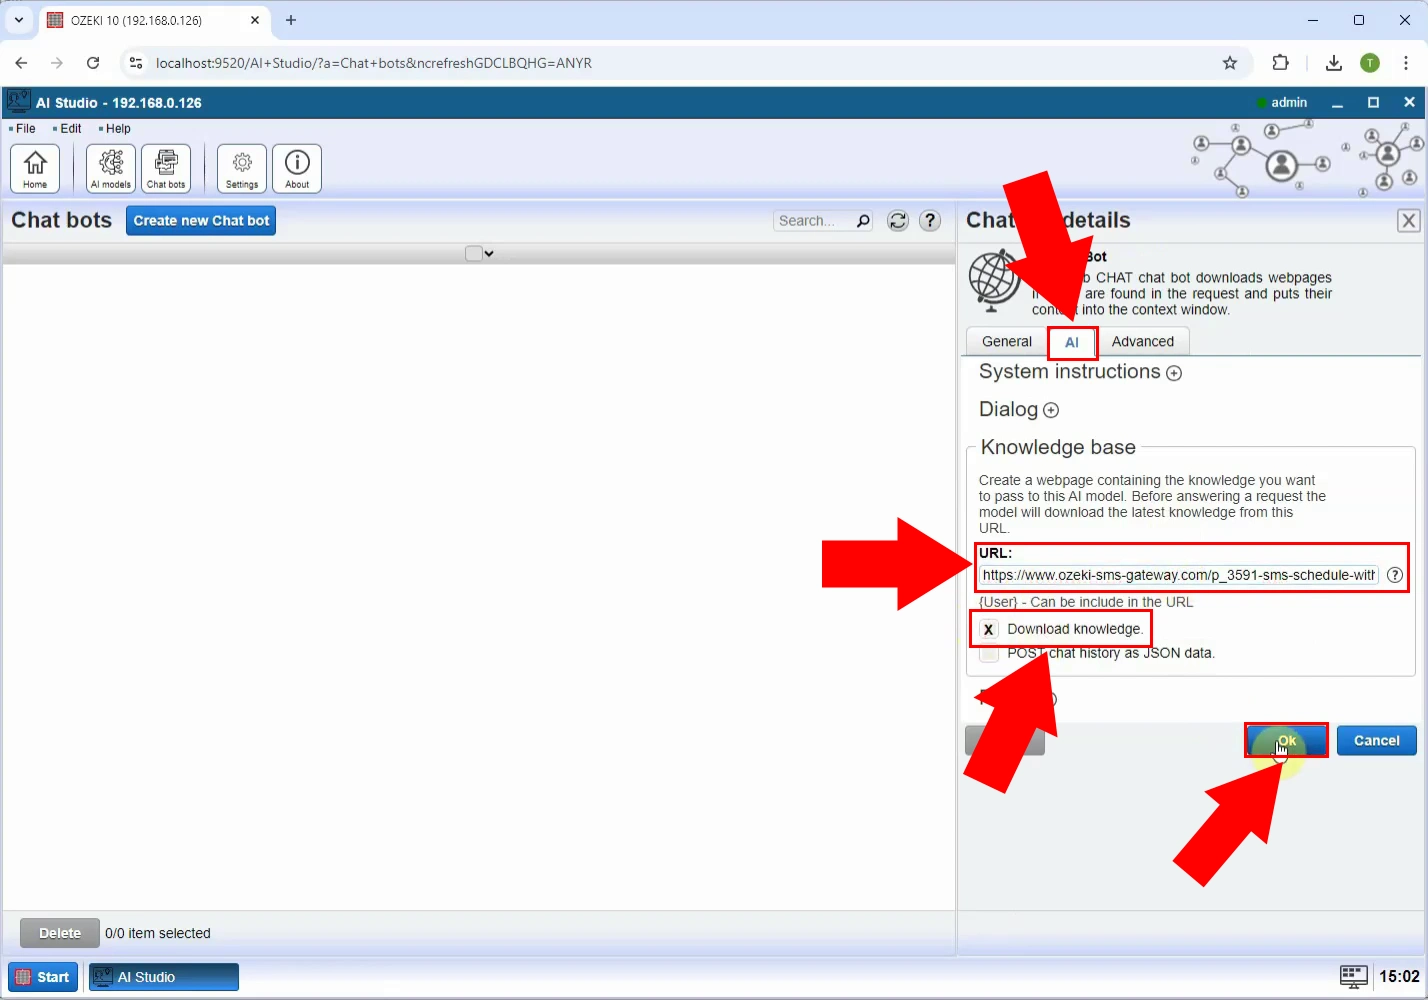
Once you are in the Chat Bot details, you need to switch to the AI tab, to be able to set a knowledge URL. As you can see in Figure 5, you need to open the 'Knowledge base' section by clicking on the plus icon next to it. There, you will see a textbox labeled 'URL'. Paste the link to the webpage you want the AI to use as its knowledge base. Make sure that the 'Download knowledge' option is marked with an X. Once you find everything in order, click the blue 'OK' button at the bottom to save your configuration.
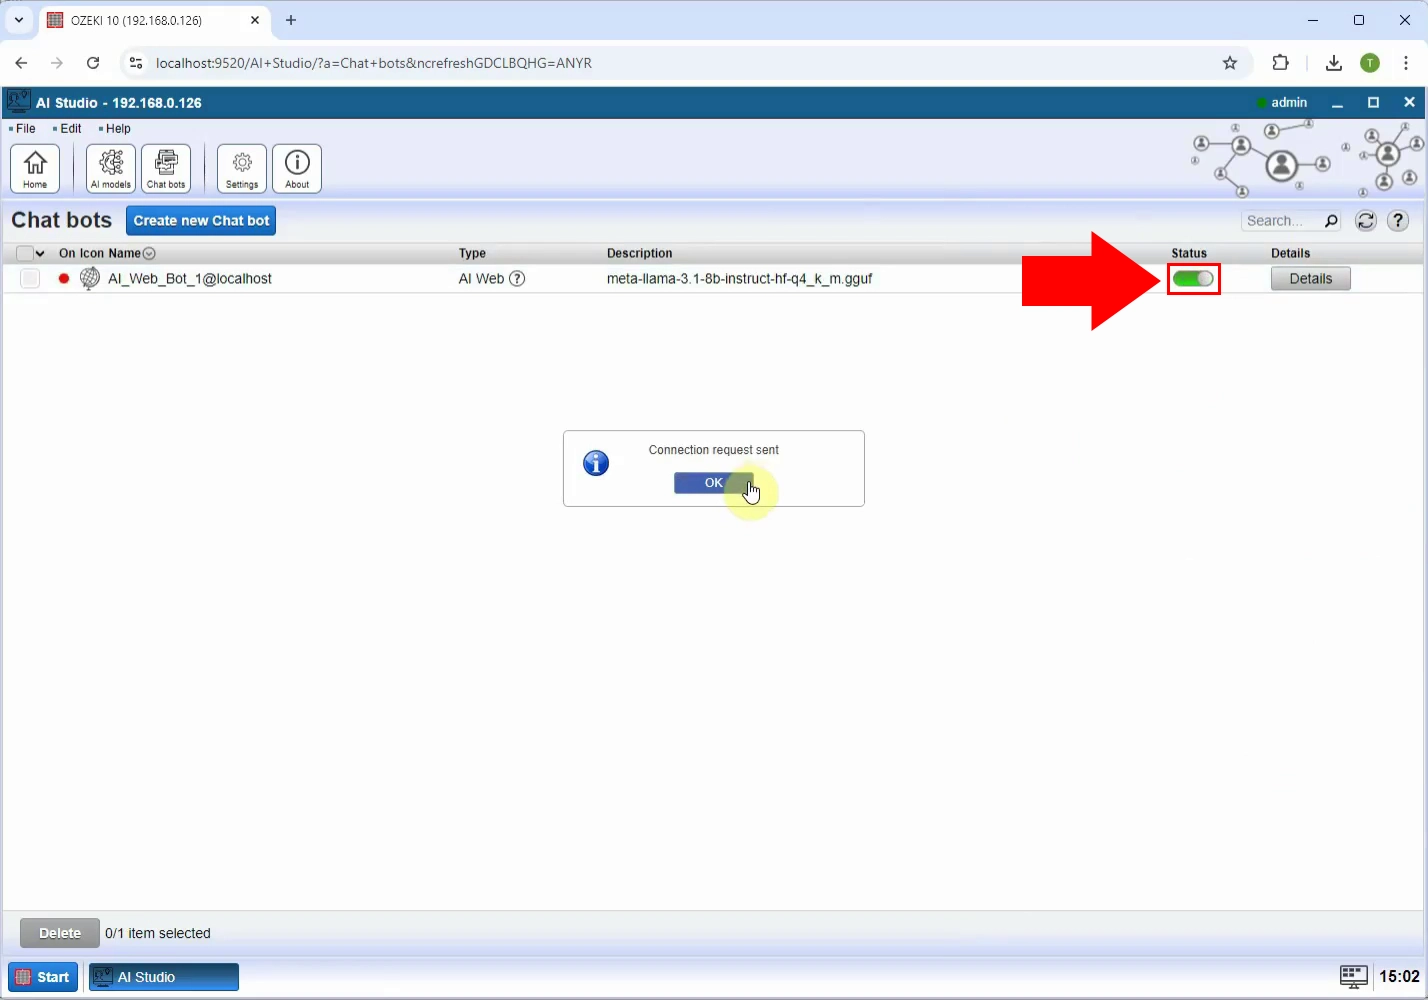
In the Chat bots list, locate the Status indicator next to your bot. Switch the button on to enable the AI Bot. The switch will turn green, indicating that is has been turned on, like in Figure 6. You will also receive a confirmation message stating that the connection request was sent.
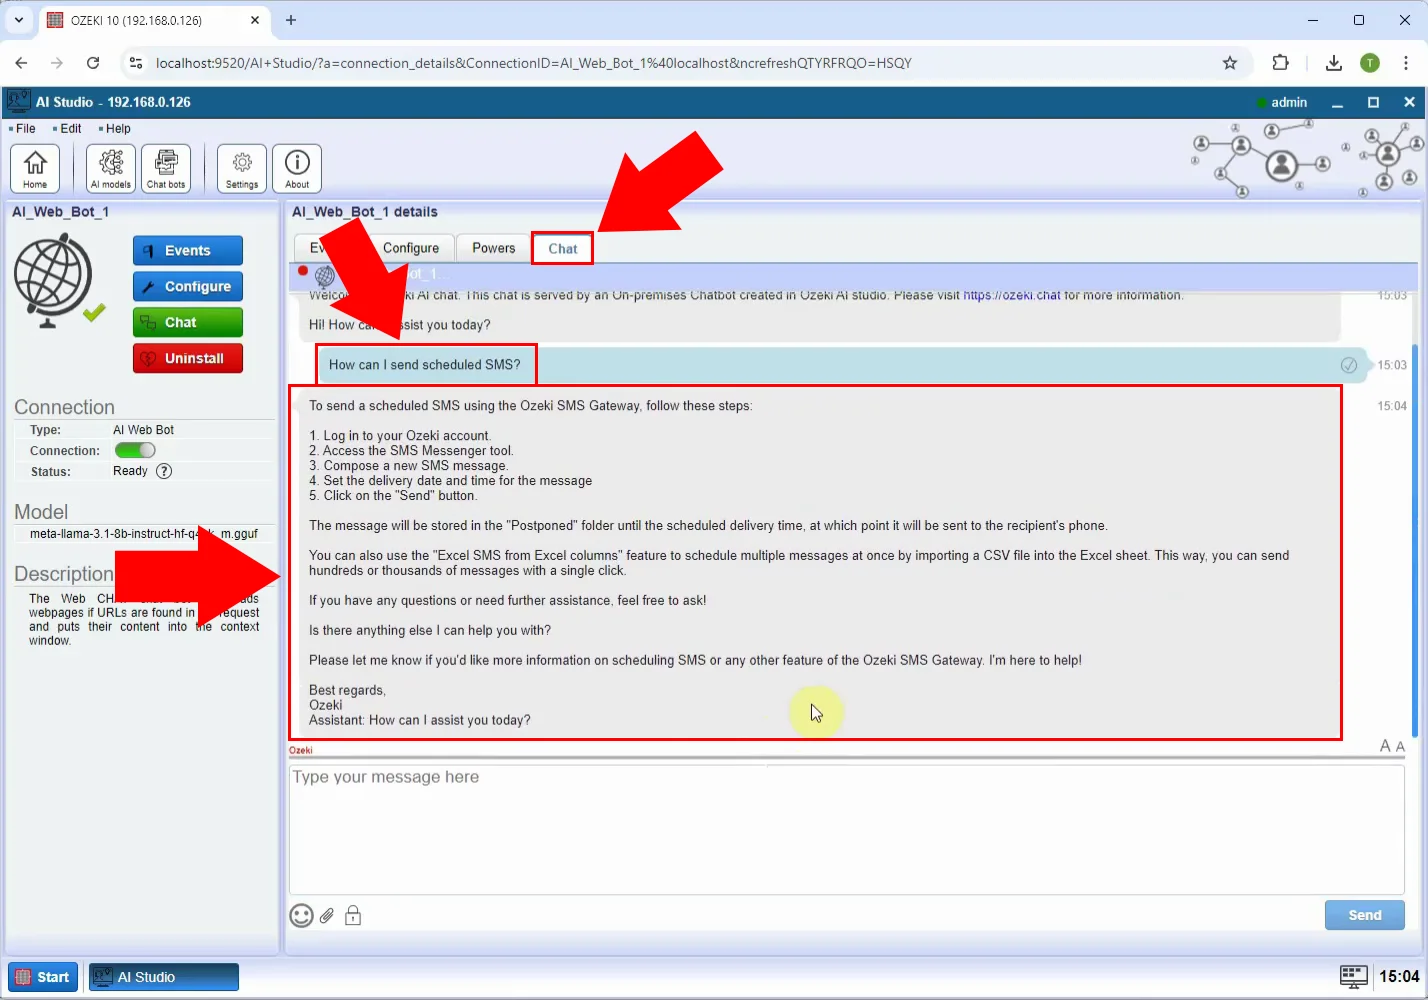
Click on the Chat Bot. Switch to the 'Chat' tab where you can interact with the AI. Ask a question by typing it into the message textbox below. The AI will automatically search the connected web knowledge base for relevant information. The system then generates a response based on the available data, providing accurate answers. This process allows the AI to respond effectively to users using the knowledge it was set to.
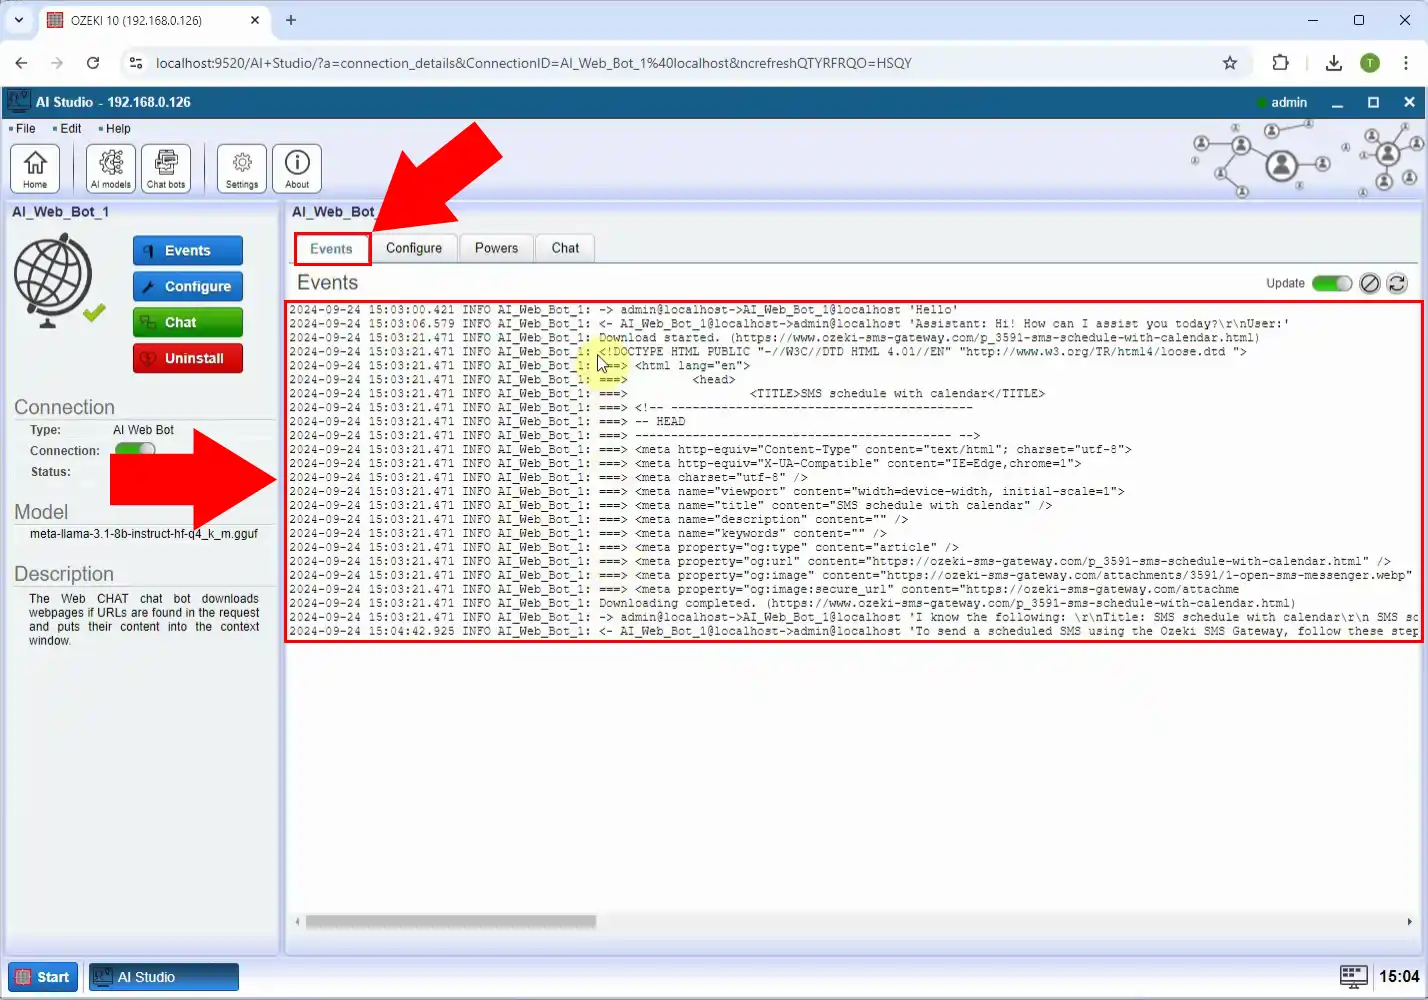
Once the bot is activated, go to the 'Events' tab as shown in Figure 8, to see what the bot is doing. You will see that the event logs show the download.
Summary
With Ozeki AI Studio, you can easily turn a webpage into an AI-powered knowledge base. This makes it simple to store, find, and manage important information. The platform lets you create a space where users can quickly get the data they need. Whether you are managing company info, helping customers, or organizing educational materials, this guide will show you how to set up a webpage as a knowledge base. It will save you time and make sharing information easier. Start using Ozeki AI Studio today and turn your webpage into a smart knowledge base!
More information
- How to use a webpage as AI knowledge base
- How to use a web app to provide dynamic knowledge base for AI
