Ozeki AI Quick Start Guide
Ozeki AI is a powerful yet intuitive tool designed to help businesses quickly deploy AI models and integrate them with various systems. In this quick start guide, you'll find clear definitions, a video tutorial, and a detailed step-by-step walkthrough with screenshots, making it easy to follow the setup process. The user-friendly interface ensures you can navigate the software effortlessly, and with our concise instructions, you can complete the setup in just 5 minutes. Whether you're looking for a quick reference or an in-depth guide, this article has you covered. Let's jump in!
What is an AI Chat bot?
AI chatbots are software programs that use artificial intelligence to simulate human-like conversations with users. They can understand and respond to text or voice inputs by processing natural language and providing relevant answers or performing tasks.
What does LLM stand for?
LLM (Large Language Model) is a type of artificial intelligence that can understand, generate, and predict human language based on vast amounts of text data. LLMs, such as GPT, are trained on diverse information and can perform tasks like answering questions, writing content, and translating text by recognizing patterns in language.
Ozeki AI Quick Start (video tutorial)
The video below showcases the essential steps in motion: adding an AI model, adding a chatbot, opening a conversation, and testing the chatbot in real time. This short guide is ideal if you're looking for a fast demonstration of the process, as it barely takes over a minute to watch.
Ozeki AI Quick Start (quick list)
- Open Ozeki AI Studio
- Add AI model
- Add Chat bot
- Open conversation
- Test chat bot
Ozeki AI Quick Start (detailed instructions)
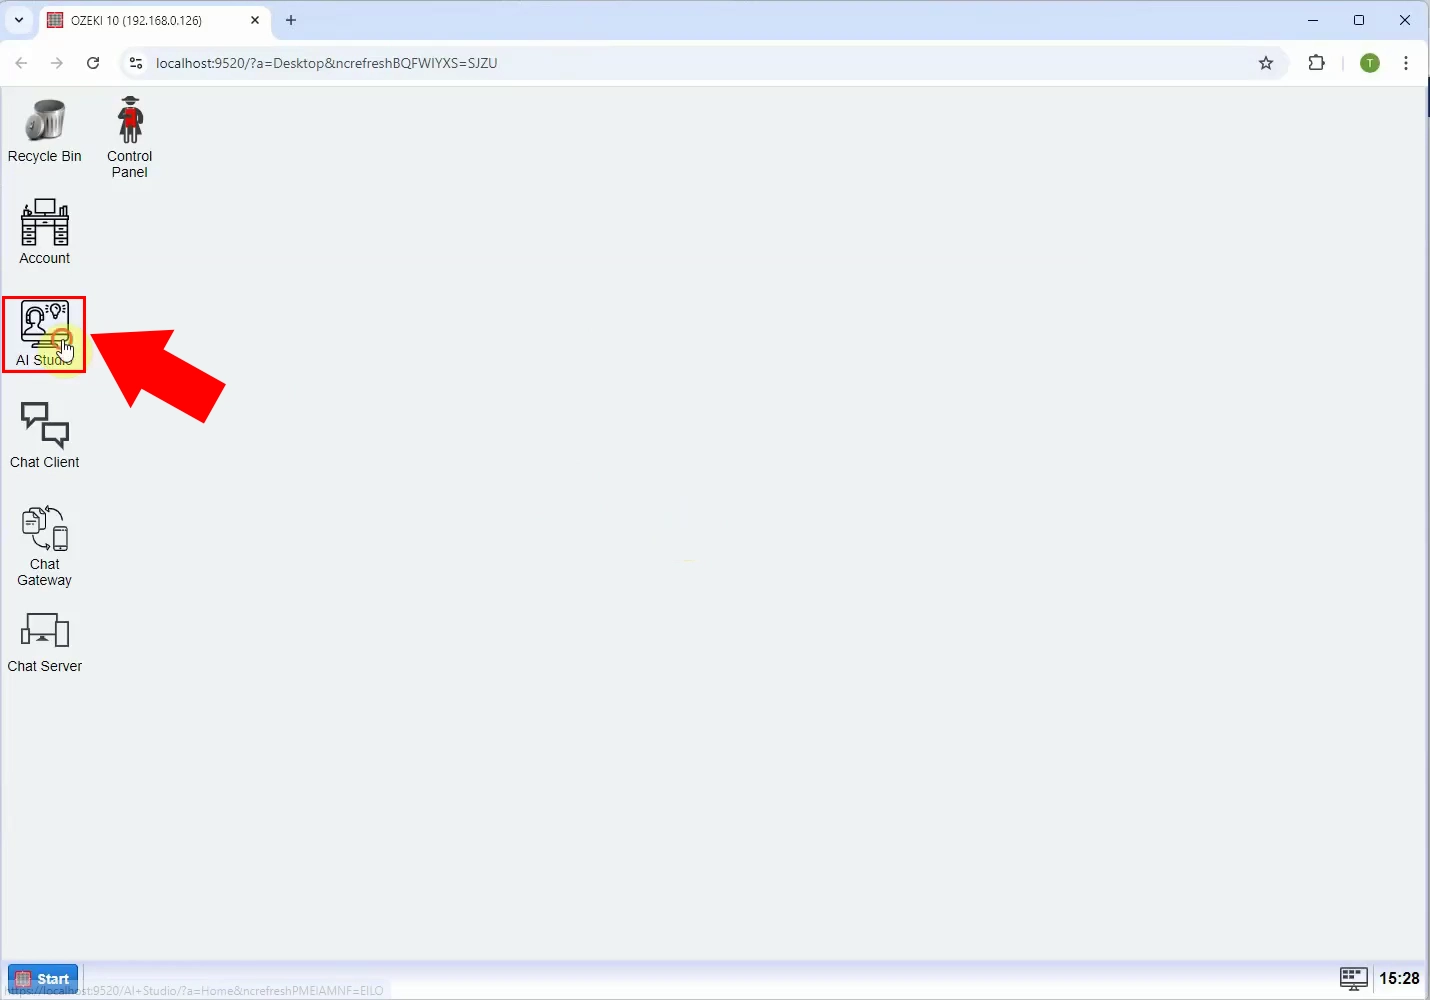
To start off, open AI Studio inside of OZEKI 10, as seen in Figure 1.
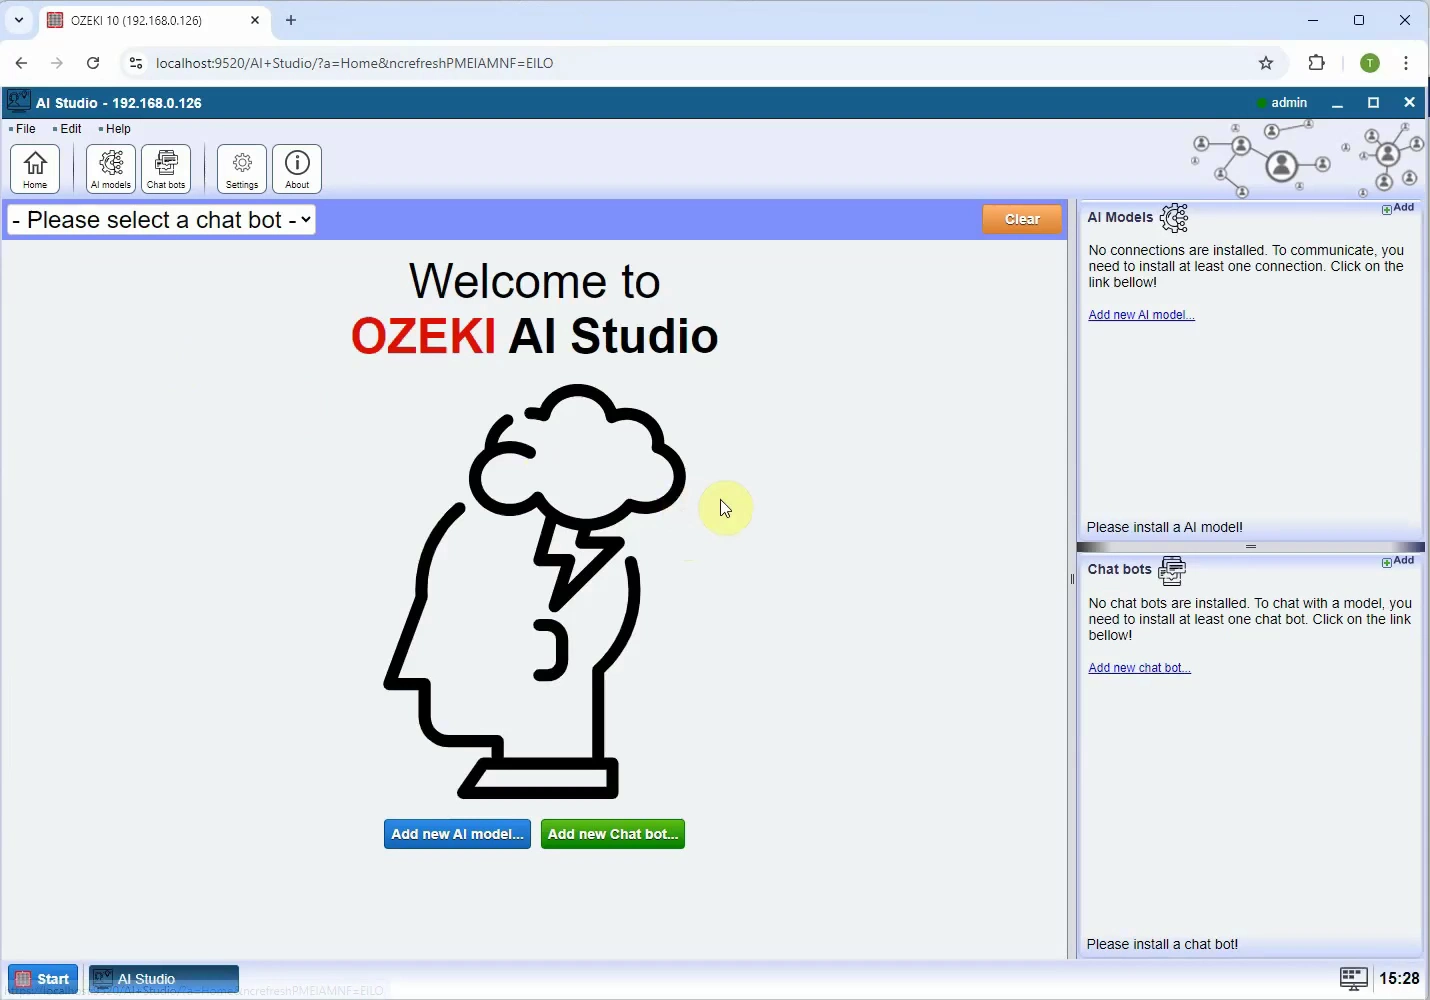
That takes you to the home page of Ozeki AI Studio. It should look similar to Figure 2.
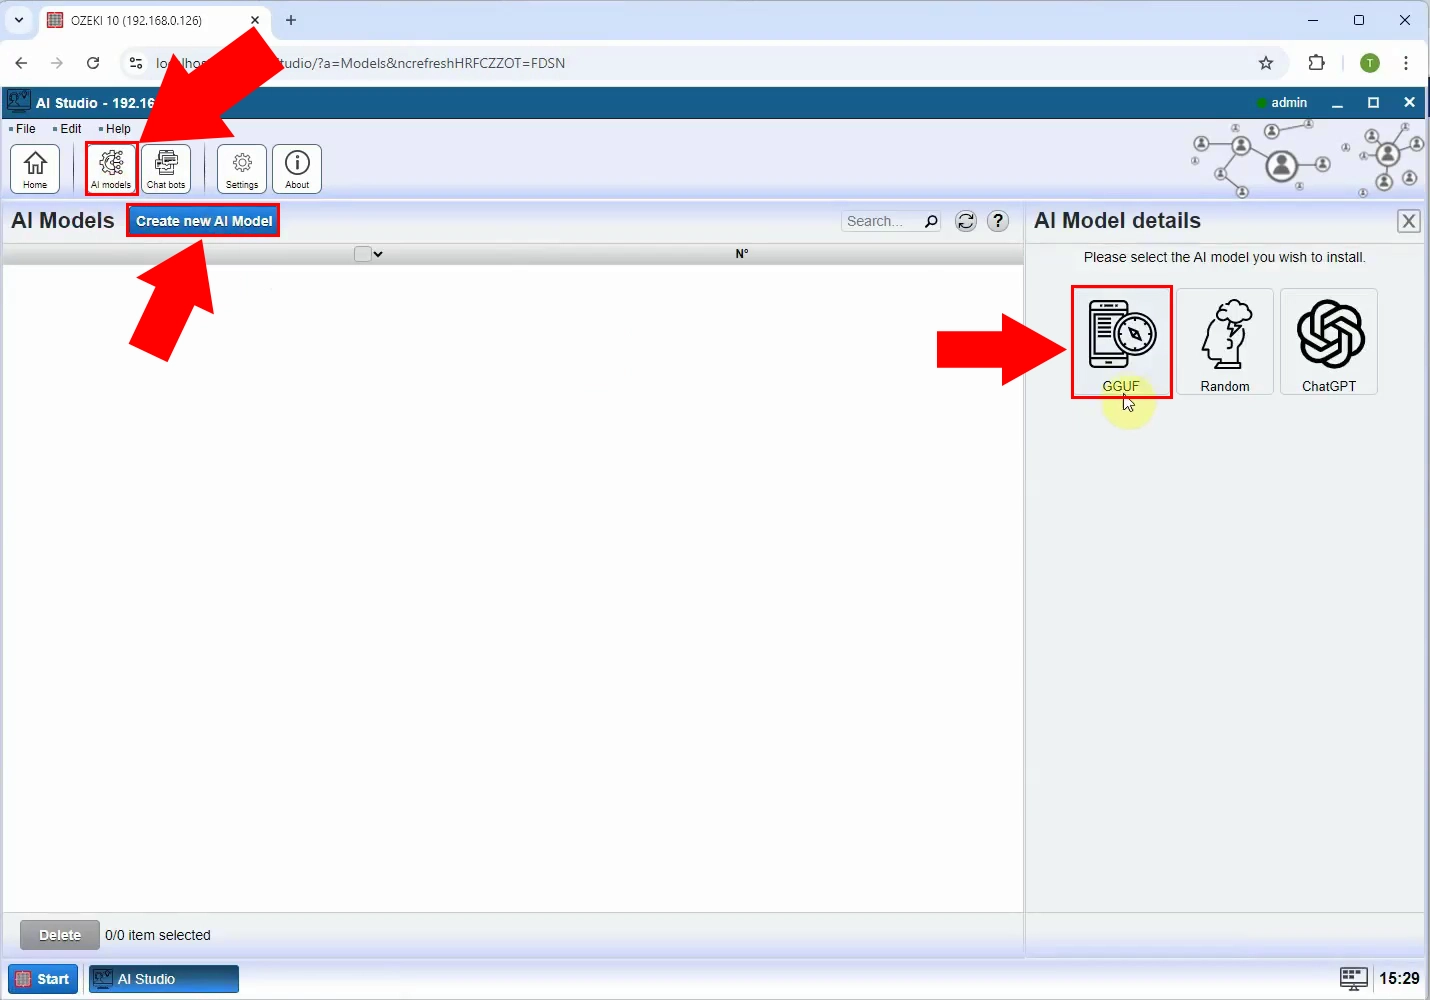
Click the AI models button on the toolbar, and click the blue Create new AI model button on the appearing page. In the right panel, select GGUF, highlighted in red in Figure 2.
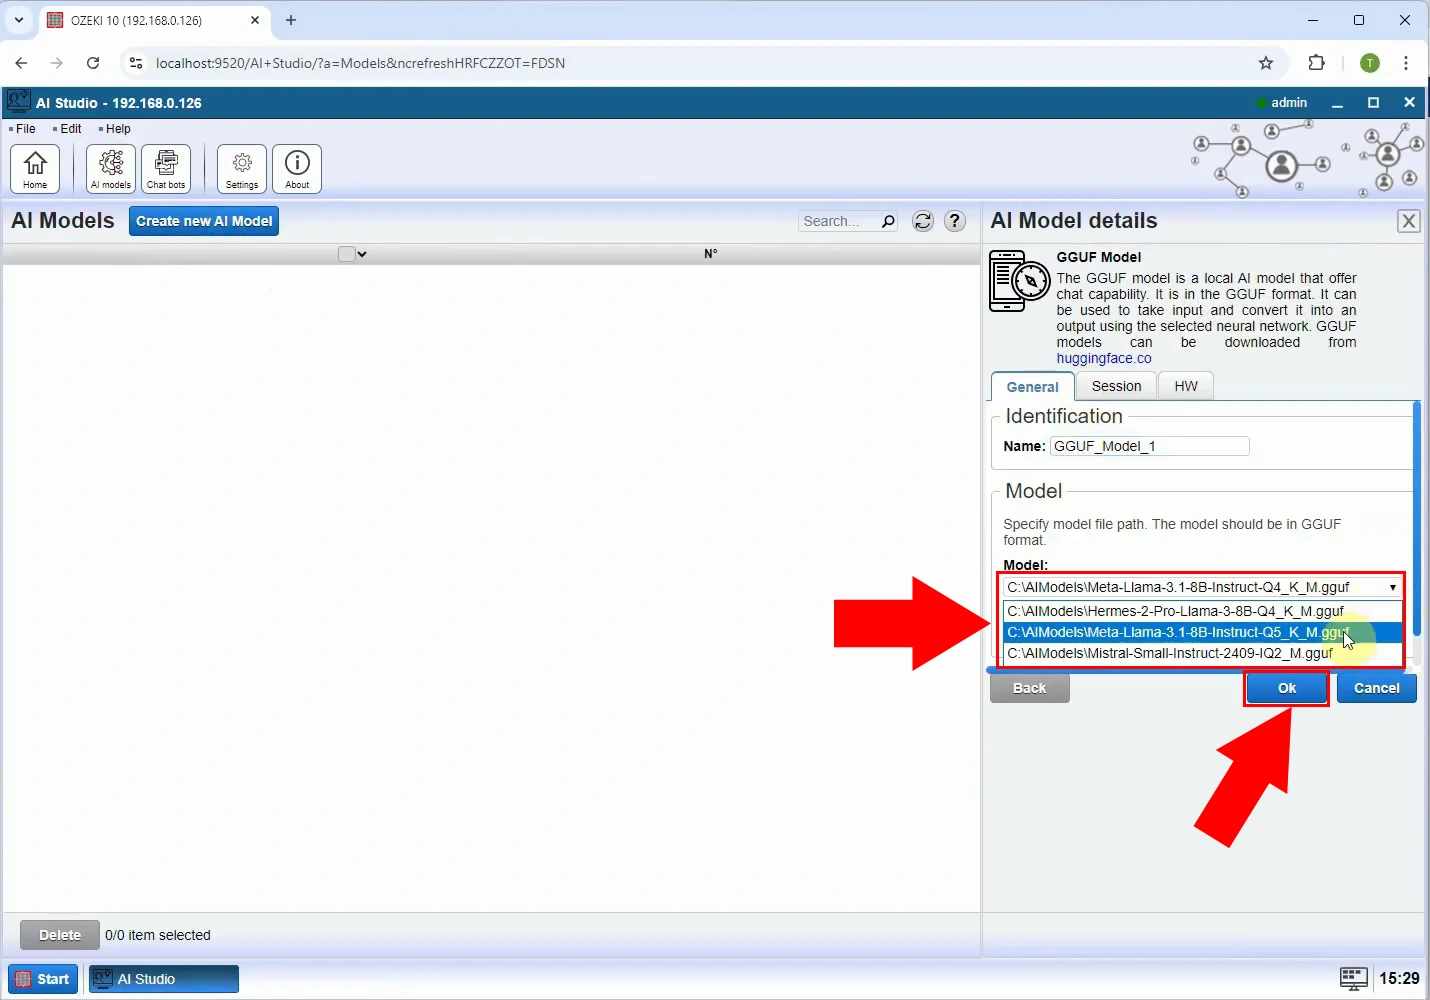
In the right panel, under Model, click the dropdown menu and select your preferred LLM file to load, as illustrated by Figure 4.
If you don't have a LLM file to load yet, click here to learn how to do that.
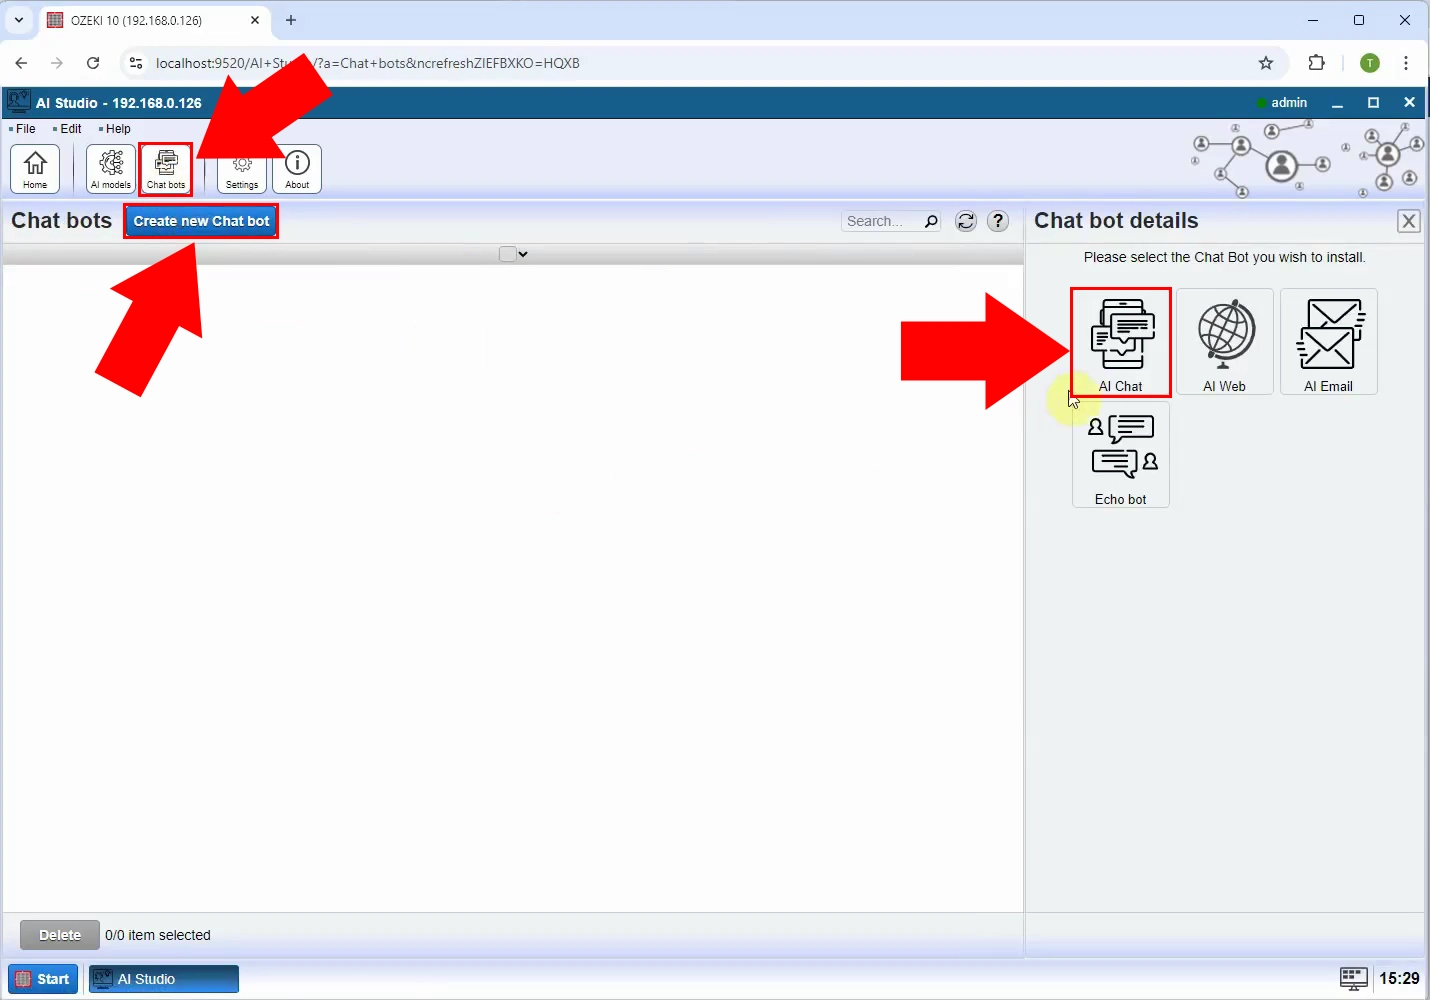
After that, click the Chat bots button on the toolbar, then the blue Create new Chat bot slightly below it. In the appearing right panel, select AI Chat (Figure 5).
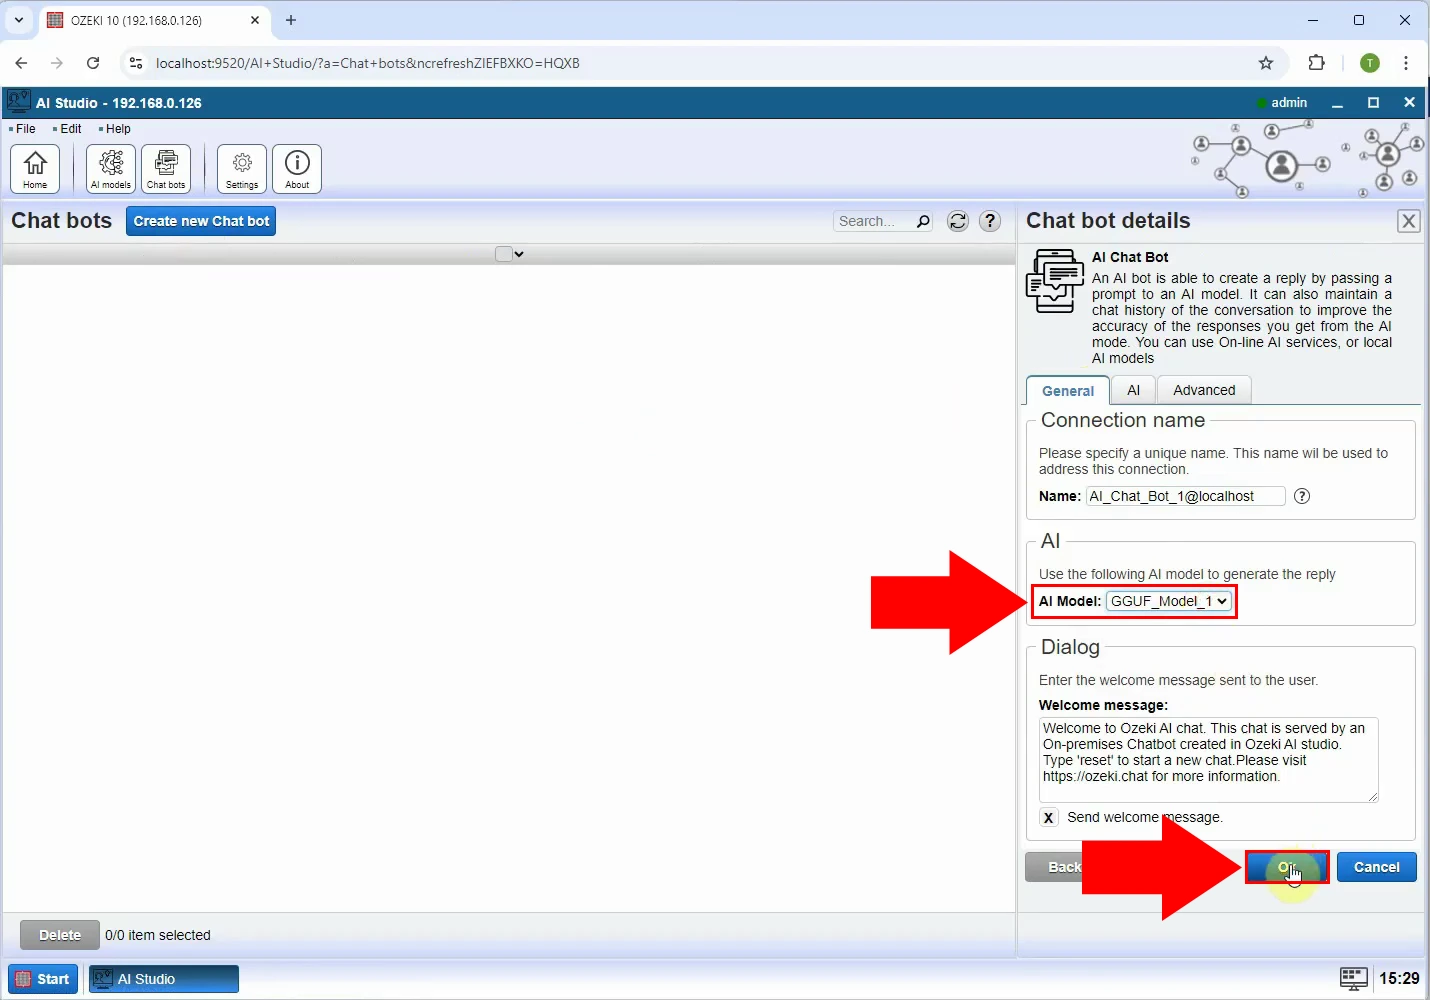
In the right panel, look for the dropdown menu next to AI Model. Open it, and select the model you've just added, similarly to Figure 6, and hit Ok.
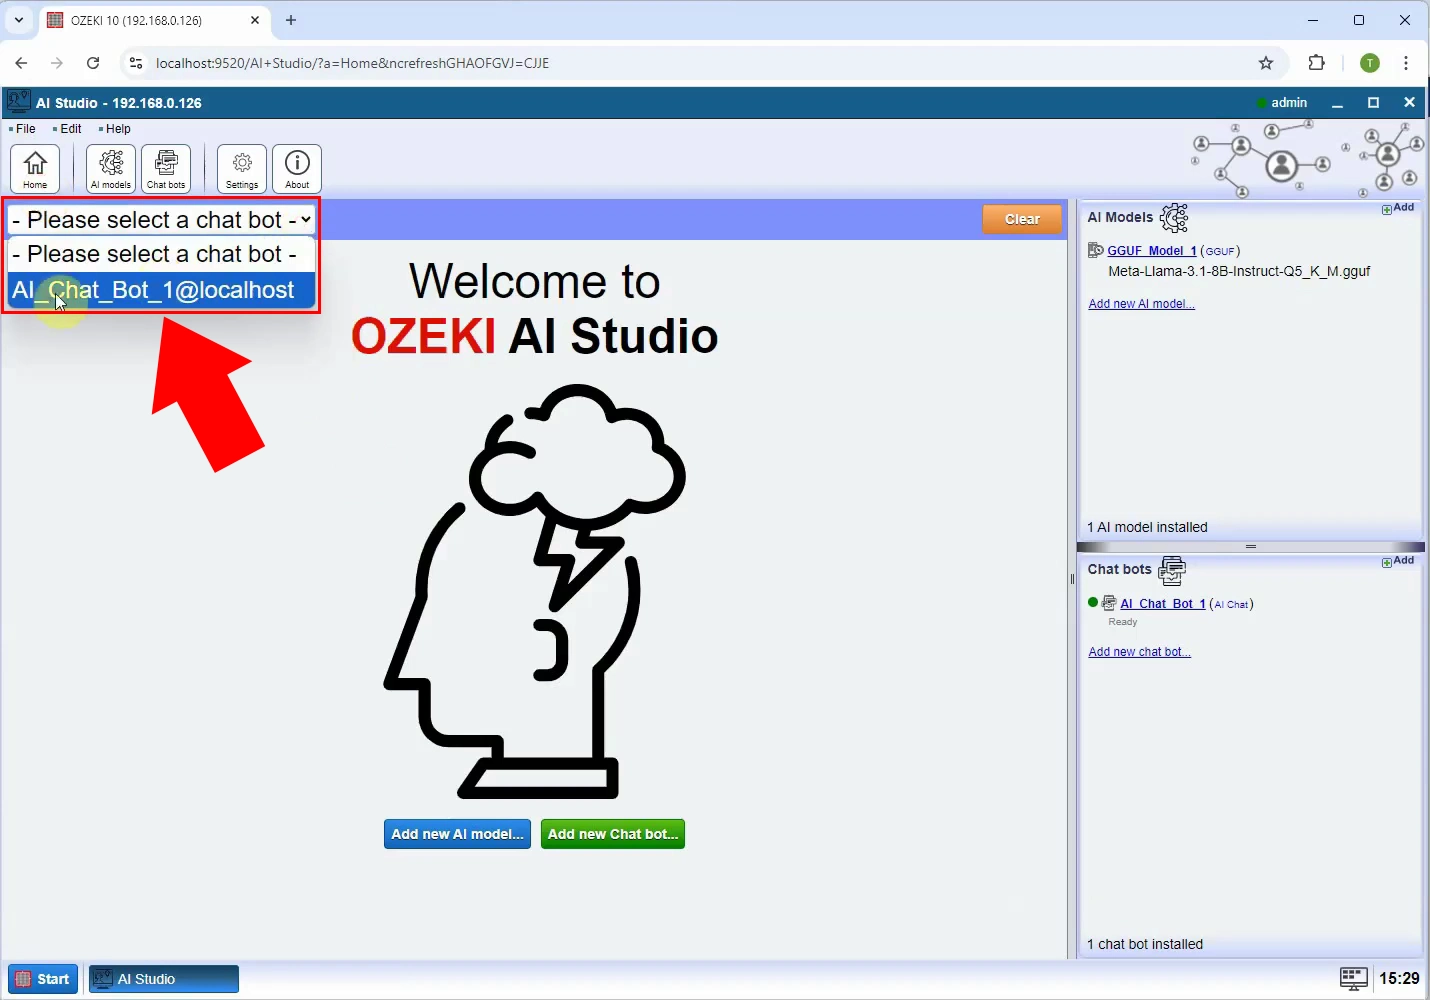
Head back to the home page of AI Studio. To open the conversation with your chat bot, open the dropdown menu near the top left edge of the screen, and select your freshly created bot (Figure 7).
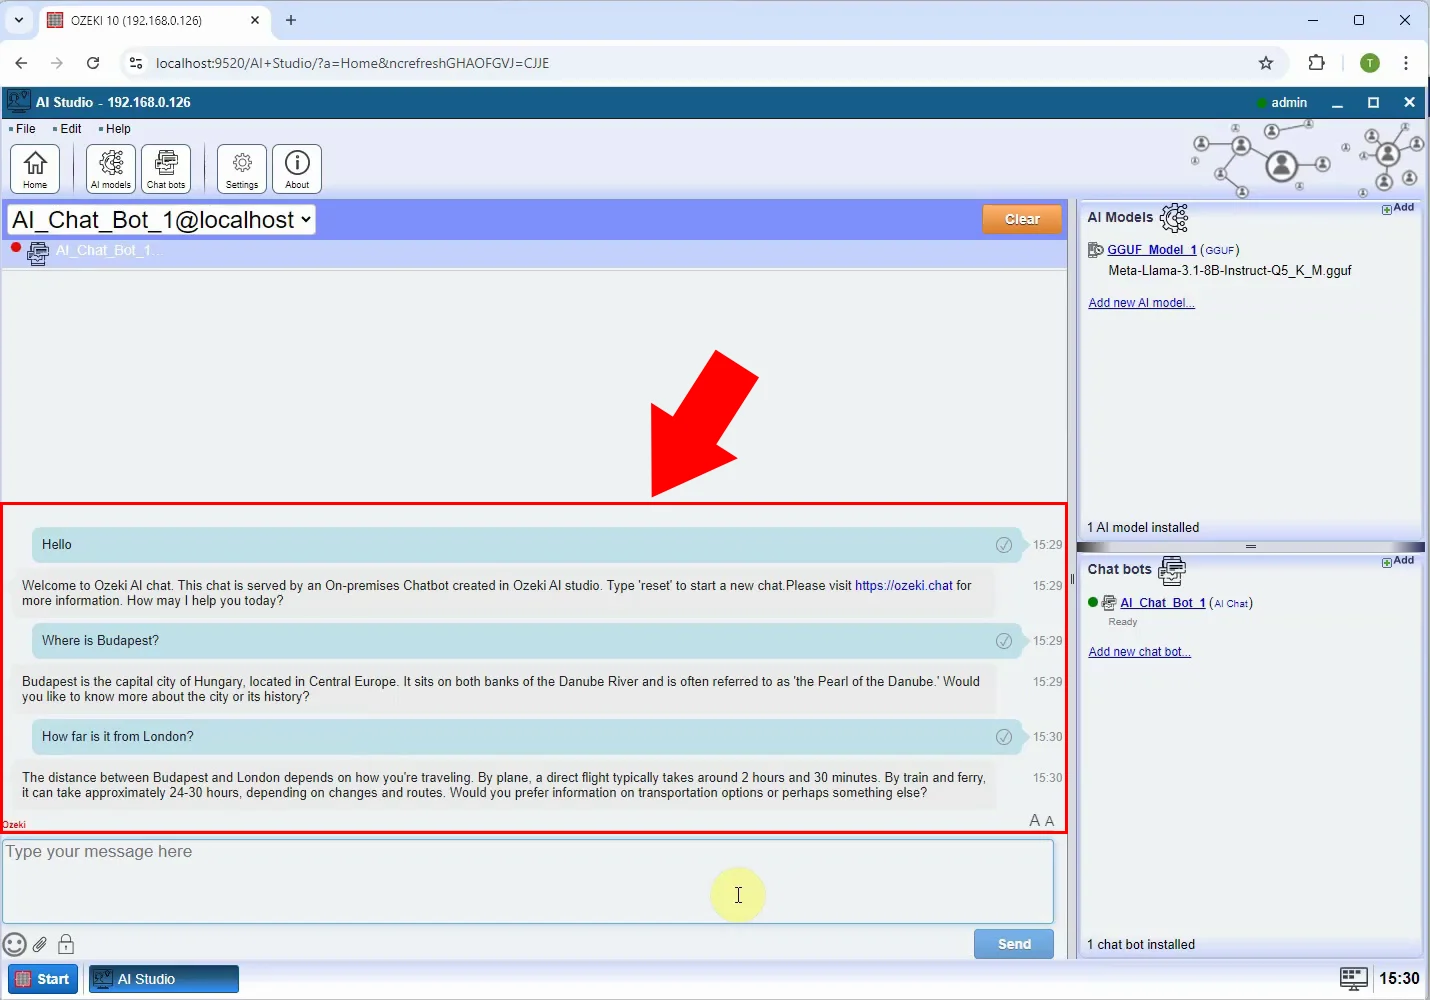
Test your chat bot by sending a couple messages. If you were successful, you should get correct and coherent answers, as you can see in Figure 8.
Conclusion
Now that Ozeki AI is set up, you're ready to start integrating AI into your workflows. With this guide, you've completed the essential steps and can now explore the platform’s full capabilities. As you refine your chatbot, Ozeki AI Studio will support your growing AI needs, helping you streamline operations and enhance customer interactions.

