How to run an AI model using vLLM
In this tutorial, you'll learn how to set up and run an AI model locally on a Linux system using vLLM. By the end, you'll have a working environment where you can download and interact with models directly from Hugging Face, making it easier to experiment and utilize AI without relying on external cloud services. This guide covers everything from installing essential tools like Python PIP and Miniconda, to setting up vLLM, and running a model through simple commands in the Terminal. No matter your experience level, this step-by-step process ensures you can get started with local AI model execution.
What is vLLM?
vLLM is an open-source, high-performance runtime for serving large language models (LLMs). It allows you to efficiently load, run, and interact with AI models on your local machine or server. Built to optimize the speed and scalability of model inference, vLLM makes it easier to use large models like those from Hugging Face without requiring extensive resources or cloud-based solutions.
Running an AI model using vLLM (in a nutshell)
- Install Python PIP
- Download and install Miniconda
- Create and activate new environment in Miniconda
- Install vLLM
- Select desired model from Hugging Face
- Load model using Terminal command
- Test model by sending test prompt
Install Python PIP and Conda
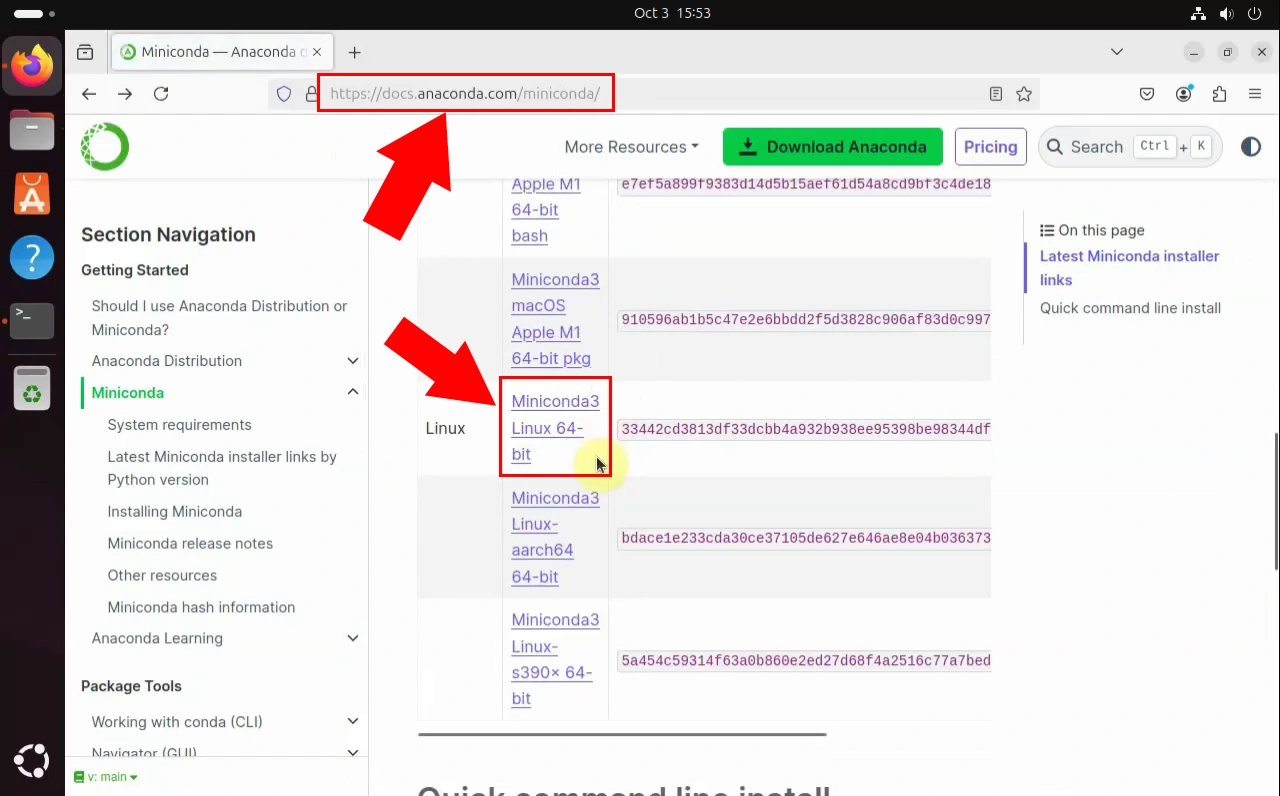
In this video, you’ll learn how to install Python PIP and Miniconda on a Linux system using the Terminal. The tutorial walks you through each step in detail, starting with the installation of Python PIP directly from the Terminal with a simple command. From there, you'll open a browser and go to the Anaconda website to download the Miniconda installer. Once downloaded, the video shows you how to navigate to the download folder via the Terminal and execute the installation of Miniconda.
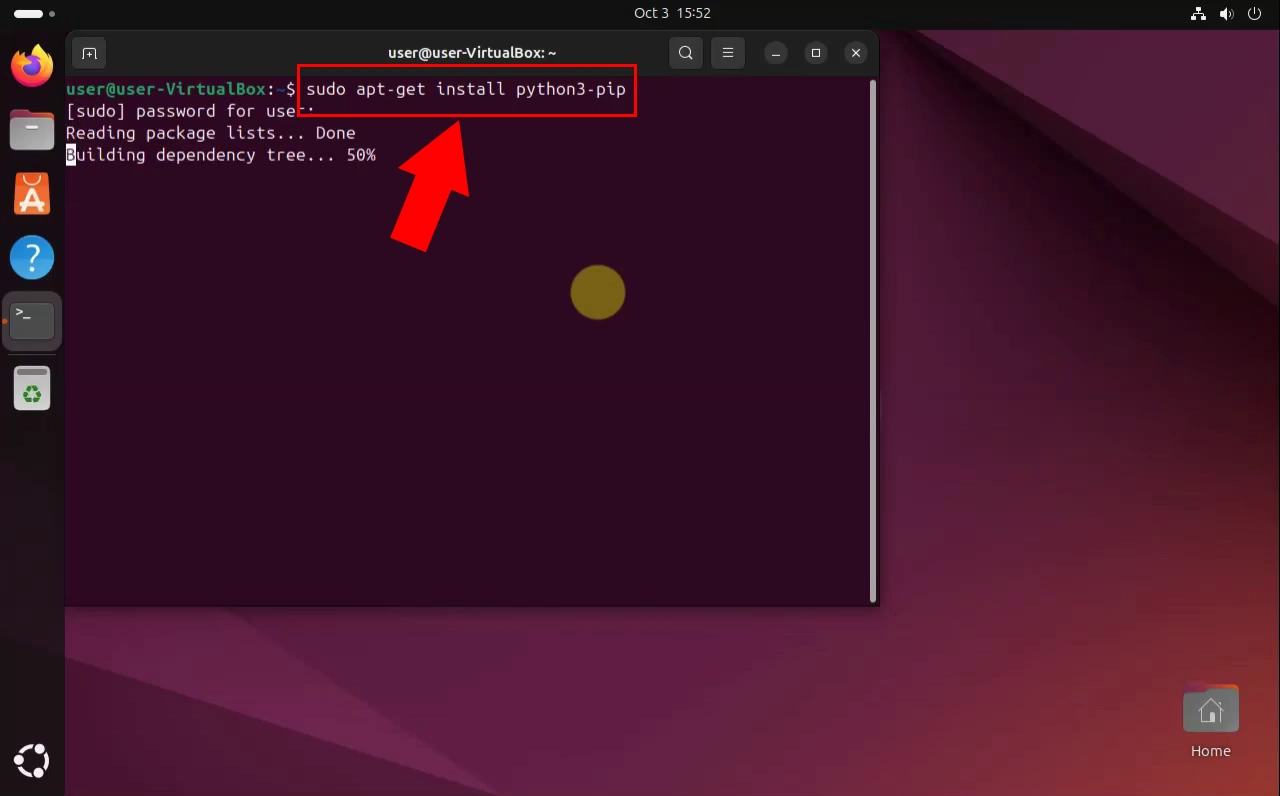
First, you'll need to install Python PIP. To do that, enter the following command into the Terminal, as seen in Figure 1:
sudo apt-get install python3-pip
Navigate to the Miniconda website, and download Miniconda3 Linux 64-bit.
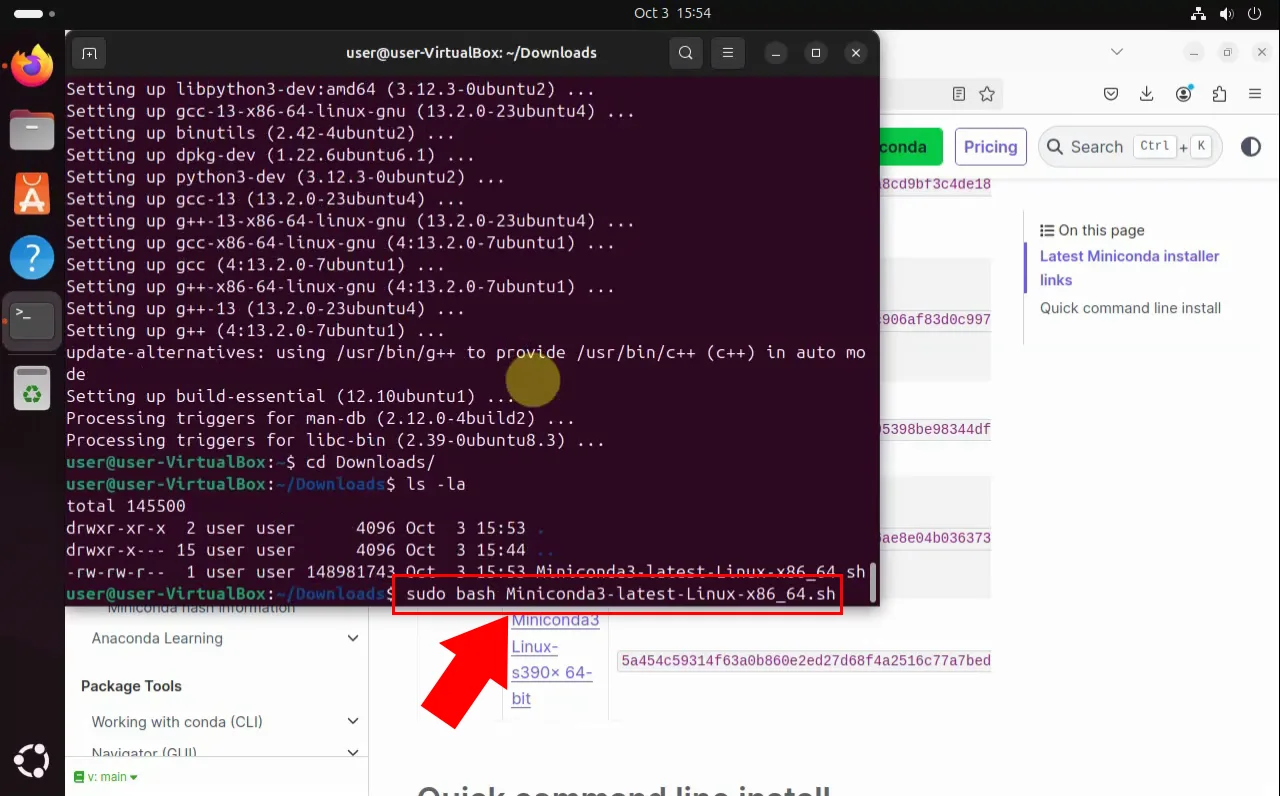
To install Miniconda, navigate to the folder you saved the installation package in, and enter the command below to the Terminal, as shown in Figure 3:
sudo bash Miniconda3-latest-Linux-x86_64.sh
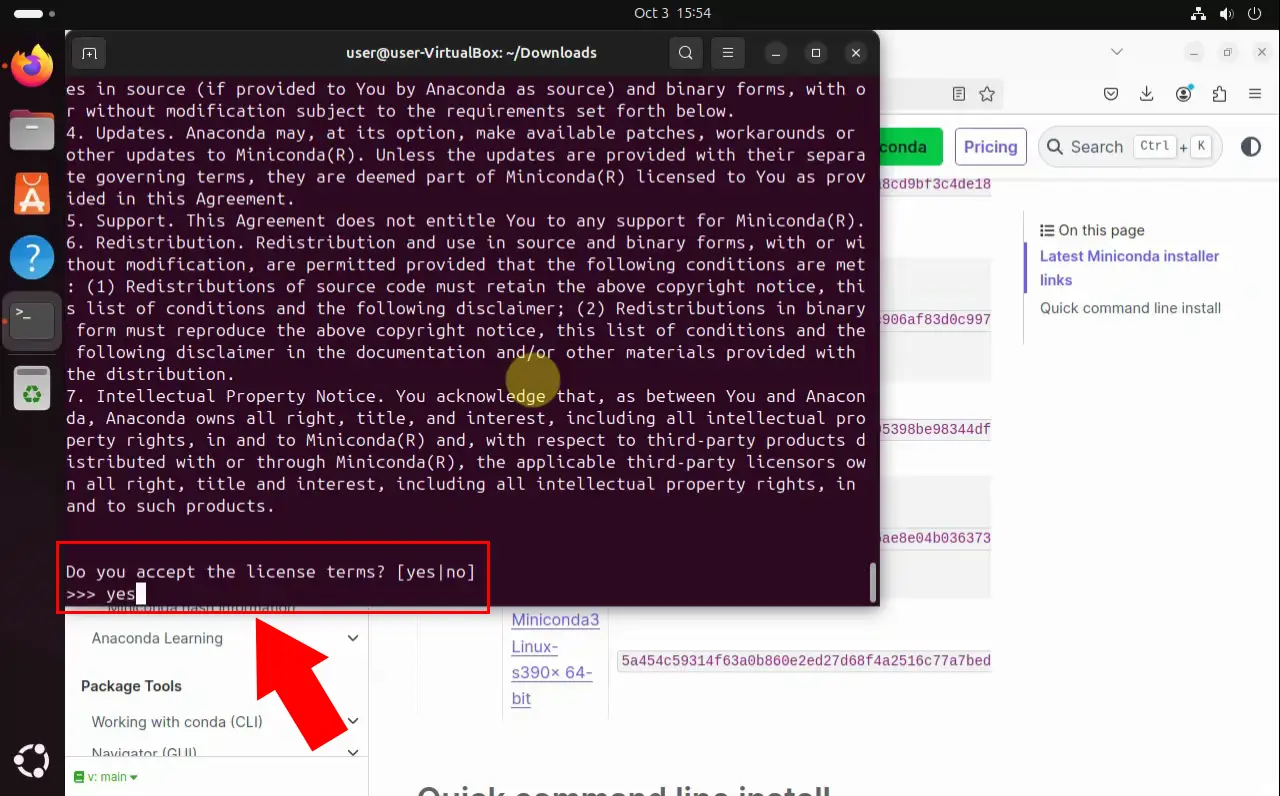
When this message (Figure 4) pops up, type yes to accept the license terms, and proceed with the installation.
Install vLLM
This video provides a step-by-step guide to installing vLLM on a Linux system using Miniconda. It begins by demonstrating how to create a new Conda environment through the terminal. After the environment is created, the video shows how to activate it with a specific command. Next, it walks through the installation of vLLM using another command, followed by a brief wait for the installation process to complete.
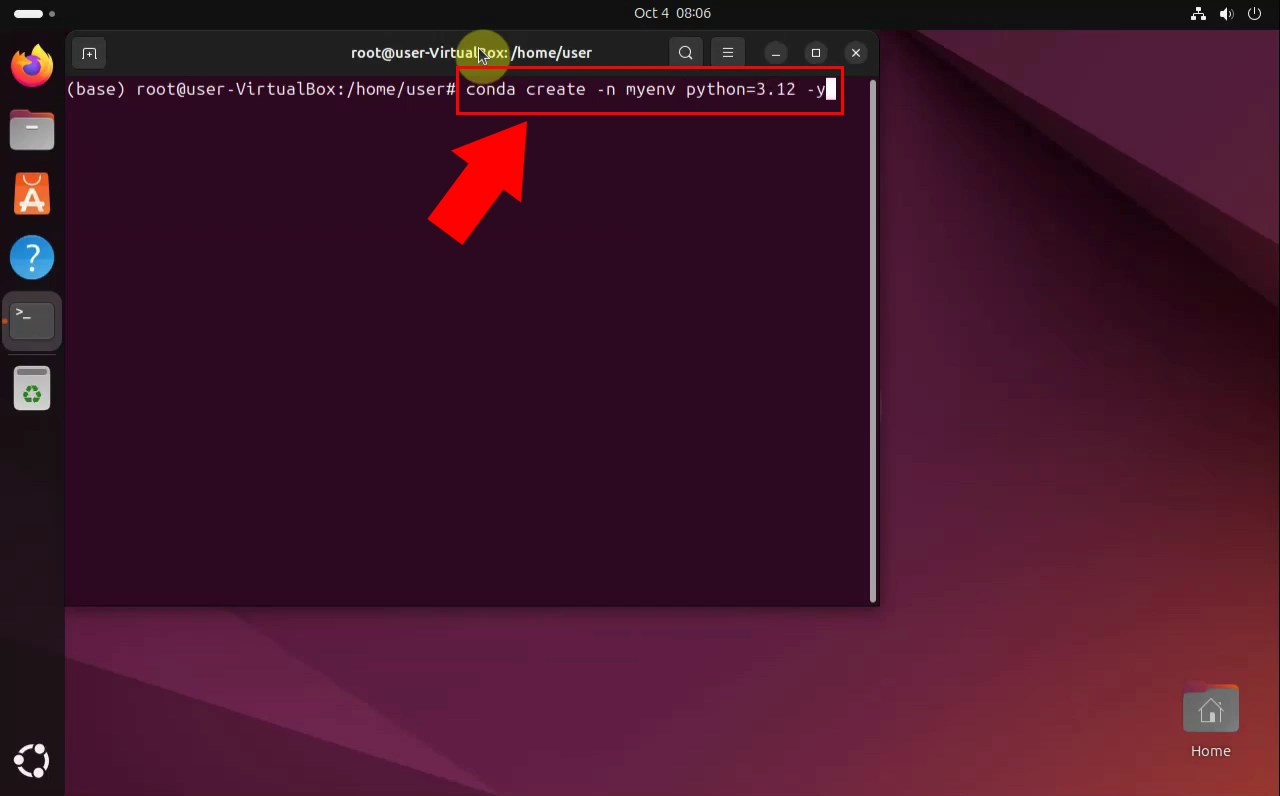
To create a new Conda environment, enter the following command, just like in Figure 5:
conda create -n myenv python=3.12 -y
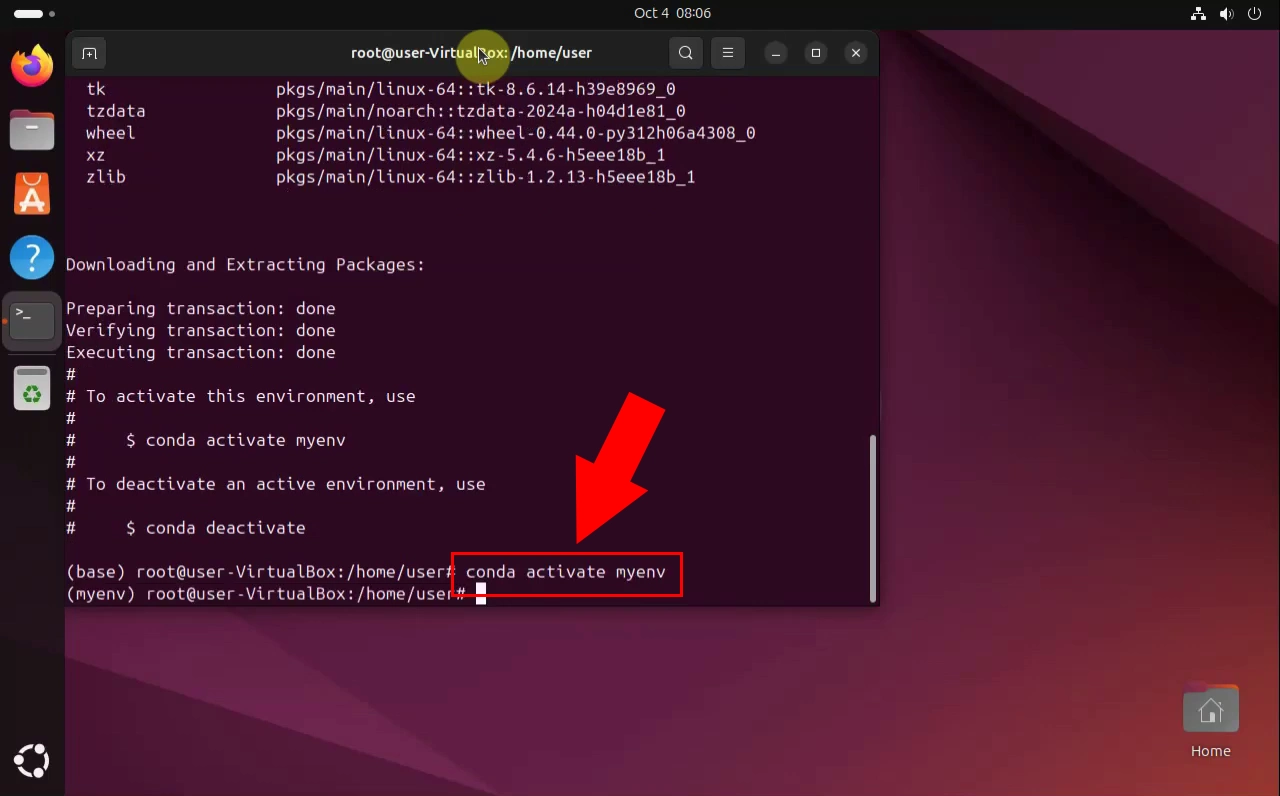
Next, activate the environment by pasting the code below (Figure 6):
conda activate myenv
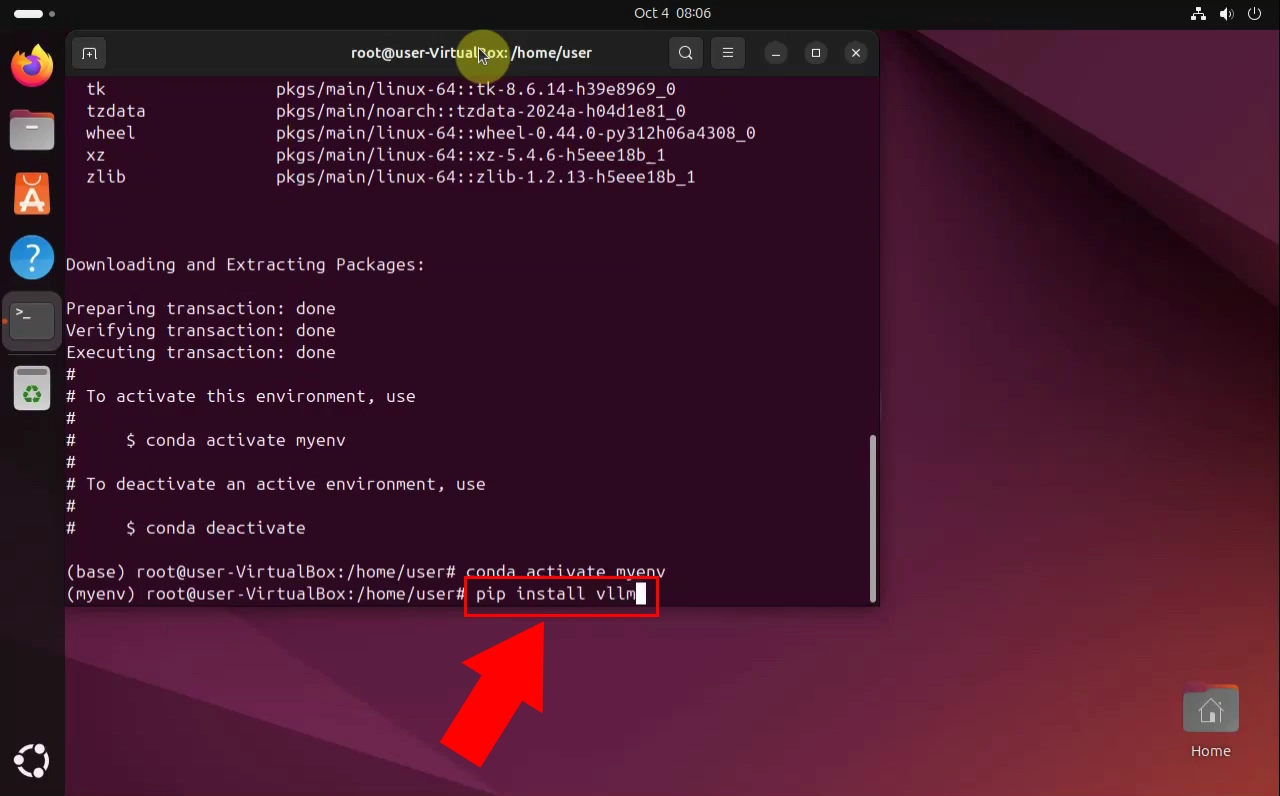
After that, install vLLM via this instruction, highlighted in red in Figure 7:
pip install vllm
Start vLLM service
The last video in this article guides you through the process of downloading and running an AI model from Hugging Face using vLLM. It starts by opening a browser and navigating to huggingface.co. From there, the video demonstrates how to search for models. It specifically selects the Llama-3.2-3B-Instruct-uncensored model. After clicking Use this model, vLLM is chosen from the dropdown menu, and a command for loading and running the model is copied. The command is then pasted into the terminal, and the video shows the loading process. Once completed, a new terminal window is opened to send an HTTP POST request with a test prompt, and the final step verifies that the response is correct and coherent.
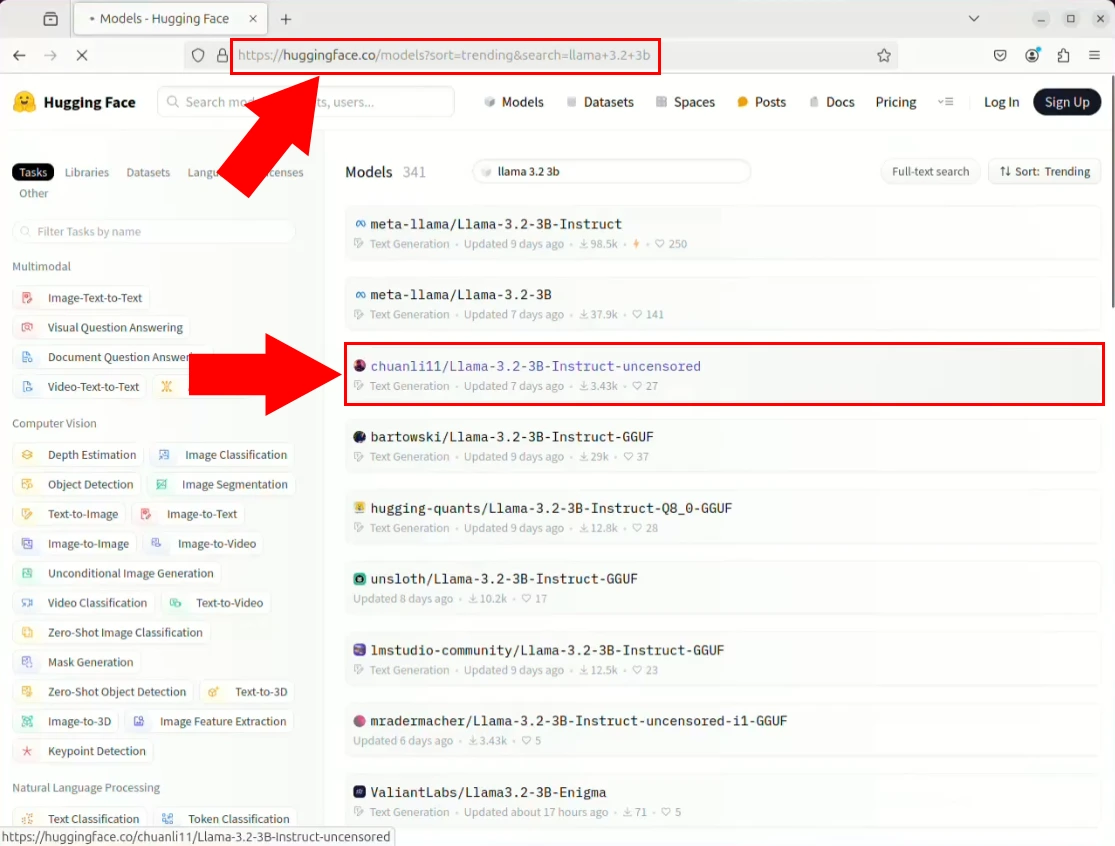
Navigate to Hugging Face, and search for your desired model. For the sake of this tutorial, we'll be using Llama-3.2-3B-Instruct-uncensored. Once found, click it, as seen in Figure 8.
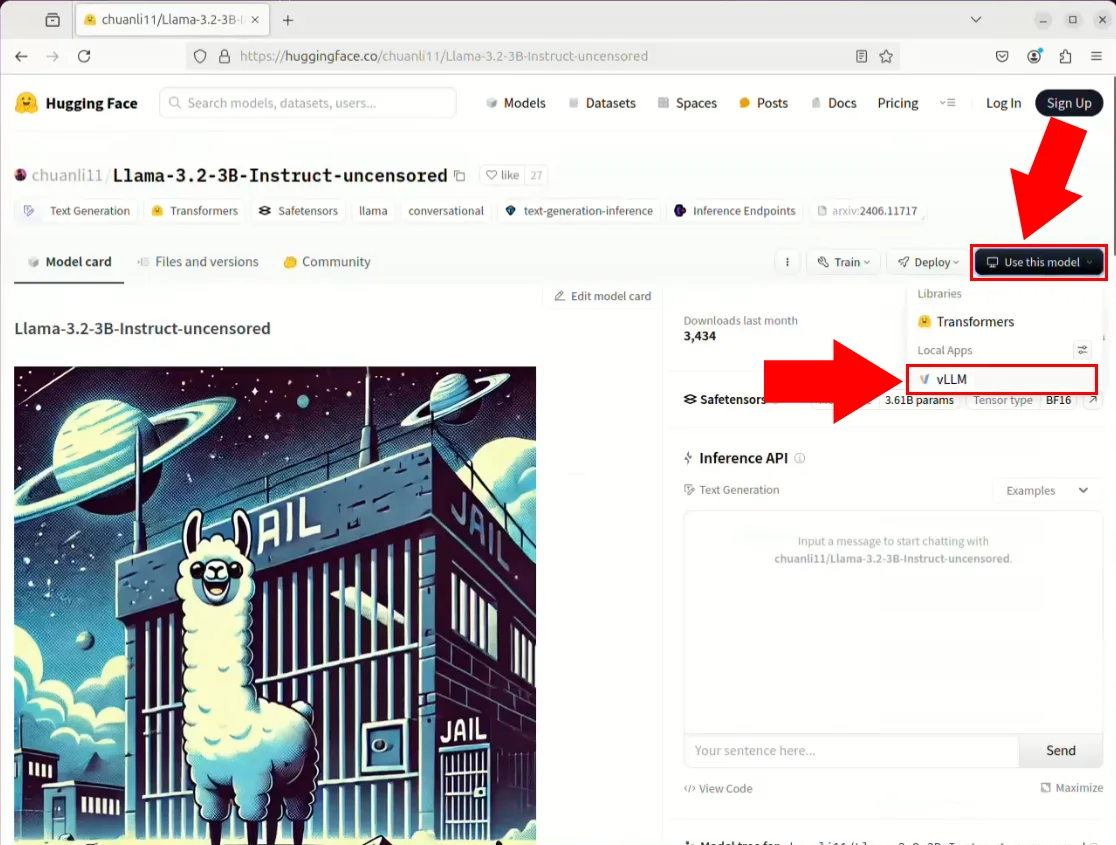
On the model's page, click the Use this model button located near the right edge of the screen. Select vLLM from the dropdown menu, just like in Figure 9.
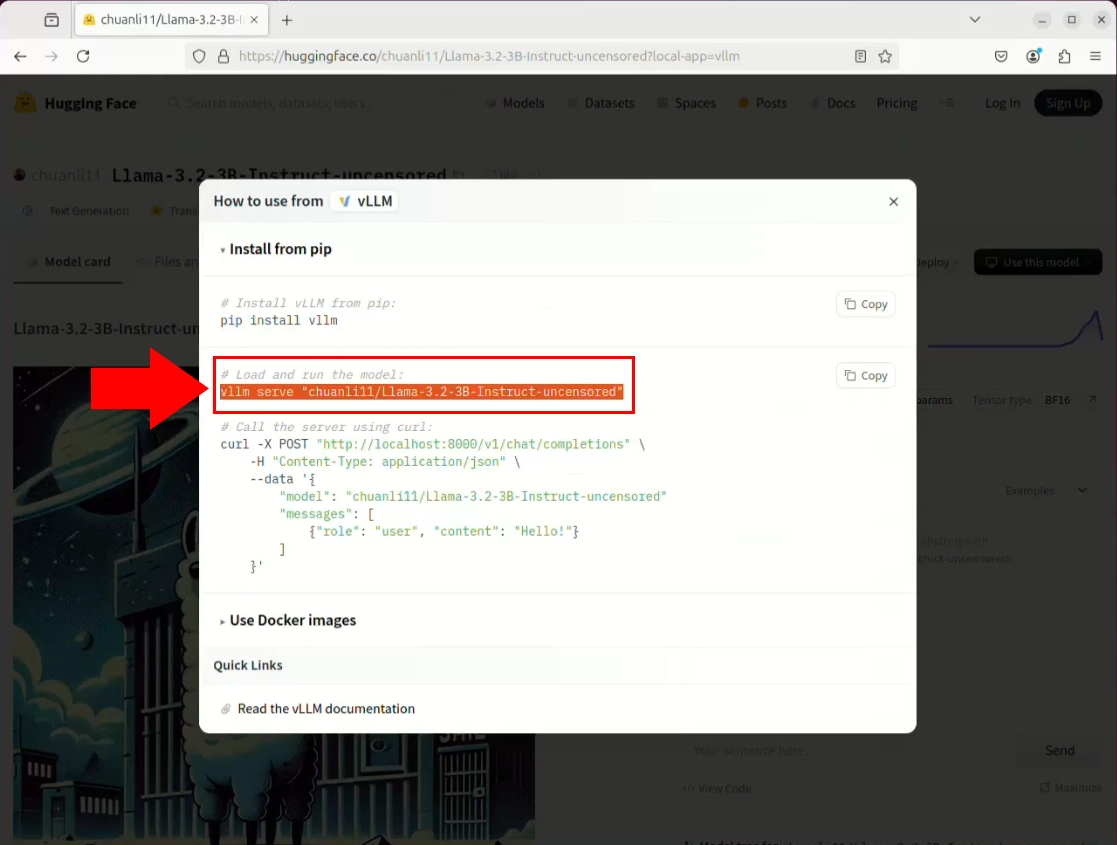
Copy the command under # Load and run the model:, as demonstrated by Figure 10.
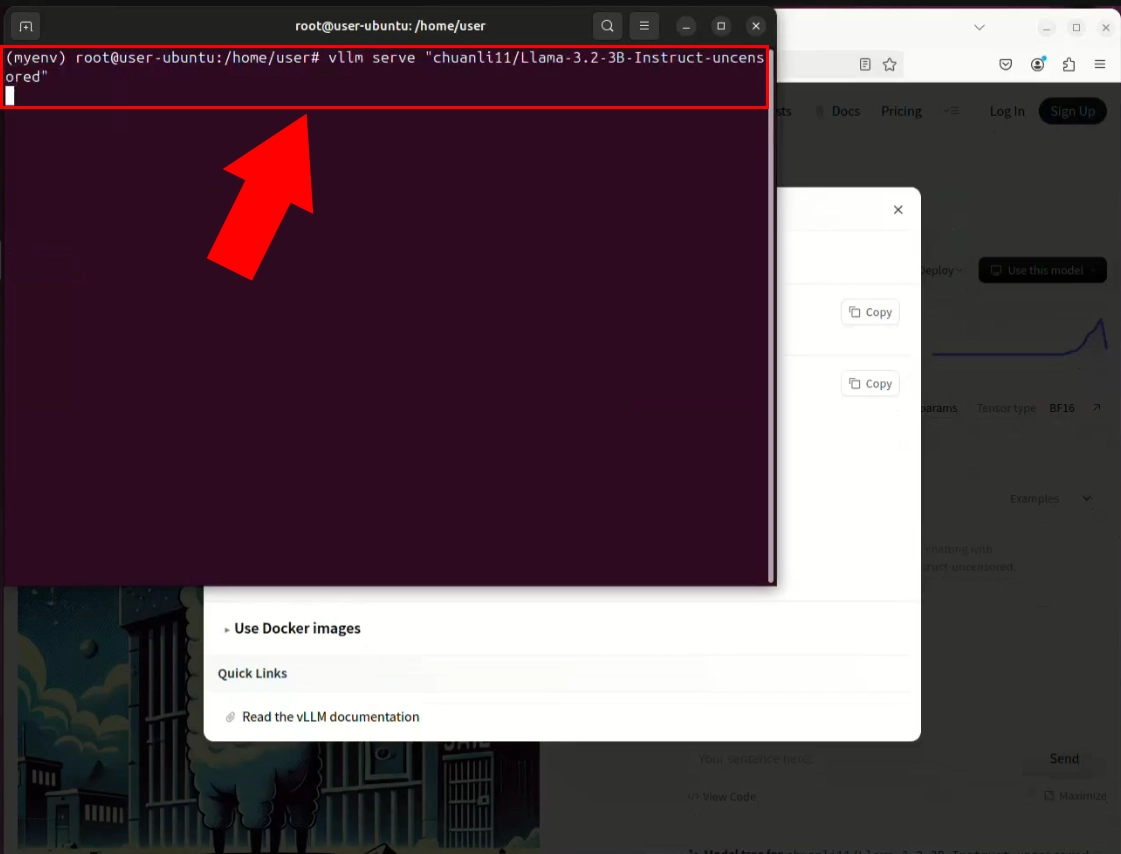
Paste the previously copied command into the Terminal (Figure 11).
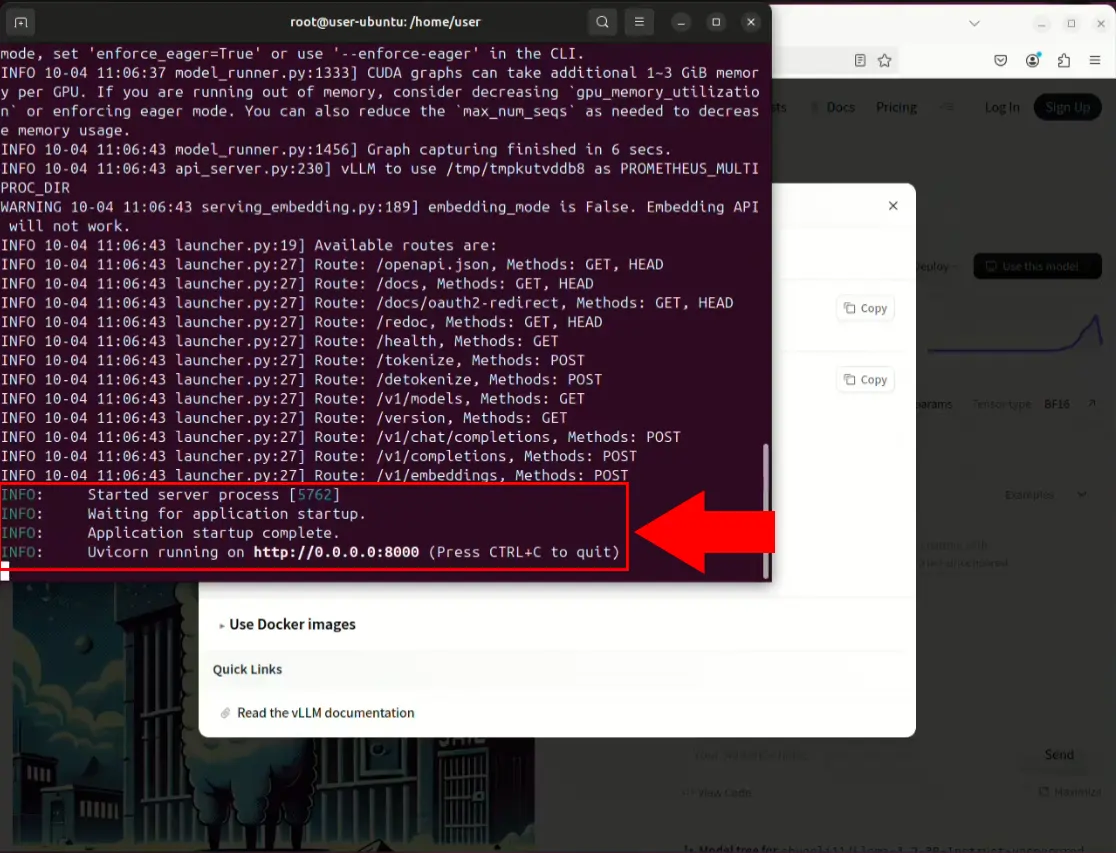
Wait for the loading process to complete. If you've done everything correctly so far, you are met with these lines, as they are in Figure 12.
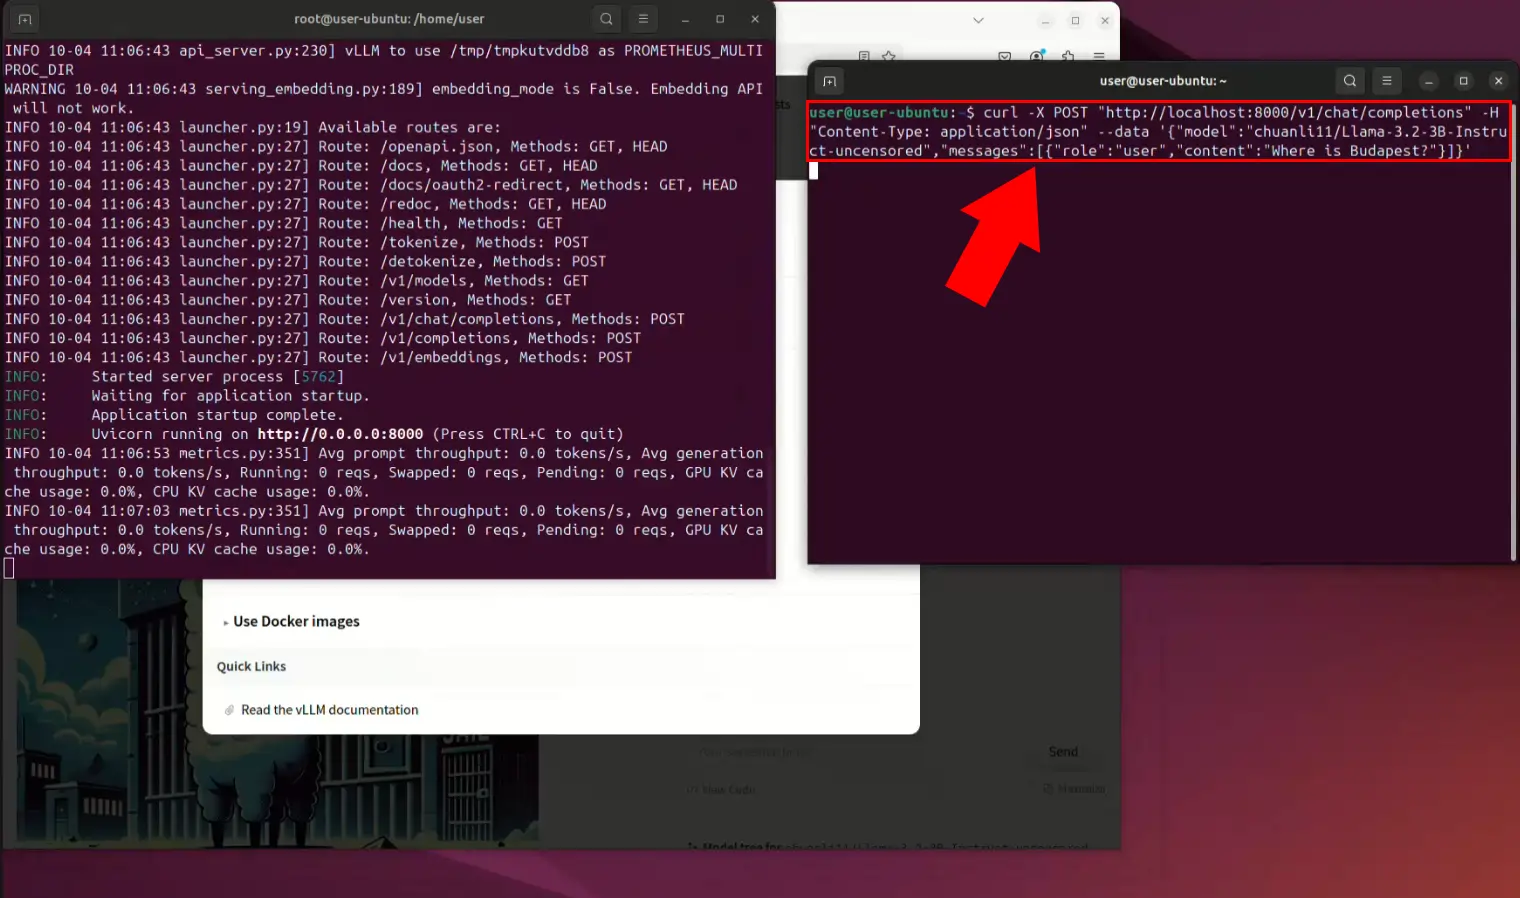
Open a new Terminal Window. Head back to Hugging Face, but this time, copy the other code block, under # Call the server using curl, and paste it into the new Terminal window.
This is a HTTP POST request containing your prompt. By default, it just says hello to the model. Modify it to your needs, then send it, as depicted in Figure 13.
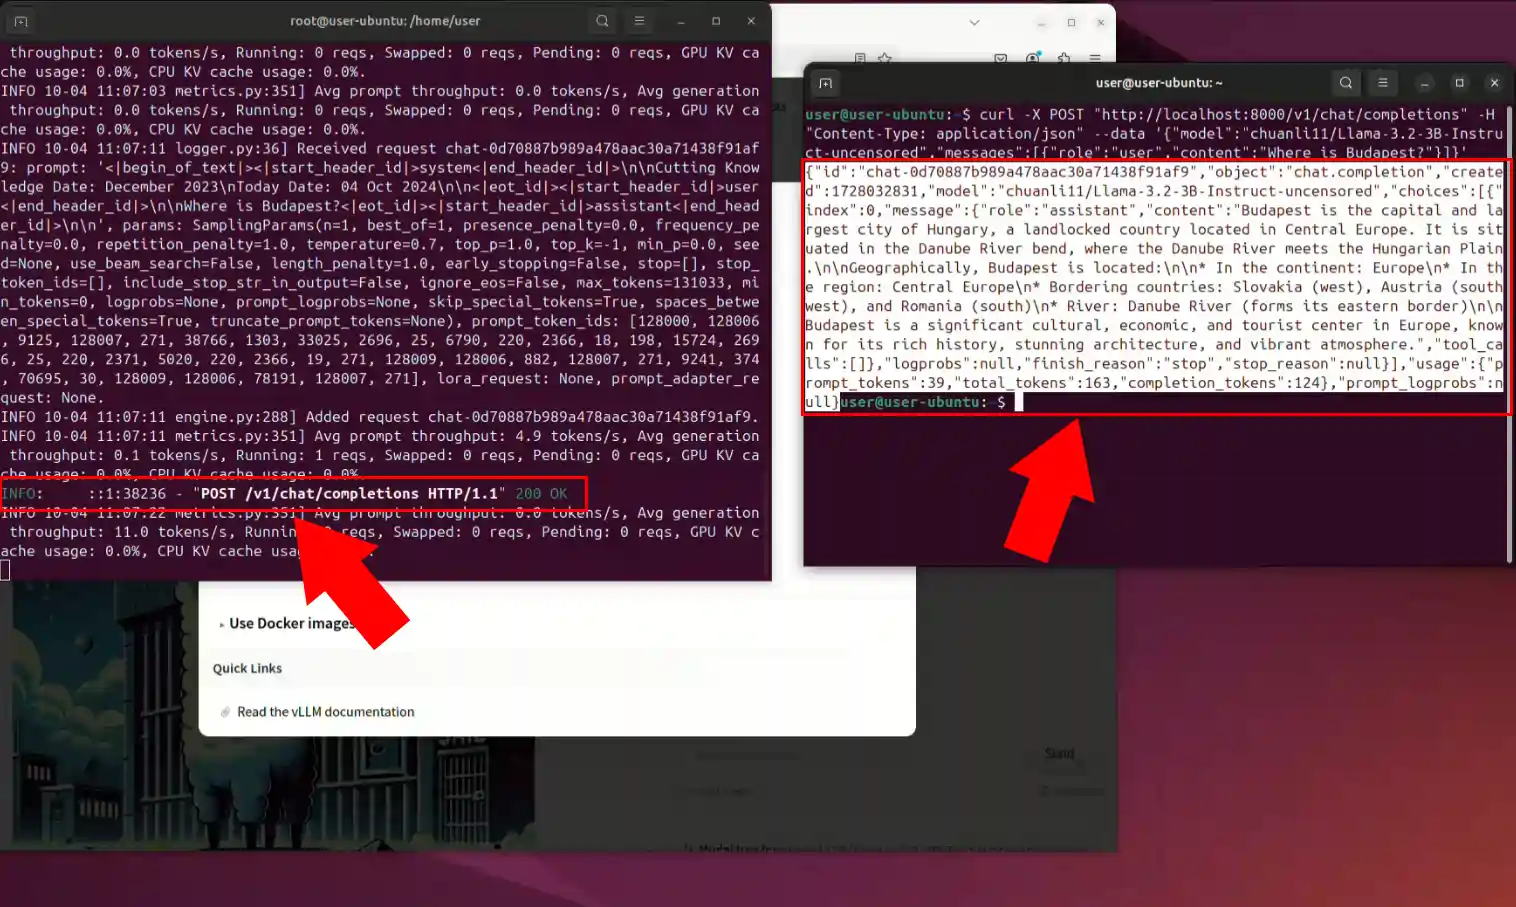
Following a successful installation, your windows should look like Figure 14. The original Terminal window confirms a successful HTTP request, and the new window shows the model's response.
Summary
You've learned how to install Python PIP and Miniconda on Linux, set up a virtual environment, and install vLLM. You’ve also explored how to download and run AI models from Hugging Face, and send requests to interact with the model. With this setup, you're now equipped to run AI models locally, giving you more control and flexibility to explore different models and their outputs right from your system.
Can I do this on Windows?
Yes, via an Ubuntu WSL. Click to find out how to use vLLM on Windows.
More information
- VLLM Windows
- VLLM
