How to run vLLM on Windows using WSL
In this article, you’ll learn how to set up vLLM on Windows using WSL. We’ll cover everything from installing the necessary Nvidia GPU drivers to running a language model and sending a prompt through Postman. By following along with the included tutorial videos, you’ll be guided through each step, including installing WSL Ubuntu, setting up Python PIP and Miniconda, and finally running your preferred model from Hugging Face via vLLM. Whether you’re looking to optimize your workflow or get hands-on experience with language models, this article will walk you through the entire process.
What does WSL stand for?
Windows Subsystem for Linux (WSL) is a compatibility layer that allows you to run Linux distributions directly on your Windows system, without the need for a virtual machine. It provides developers with the flexibility of accessing Linux-based tools, scripts, and applications while maintaining the familiarity of a Windows environment.
Running an LLM on Windows using WSL (cheat sheet)
- Download Nvidia GPU driver
- Install driver via Express Installation
- Install WSL Ubuntu from Microsoft Store
- Install CUDA toolkit on WSL
- Install Python PIP on WSL
- Download and install Miniconda
- Create and activate Conda environment
- Install vLLM
- Search for model on Hugging Face
- Run model via terminal
- Create POST request in Postman
- Send prompt and receive model response
Step 1: Download and install Nvidia GPU driver
In this video, you'll learn how to install or update your Nvidia GPU drivers step-by-step. The tutorial begins by navigating to Nvidia's official download page, where you'll select your GPU's series, product, and operating system. After downloading the appropriate driver, you'll run the installer, choose a folder to save the installation files, and opt for the Express installation option. The video walks you through the installation process, ensuring you're quipped with the latest drivers. Once the installation is complete, you'll simply close the installer.
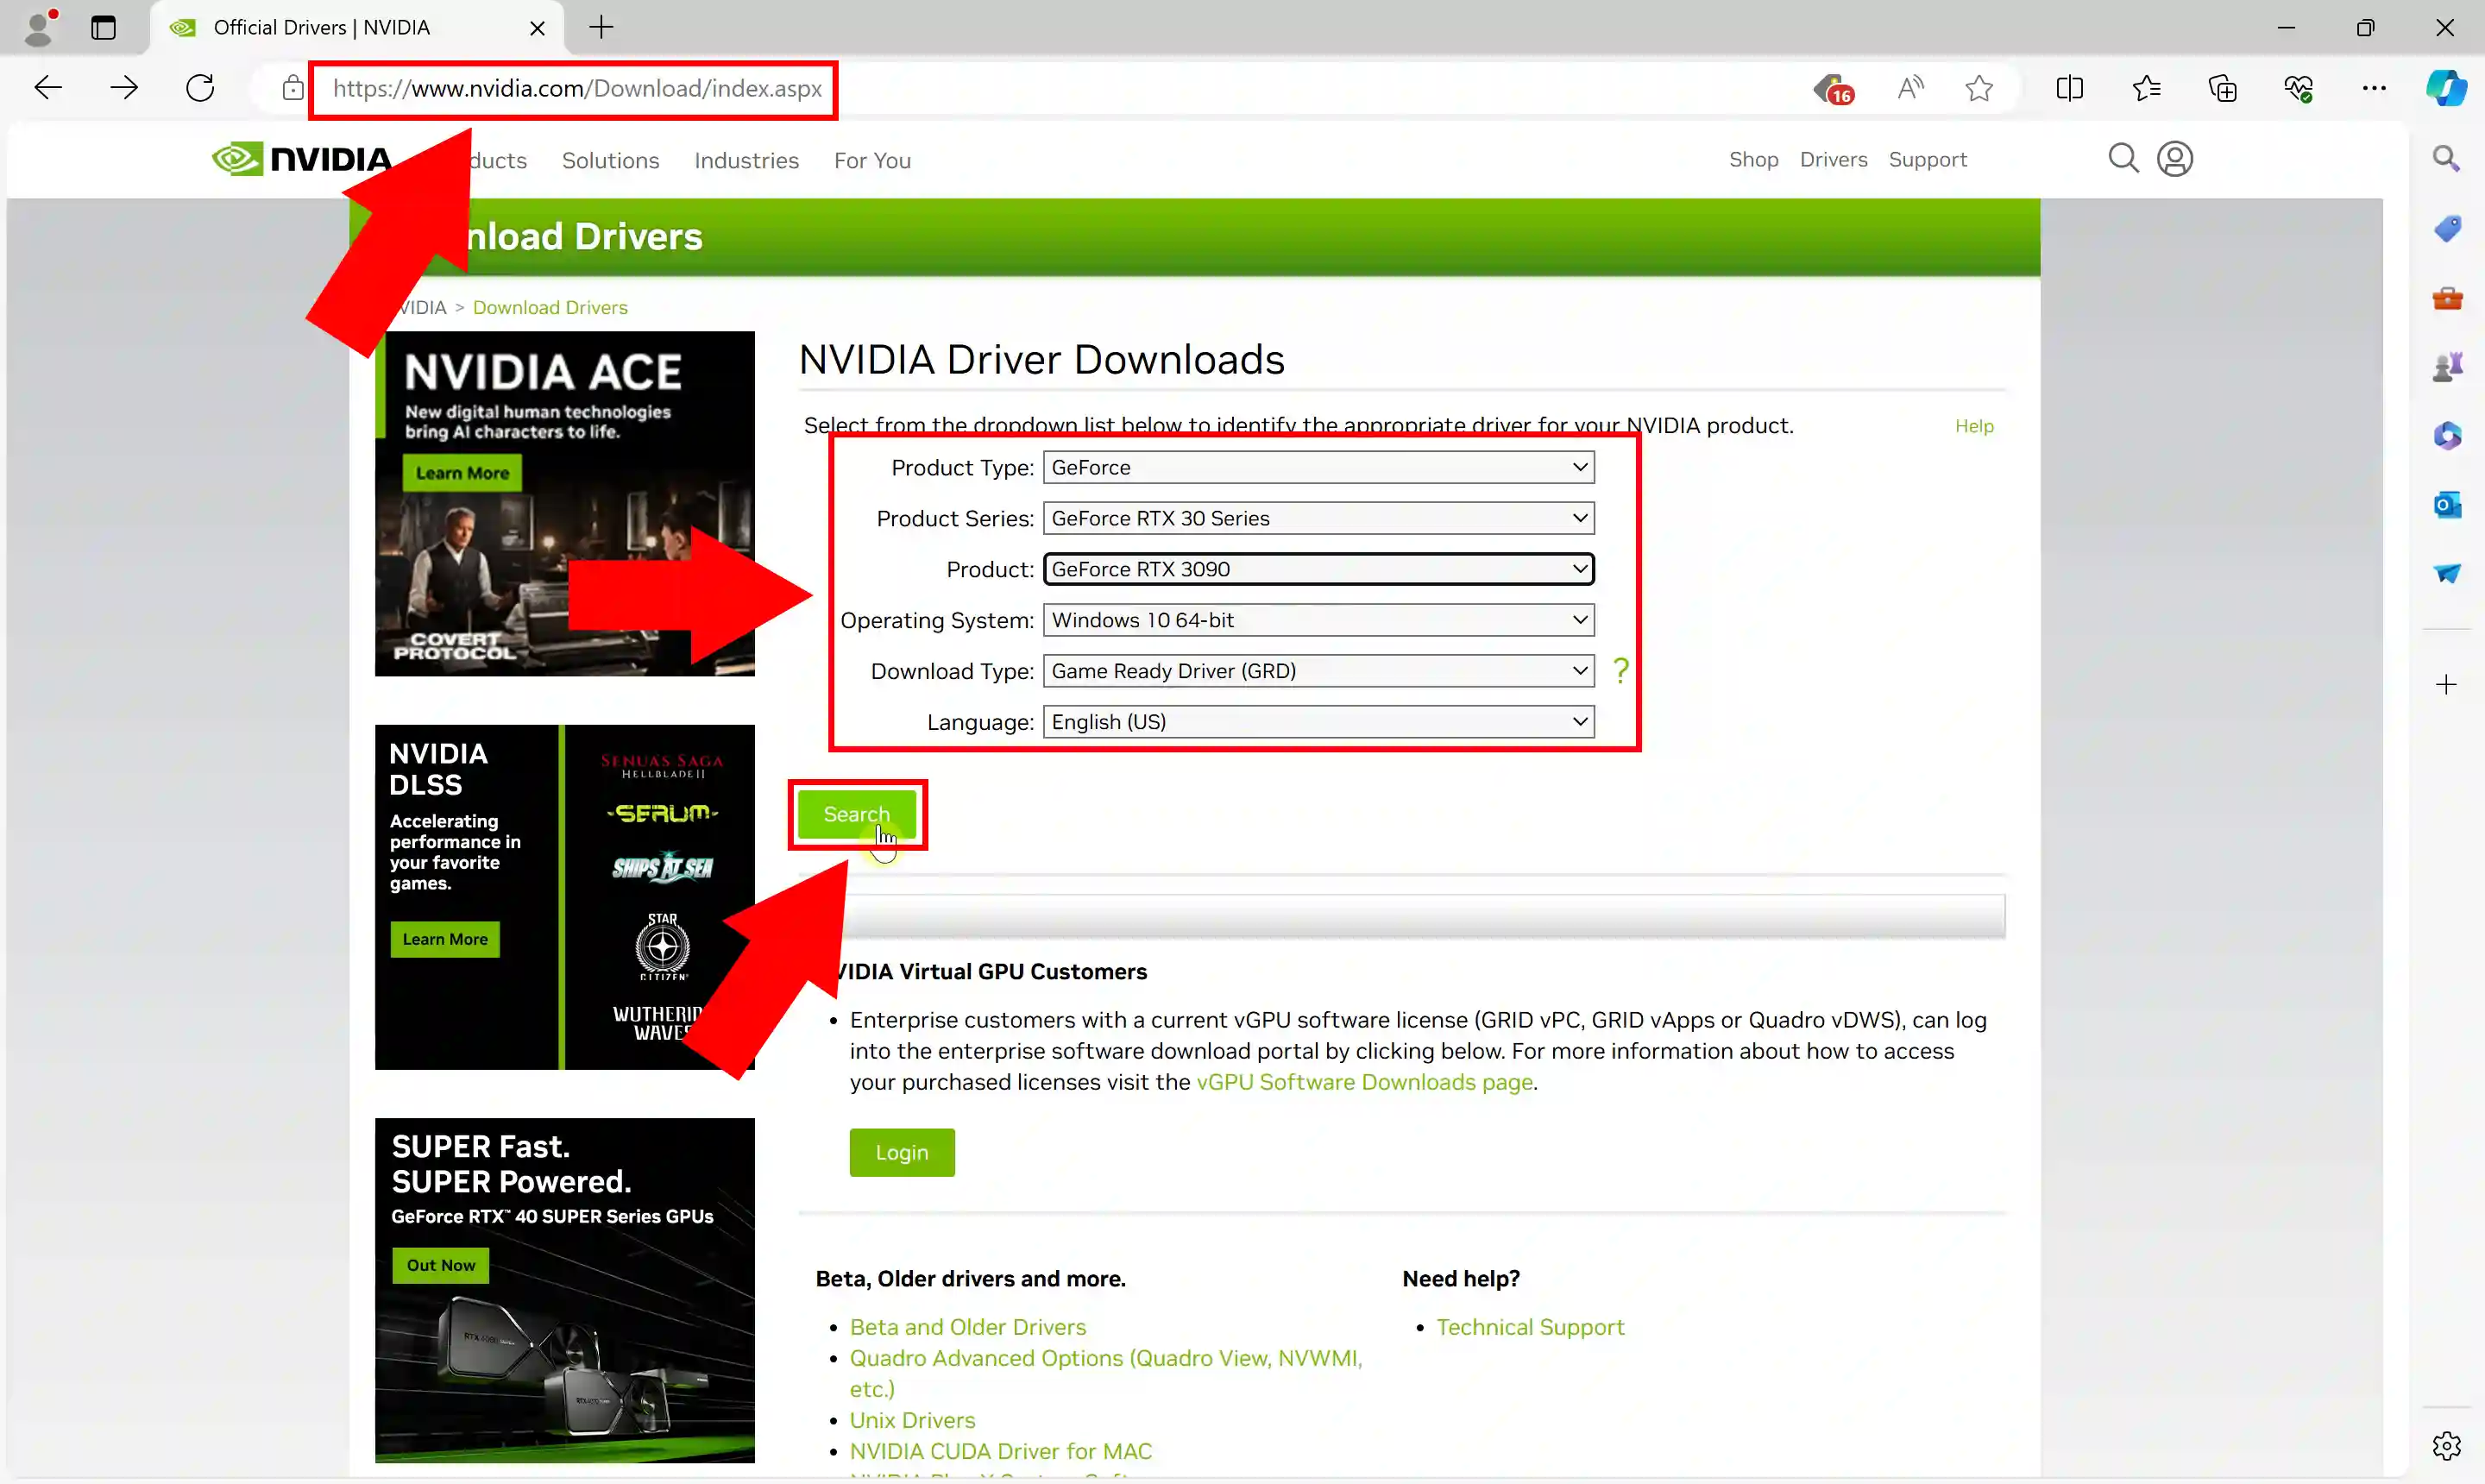
First, head to the Nvidia downloads page. Select the right driver to download by choosing from the dropdown lists. In our case, that's the drivers for the GeForce RTX 3090 GPU on Windows 10, as you can see in Figure 1. Once ready, click Search.
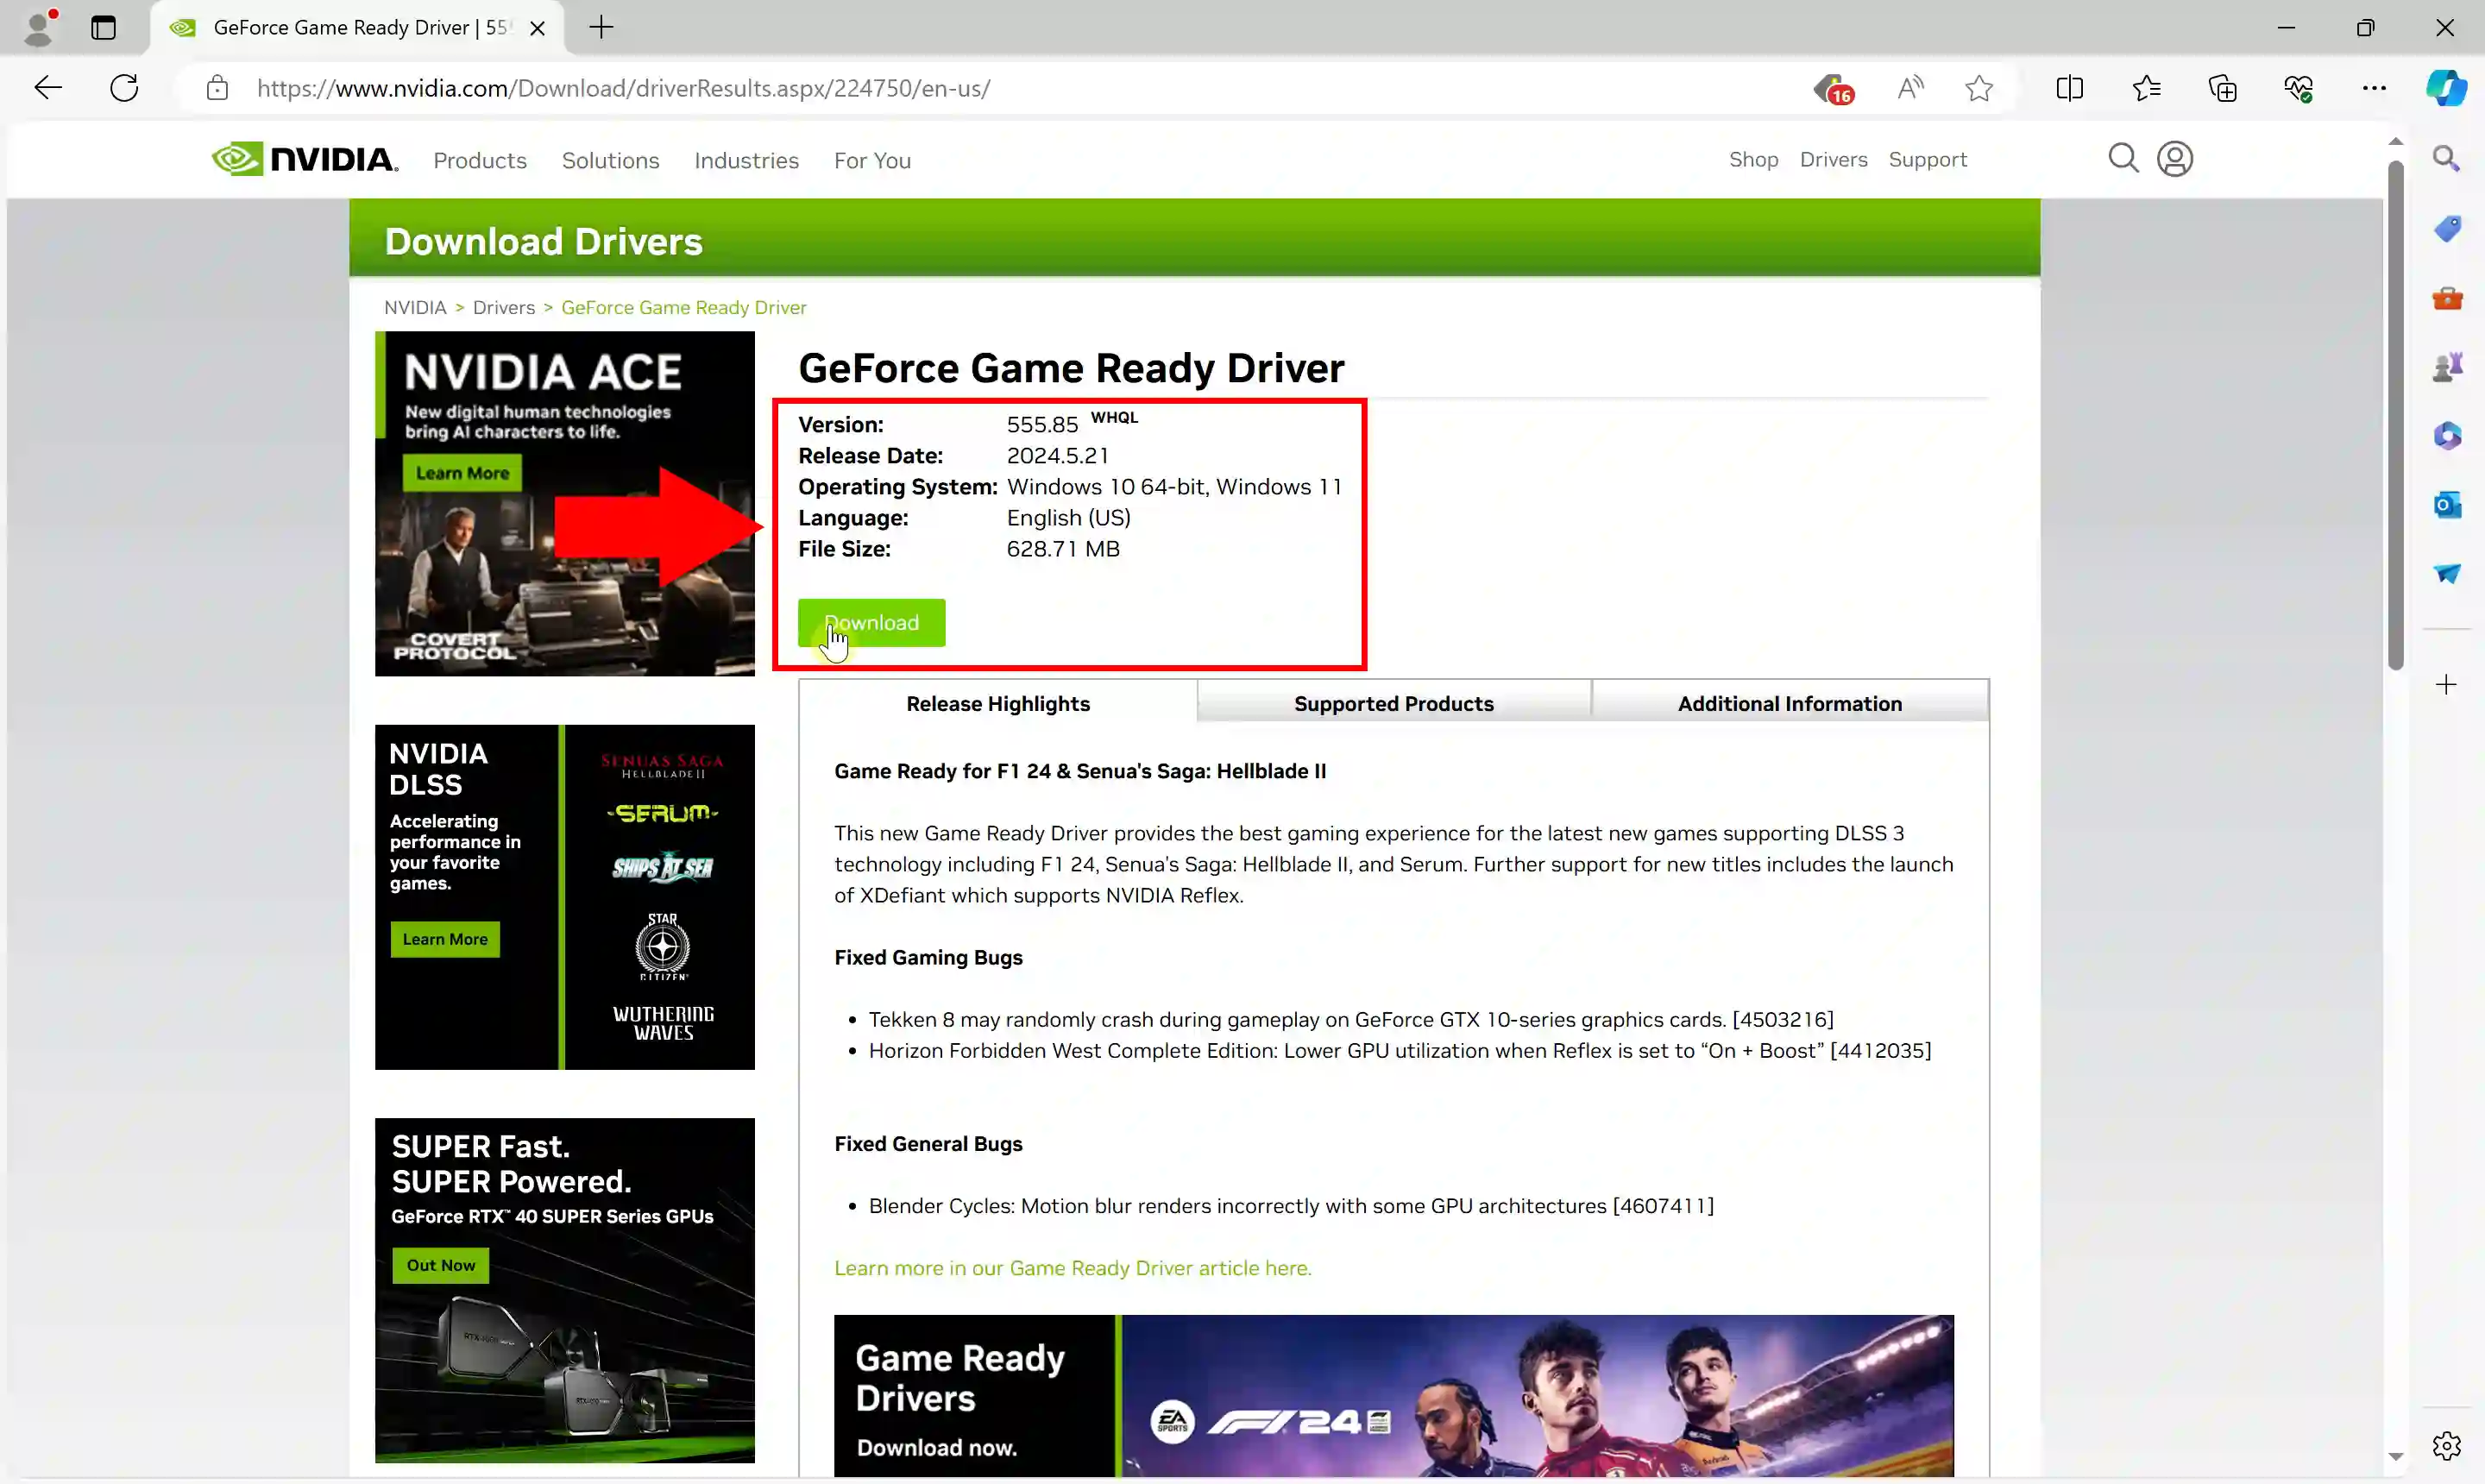
Double check if you have selected the correct driver. If so, click Download, as highlighted in Figure 2.
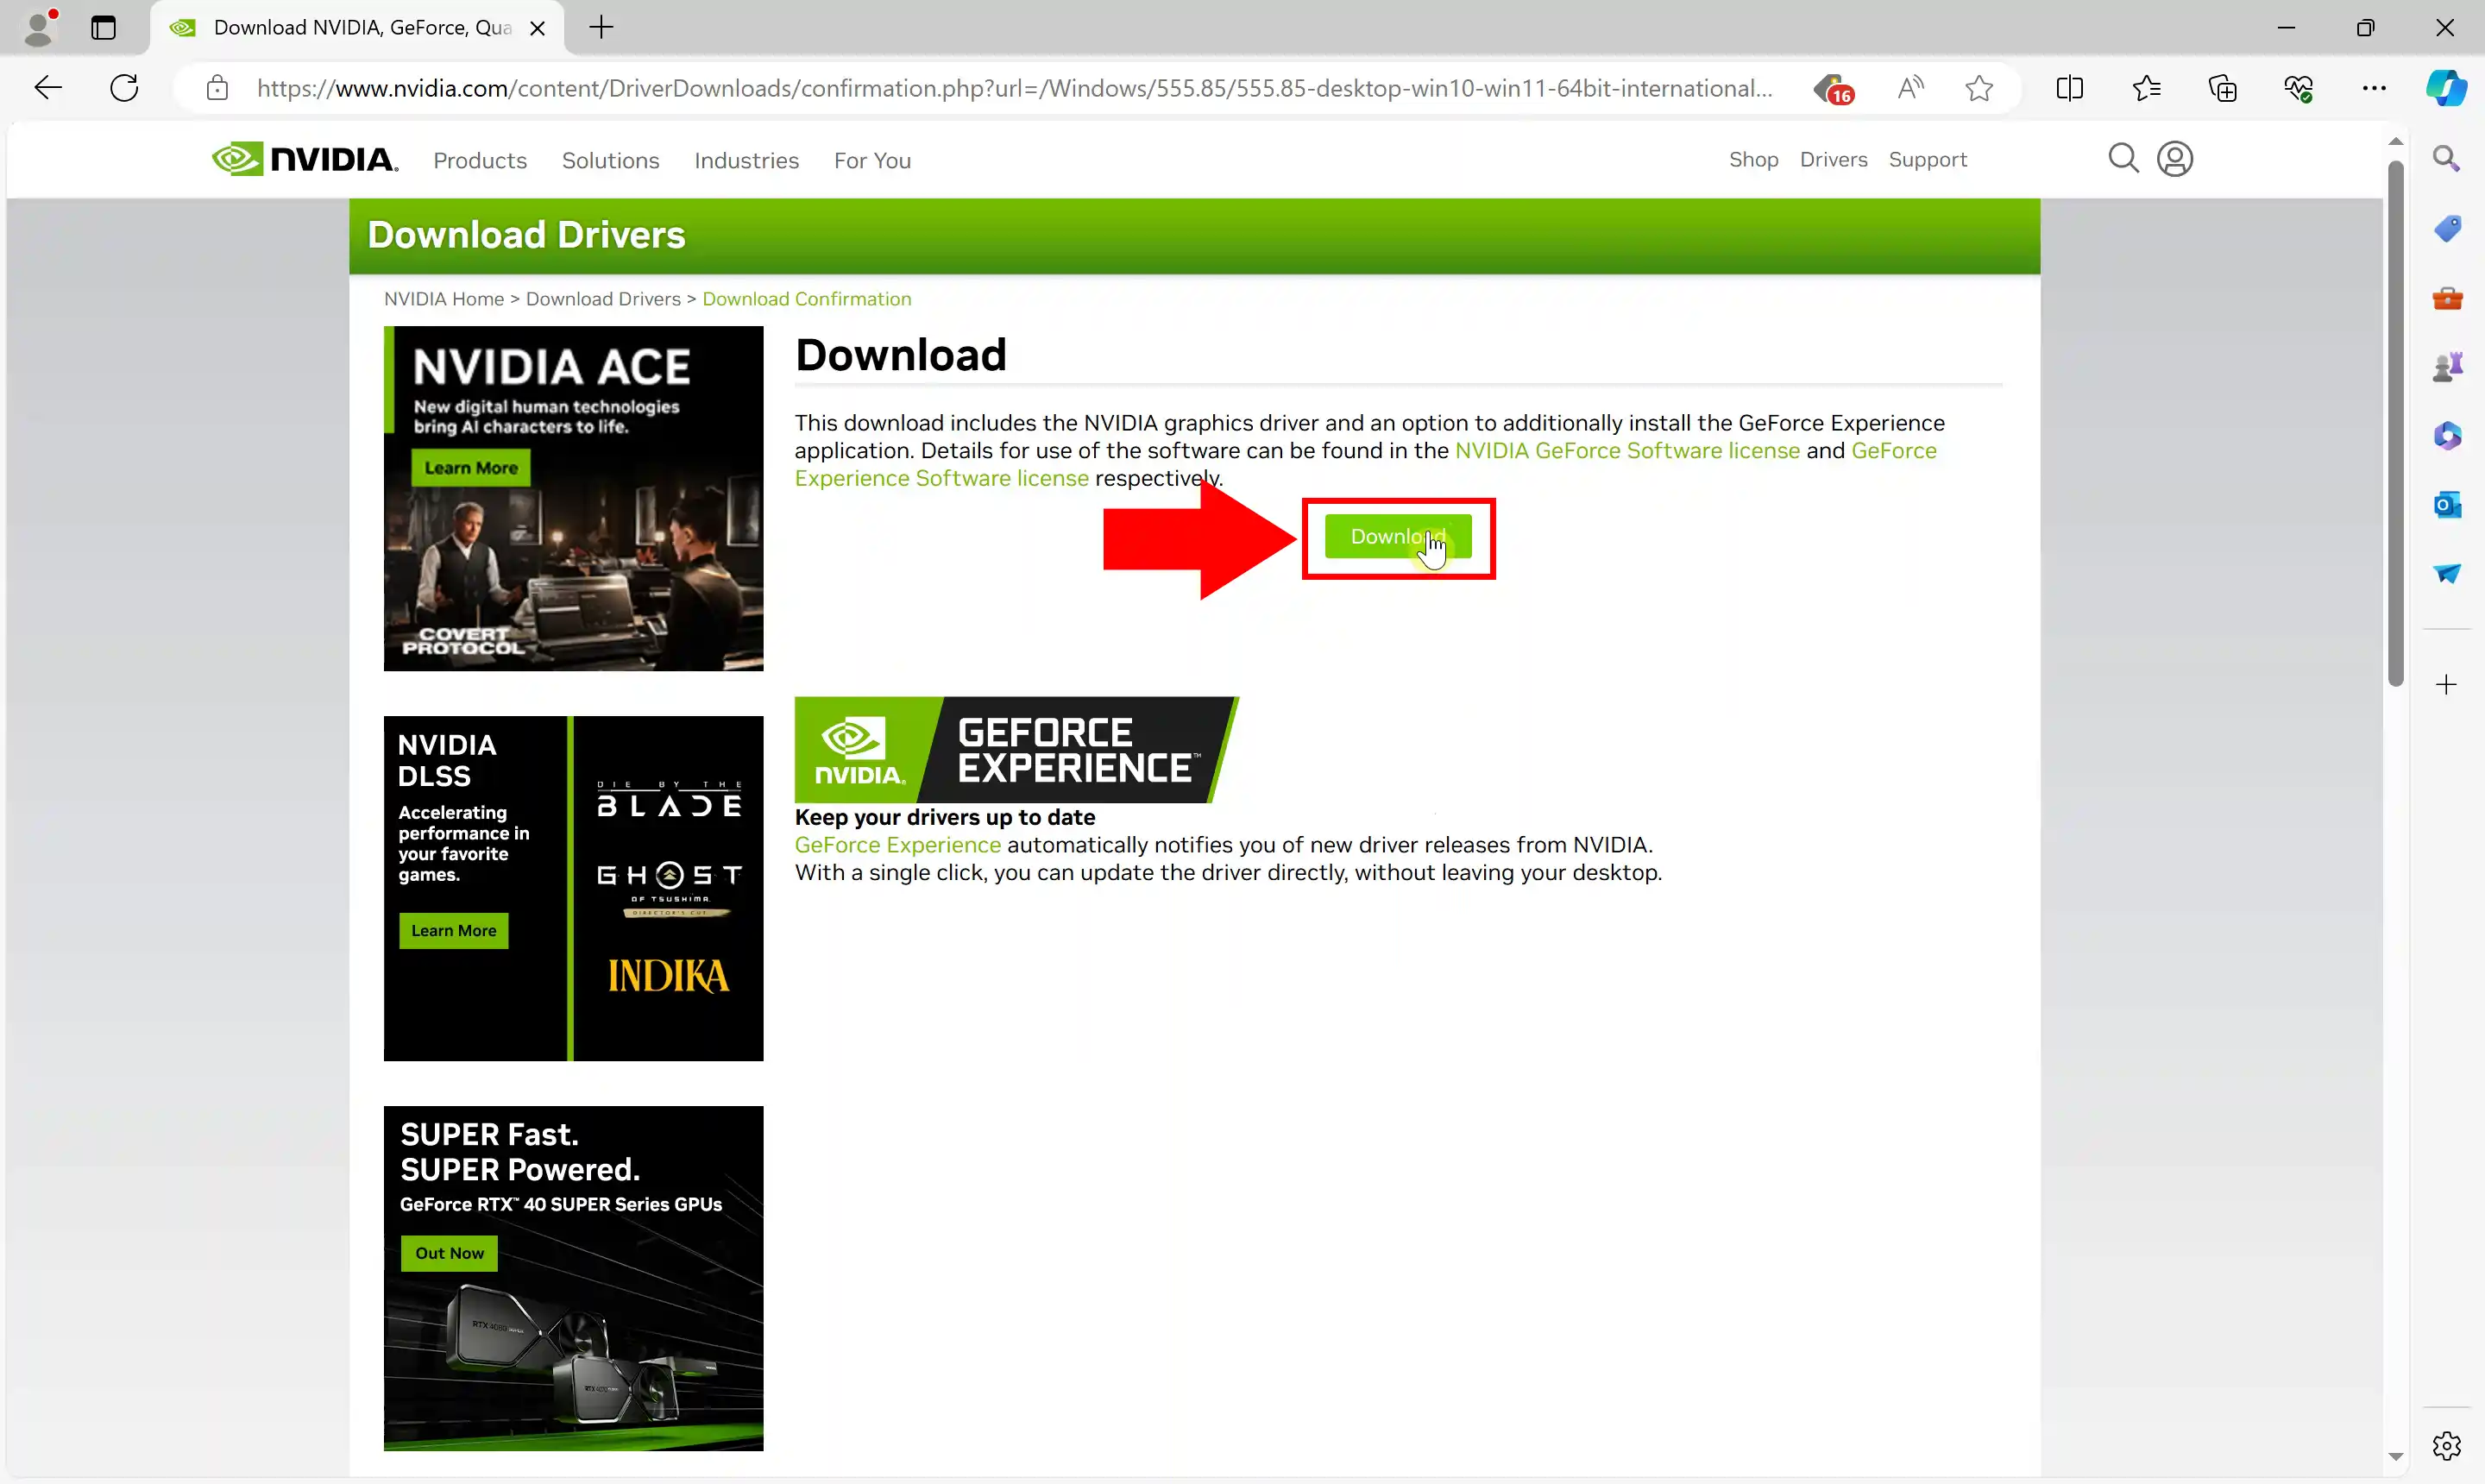
Start the download by pressing the Download button, as demonstrated by Figure 3.
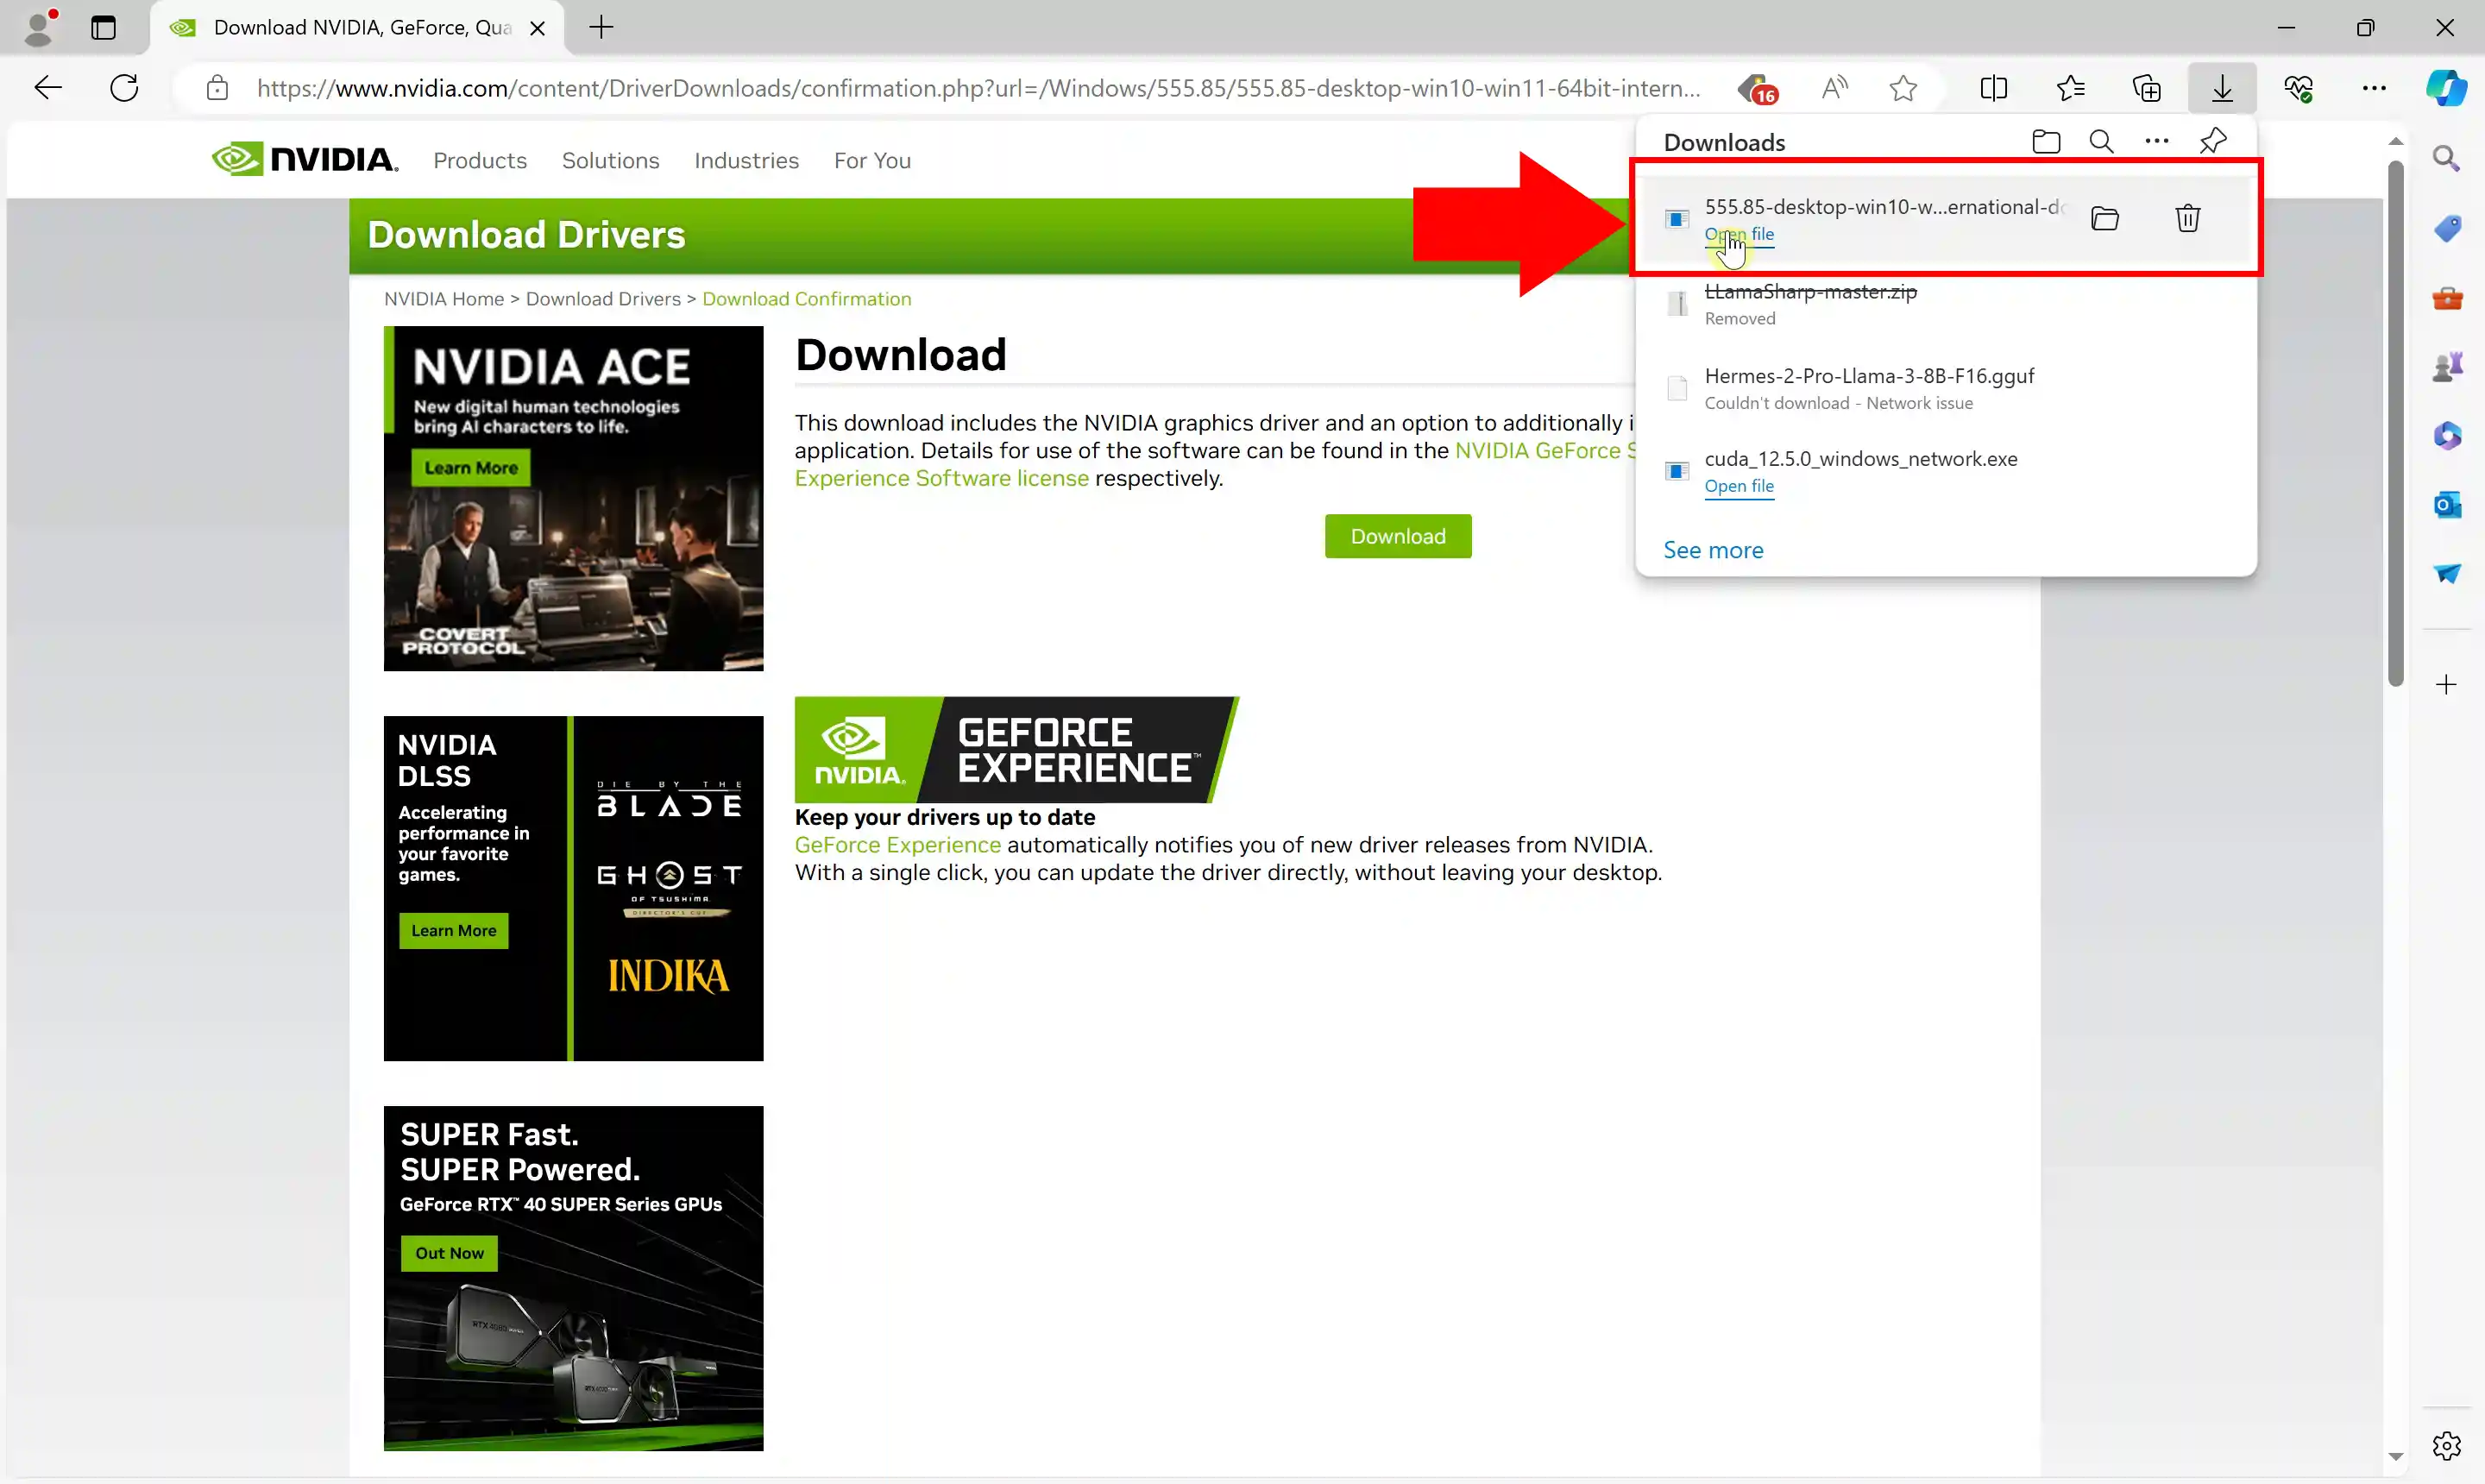
Wait for the download to finish, and open the installer (Figure 4).
Select Express Installation, click Next, showcased in Figure 5.
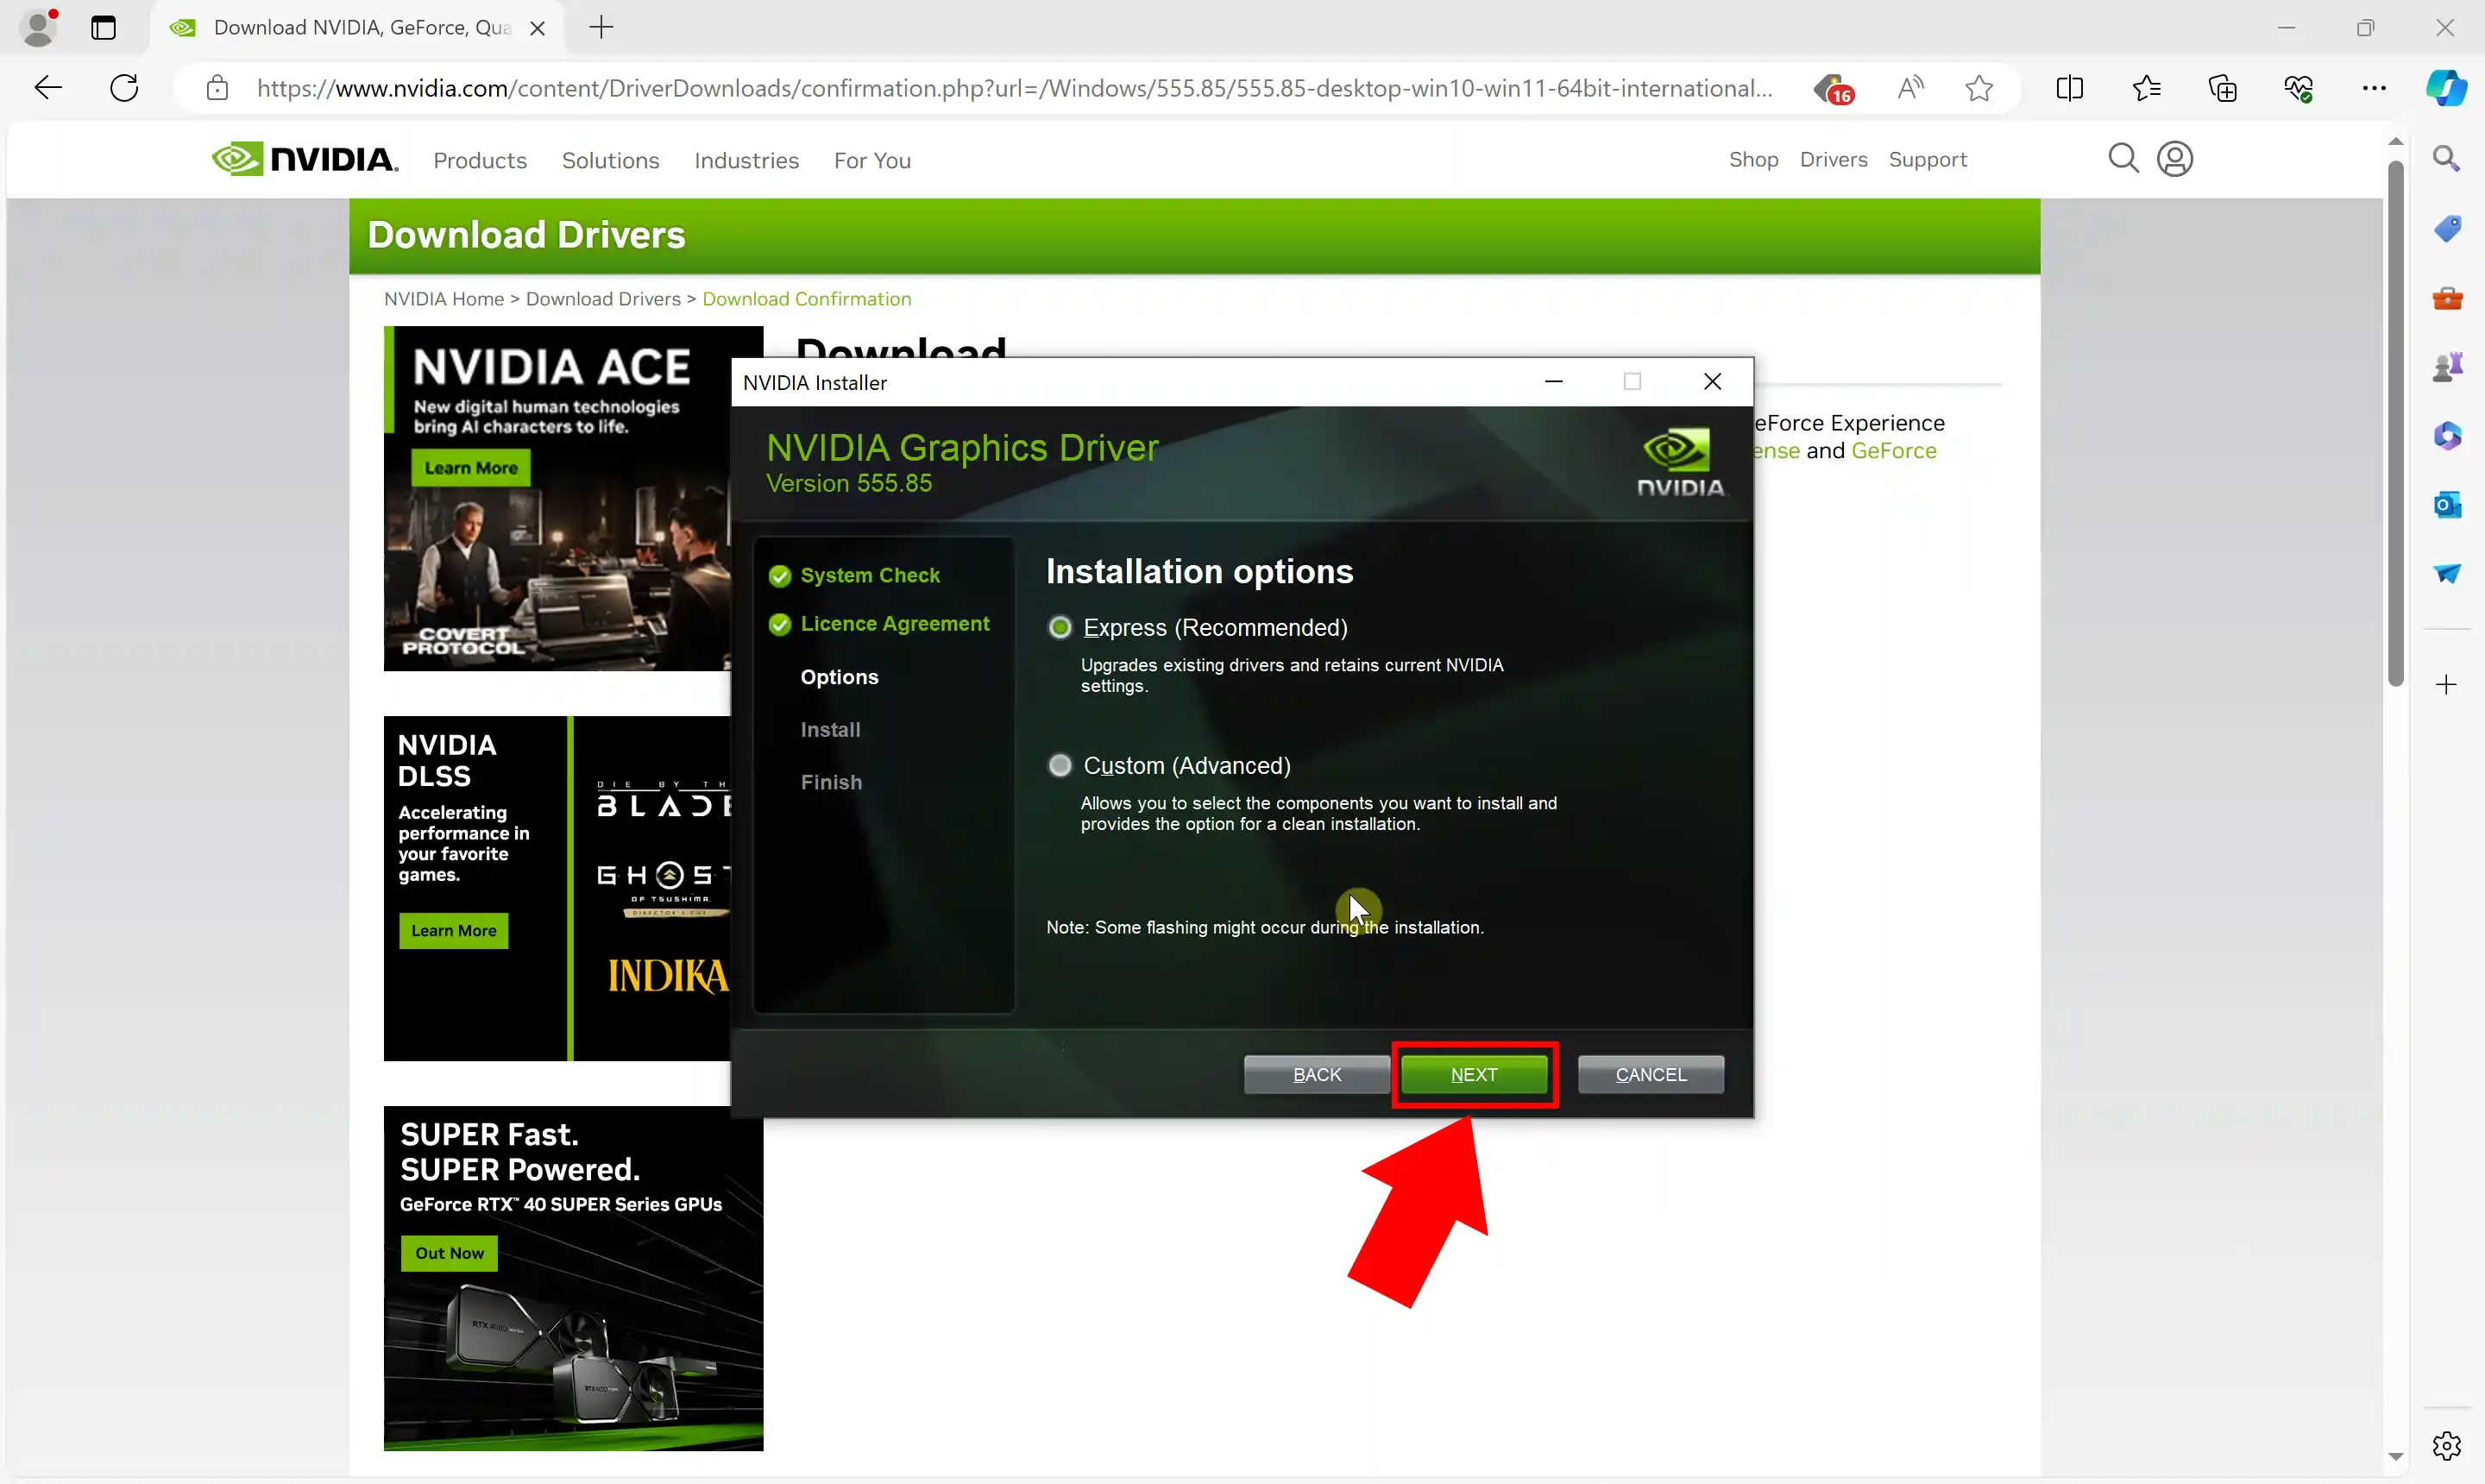
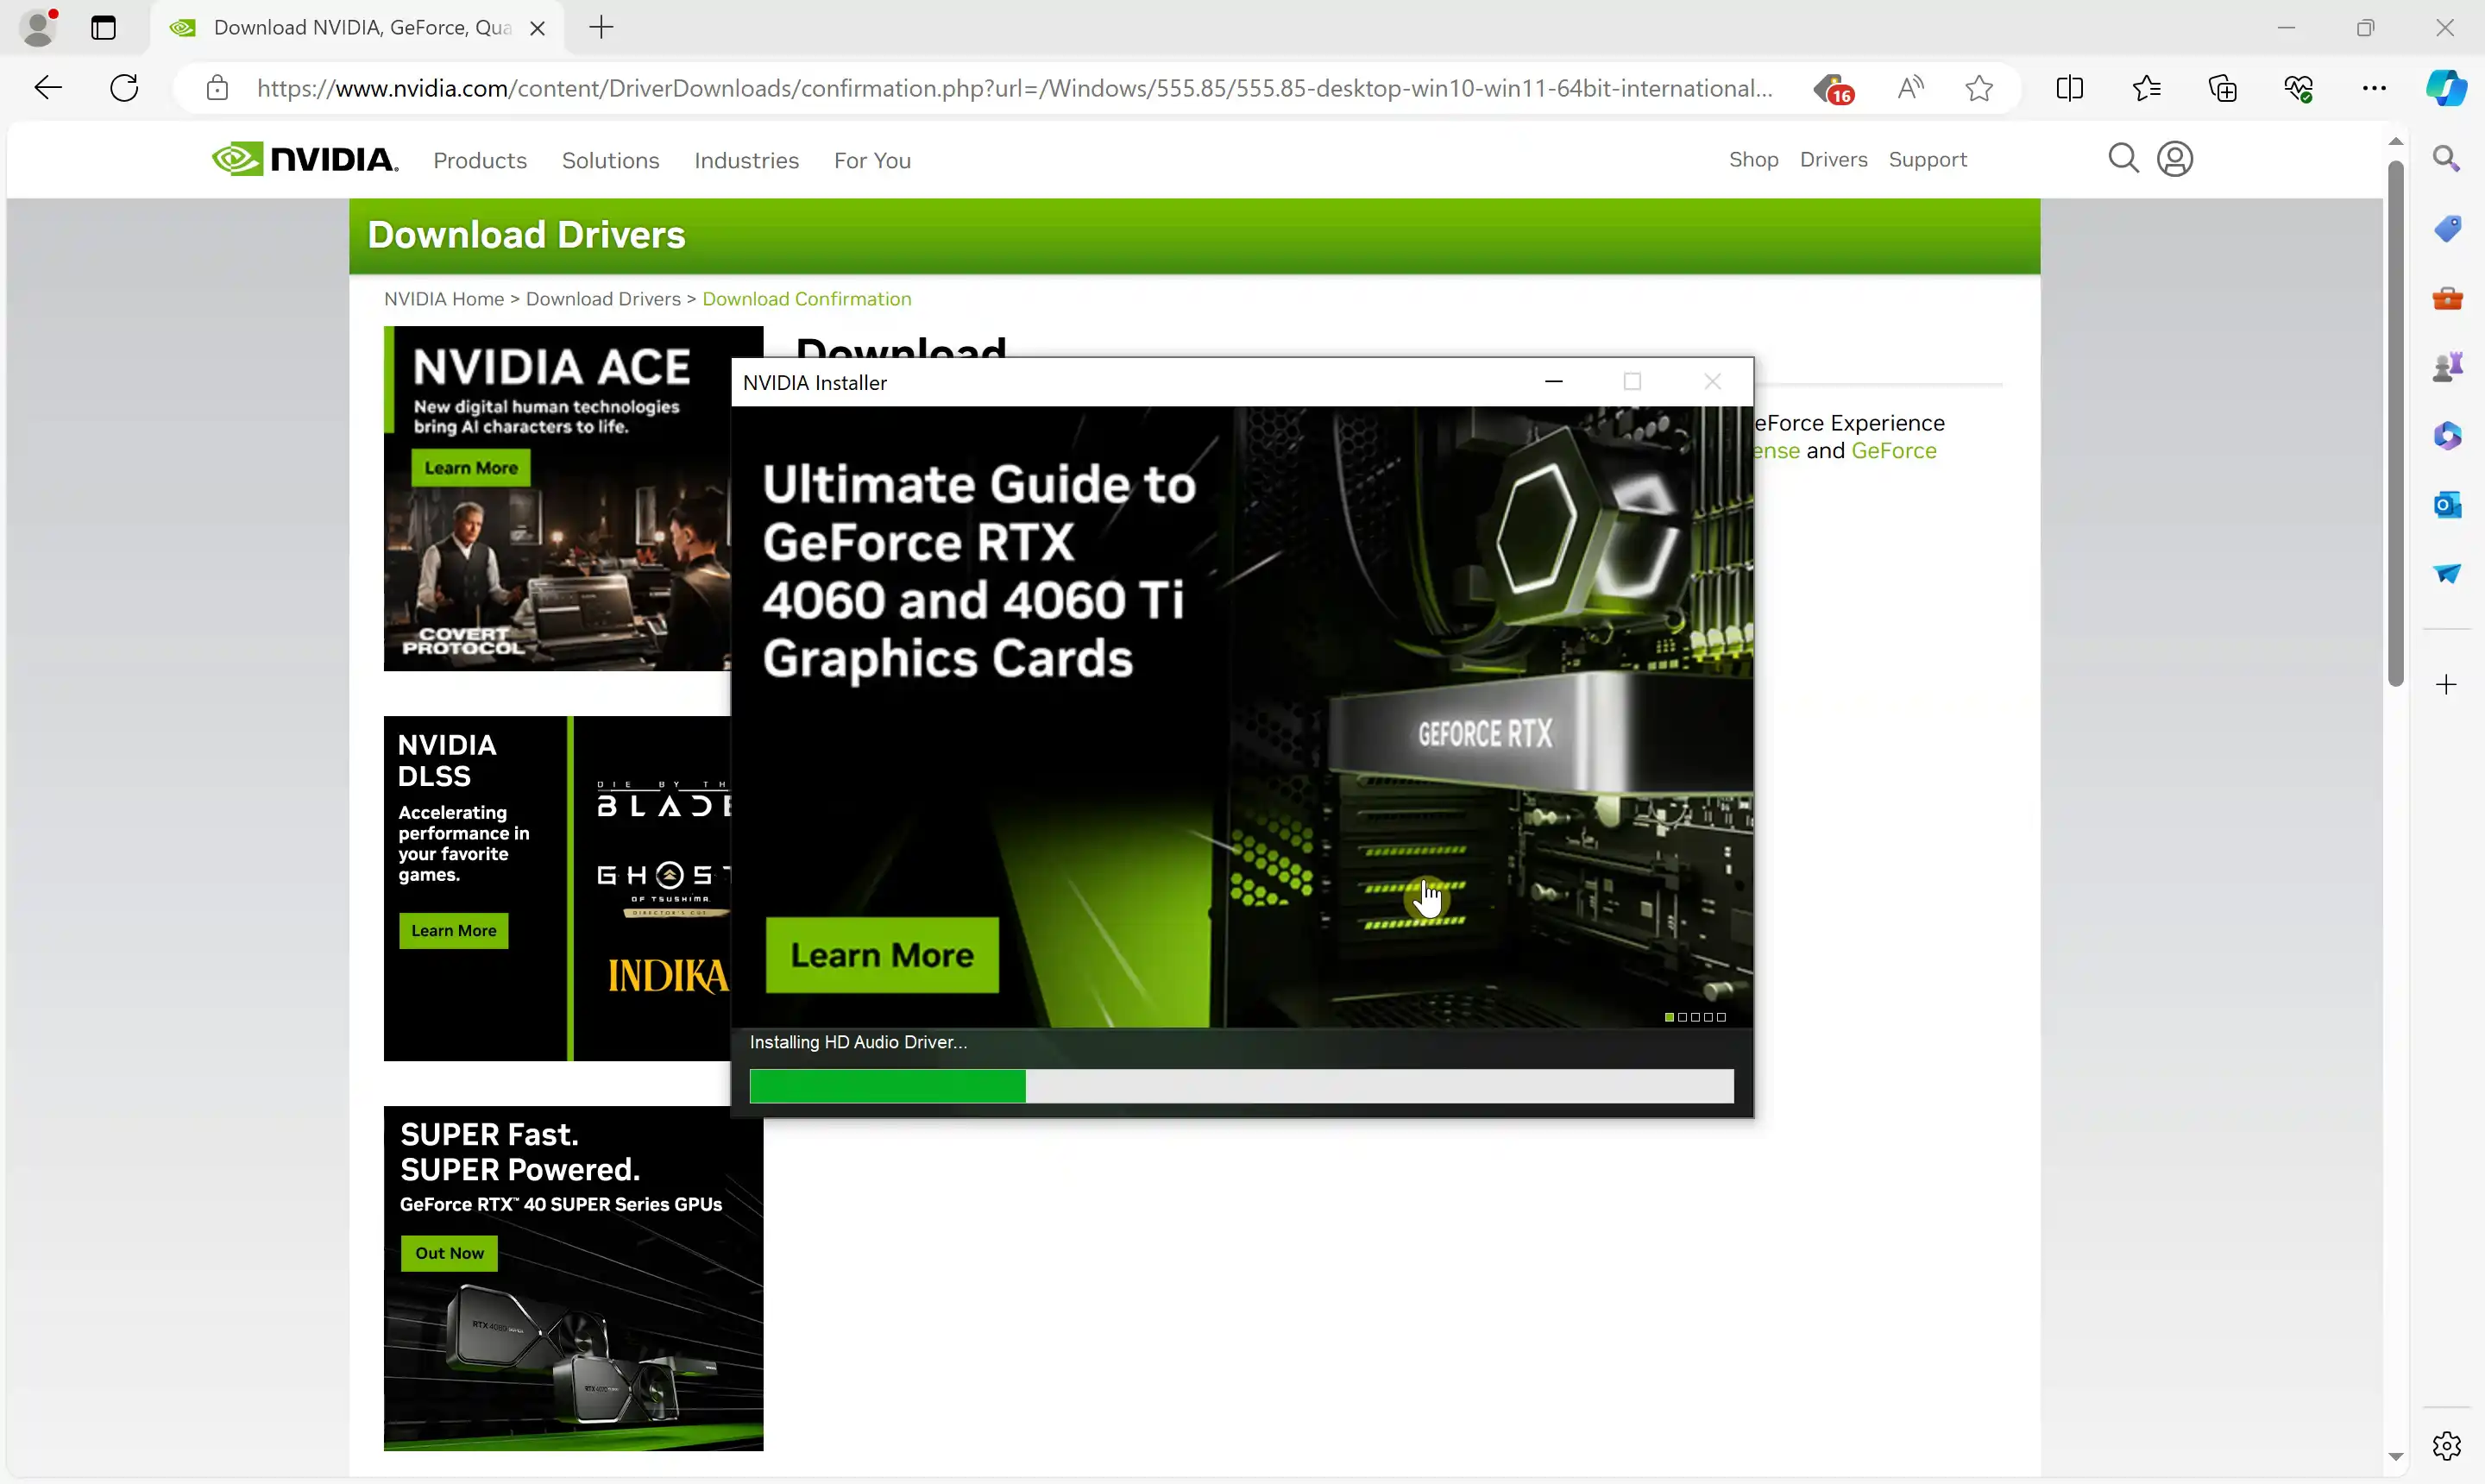
Wait for the installation process to finish, similarly to Figure 6.
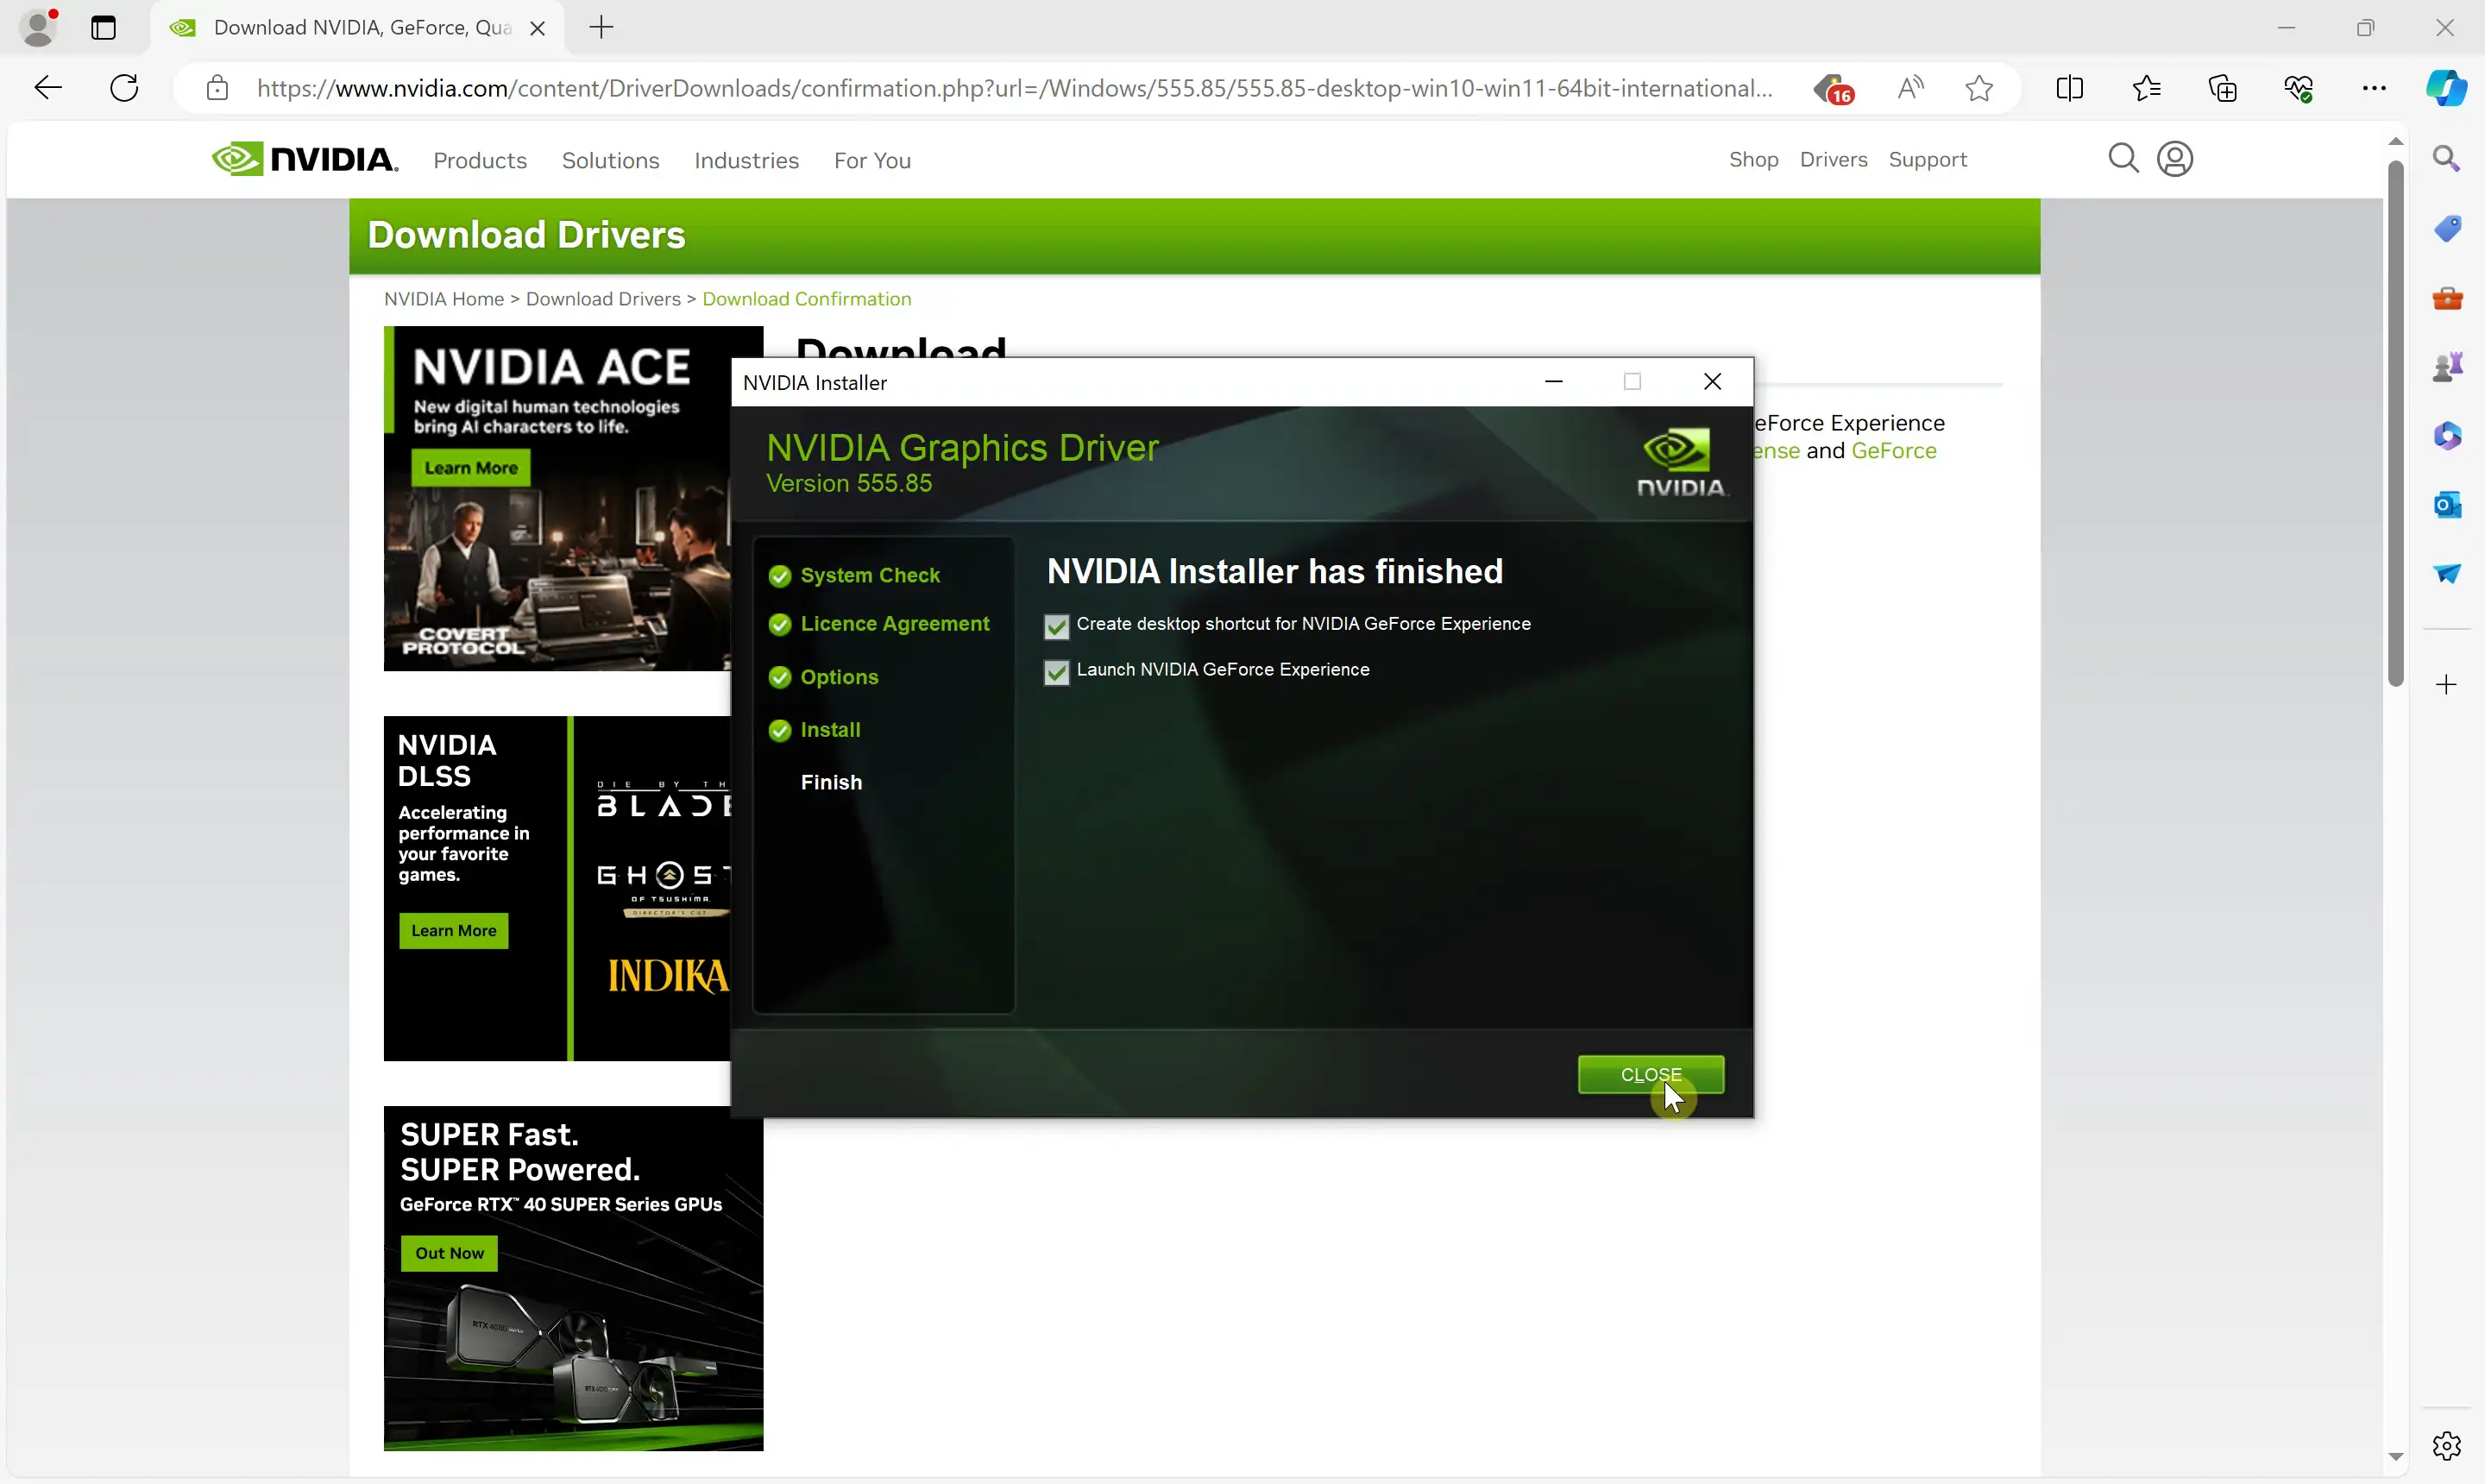
If everything went smoothly, you are met with a window similar to Figure 7. Click Close.
Step 2: Install WSL Ubuntu
In the next video, you'll be taught to install WSL Ubuntu on your Windows system using the Microsoft Store. The tutorial walks you through searching for Ubuntu LTS in the store, selecting your preferred version, and clicking Get to begin the installation. After waiting for the installation to finish, the video shows how to open the newly installed Ubuntu application, enabling you to start using Linux on your Windows machine through WSL.
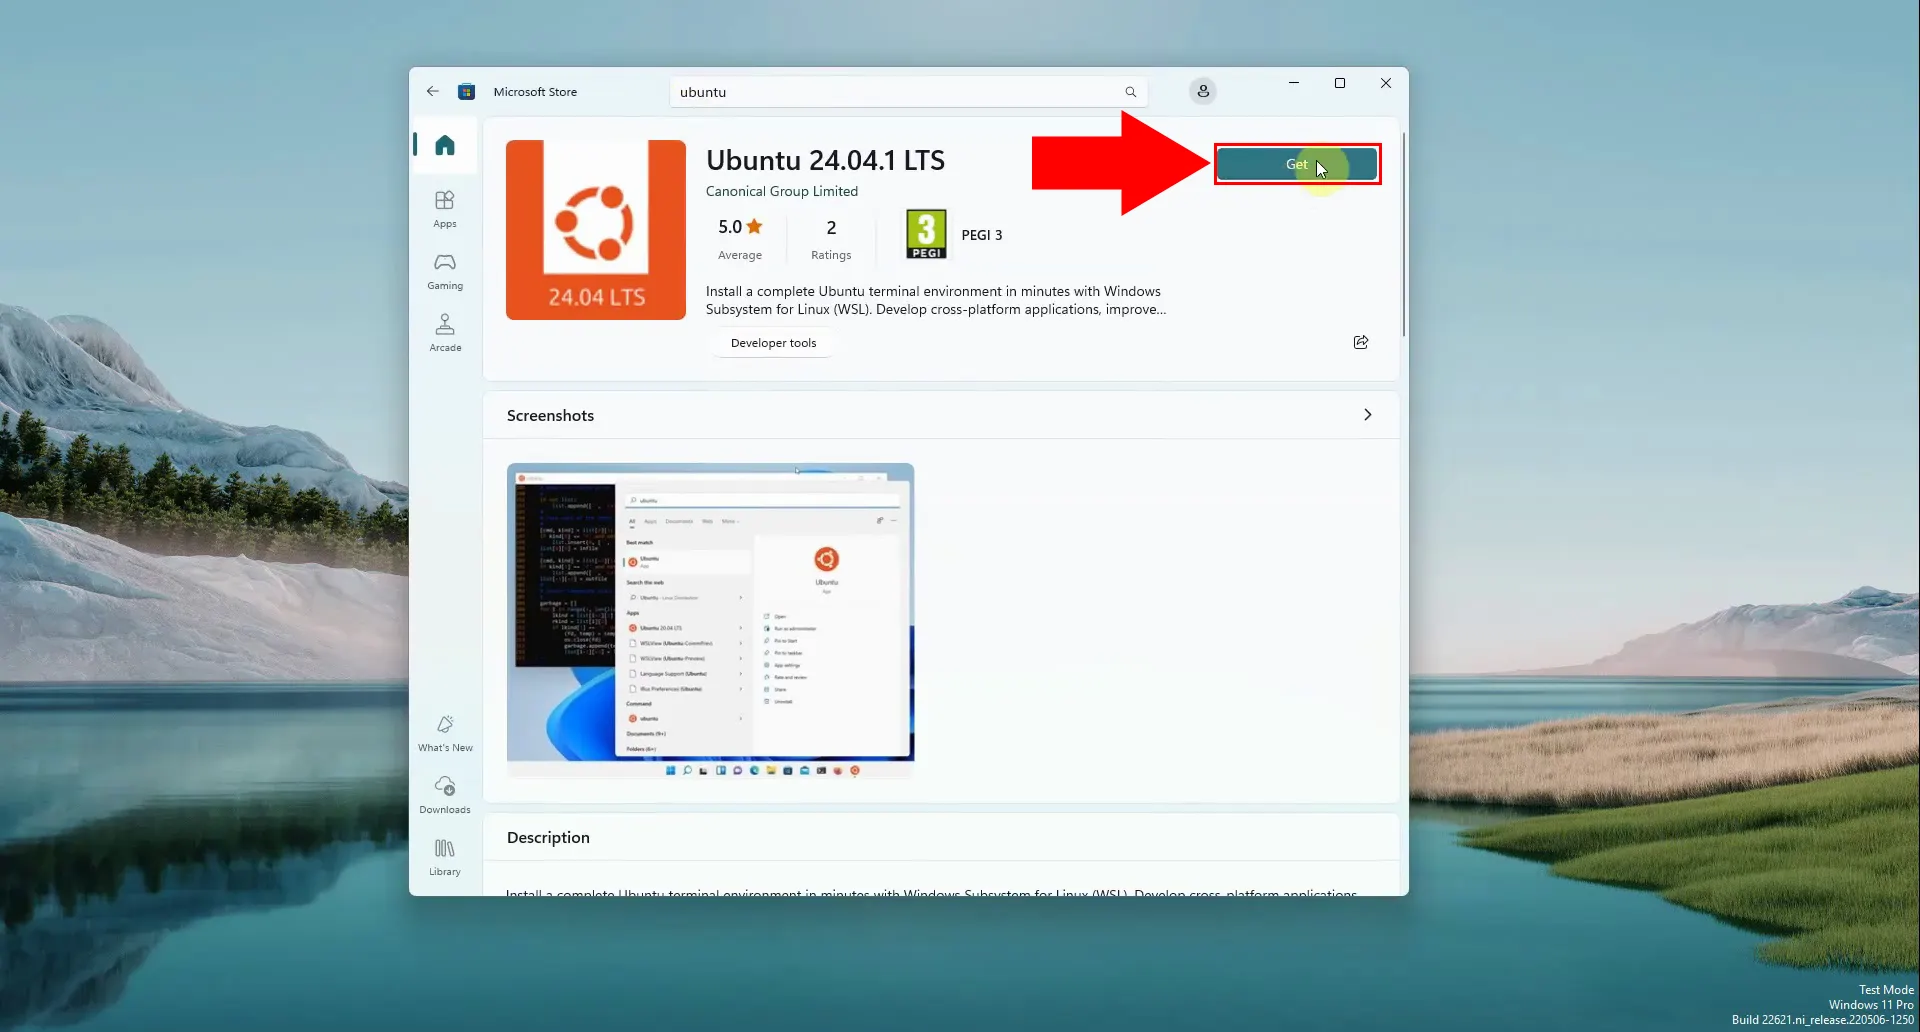
Open Microsoft Store, and search for Ubuntu LTS. For today's guide, we'll be using Ubuntu 24.04.1 LTS, as illustrated in Figure 8. Once on the store page of your desired version, click Get and wait for the installation to finish.
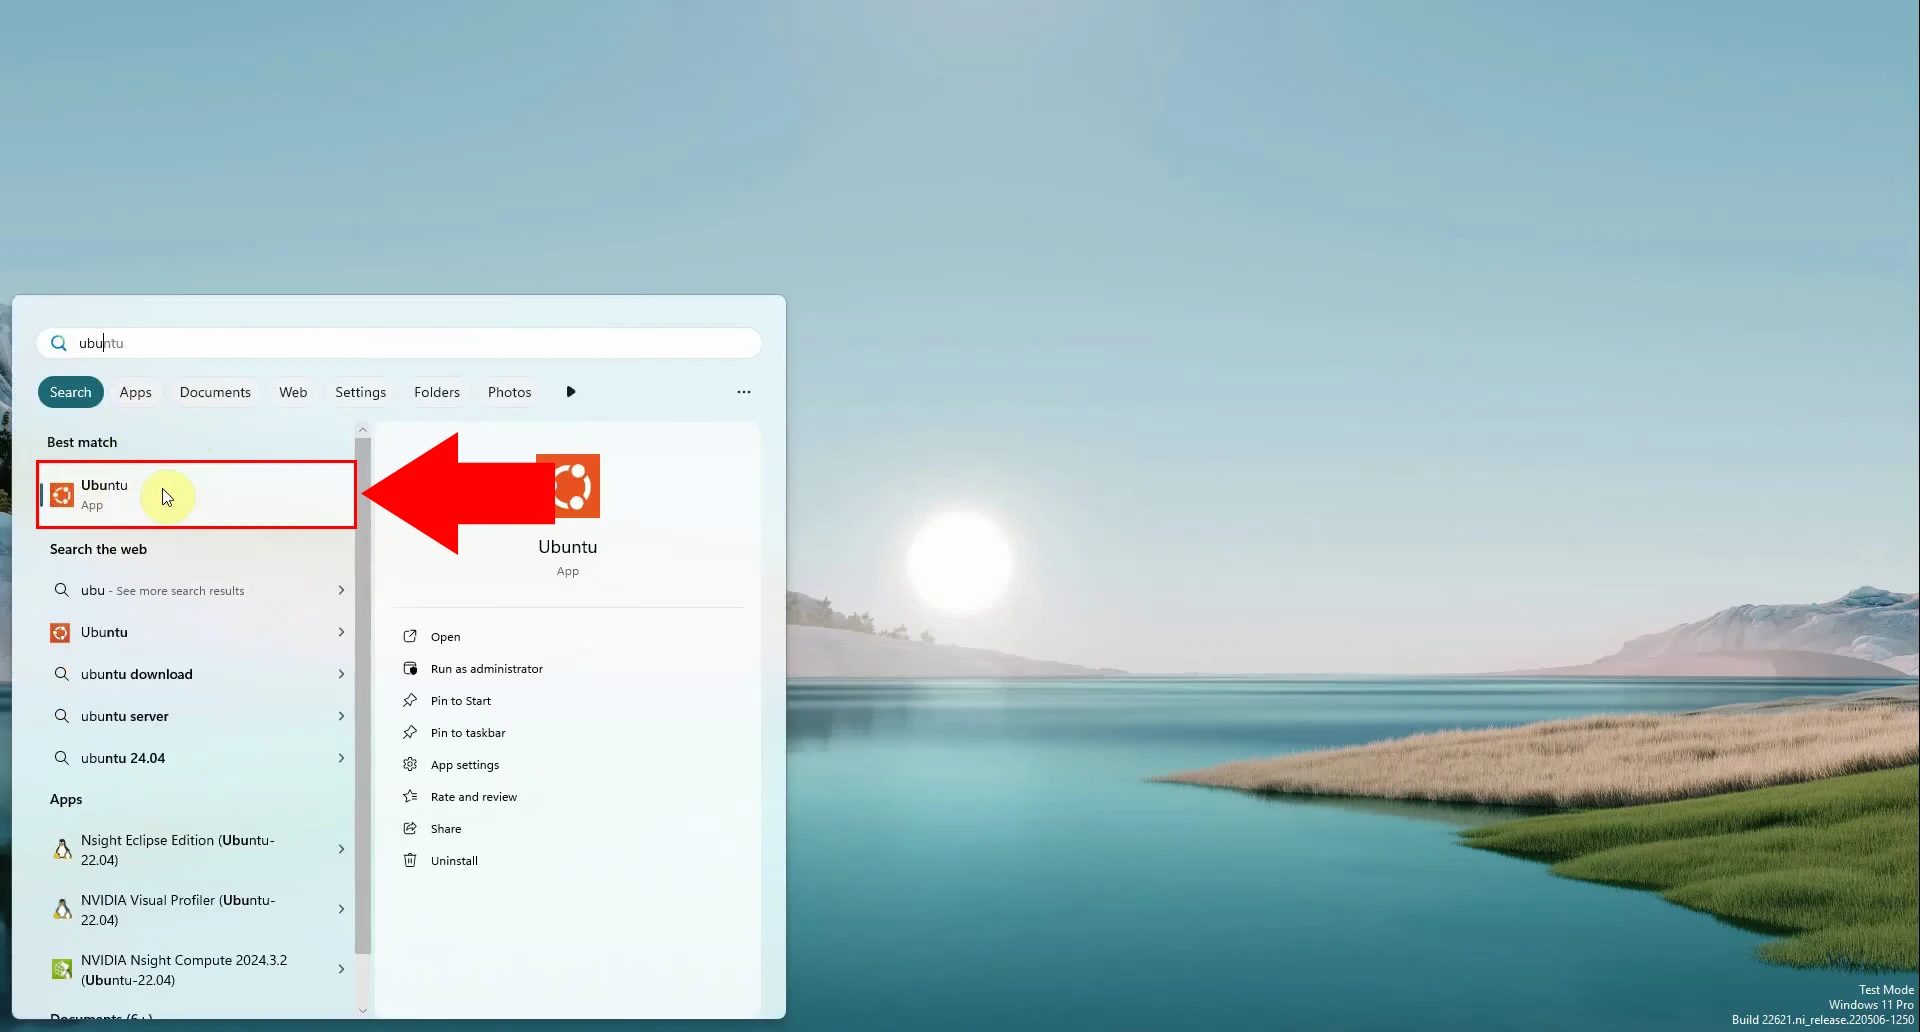
Open it. There are multiple ways to do this, this time we are going to hit the Windows key, and type ubuntu into the search field (Figure 9).
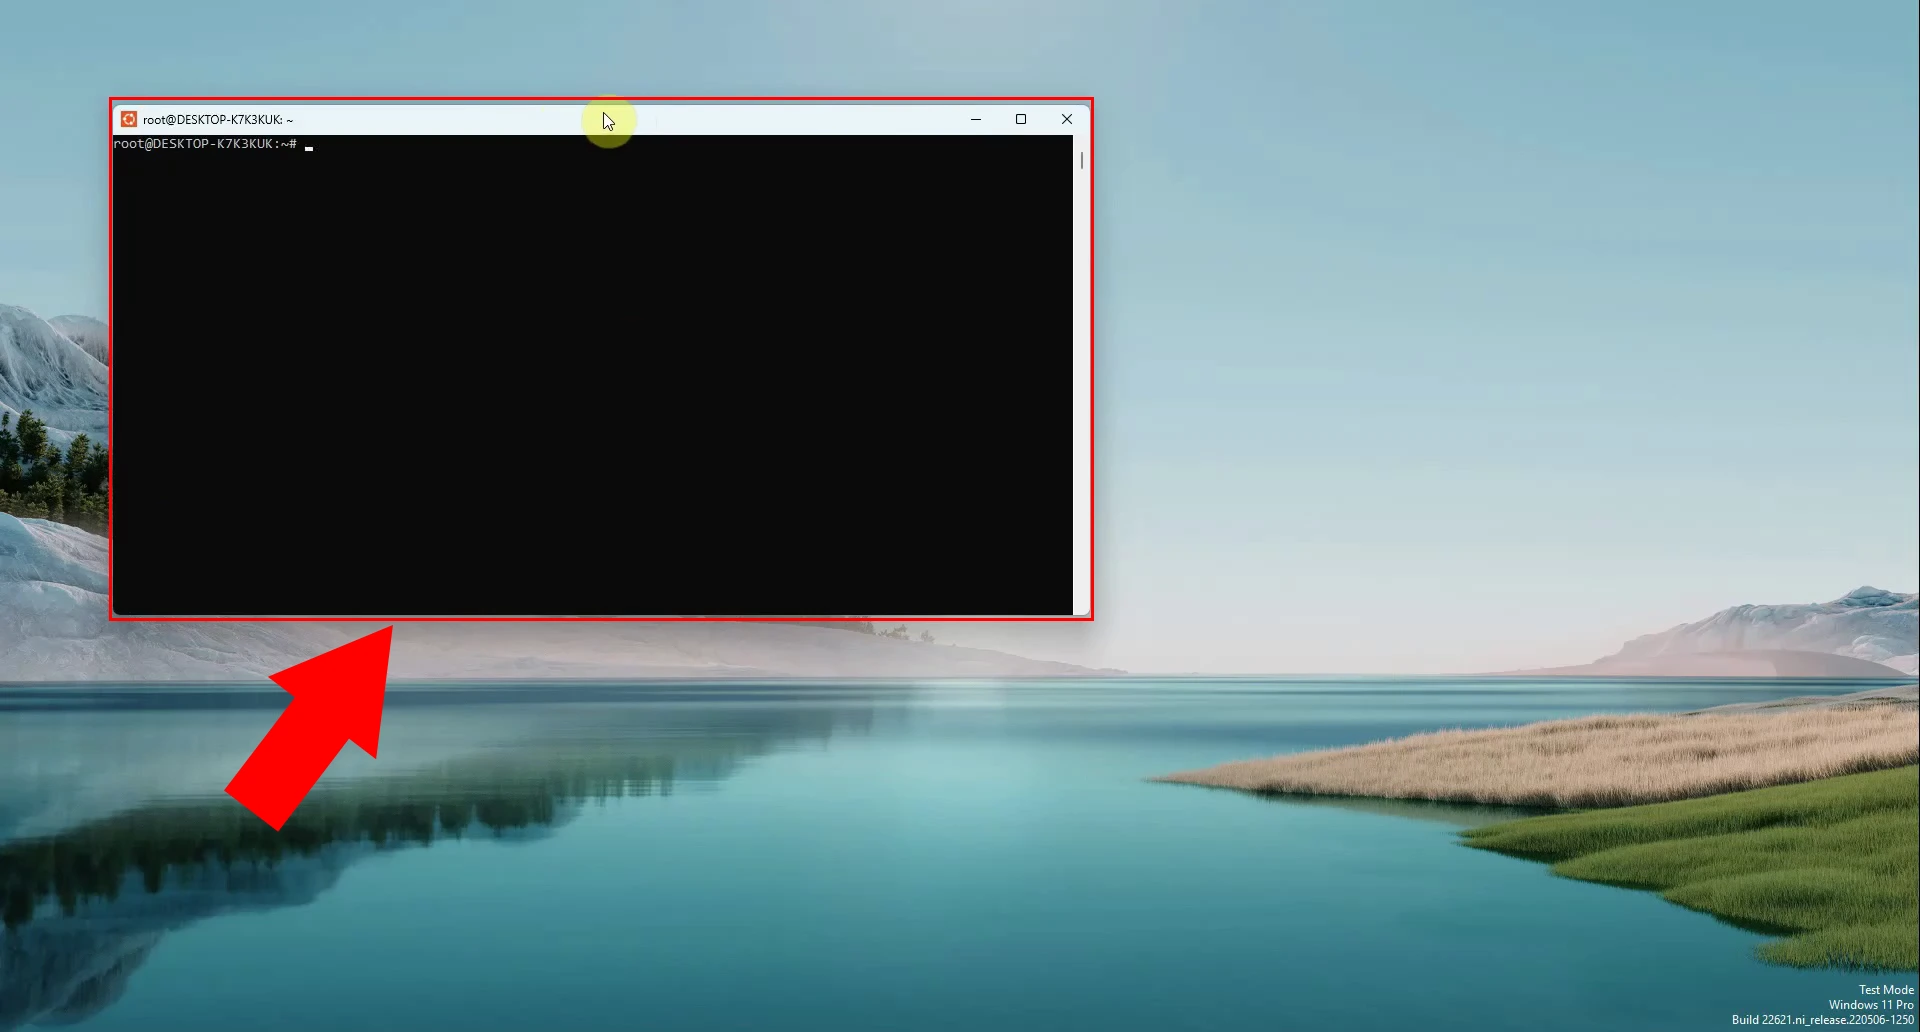
If you see a command line interface like Figure 10, you have been successful so far.
Step 3: Install CUDA toolkit on WSL
In this video, you'll learn how to install Nvidia's CUDA toolkit on your WSL interface. The tutorial starts by navigating to the CUDA toolkit downloads page, where you'll select the appropriate Operating System, Architecture, Distribution, Version, and Installer type. After that, you'll copy and paste each installation command from the page into your WSL interface, one by one, and wait for the individual installations to finish.
Head to CUDA Toolkit downloads page. Select operating system, architecture, distribution, version and installer type. In our case, those in order would be: Linux, x86_64, WSL-Ubuntu, 2.0, deb (local).
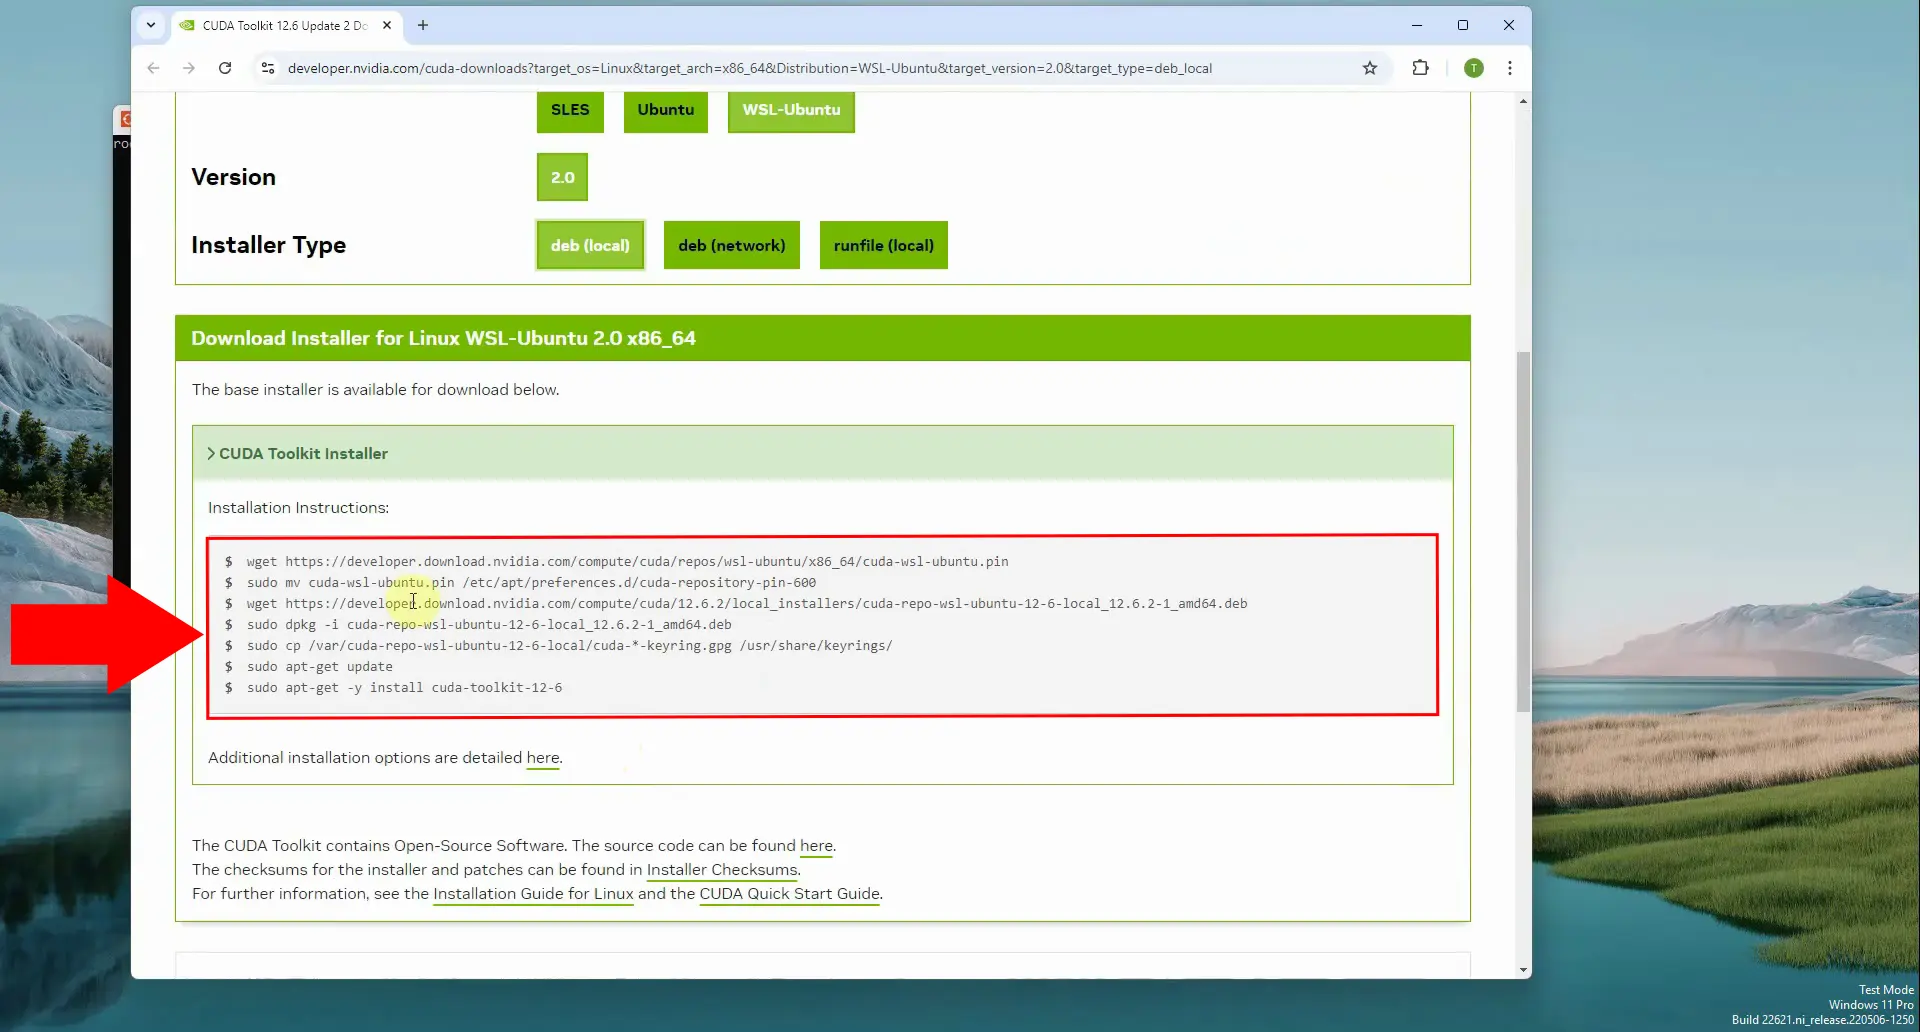
You should get a list of commands, similarly to the one in Figure 11, or the ones below.
wget https://developer.download.nvidia.com/compute/cuda/repos/wsl-ubuntu/x86_64/cuda-wsl-ubuntu.pin
sudo mv cuda-wsl-ubuntu.pin /etc/apt/preferences.d/cuda-repository-pin-600
wget https://developer.download.nvidia.com/compute/cuda/12.6.2/local_installers/cuda-repo-wsl-ubuntu-12-6-local_12.6.2-1_amd64.deb
sudo dpkg -i cuda-repo-wsl-ubuntu-12-6-local_12.6.2-1_amd64.deb
sudo cp /var/cuda-repo-wsl-ubuntu-12-6-local/cuda-*-keyring.gpg /usr/share/keyrings/
sudo apt-get update
sudo apt-get -y install cuda-toolkit-12-6
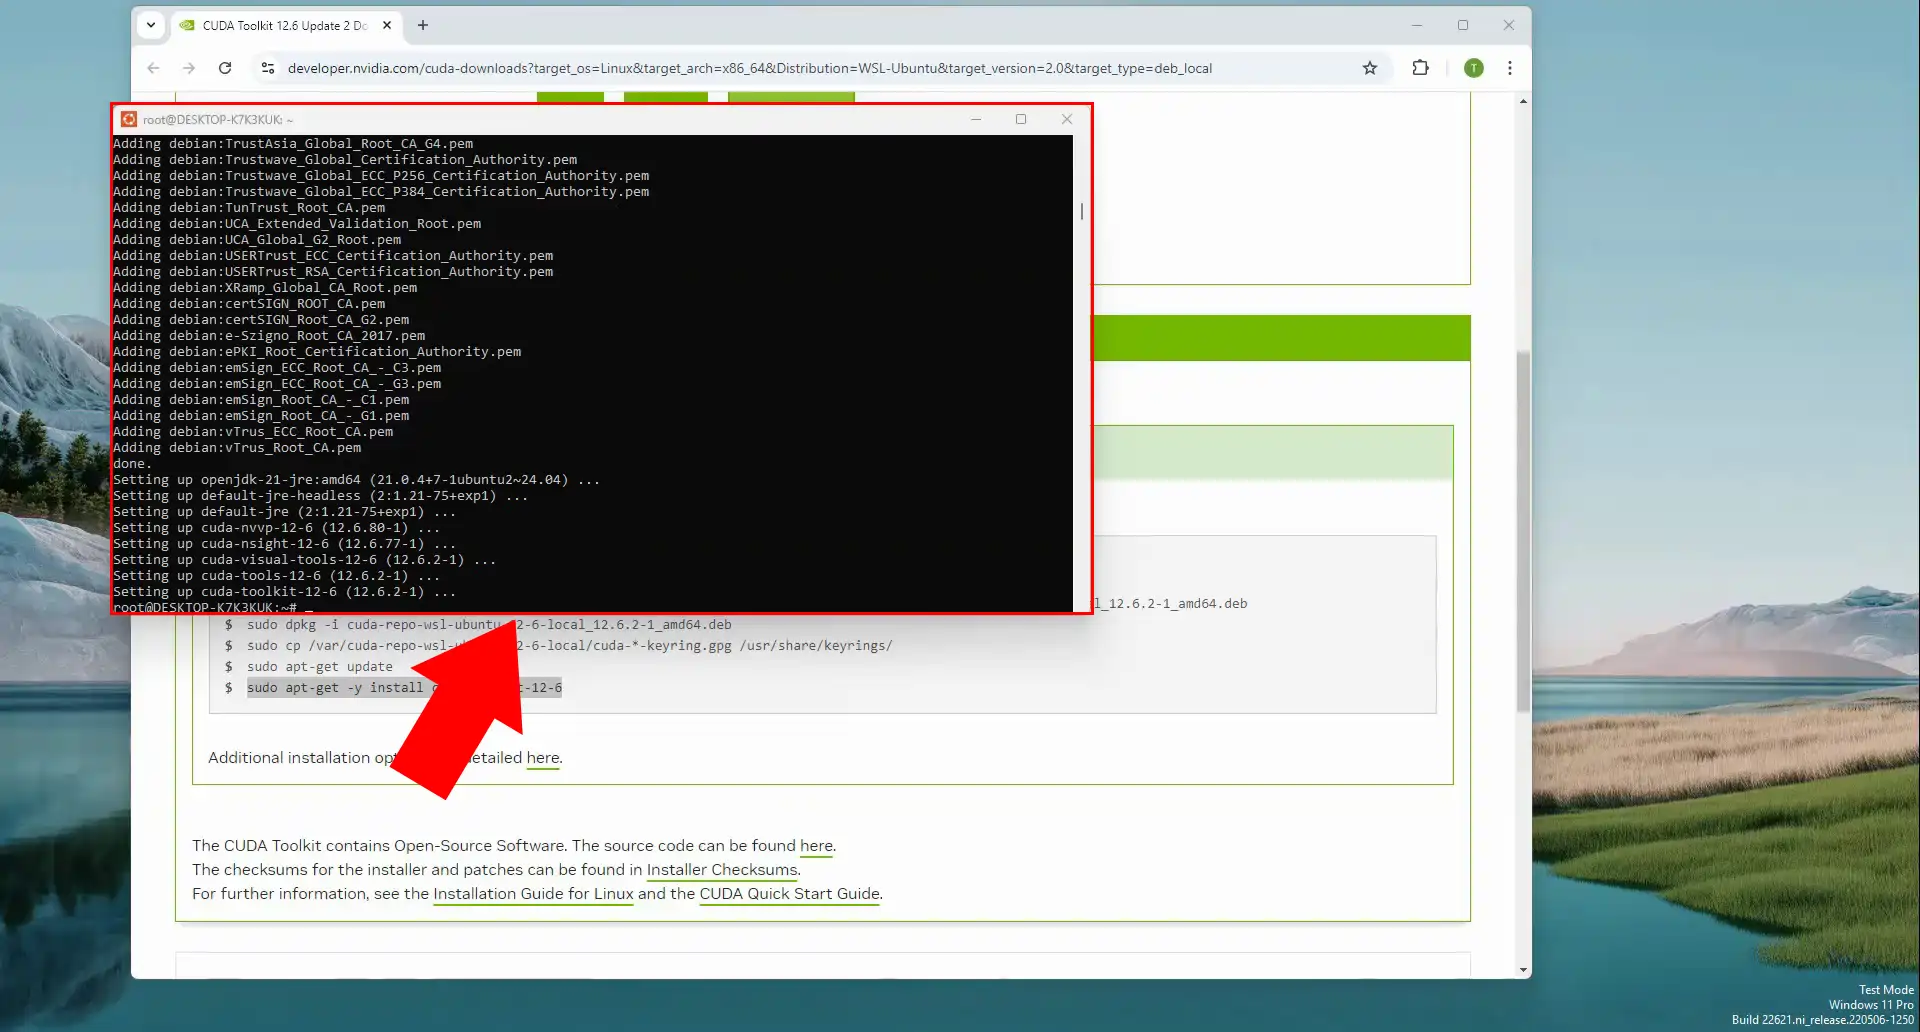
Run each command line individually, and wait for the installations to finish, as seen in Figure 12.
Step 4: Install Phyton PIP and Conda environment
In this video tutorial, you are guided through the process of installing Python PIP and Miniconda on Ubuntu WSL. It begins with a demonstration of how to install Python PIP using the command line. Once the command is executed, the viewer is prompted to confirm the installation by entering 'yes' and waiting for the process to complete.
Next, the tutorial shows how to navigate to the Miniconda downloads page and copy the link address for the Linux 64-bit installer. The video continues with downloading Miniconda via the "wget" command, followed by the installation process. Viewers are instructed to follow the on-screen prompts during the installation, waiting until it is fully completed before concluding.
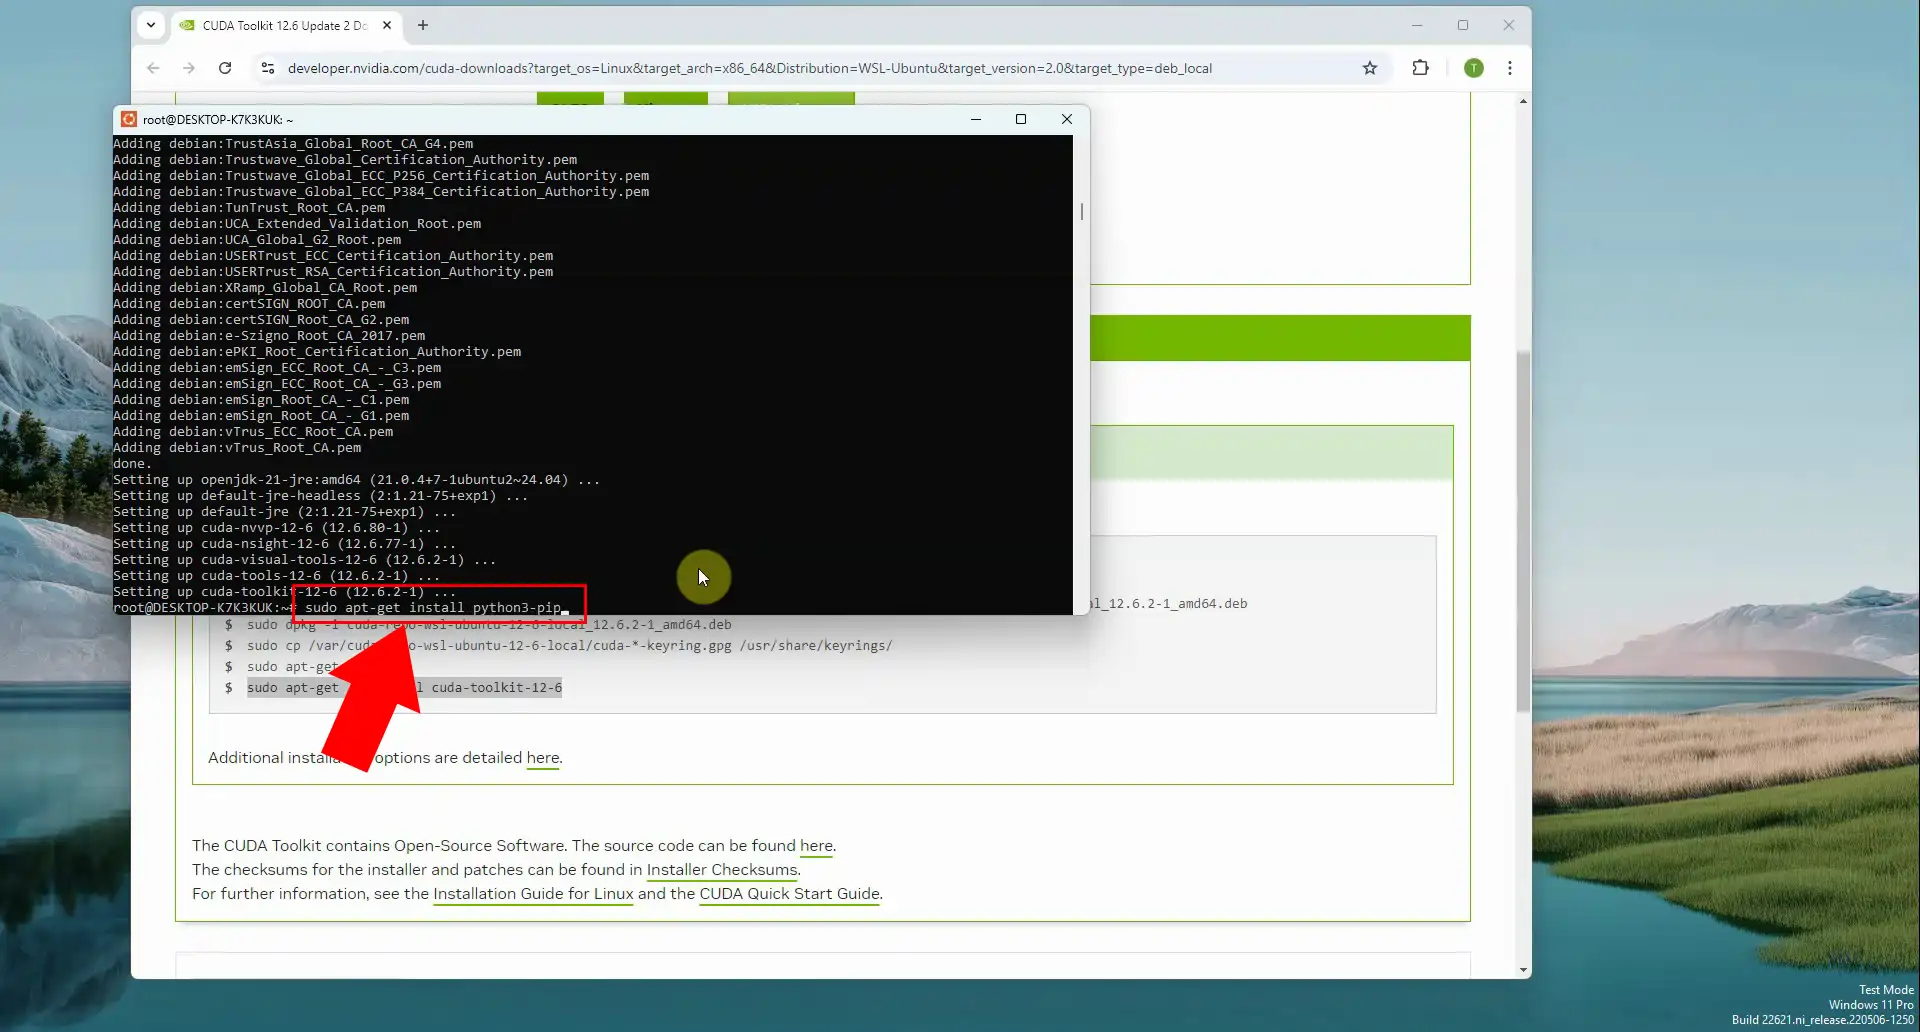
Enter the command below into the Terminal to start Python PIP's download (Figure 13).
sudo apt-get install python3-pip
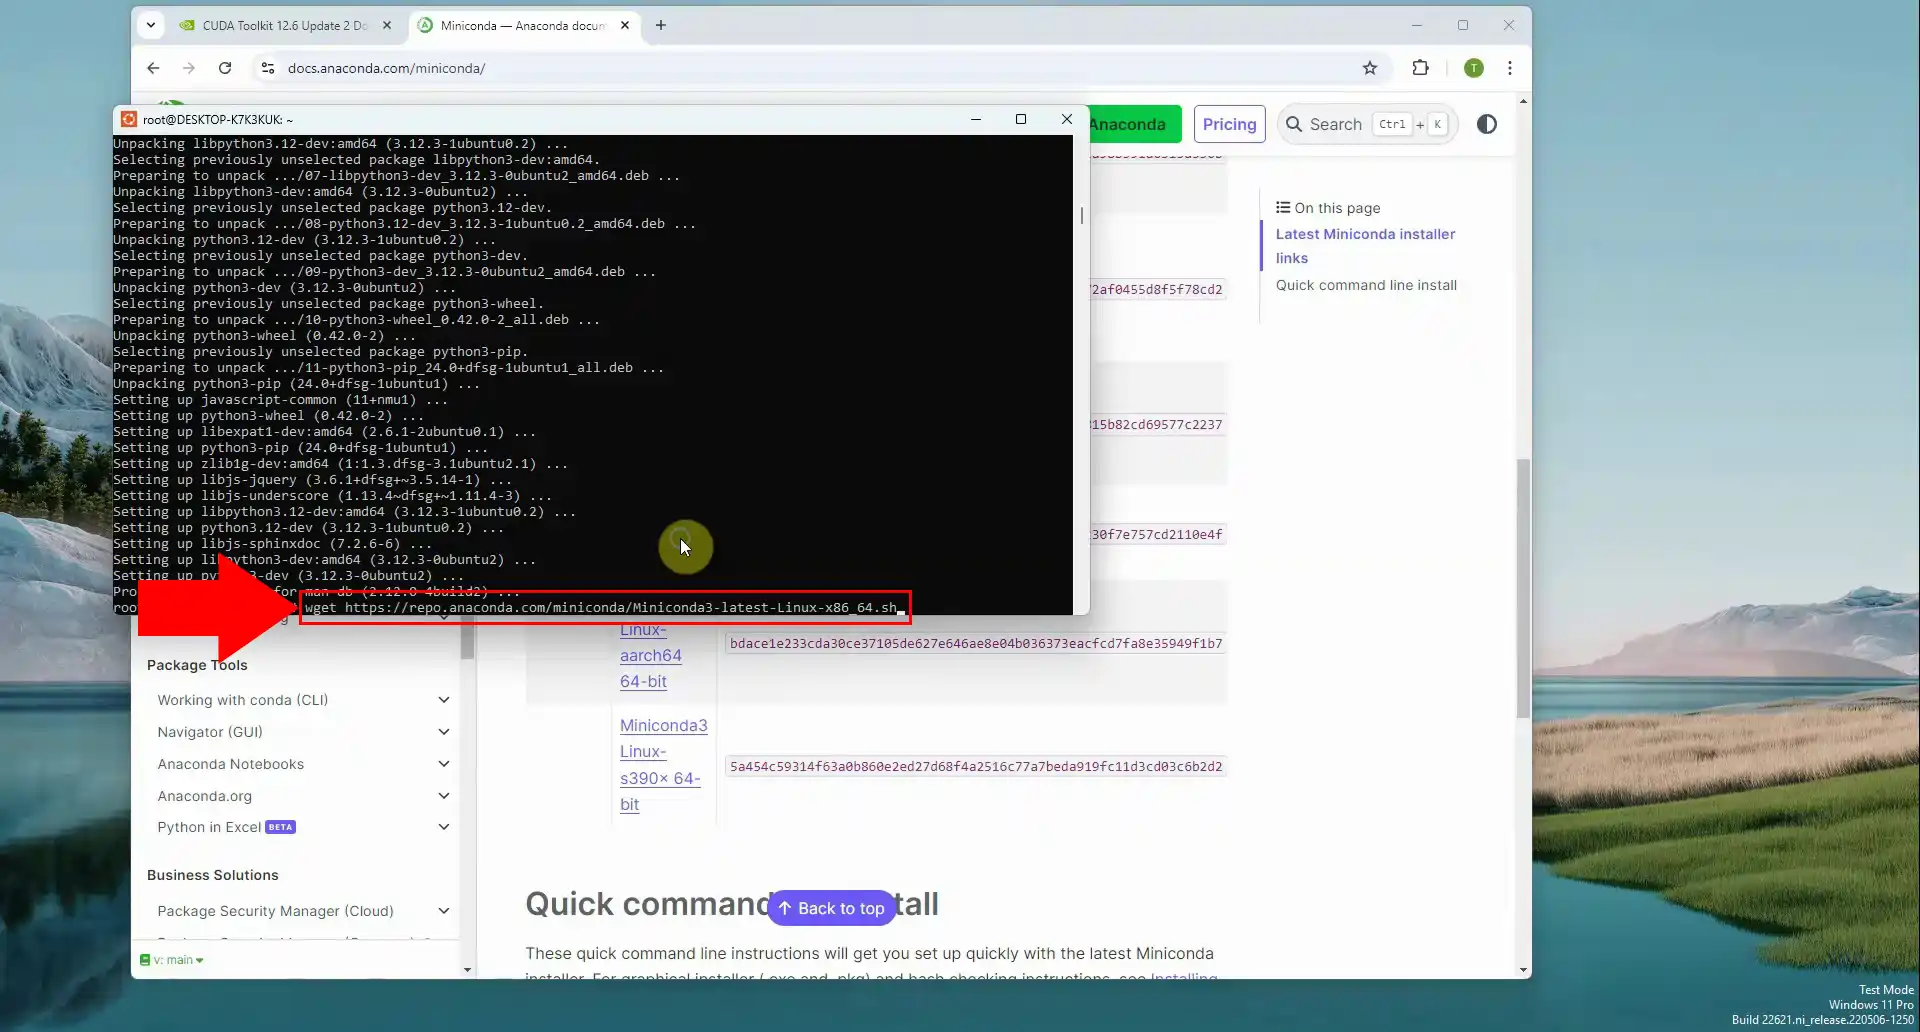
On the Miniconda downloads page, look for the Linux 64-bit installer, right click on it, and select Copy link address from the dropdown list. Open the terminal, enter wget and paste the link on your clipboard, highlighted in Figure 14.
Alternatively, you can copy and paste the command below to do the same.
wget https://repo.anaconda.com/miniconda/Miniconda3-latest-Linux-x86_64.sh
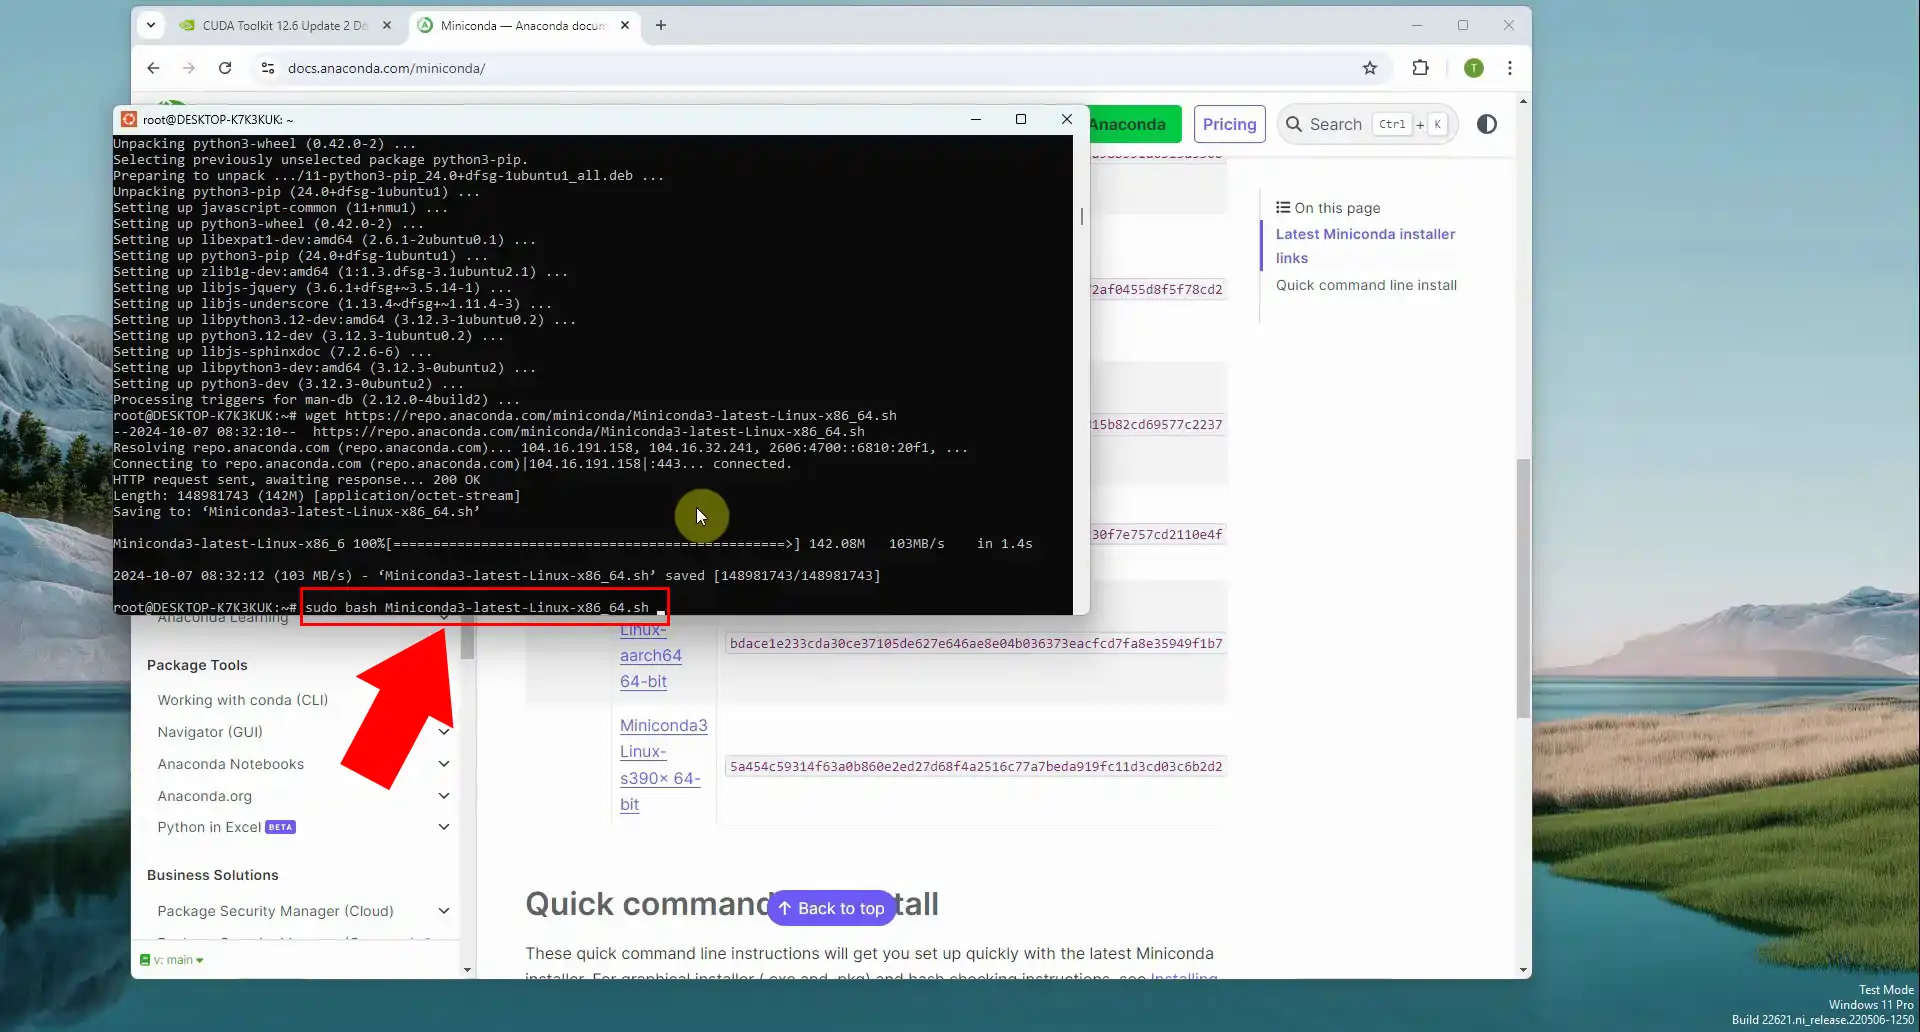
Run the install script you've just downloaded by pasting the command below into the Terminal, as illustrated by Figure 15.
sudo bash Miniconda3-latest-Linux-x86_64.sh
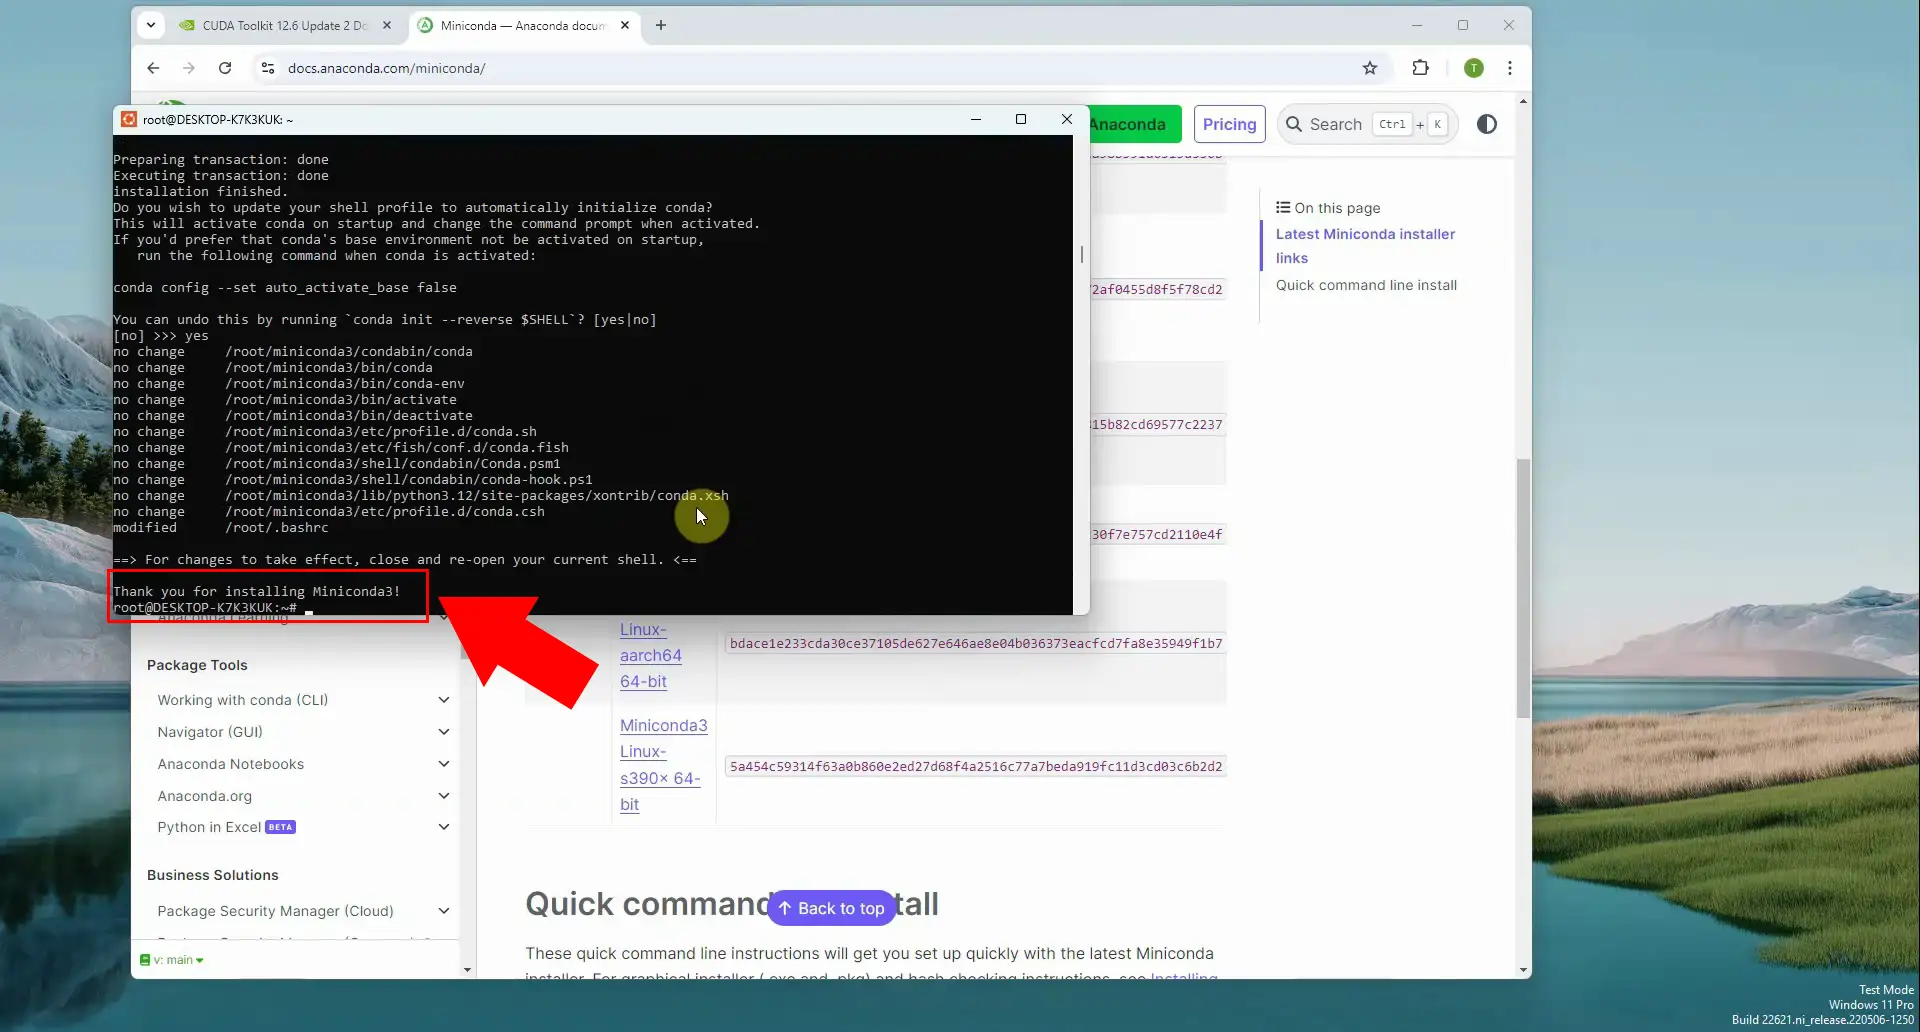
Follow the instructions of the installer, and wait for the process to finish. When done, your Terminal should look similar to Figure 16.
Step 5: Install and run vLLM
In this video tutorial, the viewer learns how to run their preferred LLM and send a prompt to it via an HTTP POST request using Postman. The video begins with creating and activating a new Conda environment, followed by the installation of vLLM through a command. Once the environment is set, the viewer is directed to Hugging Face to search for their desired model, in this case, Llama-3.2-3B-Instruct-Uncensored.
The tutorial demonstrates how to navigate the model's page, click Use this model, and select vLLM from the dropdown. It then shows how to copy the command under # Load and run the model and execute it in the terminal. After waiting for the model to load, the focus shifts to Postman, where a new POST request is created.
The viewer is shown how to copy the address and request body, including the prompt, from the model's page into Postman. They can then modify the prompt to fit their needs and send the request. Finally, the tutorial checks whether the model's response is accurate and coherent.
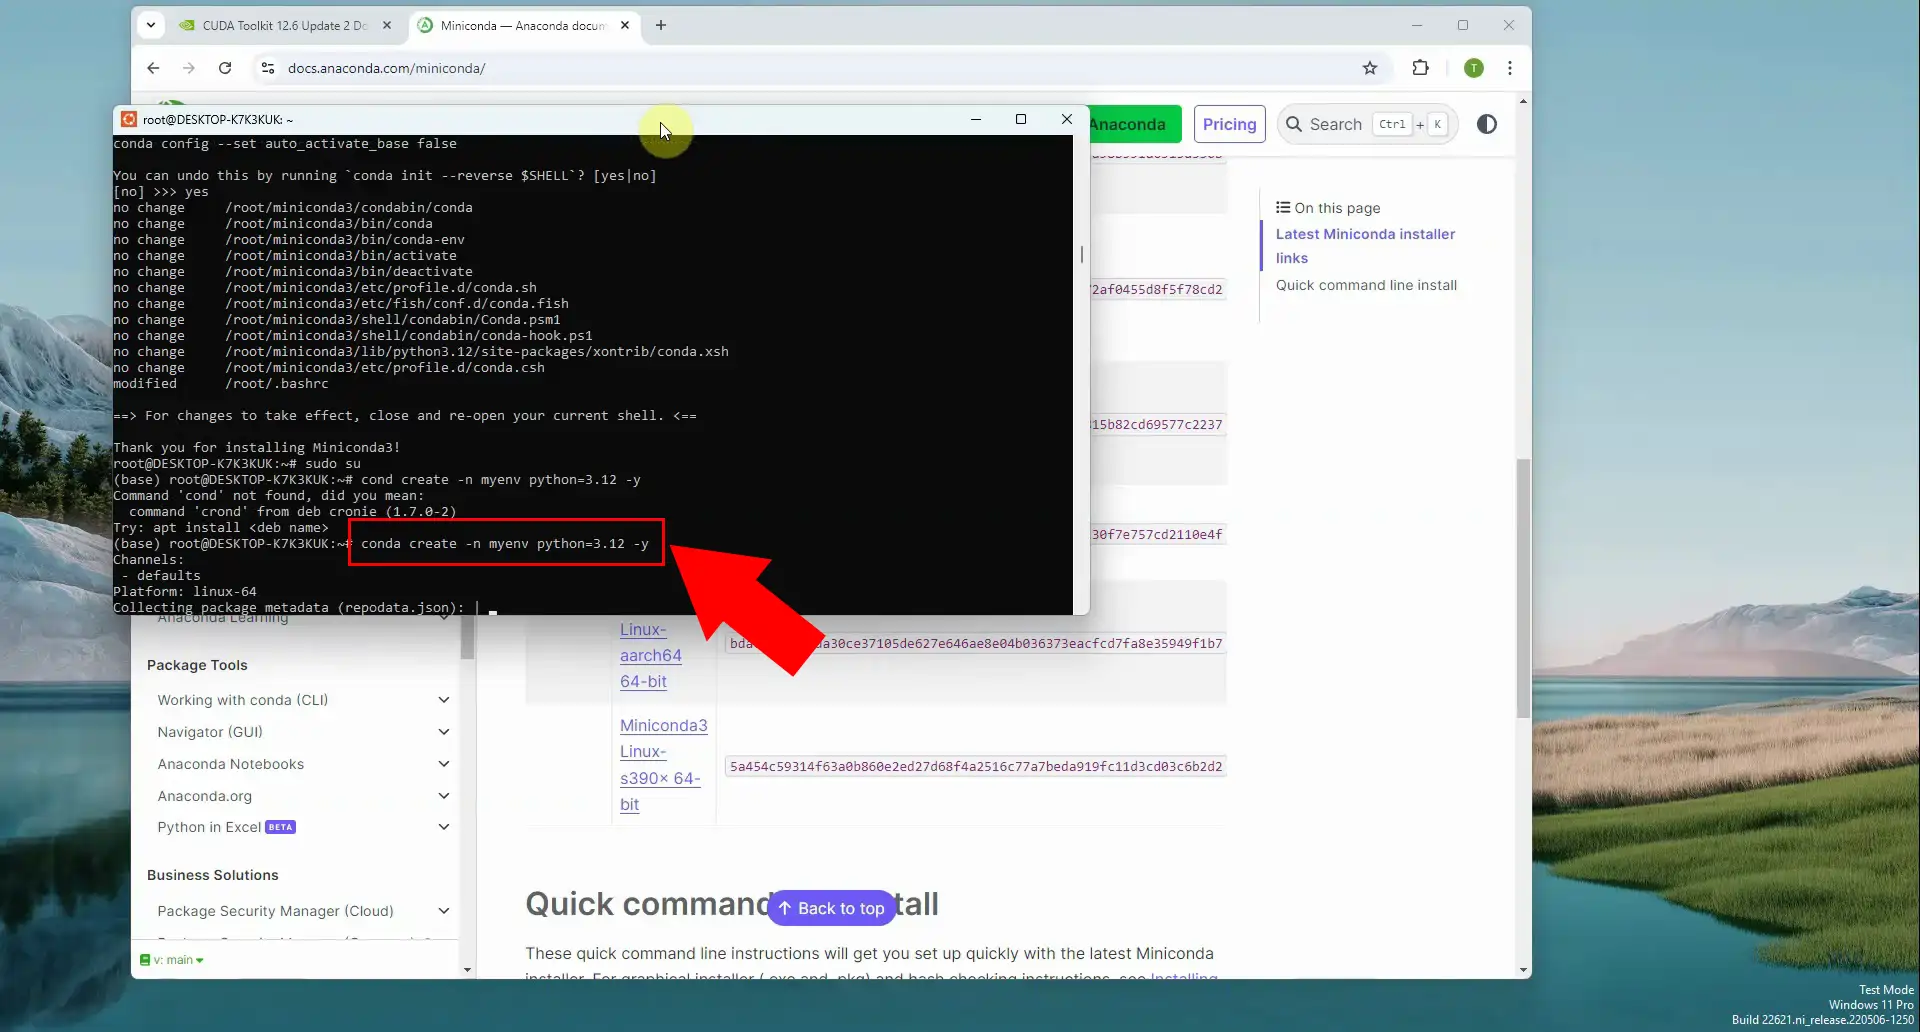
Create a new Conda environment by pasting the command below into the Terminal, as highlighted in Figure 17.
conda create -n myenv python=3.12 -y
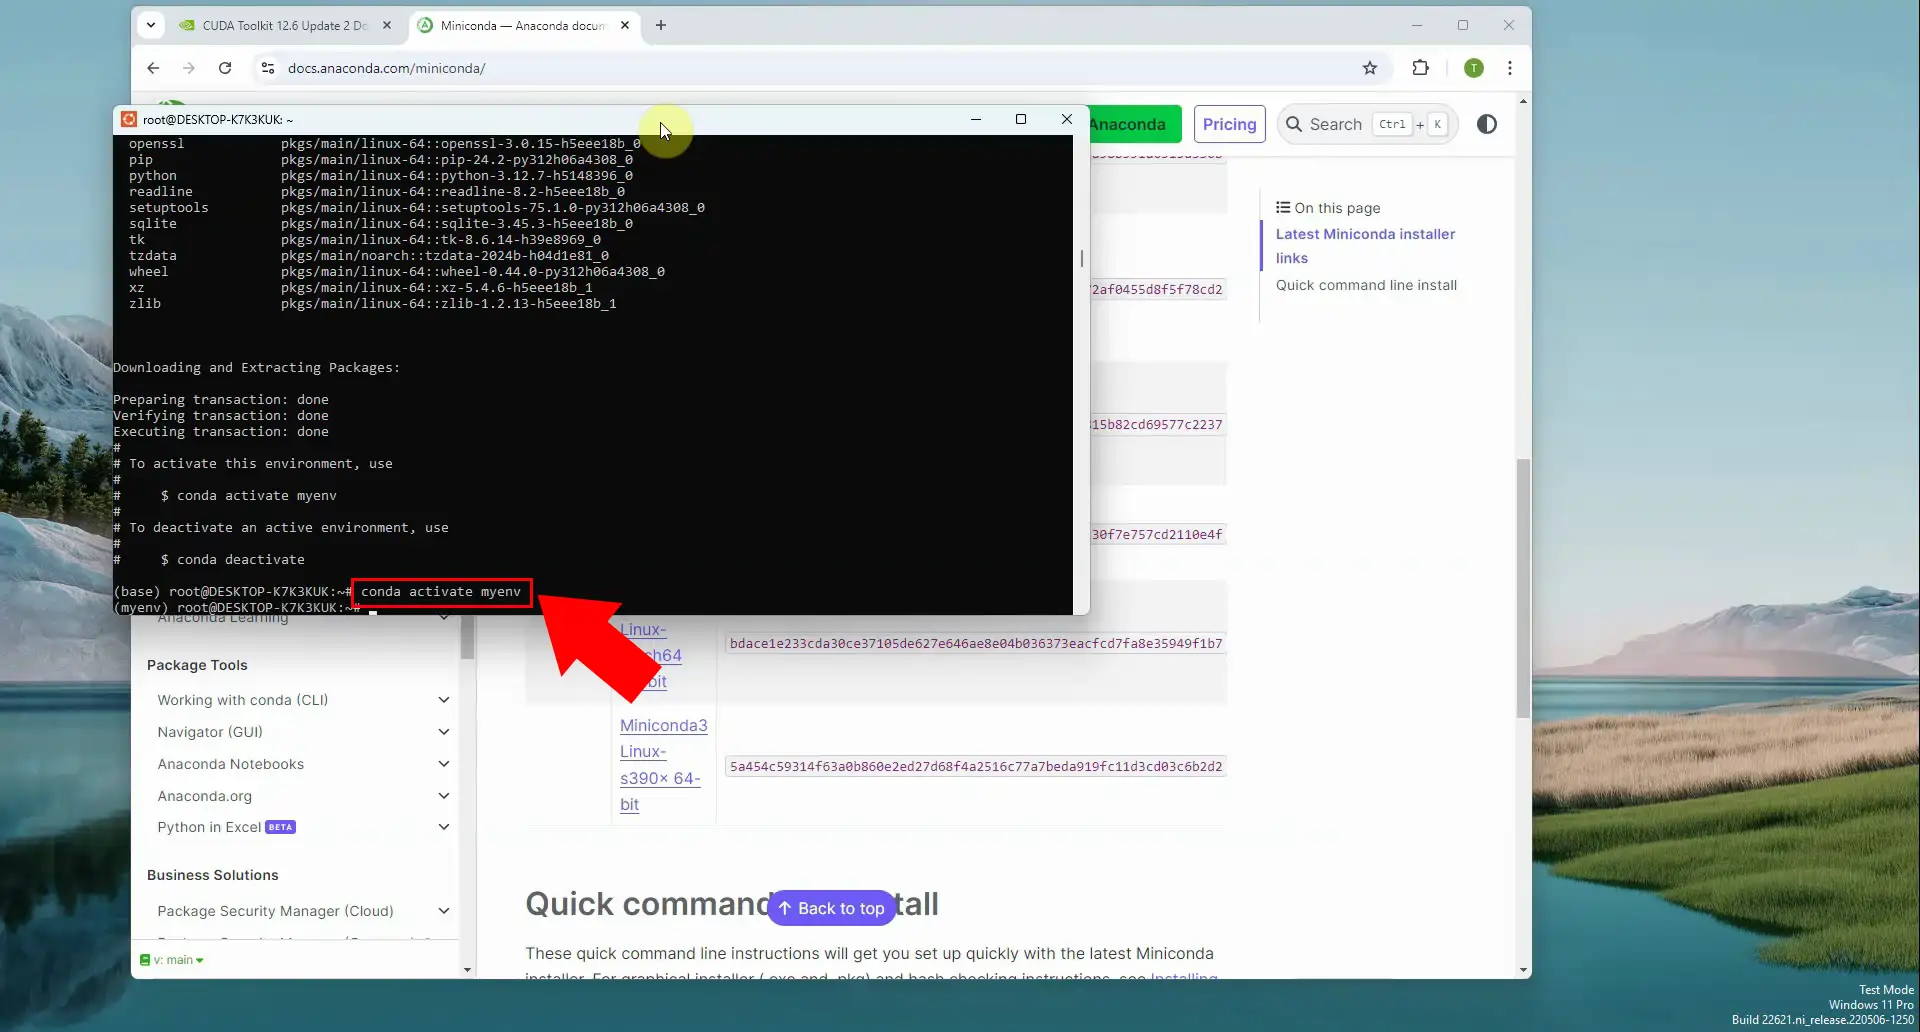
Then, activate this new environment by pasting the next piece of code into the Terminal, as you can see in Figure 18.
conda activate myenv
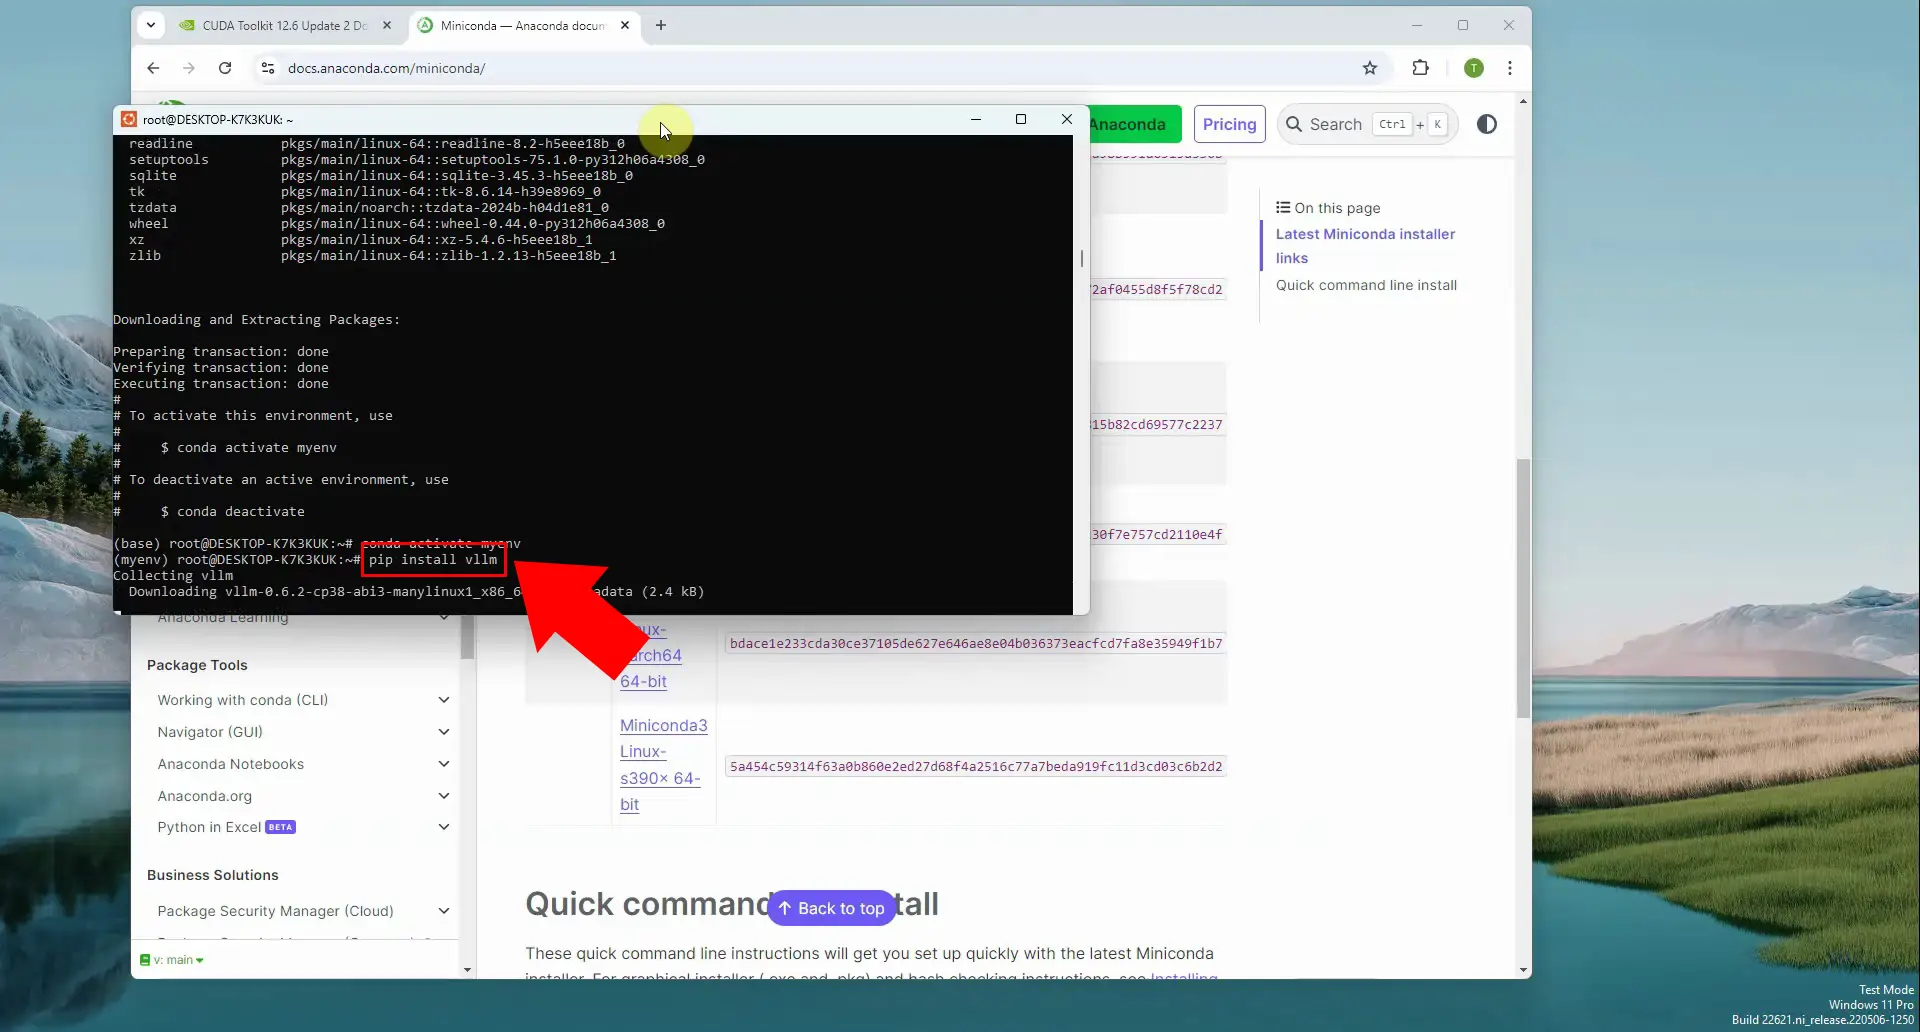
After that, install vLLM using this command (Figure 19):
pip install vllm
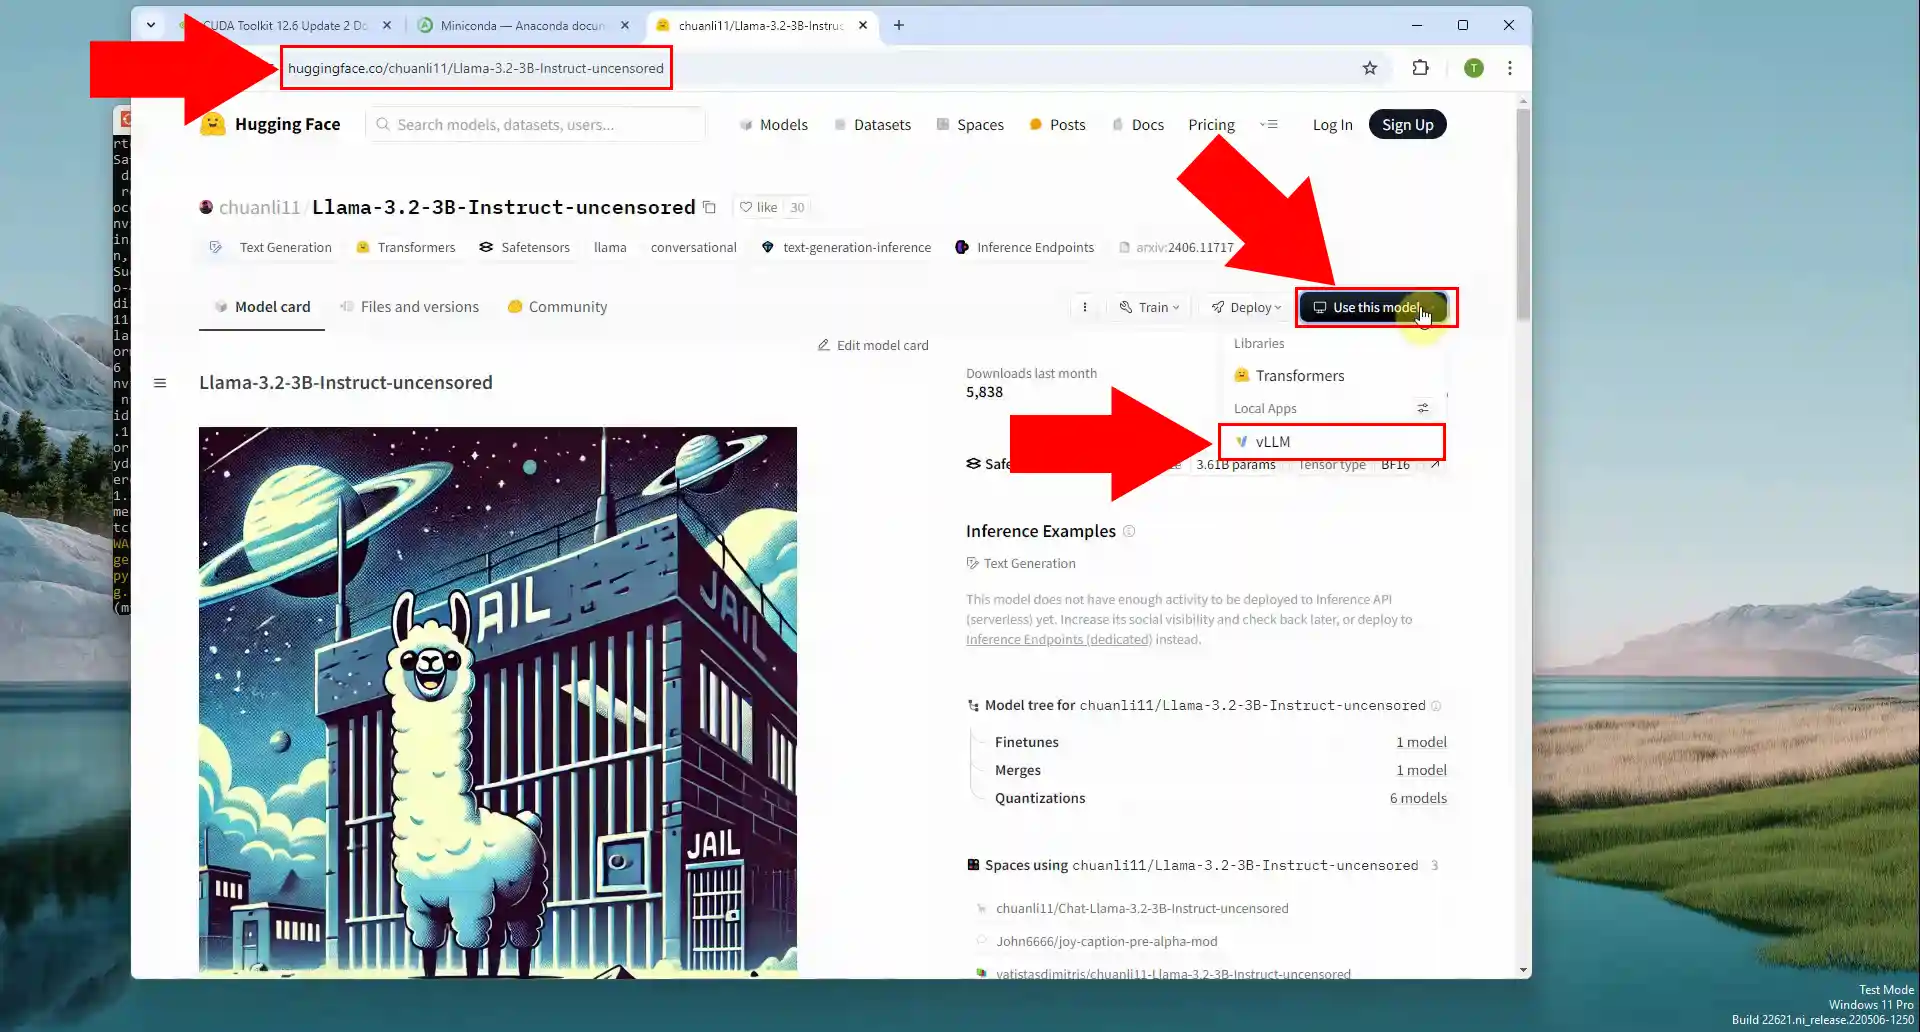
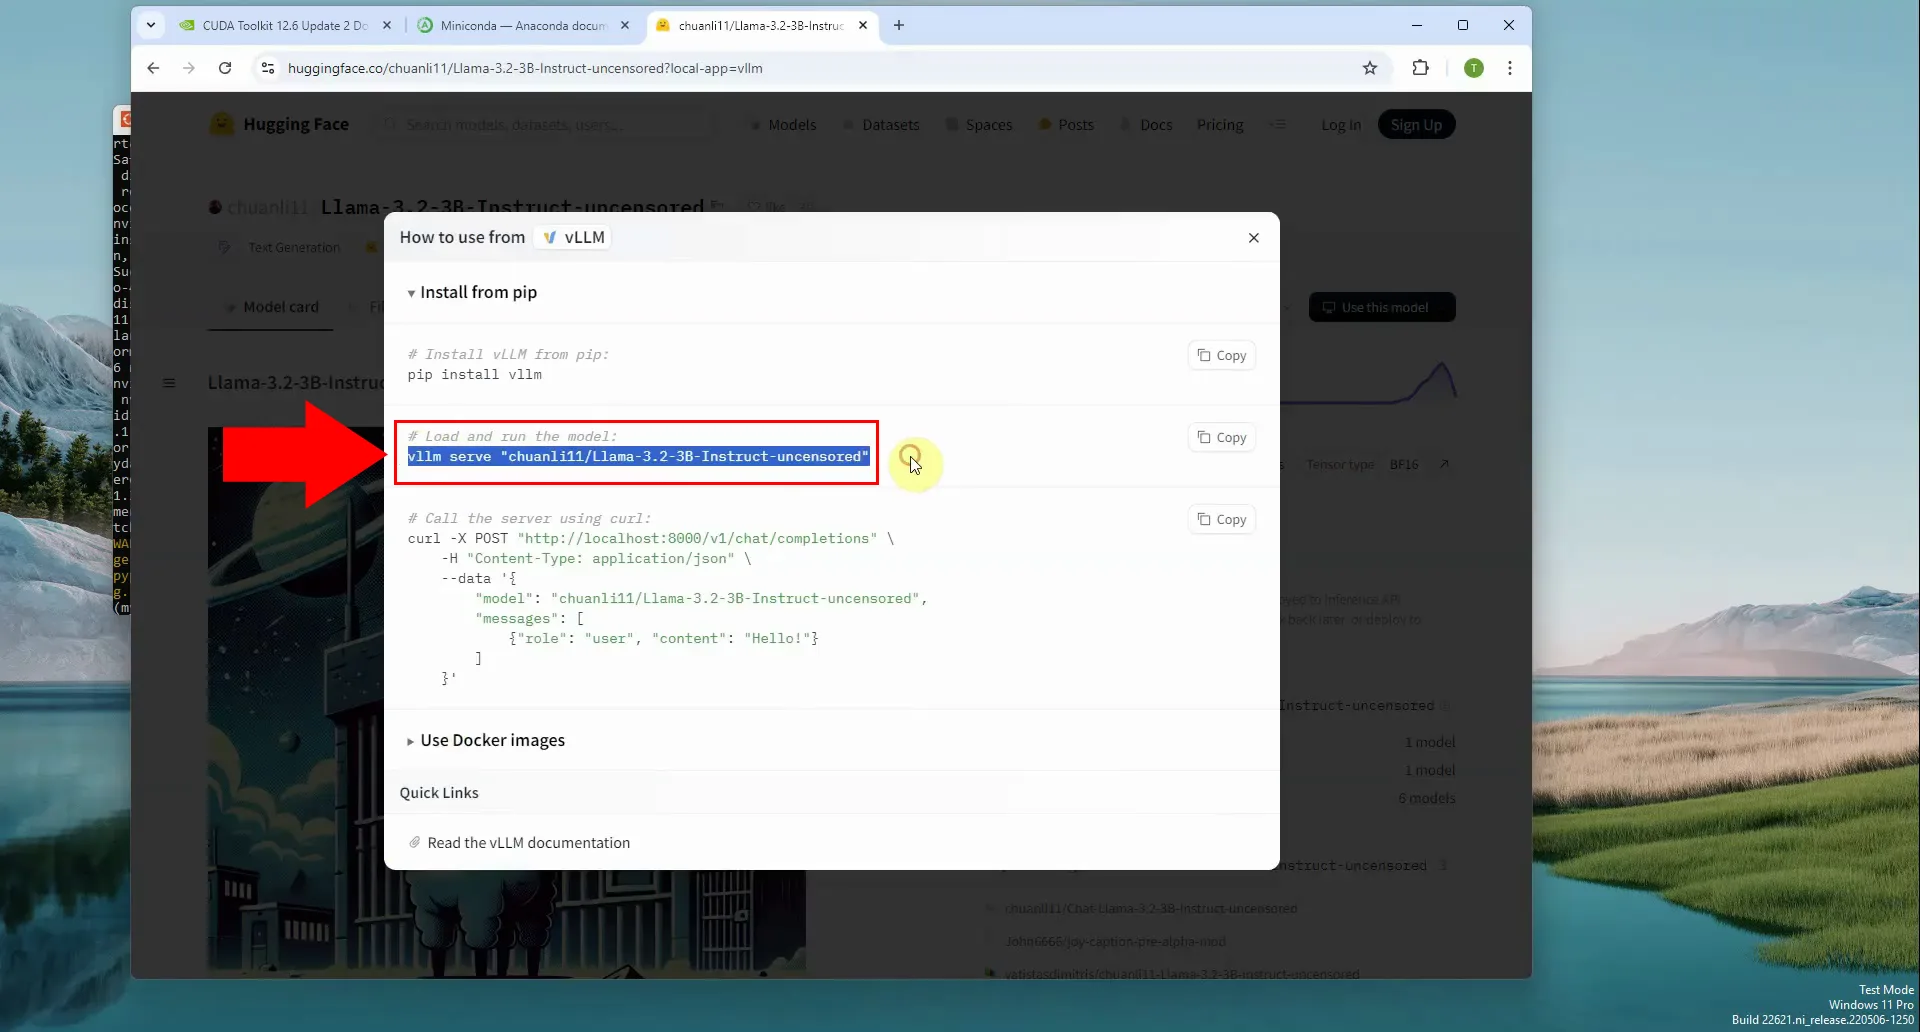
Navigate to the page of your preferred model on Hugging Face, and click the Use this model button near the right edge of the screen. Select vLLM from the dropdown list, highlighted by a red arrow in Figure 20.
From the pop-up window, copy the command under the # Load and run the model command, signified by a bright red frame in Figure 21.
Alternatively, if you're using the exact same model as we do in this tutorial, you may copy the following command:
vllm serve "chuanli11/Llama-3.2-3B-Instruct-uncensored"
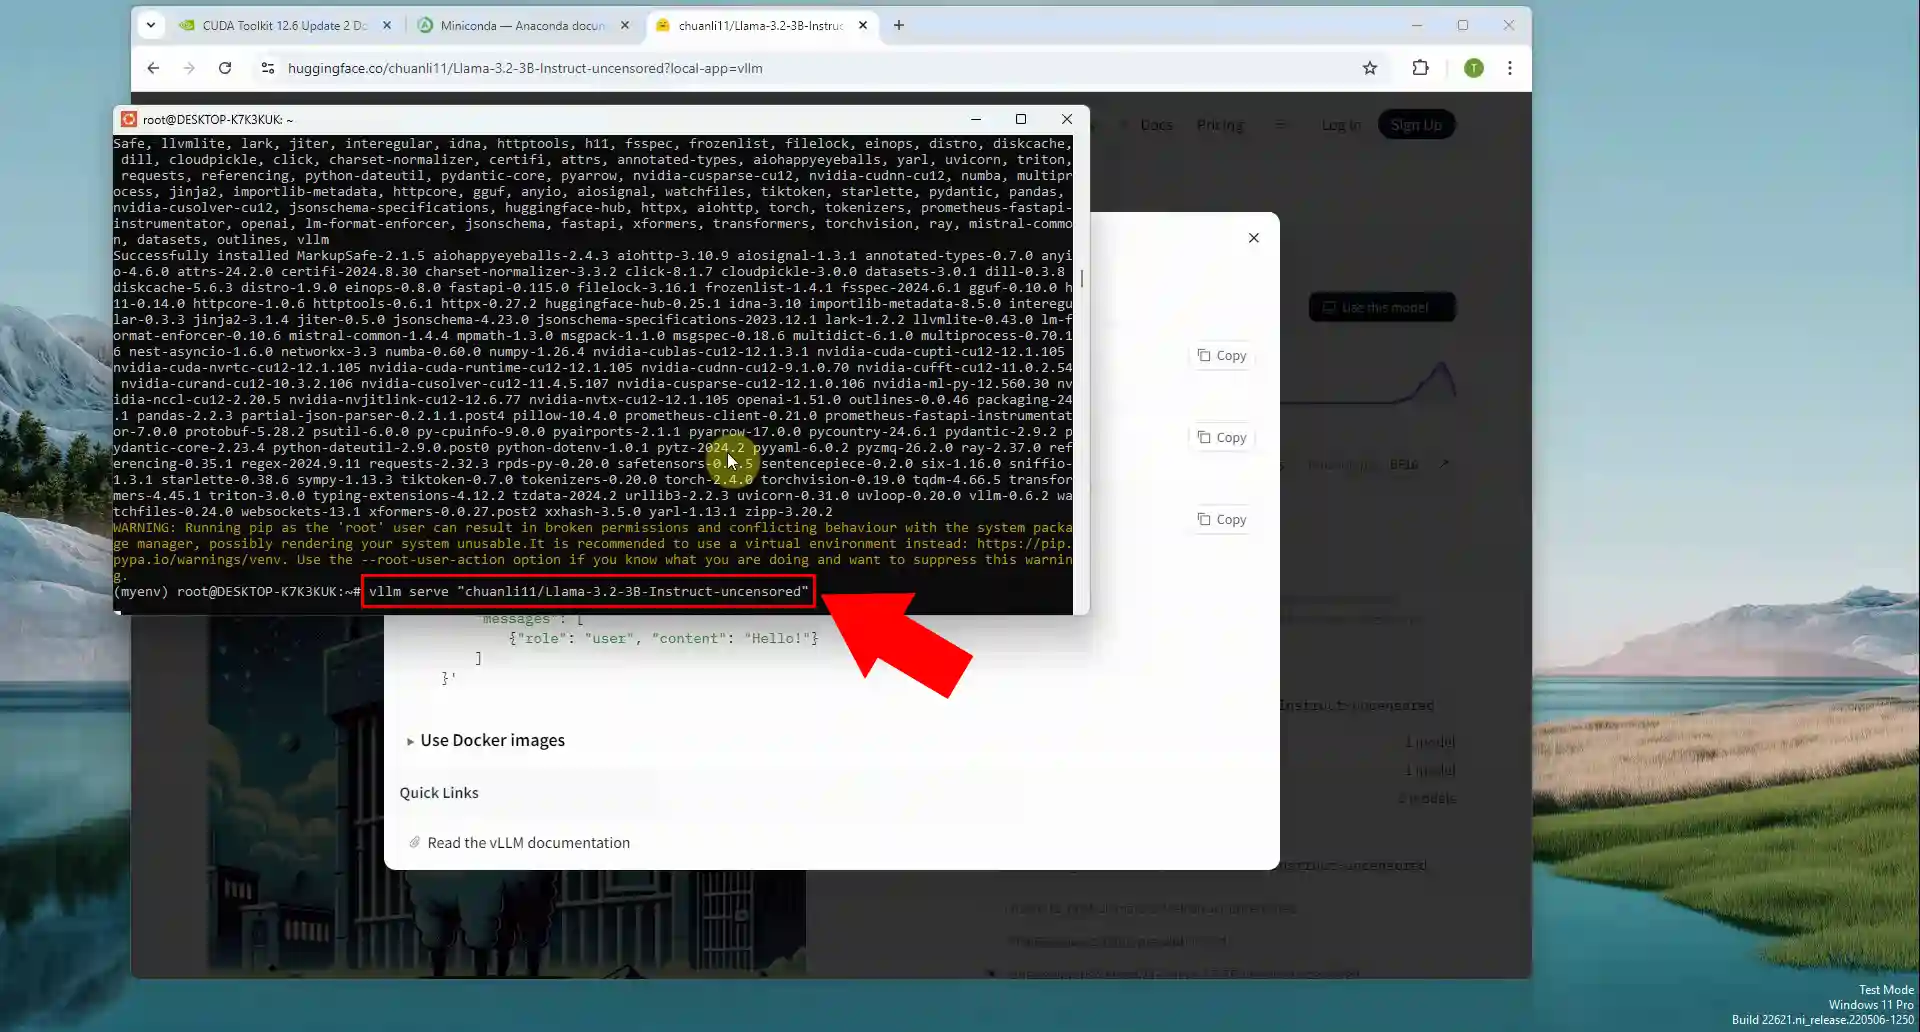
Paste the content of your clipboard to the Terminal window, and execute the command. Wait for the model to load, as seen in Figure 22.
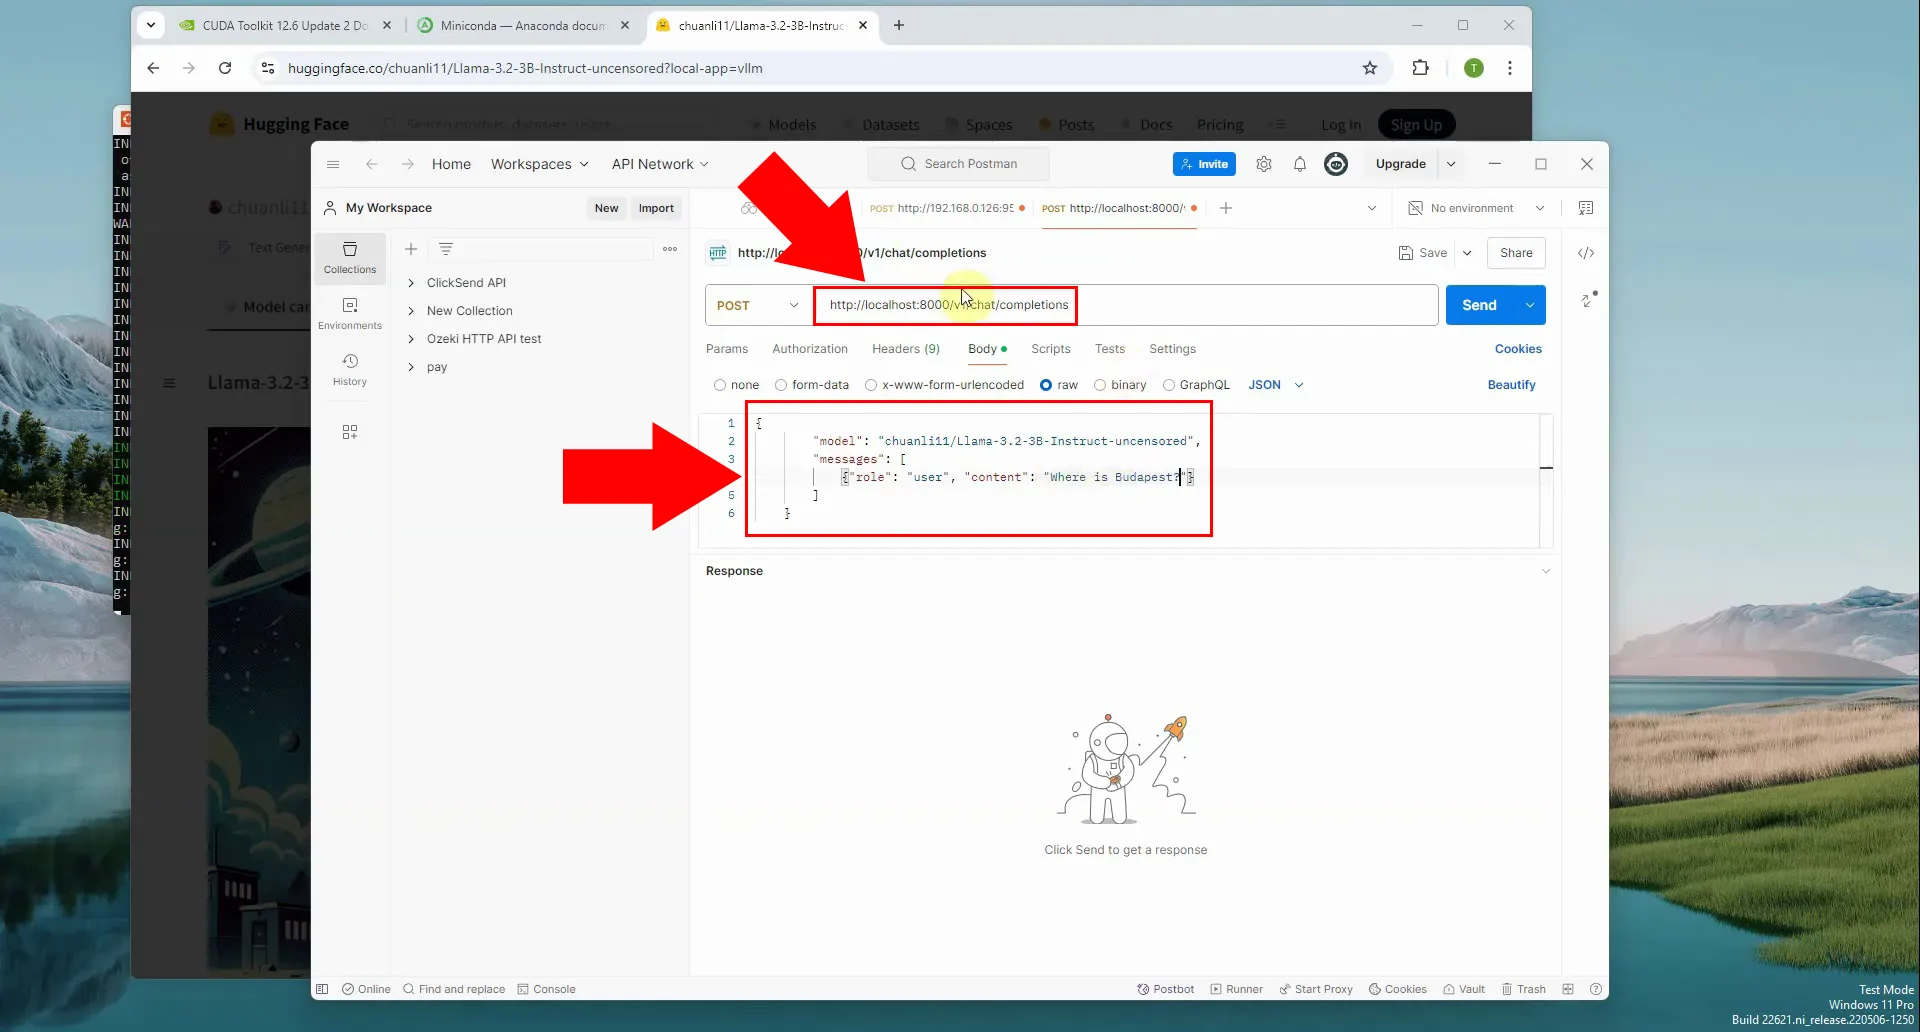
Open Postman, create a new POST request. Copy the address and the request body from Hugging Face, each to their respective fields, just like in Figure 23.
Adjust the test prompt to your needs. For the sake of this tutorial, we'll be asking where's Budapest.
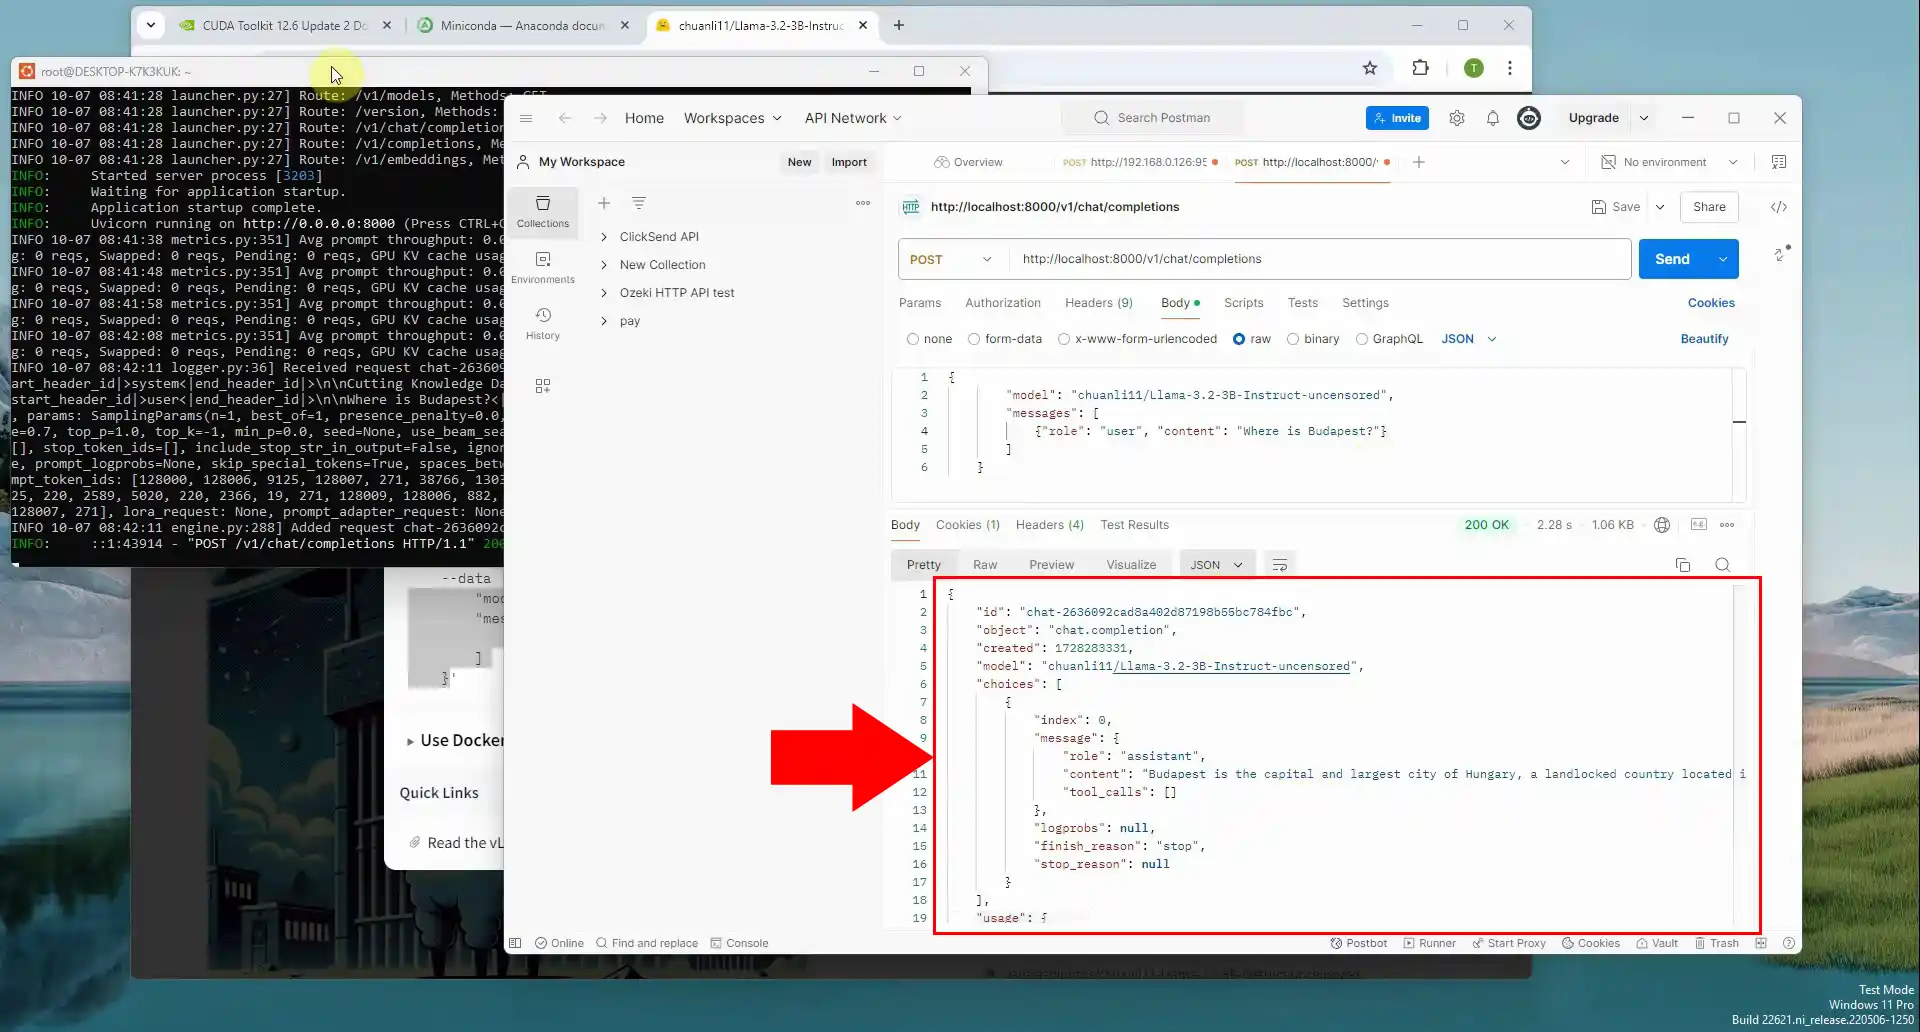
Send the request, and check the response in Postman. If you get a reply, and it's the correct answer to your question, you have completed our tutorial (Figure 24).
Closing thoughts
By the end of this article, you’ve gained the knowledge needed to run vLLM on Windows through WSL. You’ve learned how to install Nvidia GPU drivers, set up WSL Ubuntu, and install both Python PIP and the Miniconda environment. On top of that, you've seen how to load a model from Hugging Face, send a prompt to it using Postman, and verify the model’s response. With these steps under your belt, you’re prepared to effectively run language models using this versatile setup.
Are there easier ways to run an LLM locally on Windows?
Yes, read this article to find out how you can run LLMs on Windows, using Ozeki AI Studio.
More information
- VLLM Windows
- VLLM
