How to send a chat message from the chat gateway GUI
Welcome to the guide on sending chat messages through the Ozeki Chat gateway GUI! Whether you’re new to Ozeki Chat Gateway or looking to streamline your communication processes, this guide will walk you through each step of sending chat messages with ease. From accessing your Ozeki Chat Gateway account and configuring your chat connection to composing and sending messages, we’ve got you covered. Follow our clear and concise instructions, and watch the video tutorial for a visual walkthrough. By the end of this guide, you'll be equipped to handle chat messaging efficiently, leveraging the full potential of your Ozeki system.
What is a chat gateway GUI?
The Chat Gateway GUI in Ozeki Chat Gateway is a user-friendly interface for managing chat messages. It allows you to set up connections, compose and send messages, and track delivery statuses.
How to send a chat message from the chat gateway GUI (Easy steps)
To send a chat message from the chat gateway GUI
- Access your Ozeki Chat Gateway account
- Navigate to the Main Interface
- Begin setting up your chat connection
- Install the Ozeki Chat Account
- Configure Chat Account settings
- Connect to the Ozeki server to enable chat message sending
- Compose a message
- Check the message on MyOzeki chat website
- Reply to the received messages
- Return to the Ozeki Chat Gateway
- View the details of received messages
Send messages from the chat gateway GUI (Video tutorial)
In the following video guide, we will guide you through the process of sending a chat message using the chat gateway GUI. The steps are simple and easy to understand. All you need to do is to follow the given instructions. You will see how to start with the essential setups of the Ozeki Chat Gateway system and how to apply it in practice. By the end of this tutorial, you will know how to use this feature of the Ozeki Chat Gateway in the future.
Begin by accessing your Ozeki Chat Gateway account. If you do not have an account yet, download the Ozeki Chat Gateway from the https://ozeki.chat/ website. Install the Ozeki application, then create an Ozeki account. Log into your account by entering your login credentials. After loading the account, navigate to the Ozeki Chat Gateway's home screen. By entering into the Ozeki Chat Gateway's main interface, find the add new chat account option.
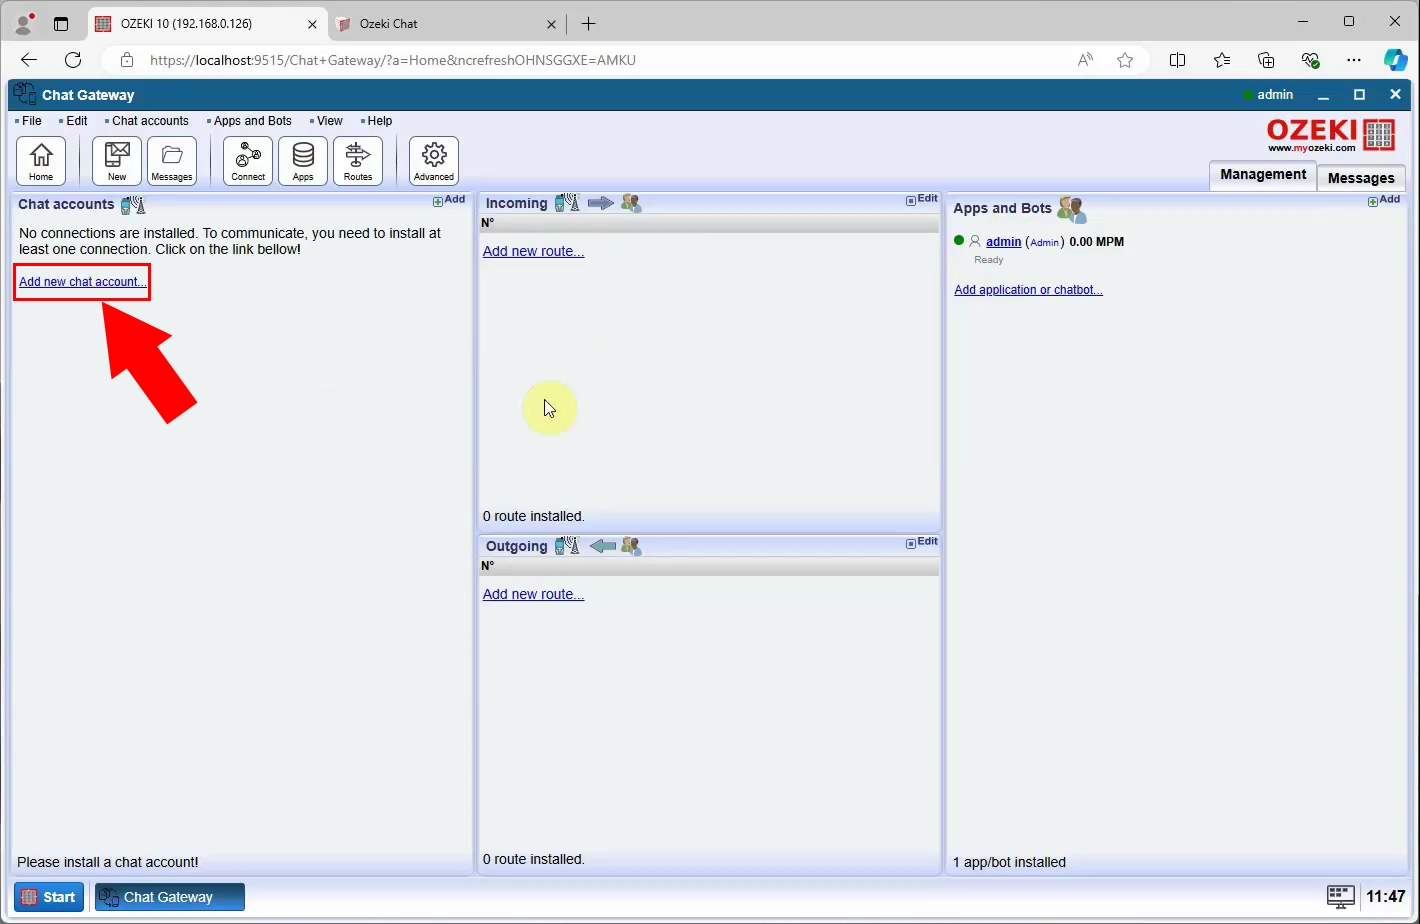
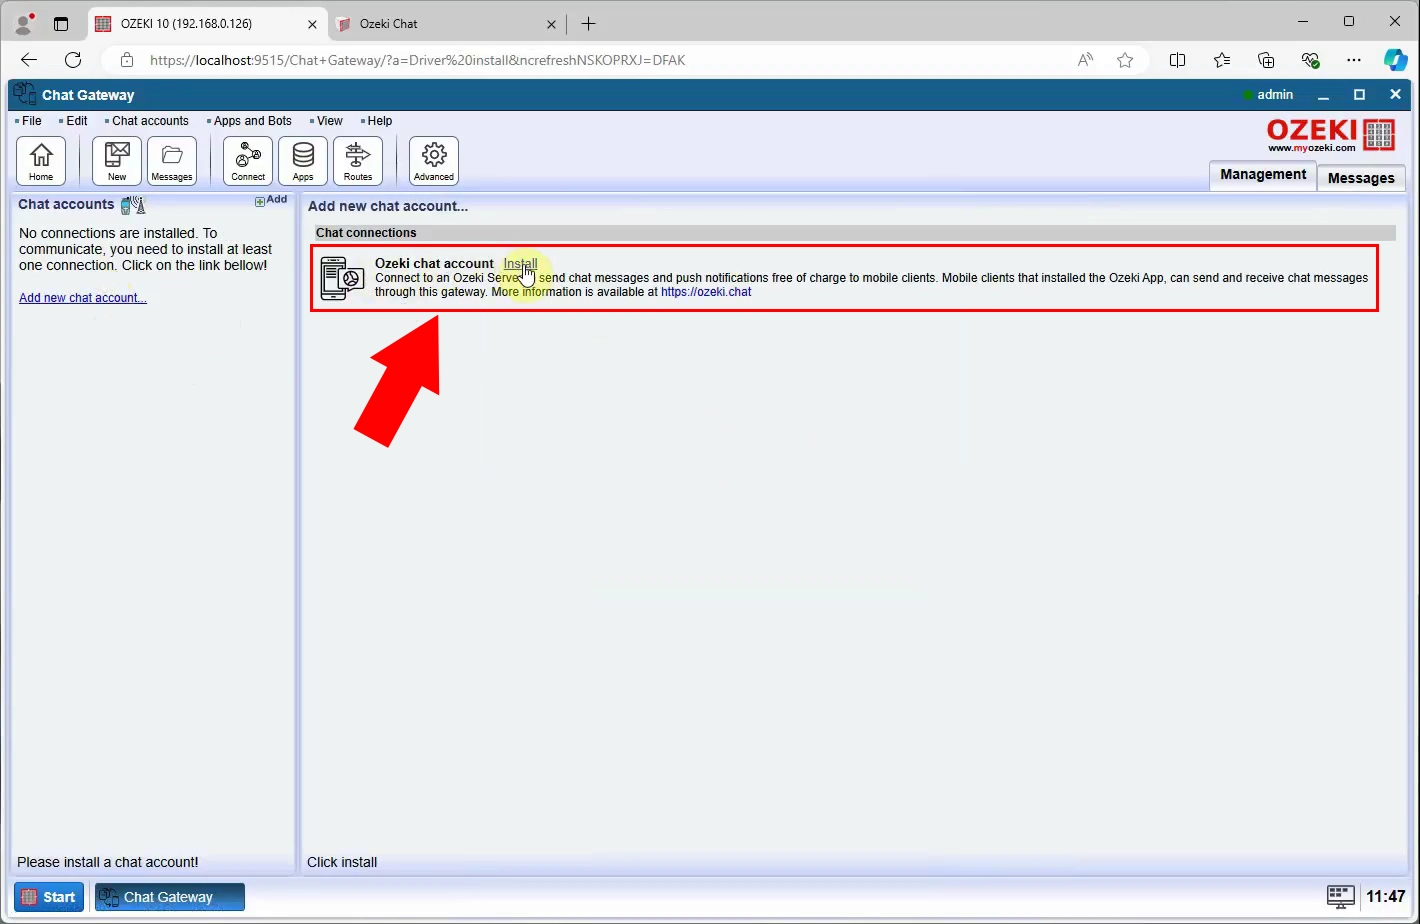
Install the Ozeki Chat Account from the connections panel. Connect to the Ozeki server to send chat messages and push notifications free of charge to mobile clients. Mobile clients that installed the Ozeki App can send receive chat messages through the this gateway. Click on the install link to initiate the installation process.
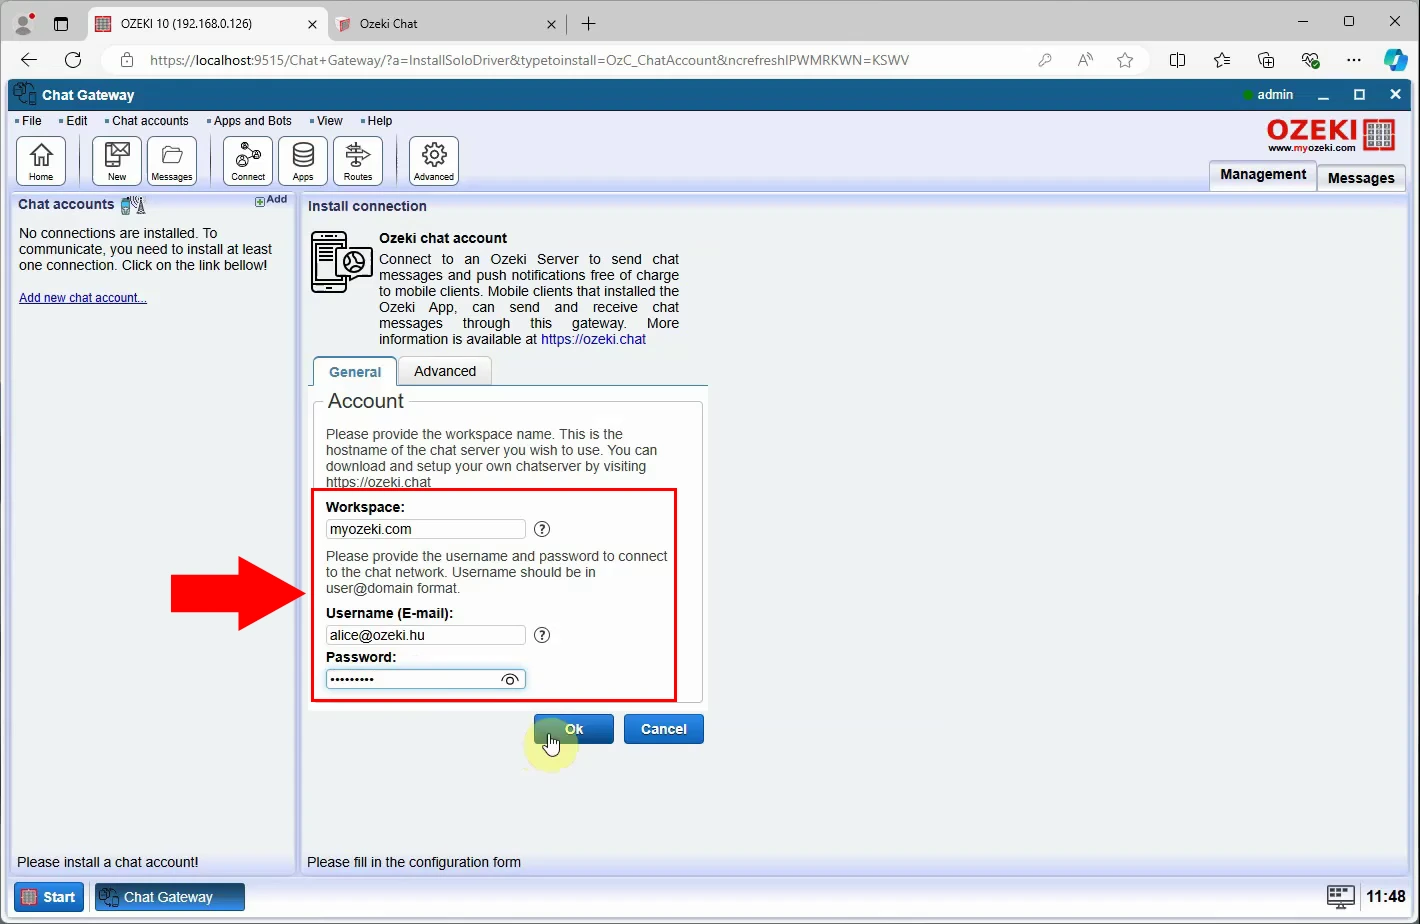
Now, provide the workspace name which will be hostname of the chat server you wish to use. Enter the workspace name, then add an username and password to connect to the chat network. Username should be in a user@domain format. This format helps in creating a unique identity within the chat network, allowing you to send and receive messages without any conflicts. Save these settings with the "Ok" button.
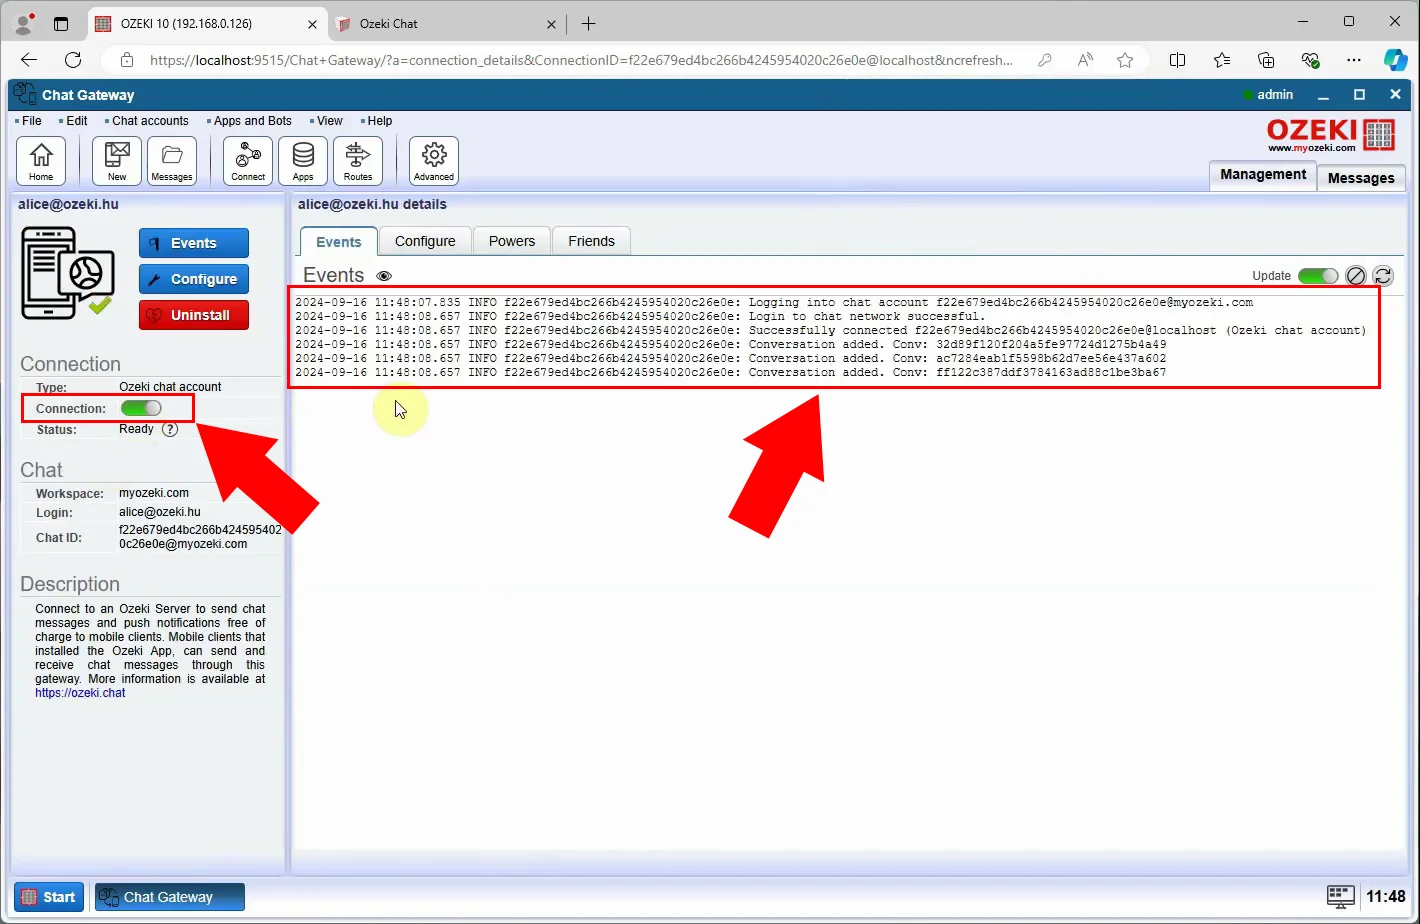
Once these details are provided and confirmed, the system will verify the connection and, upon successful authentication, link your Ozeki Chat Gateway to the specified chat network. Enable communication between your Ozeki Chat Gateway and the mobile clients using the chat system. Set the slider button to green to enable the connection with the system. At the events tab, you will see a notification about the successful connection.
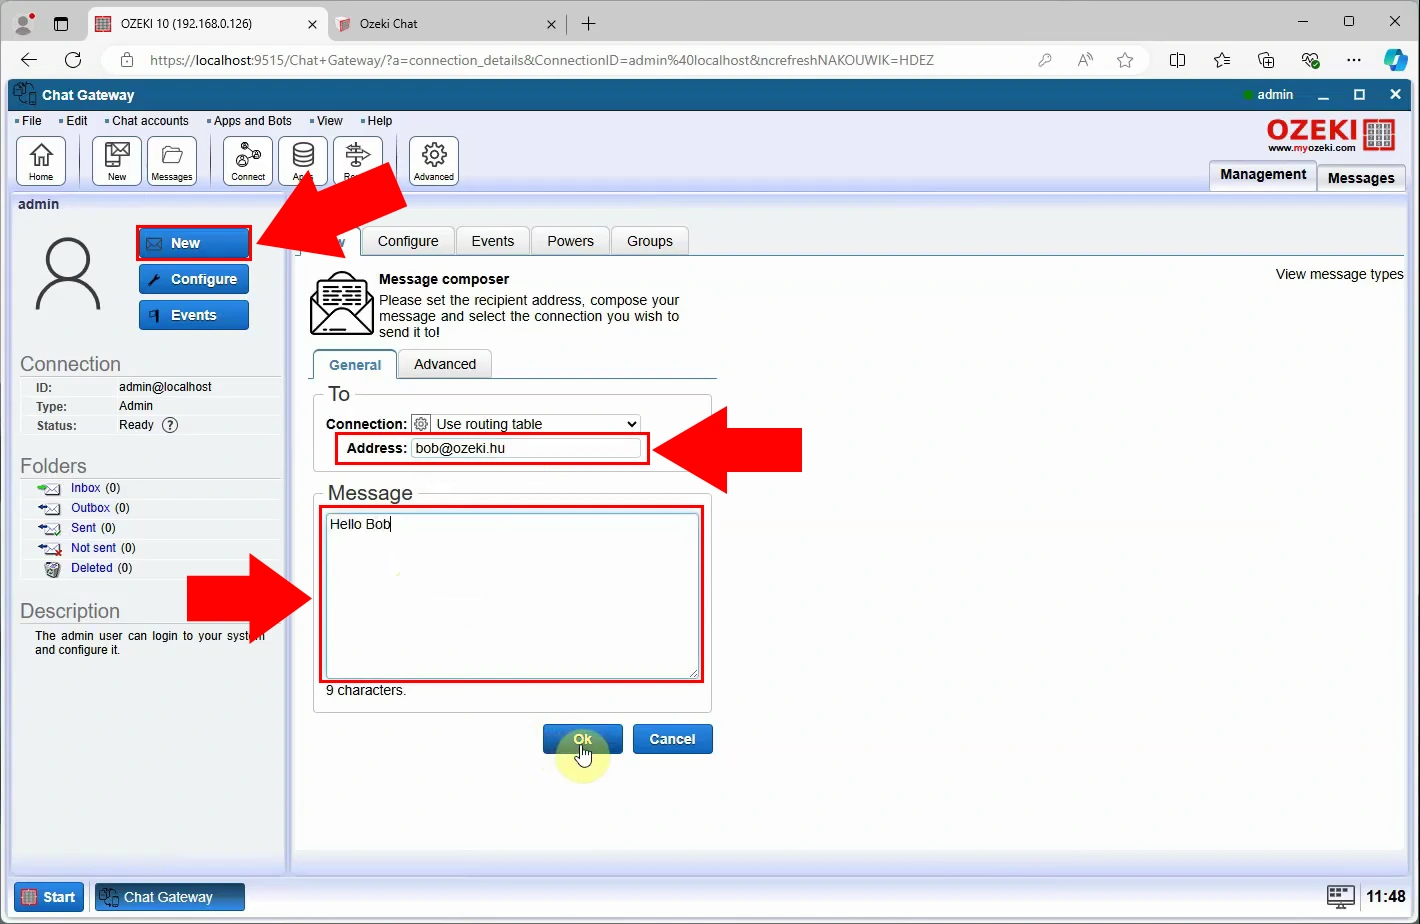
Once the connection has been established, start sending messages. Load the home screen of the gateway, then open the admin application. Click on the "New" button to begin creating an Chat message. Provide the recipient address, compose the message then select the connection you wish to send it to. After the message is composed, send it with the "Ok" button. When the message is sent, you will recognize a message delivery history, included all the necessary information about your message.
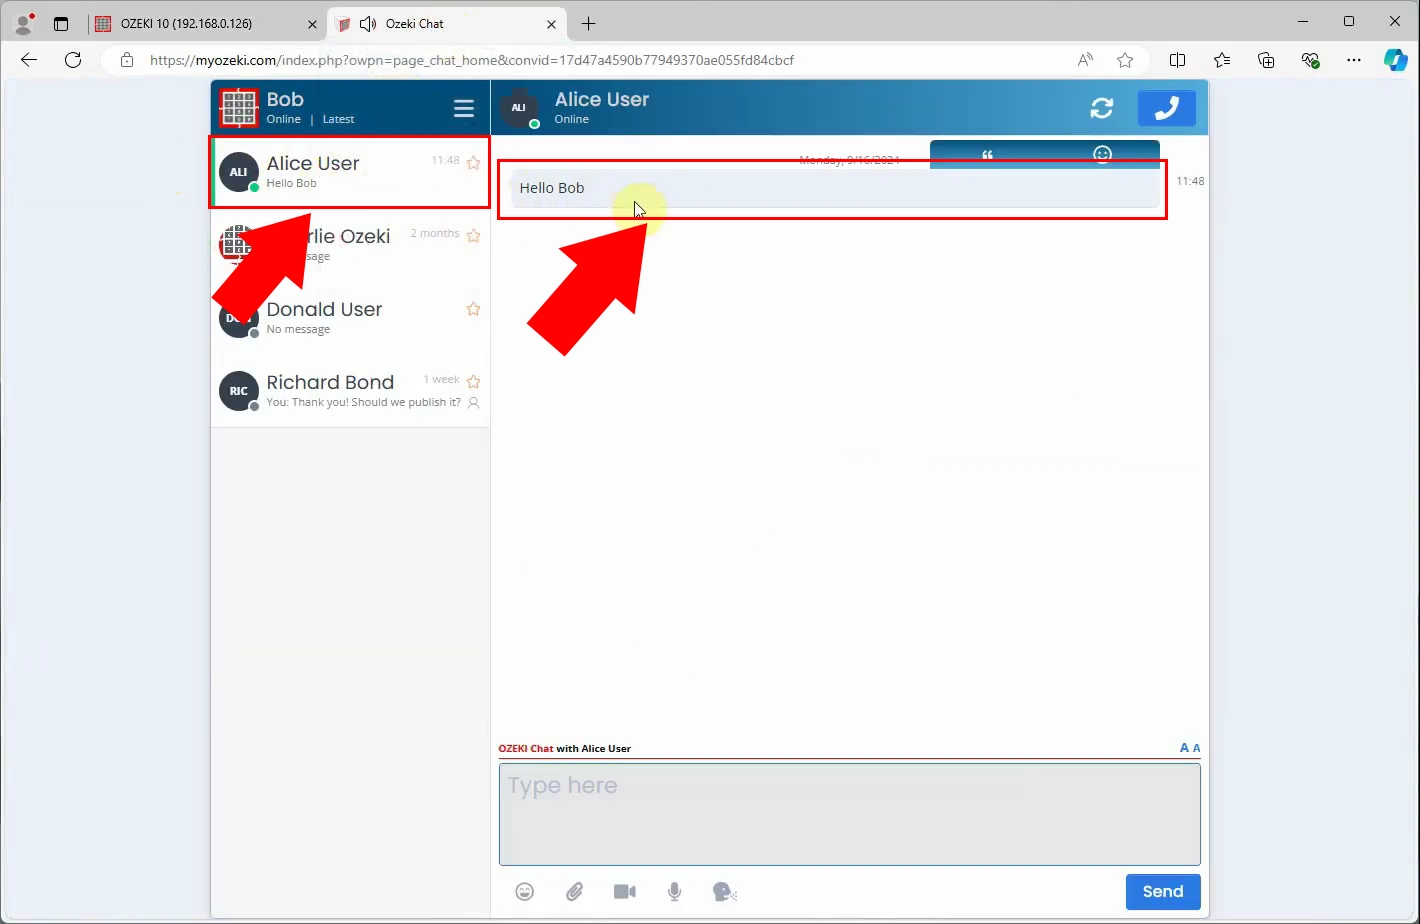
When the message has sent, load the MyOzeki Chat website at your browser. Access your MyOzeki account, then navigate to the chats page. In case of successful message delivery, you will find the chat message with the recipient user. To view the full conversation, simply click on the chat icon, and the entire chat history with that person will appear.
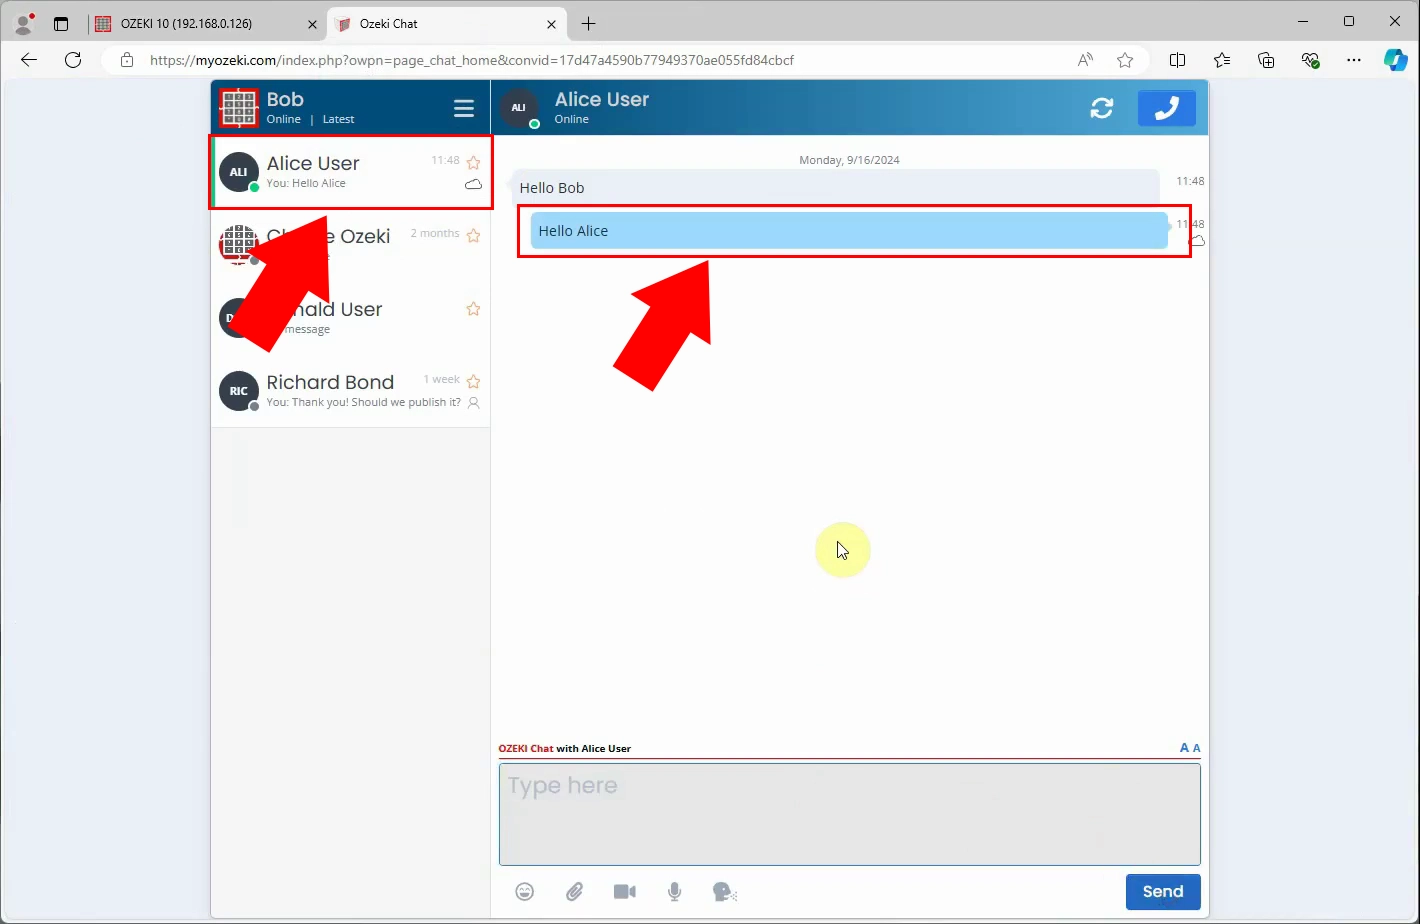
As the recipient, respond to the message using the MyOzeki Chat interface, continuing the conversation directly within the chat window. You can type your reply in the input box and press Send to deliver your message instantly. The chat interface is designed for real-time communication, allowing for smooth, uninterrupted exchanges between users.
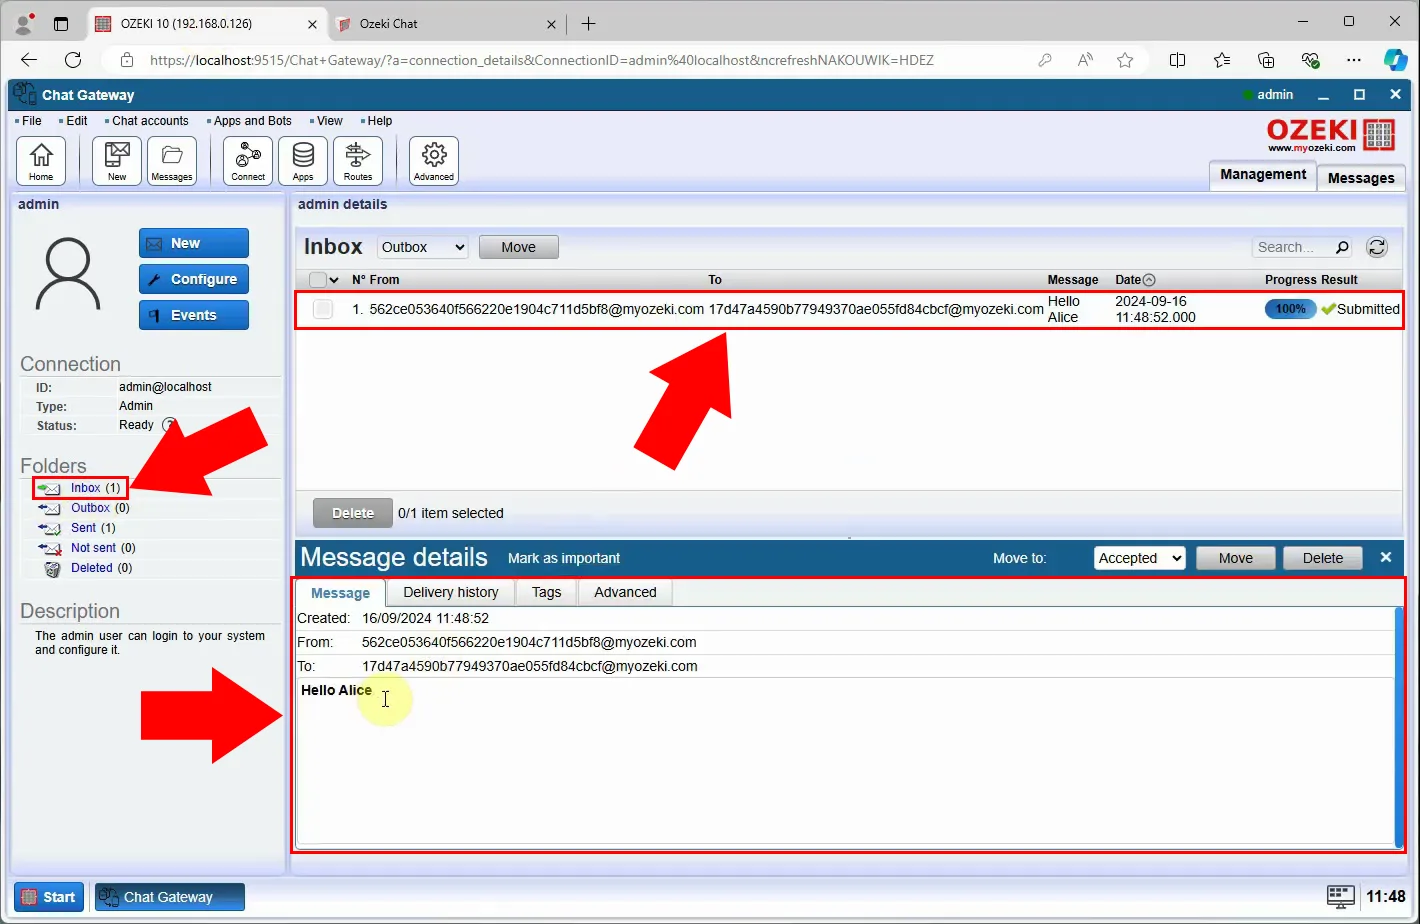
By navigating back to the Ozeki Chat Gateway, you can see the received chat message in the Admin inbox folder. You can find all the data about the chat message, including the time when the message was sent, who sent the message and what was the message content itself. This feature allows administrators to track communication effectively.
Summary
You’ve now mastered the process of sending chat messages through the Ozeki Chat Gateway's chat gateway GUI. From setting up your chat connection and configuring account settings to sending and receiving messages, you’ve learned the essential steps to streamline your communication efficiently. Remember, whether you’re using the chat gateway GUI or other methods, Ozeki Chat Gateway provides versatile tools to meet your messaging needs. For further assistance or more advanced configurations, refer to our detailed documentation or contact us in email.
FAQs
Can I send messages to multiple recipients at once?
Yes, you can compose and send messages to multiple recipients simultaneously using the Chat Gateway GUI.
How do I check if my message has been delivered?
After sending a message, you can check its delivery status in the message history or on the MyOzeki chat website.
Is there a way to view past chat conversations?
Yes, you can view past conversations on the MyOzeki chat website or in the Admin inbox folder within the Ozeki Chat Gateway.
Can I schedule messages to be sent later?
The Chat Gateway GUI does not support message scheduling directly. To schedule messages, consider using additional tools or scripts compatible with Ozeki Chat Gateway.

