How to send chat messages using HTTP requests
Welcome to the Ozeki Chat Gateway guide on sending chat messages using HTTP requests! Whether you're looking to streamline your messaging system or integrate chat functionality into your applications, this guide provides step-by-step instructions to help you get started. We cover everything from setting up your Ozeki Chat Gateway account and configuring routes to preparing and sending HTTP requests.
What is a HTTP request?
An HTTP request is a message sent from a client to a server using the Hypertext Transfer Protocol (HTTP) to request specific resources or actions. It includes a request line, headers, and sometimes a body, specifying the type of request (such as GET or POST) and any additional parameters. The server processes the request and returns a response, which typically includes the requested data or a status message.
How to send chat messages using HTTP requests (Easy-to-follow instructions)
To send chat messages using HTTP requests
- Open your Ozeki Chat Gateway
- Add a New Chat Account
- Set up account details
- Establish chat connection
- Install HTTP User Application
- Configure Incoming Route
- Define Outgoing Route
- Prepare the HTTP request
- Execute the HTTP request
- Verify message delivery
Send chat messages using HTTP requests (Video tutorial)
The next video will guide you through the process of sendig chat messages using HTTP requests. It will demonstrate you all the essential steps to learn the process with ease. It start by setting up your Ozeki Chat Gateway account, then you will learn how to define HTTP endpoints for sending and receiving chat messages. It will show you how to set both incoming and outgoing message routes. By the end of this video you will gain the knowledge to use the Ozeki chat effectively.
Step 1 - Open your Ozeki SMS Gateway account
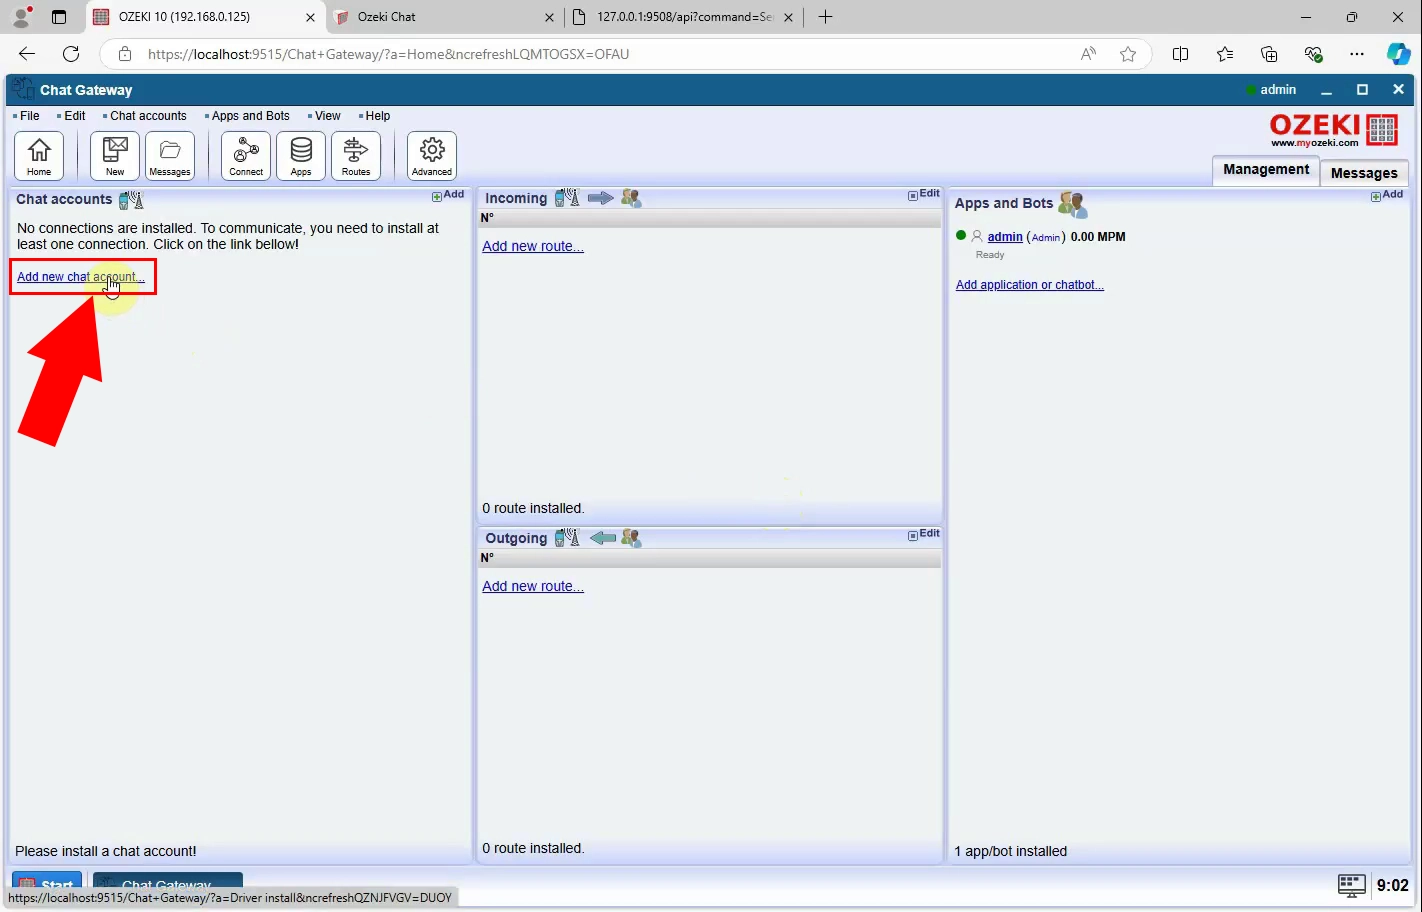
Start by logging into your Ozeki Chat Gateway account. If you don’t have an account, download the Ozeki Chat Gateway from https://ozeki.chat/, install the application, and create a new account. Once you’ve logged in, you’ll be directed to the home screen of the Ozeki Chat Gateway. From there, go to the main interface and select the option to add a new chat account.
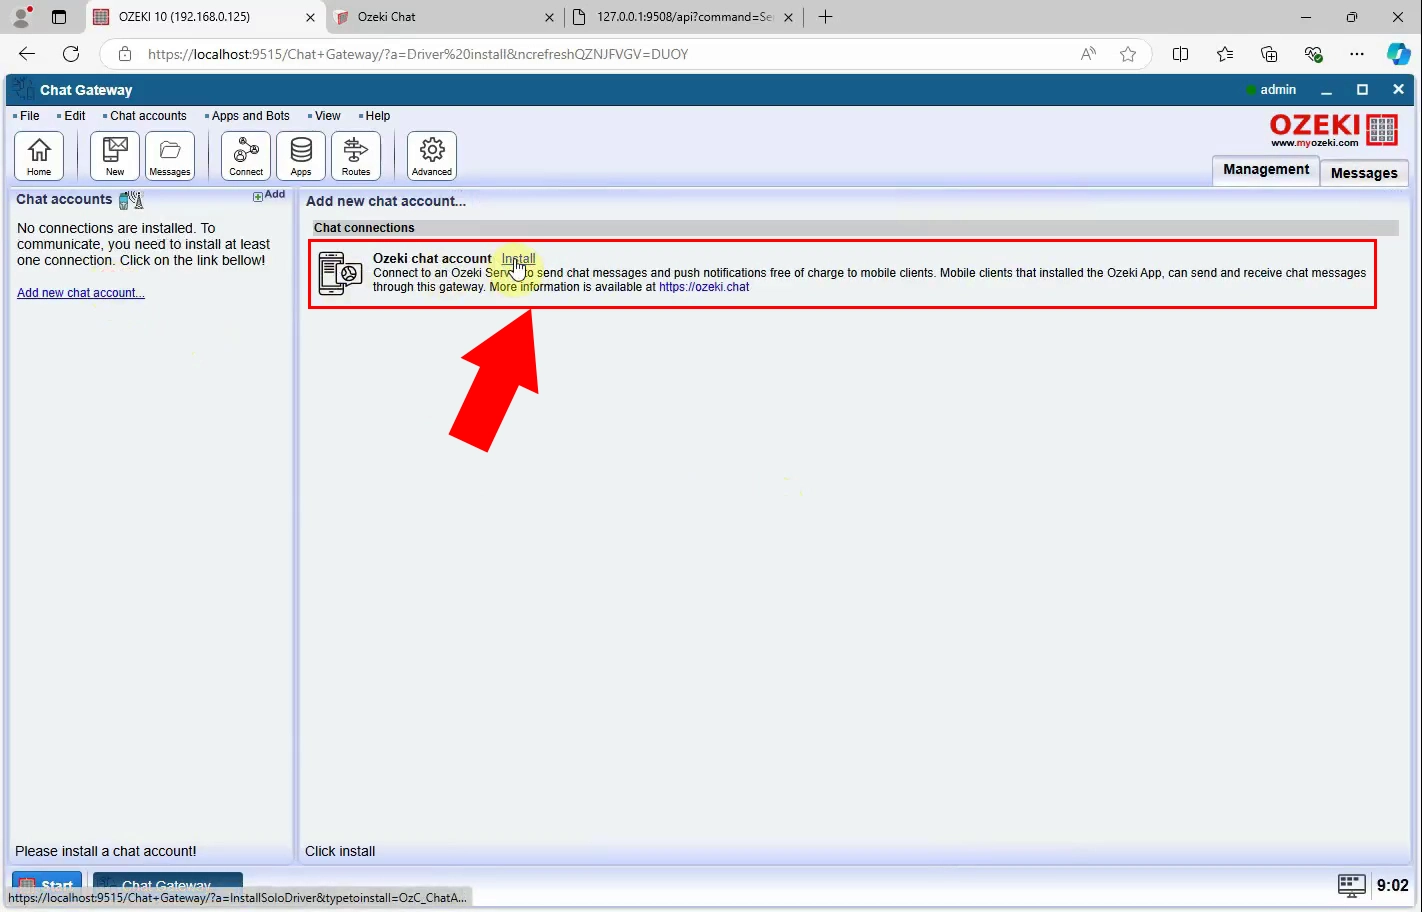
Install the Ozeki Chat Account from the connections panel to connect to the Ozeki server. This setup will allow you to send chat messages and push notifications to mobile clients at no cost. Mobile clients with the Ozeki App can use this gateway to both send and receive messages. Click the installation link to begin the setup process.
Step 2 - Configure Ozeki Chat Account
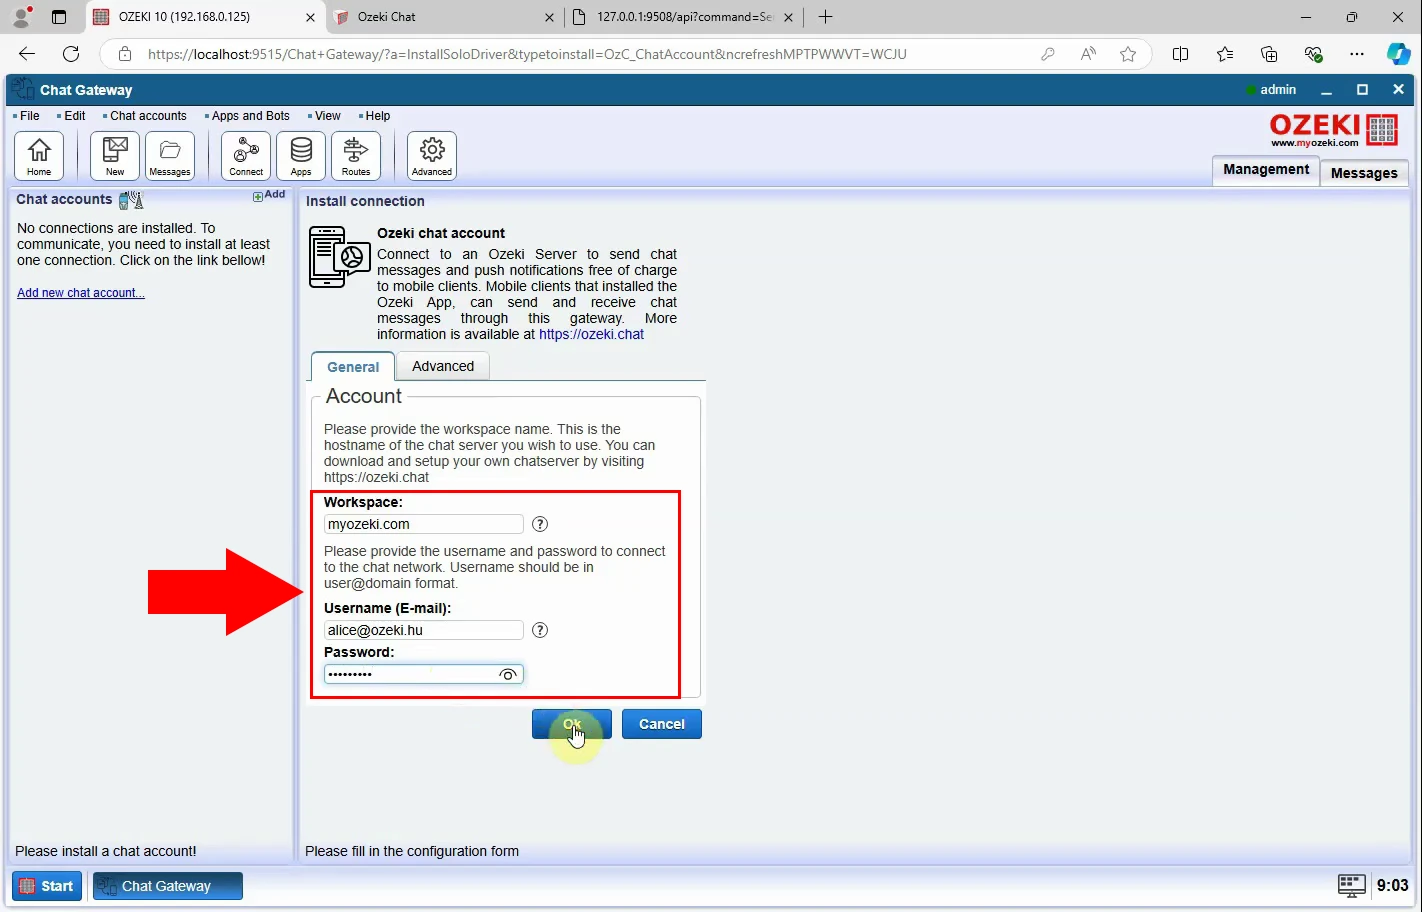
Next, provide a workspace name to serve as the hostname for your chat server. Once you've set the workspace name, create a username and password for accessing the chat network. Format the username as user@domain to ensure a unique identity within the network, enabling smooth message exchange. Click "Ok" to save these settings.
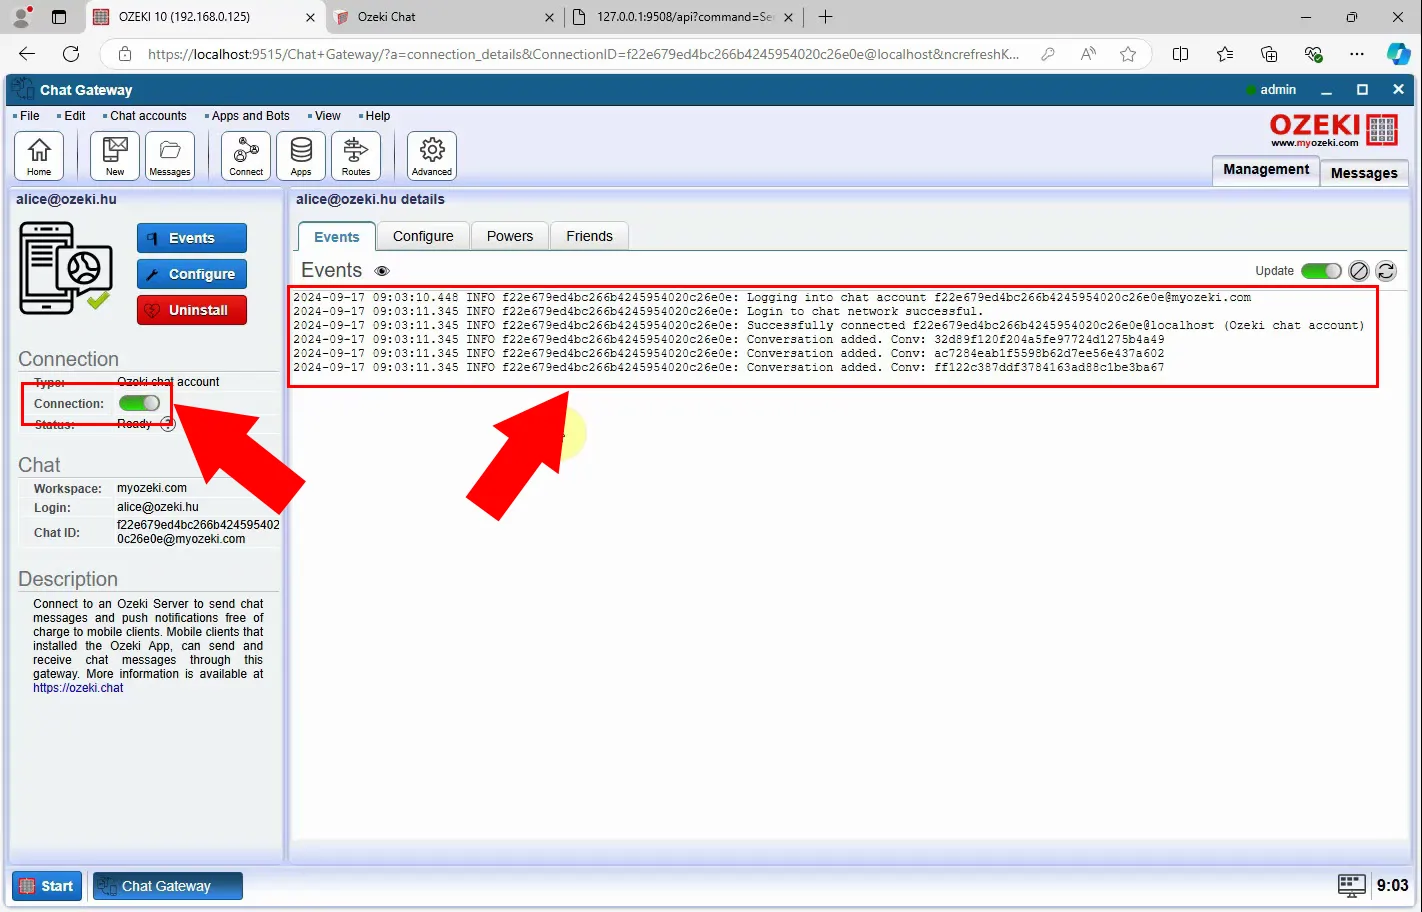
After entering and confirming these details, the system will check the connection. Once authentication is complete, your Ozeki Chat Gateway will be linked to the specified chat network. To activate communication between your gateway and mobile clients, turn the slider button to green. You'll receive a notification about the successful connection in the events tab.
Step 3 - Setup HTTP user application
Next, navigate back to the main interface of the Ozeki Chat Gateway. Locate the "Add New Application or Chatbot" panel. In this section, you'll have the option to integrate new applications or chatbots with your Ozeki Chat Gateway, allowing you to expand its functionality and connect with additional services.
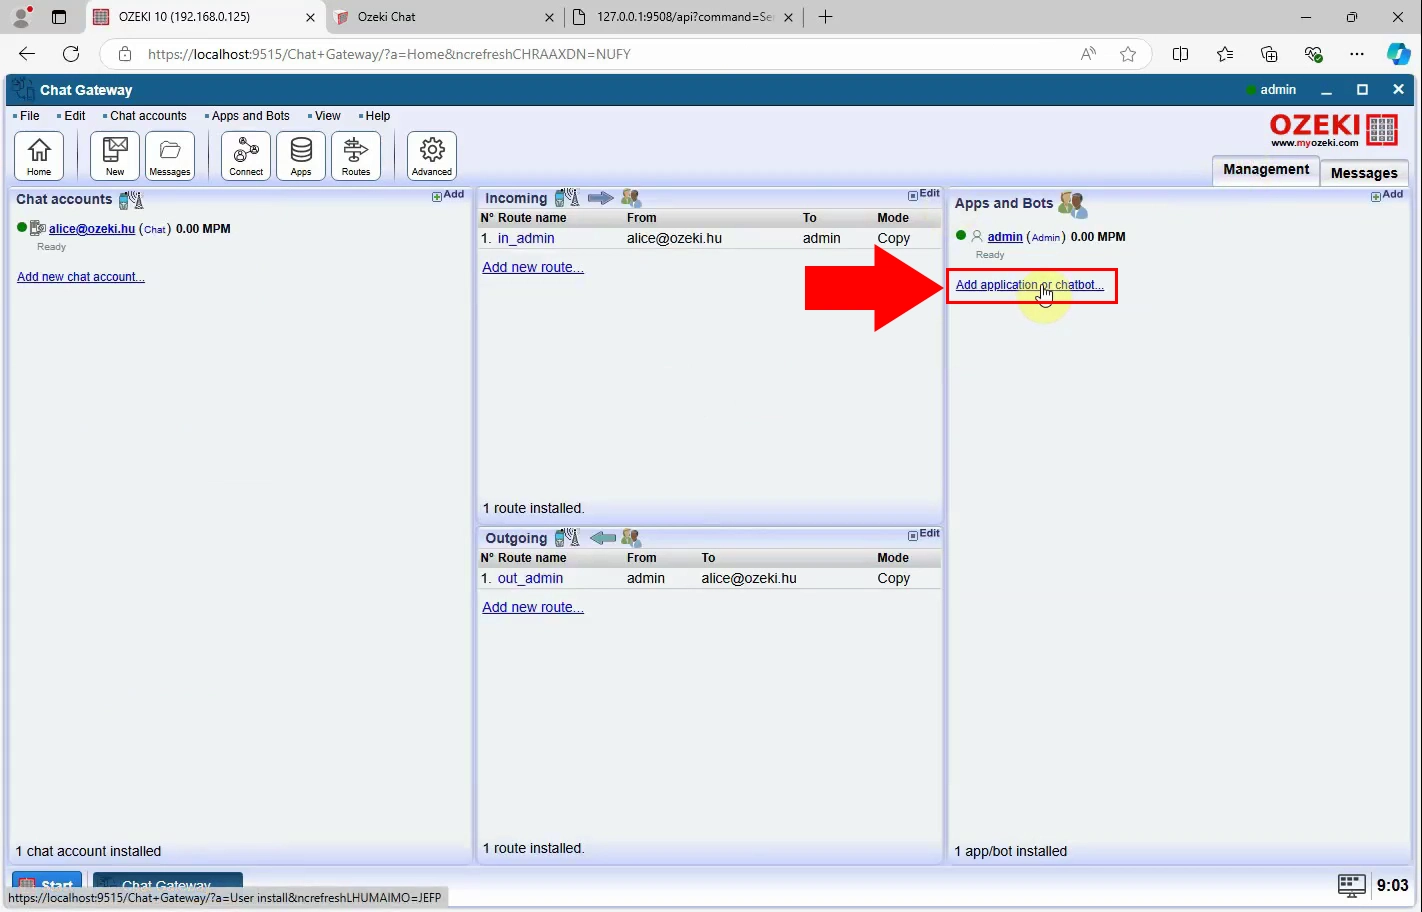
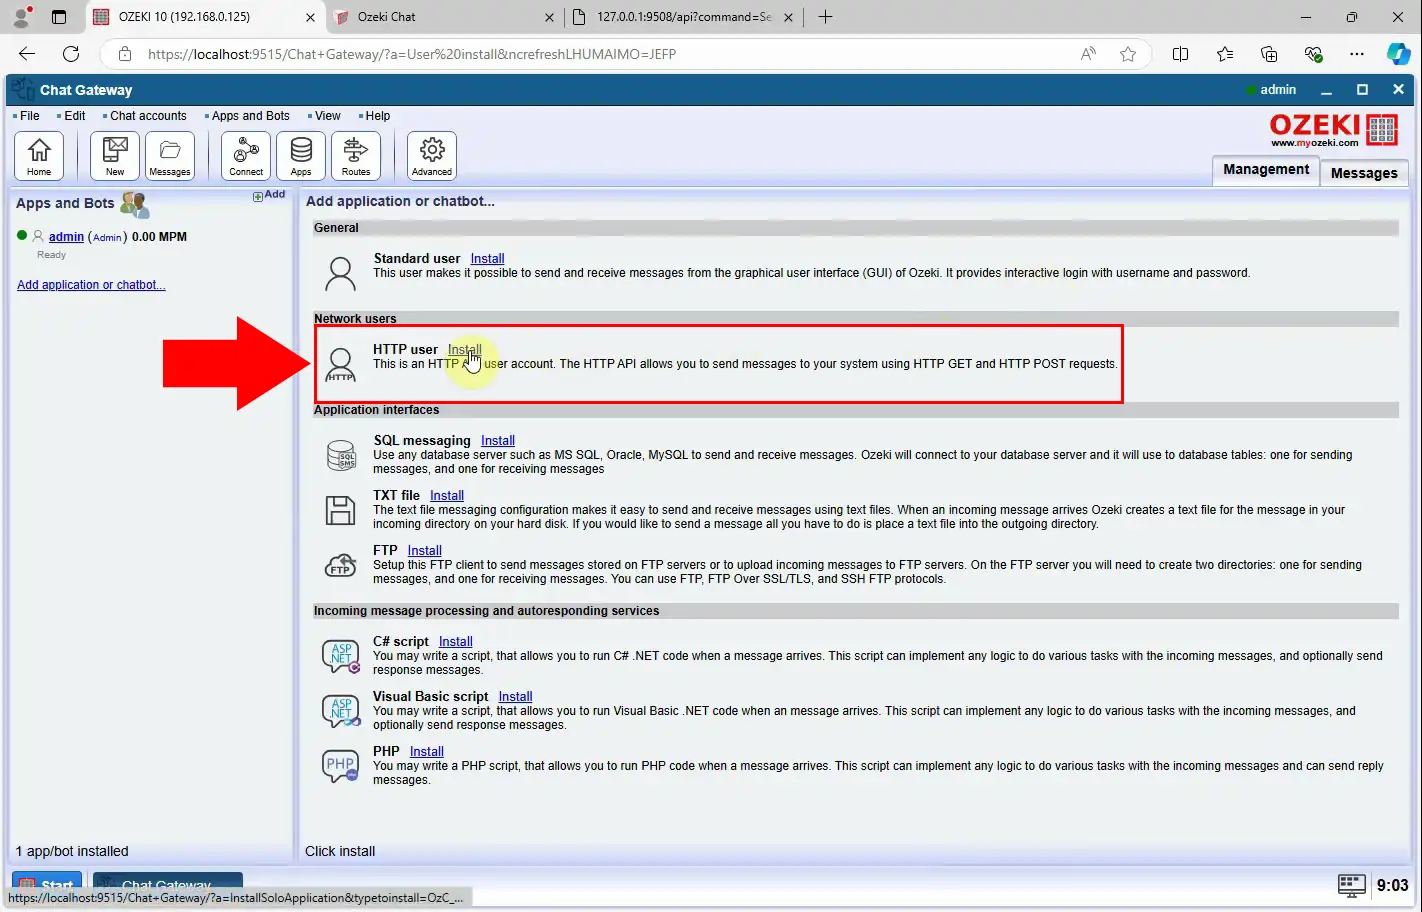
Install the HTTP user application from the connections panel. This HTTP application will enable you to send messages to your system using HTTP GET and HTTP POST requests. By integrating this functionality, you'll be able to interact with your system through standard web protocols, facilitating communication and data transfer.
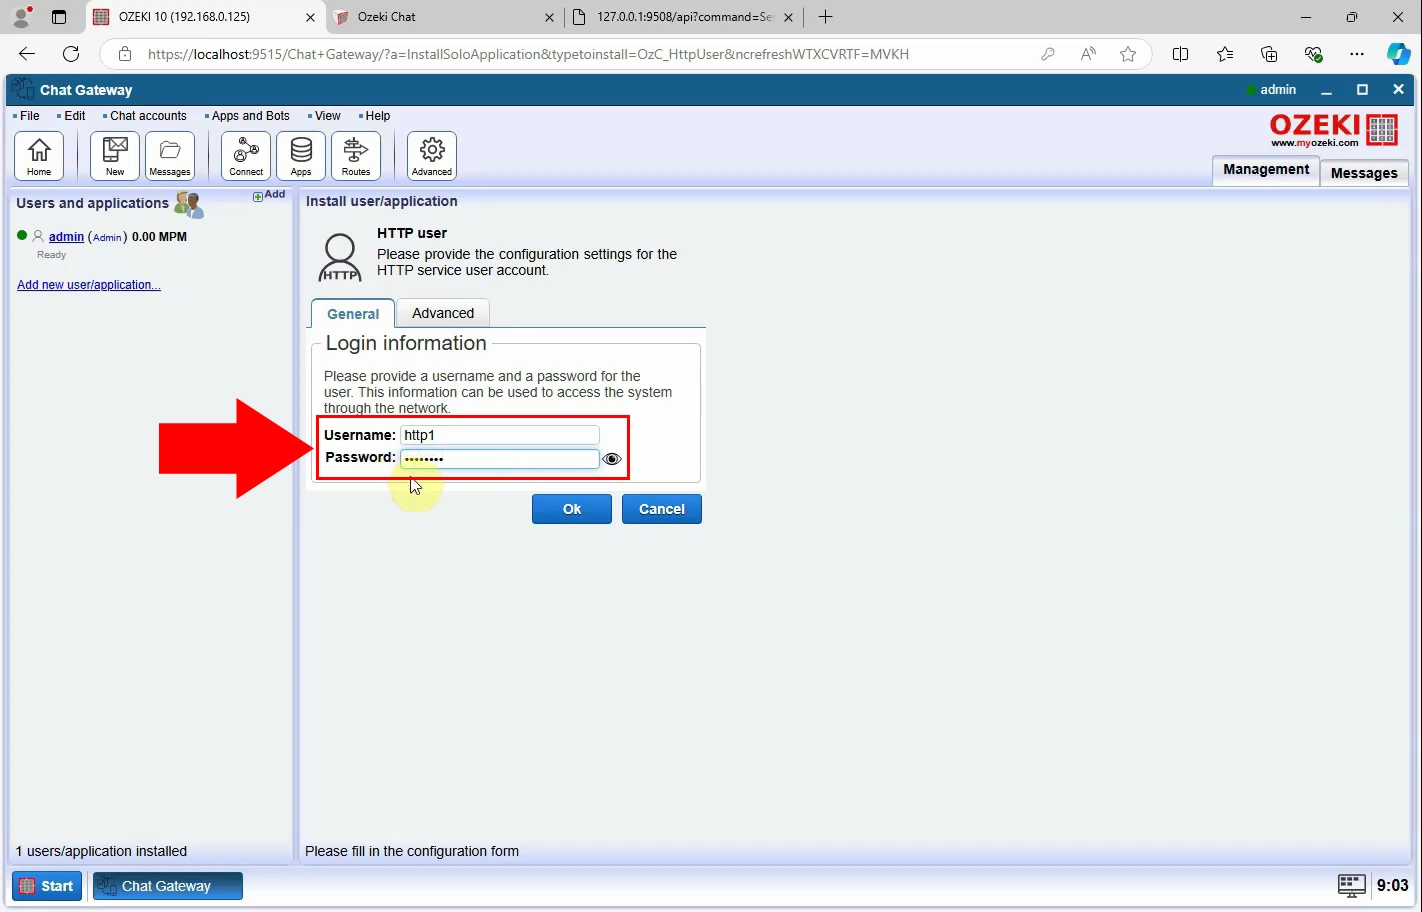
Provide a username and password for the HTTP user. This information will be used to access the system through the network. When you are done with it, click on the "Ok" button. This step is crucial for establishing secure communication with your system.
Step 4 - Define Message Routes
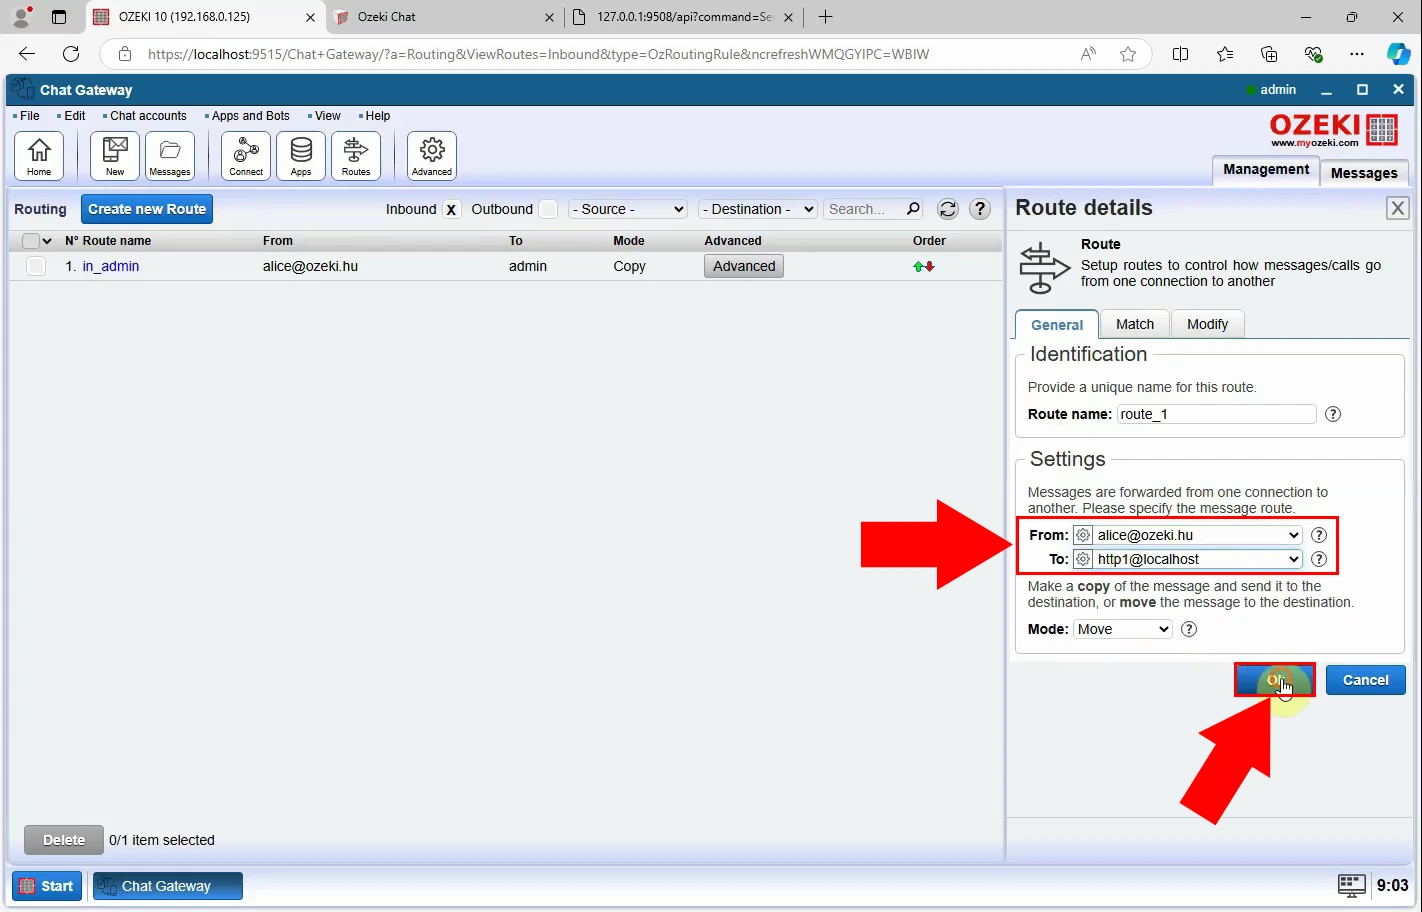
Next, go back to the main interface and choose the "Add New Route" option. This route will define how incoming messages are handled and routed within your system.
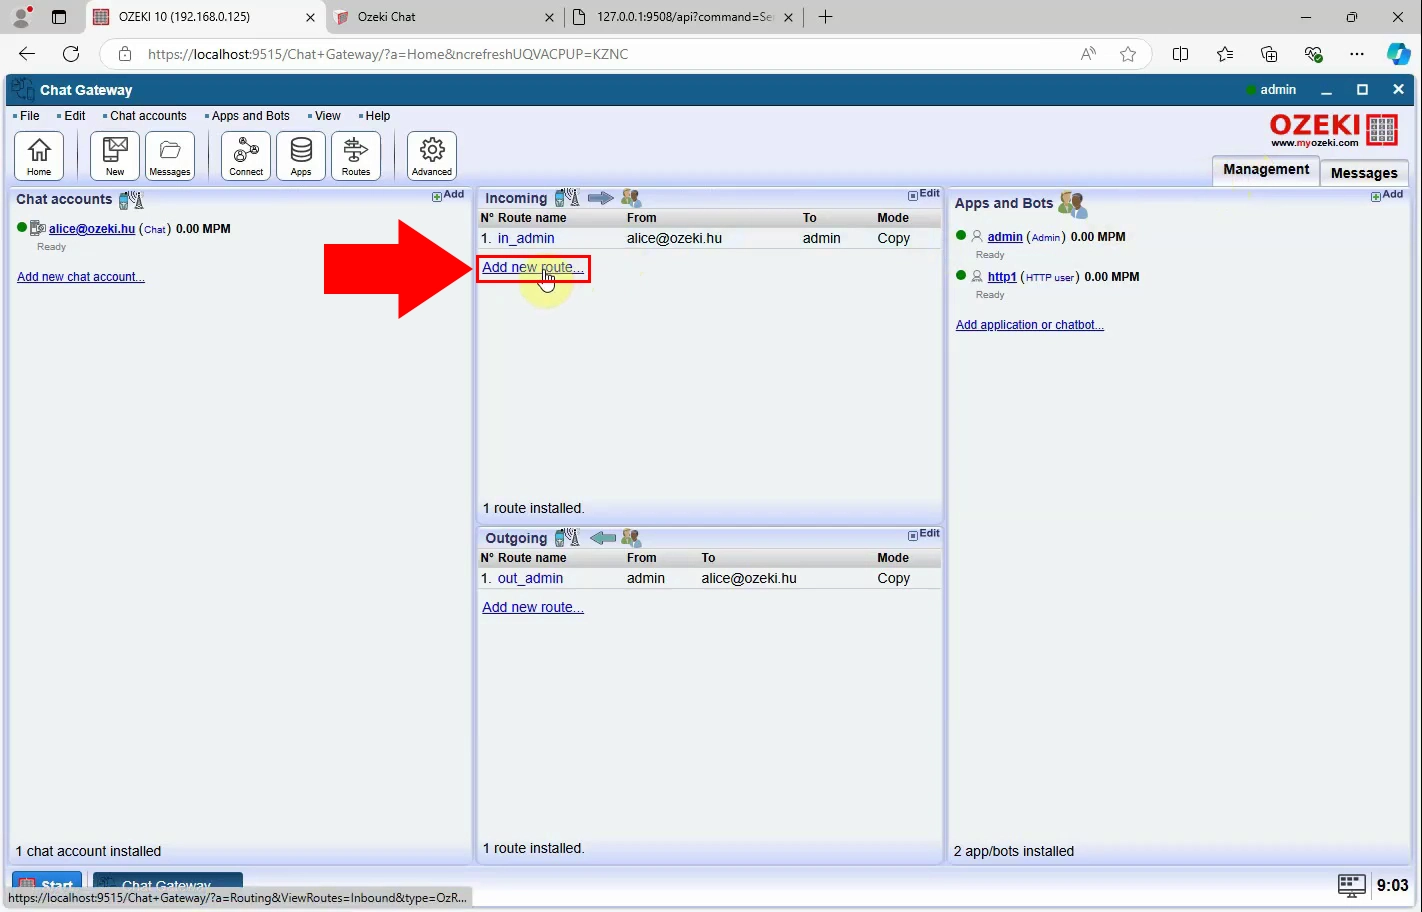
You need to set up the incoming route, which will control how messages and calls are routed between connections. Start by giving this route a unique name, then adjust the necessary settings. Define the sender and receiver addresses to establish the message path. Once you have finished configuring the route, click "OK" to save the settings.
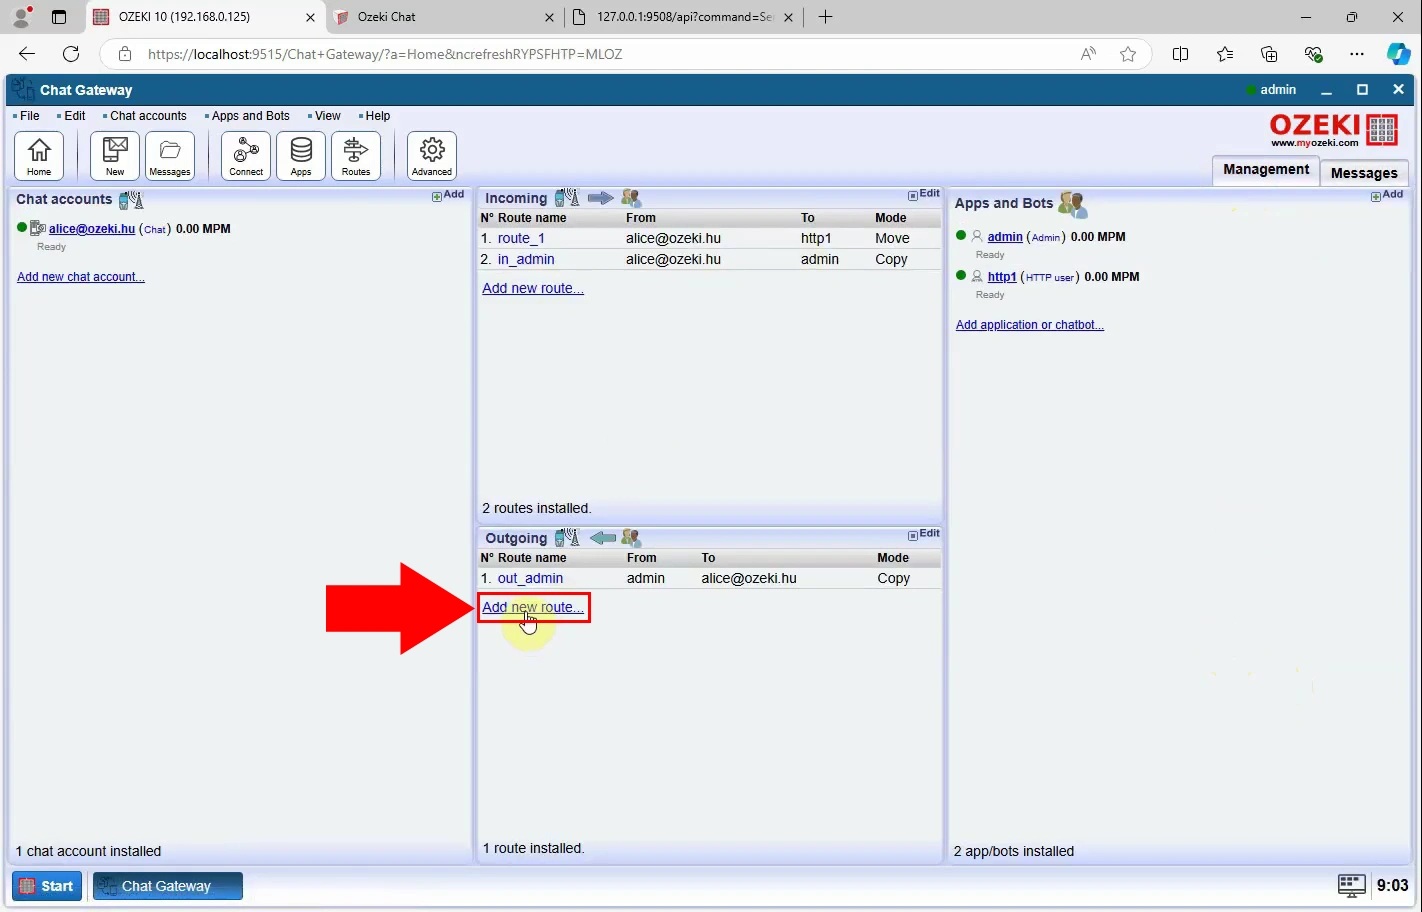
To set up a new outgoing route, choose the "Add New Route" option. This configuration will manage how outgoing messages are processed and directed to their recipients. Make sure to fill in all necessary details, including routing criteria and destination settings, before finalizing the setup.
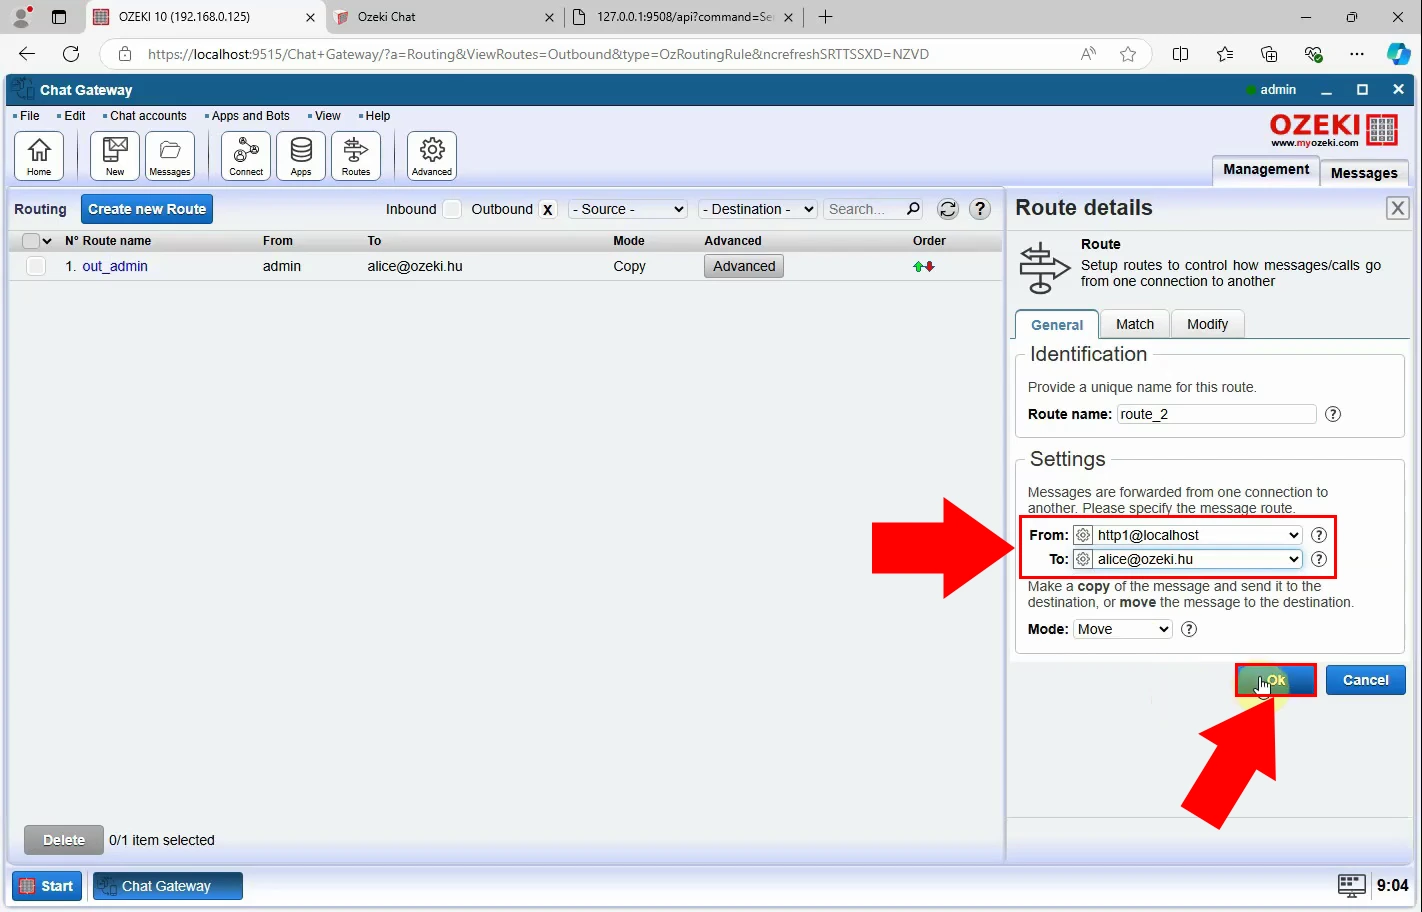
Set up the outgoing route to control how messages and calls are routed between connections. Begin by assigning a unique name to the route, then configure the required settings. Specify the sender and receiver addresses to establish the message path. After you’ve entered all the details, click "OK" to save the route configuration.
Step 5 - Send HTTP Request
Once you have configured the outgoing route, the next steps involve setting up how messages are sent using HTTP requests. Prepare the HTTP request needed to send messages through the configured route. This request has to include parameters such as the message content and the destination details.
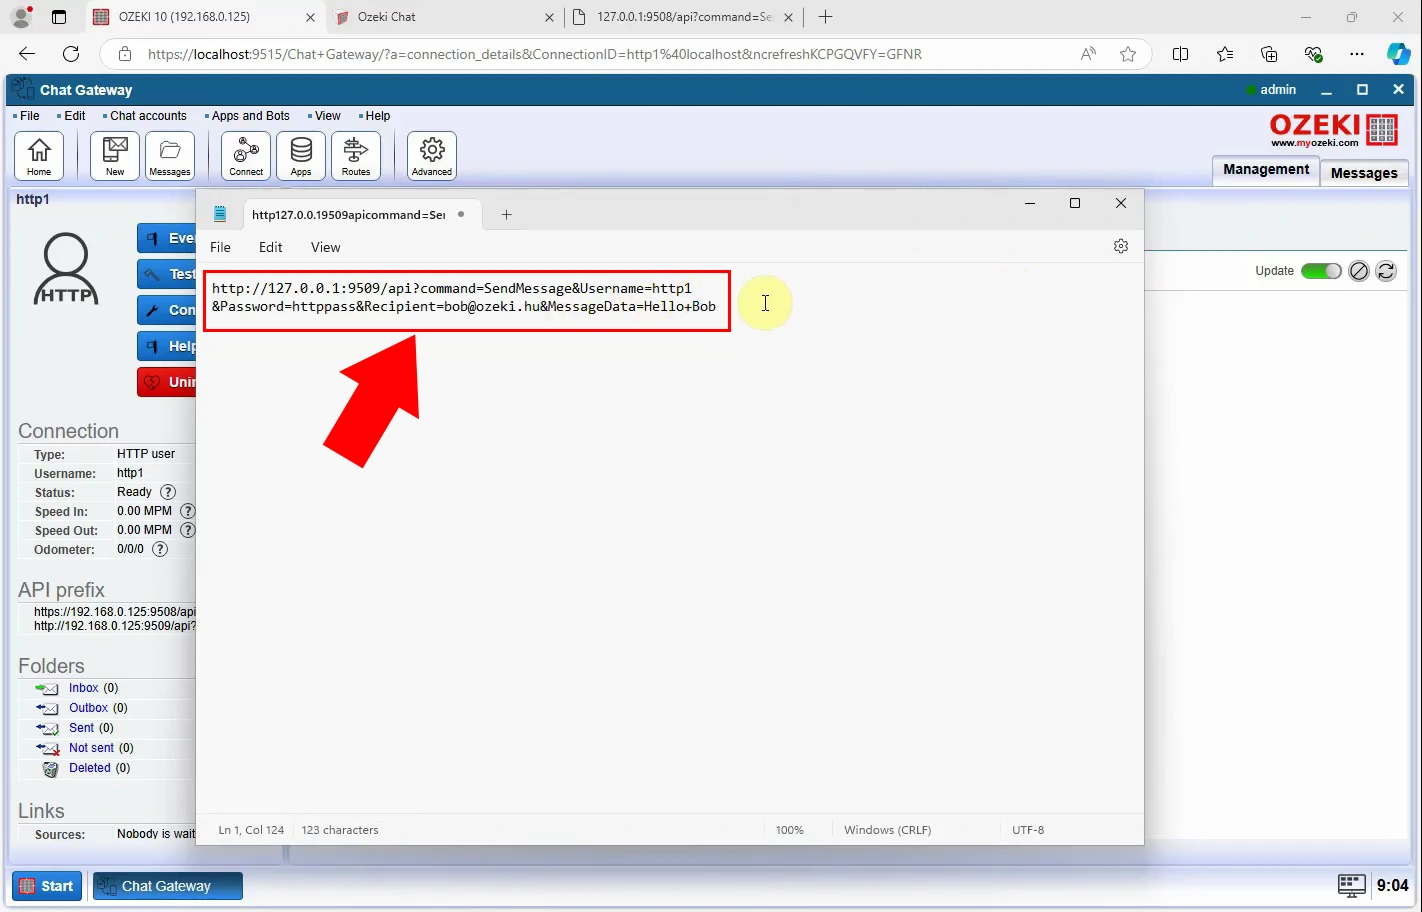
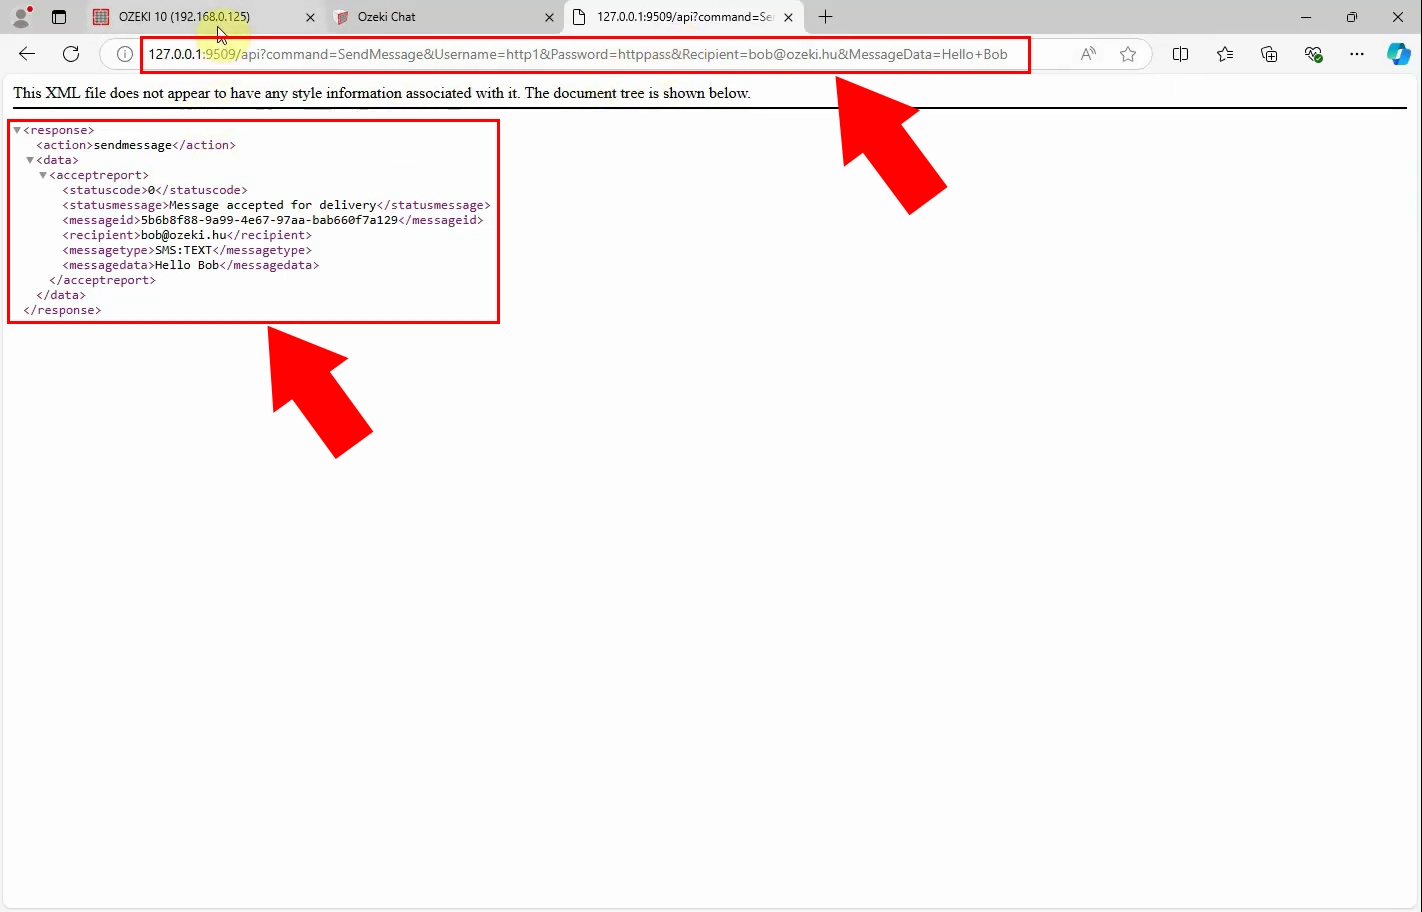
Use the HTTP request to send messages. This step involves executing the request to transfer the message according to the settings you configured. Copy the HTTP request, then paste it to the browser. The system will automatically interact with the route and direct the message to the recipient. At the events tab, we can see the notification about successful submission.
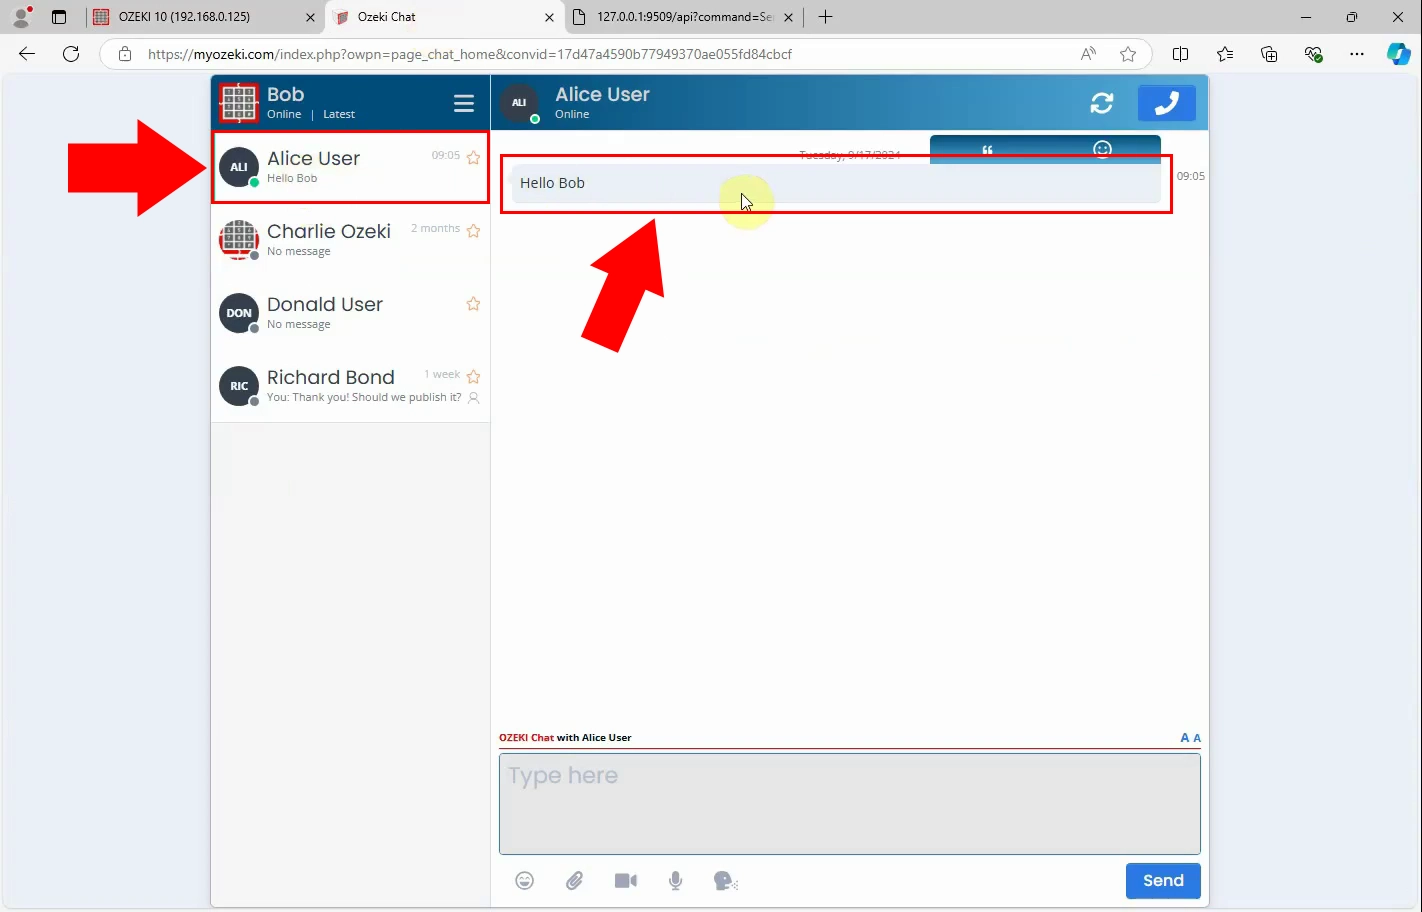
By loading the myozeki.com website, you can see that the message has been sent to it's recipient through the system. The website provides real-time updates and status notifications, allowing you to track the delivery process and confirm that your message has been transmitted.
Conclusion
By following the outlined steps, you can effectively send chat messages using HTTP requests with Ozeki Chat Gateway. From setting up your account and configuring routes to executing HTTP requests, you’ll gain the knowledge needed to manage and automate your messaging processes. For additional assistance or to explore other functionalities, refer to our detailed documentation and video tutorials available on our website.
More information
- How to send a chat message from the chat gateway GUI
- How to send chat messages from an SQL database
- How to send chat messages from Txt files
- How to send chat messages using HTTP requests
- VB
- C sharp
- PHP

