How to install the Windows Client
On this page, we are going to show the most important step you need to take when it comes to installing the Ozeki Windows Client. You can install the Chat server on Windows 10, 11 and also on Windows Server 2016, 2019 and 2022. By following these simple steps you will see how easy it is the install it by yourself and enjoy all the features it may offer you.
Installing the Windows Chat Client (Video guide)
In this short video tutorial we provide a user-friendly, simpler video tutorial on how to properly install the Window Chat Client on a computer. The video starts with downloading the server from the right website and then ends with successfully login into the Windows Chat Client.
Installing the Windows Chat Client (Quick steps)
- Download Windows Chat Client from the website
- Open the file from your 'Downloads'
- Extract Chat Client installer
- Start Chat Client installer with a double click
- Allow the app to make changes to your device
- Installer welcome page
- Accept the license agreement
- Installing process
- Windows Chat Client has been installed on your computer
- Start Windows Chat Client
- Log into your Ozeki account
- Successful login
Installing the Windows Chat Client (Step-by-step guide)
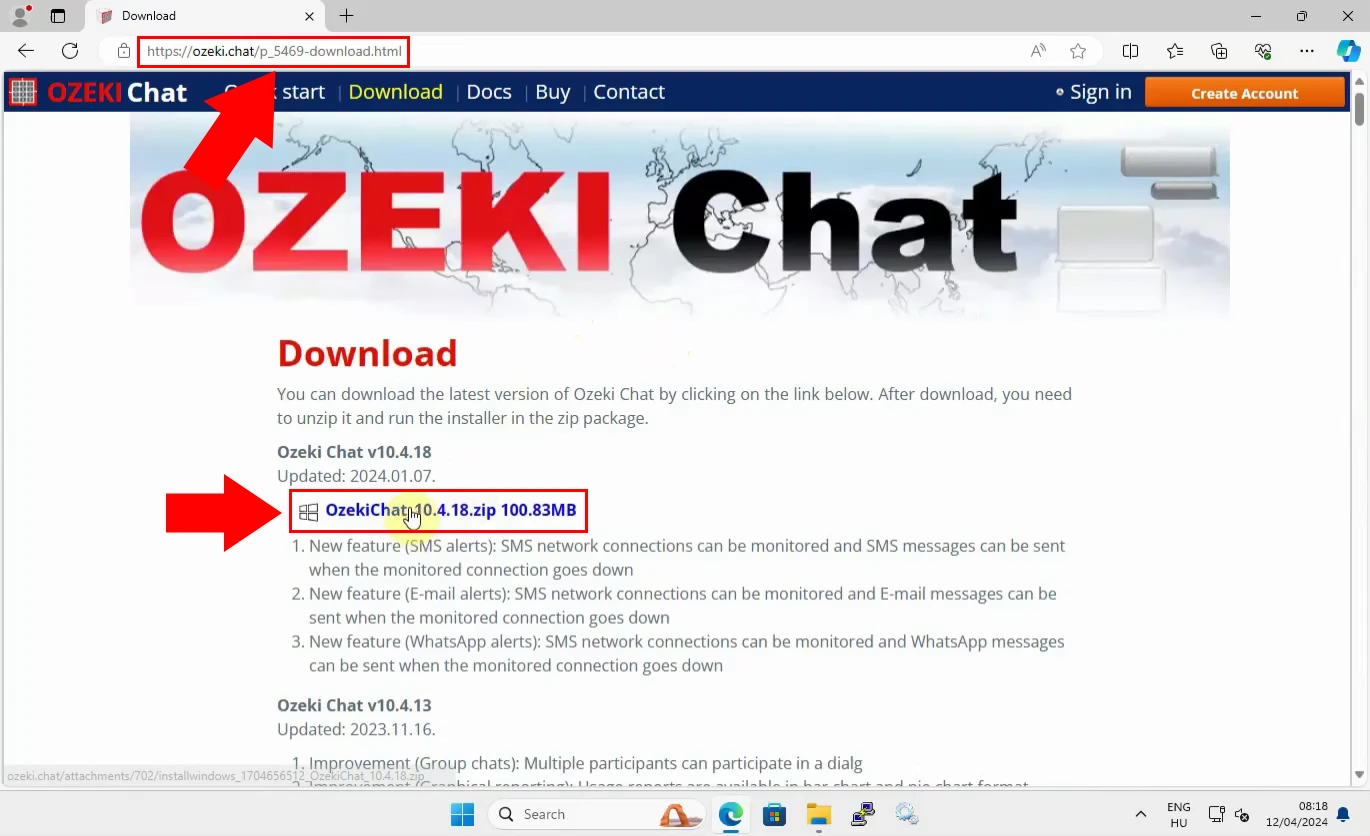
The first thing you need to do to start the entire process is download Windows Chat Client from the website. Click on the latest version of Ozeki Chat by clicking on the link as shown in Figure 1.
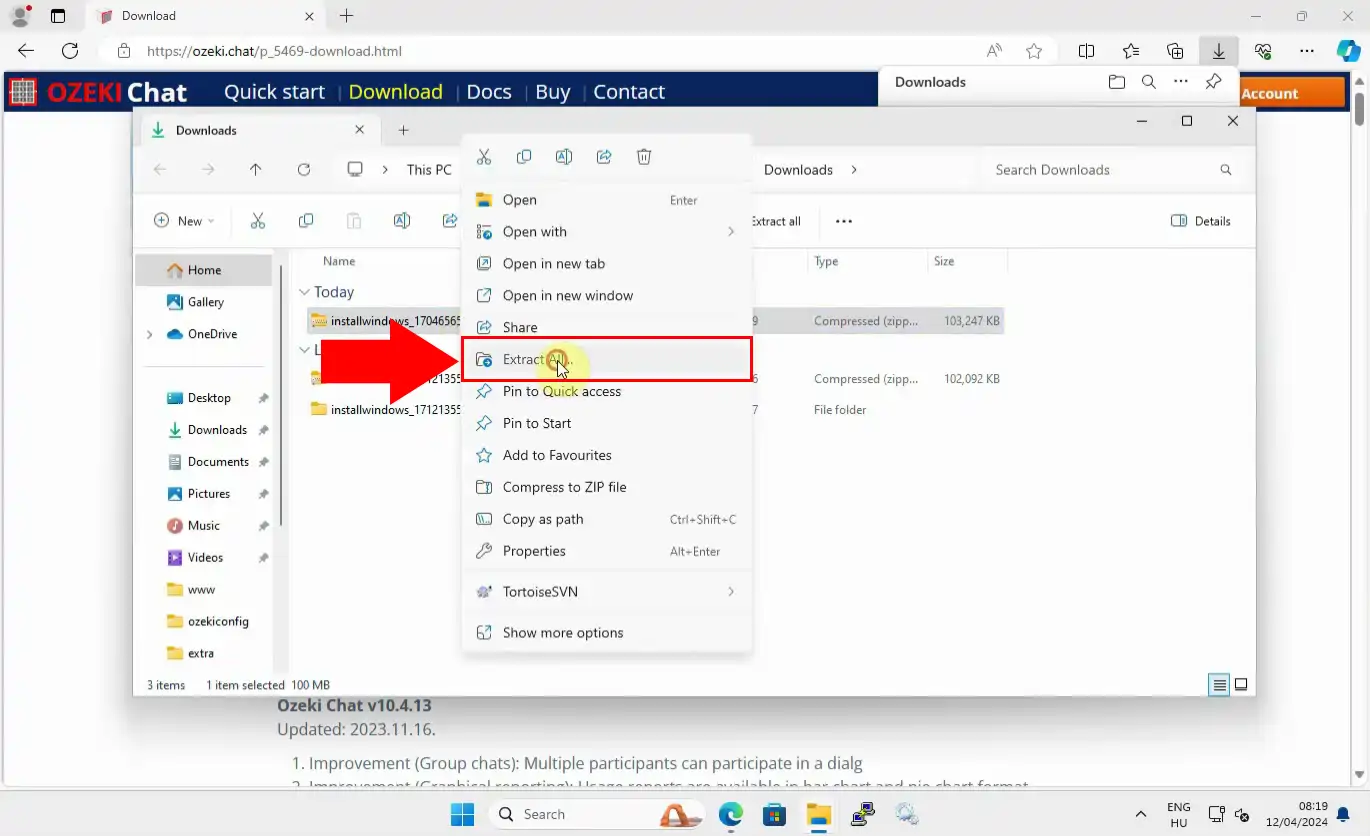
Open the file from your downloads in the upper right corner. Click on the file with a right click and choose the option 'Extract all' as represented in Figure 2 to extract the Chat Client installer. Select a destination folder where you would want to save your extracted files.
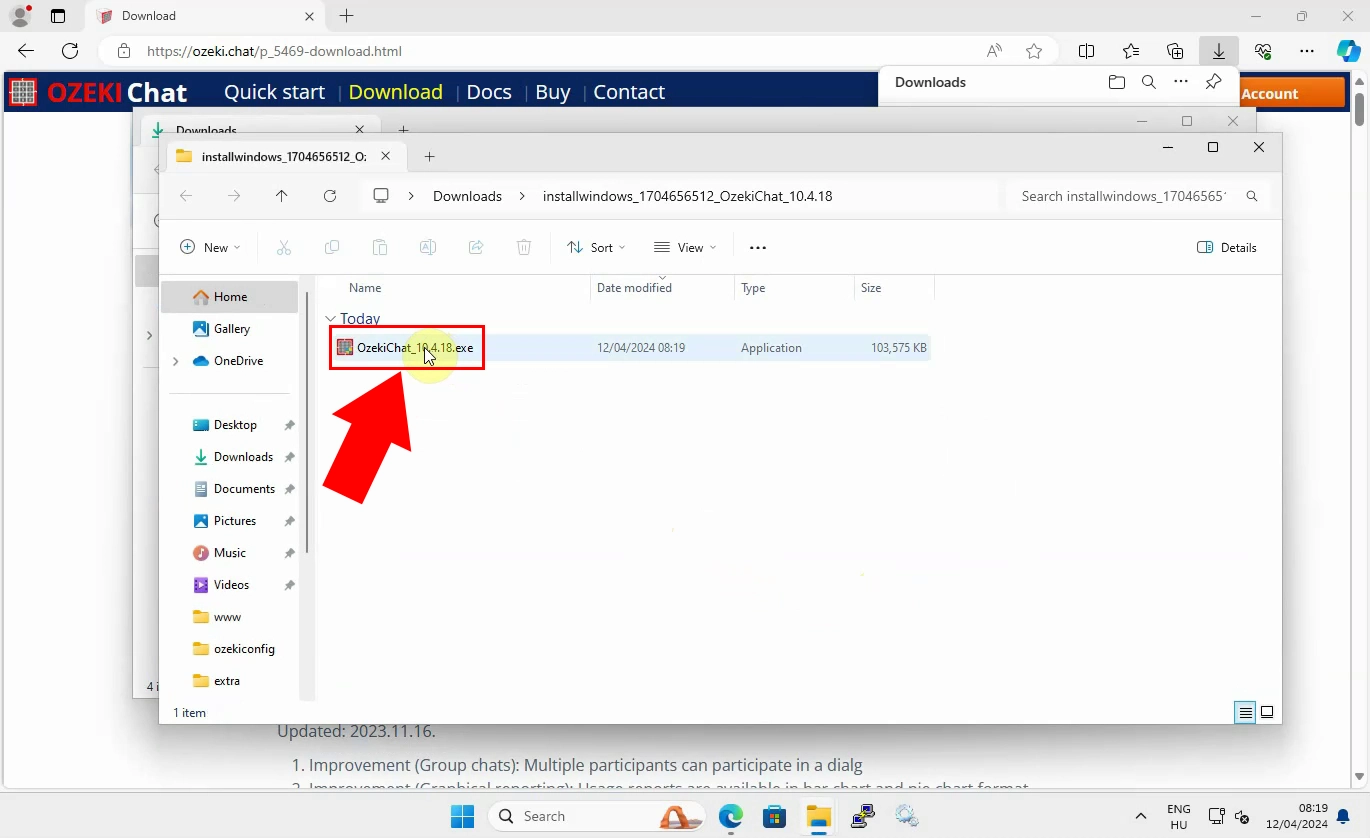
Now that the file has been extracted you need to click on it with a double click to start the chat installer as you can see in Figure 3.
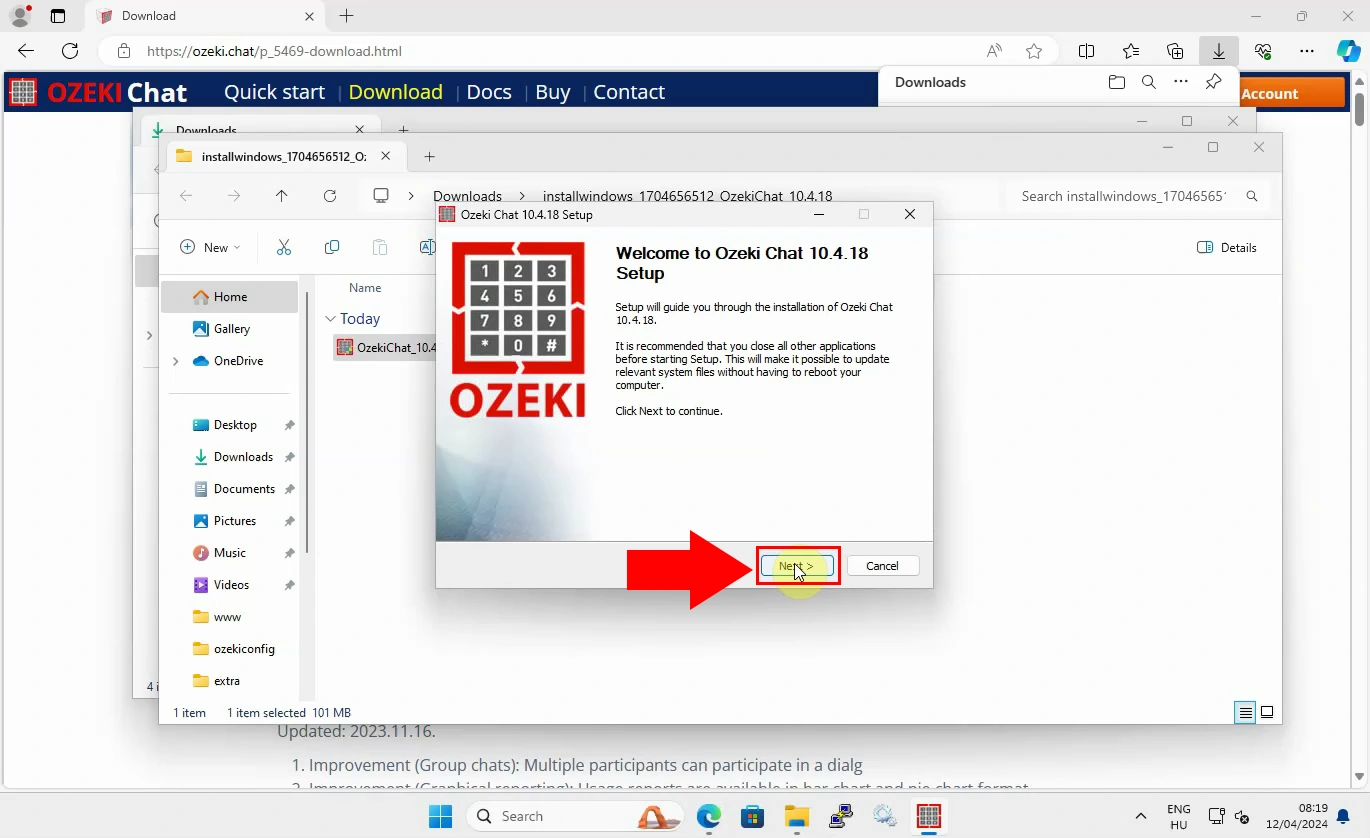
After the double click a window will pop up on your screen asking if you want to allow this app to make changes to your device. You need to click on 'Yes' to be able to move on. You will be welcomed by the Ozeki Chat Setup welcome page as shown in Figure 4 below. Click on 'Next' to continue the installation.
After accepting the license agreement the installation process will start the same way as you can see in Figure 5. This process might take a while but be patient about it.
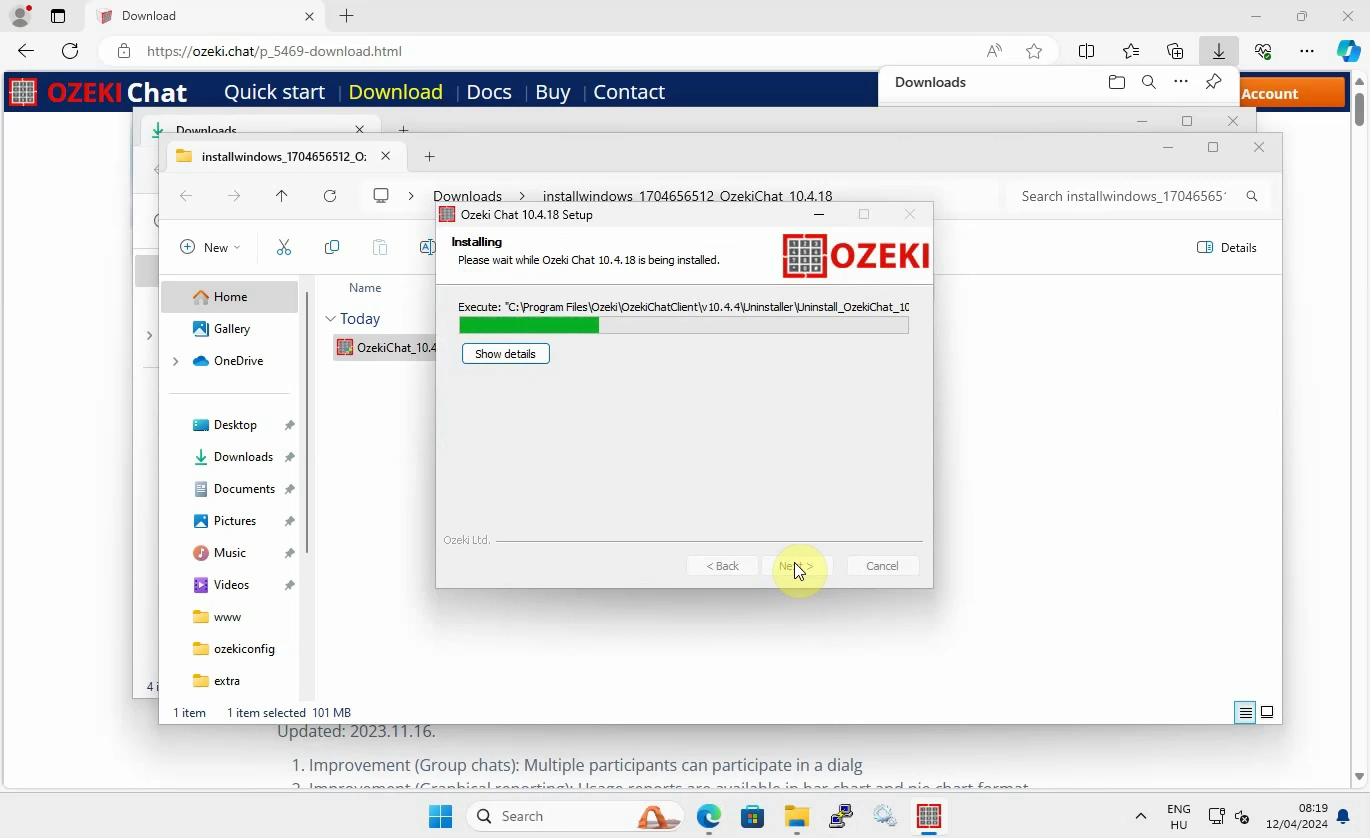
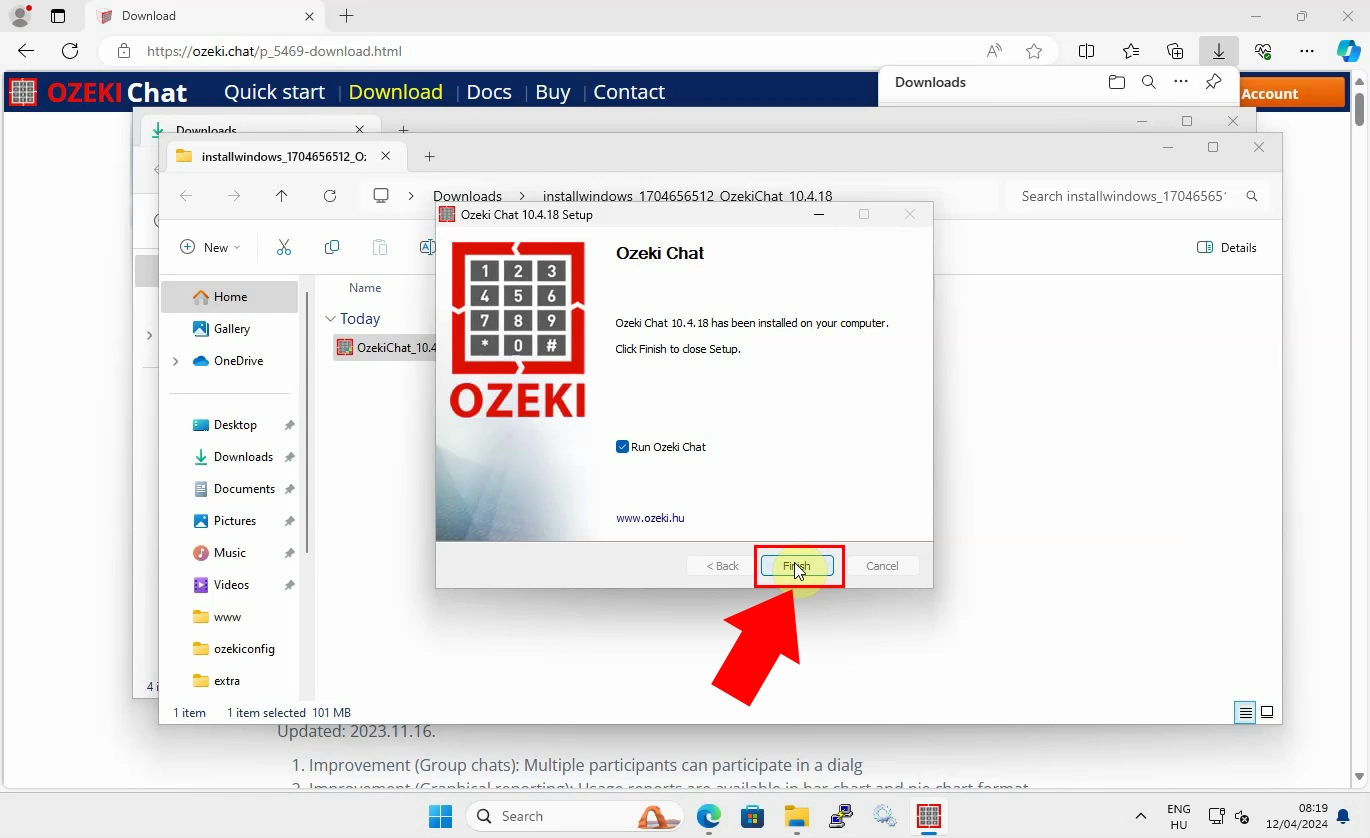
Once the installation is ready you will see a window just like on Figure 6 where you can make sure that the Windows Chat Client has been installed on your computer. Click on 'Finish' to end the installation process.
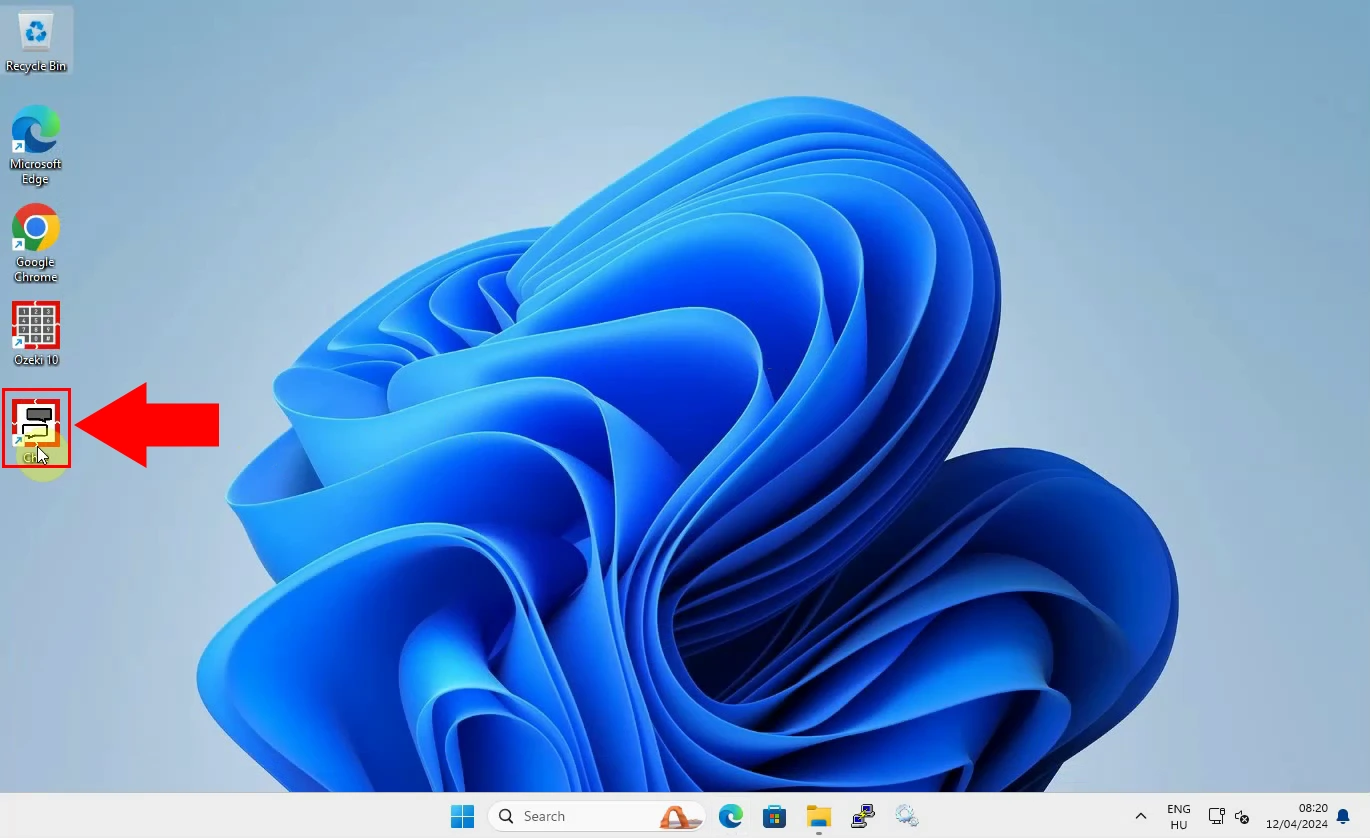
After the installation is done the next step you need to do is start the Windows Chat Client. Do this by clicking on their icon on your screen, the same way as it is shown in Figure 7. If for any reason the app does not appear on you screen feel free to search for it in the Windows search bar.
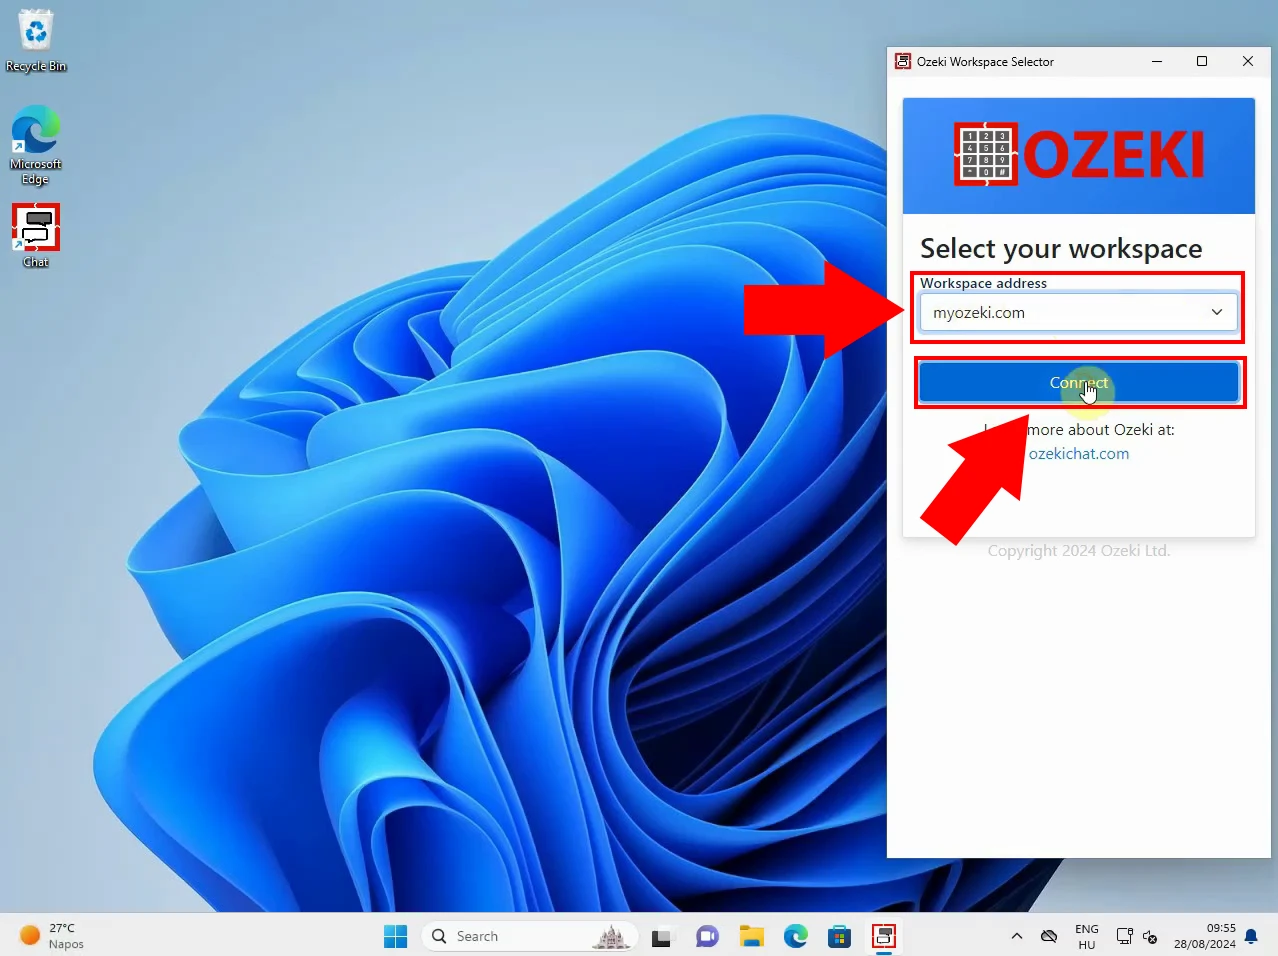
Connecting to myozeki.com is the next essential step in the process. First of all, you need to select your workspace address. After that, tap on the 'Connect' button just like it is shown in Figure 8.
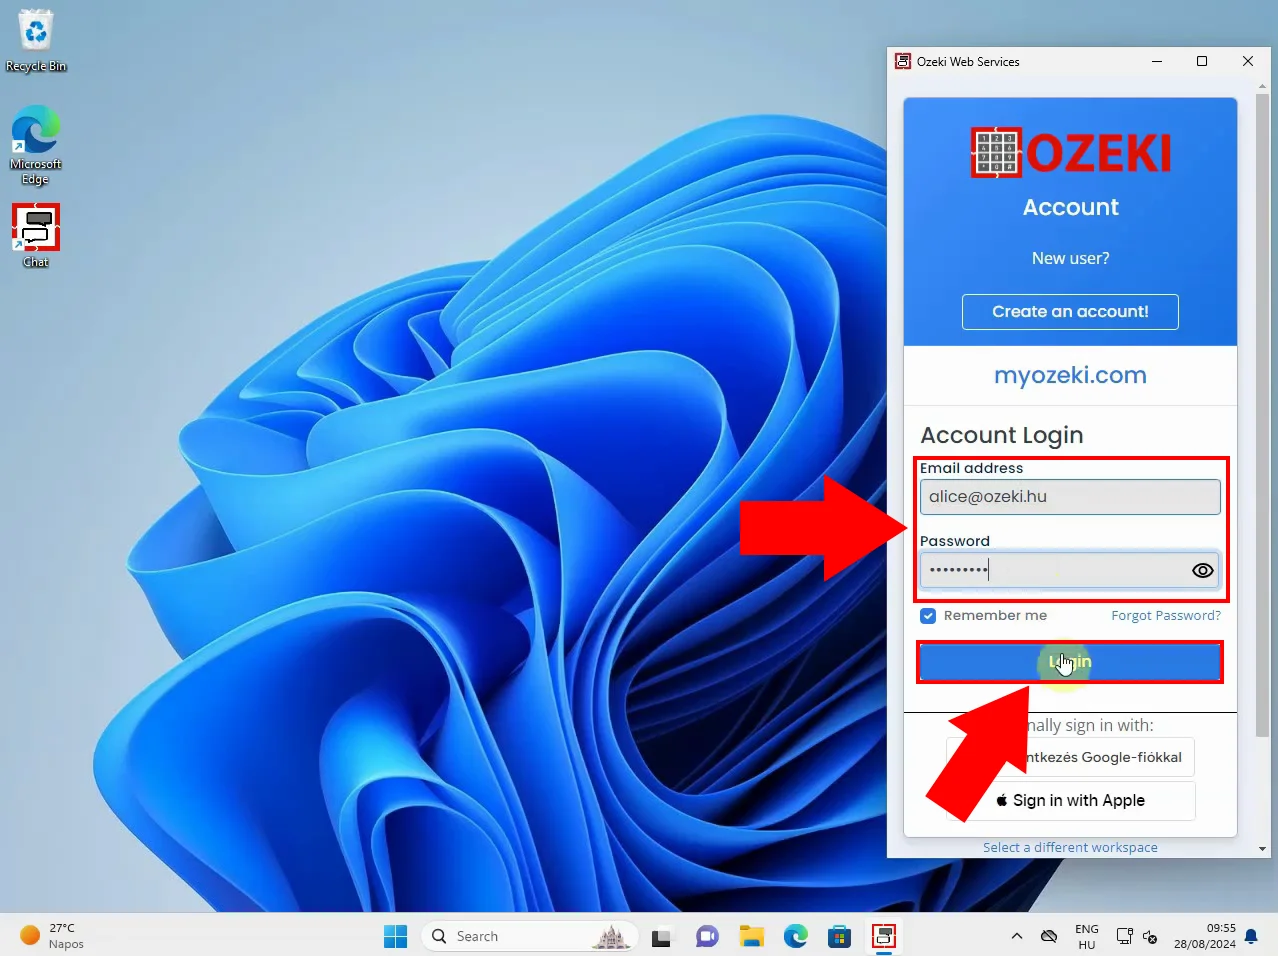
As you can see in Figure 9 you are now asked to log into your Ozeki account. Provide your E-mail address and then enter your password connected to this account and press on the 'OK' button.
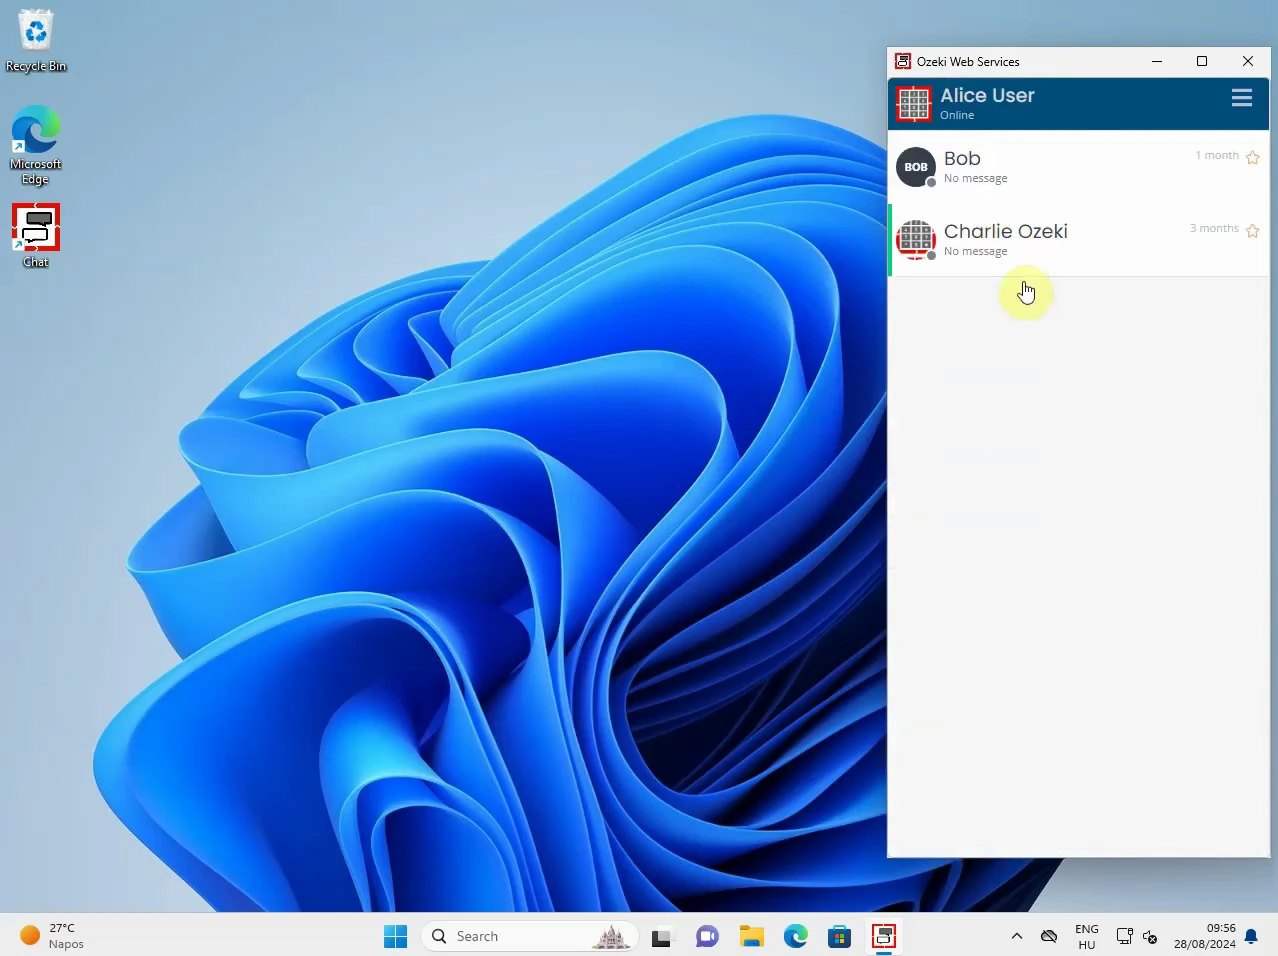
As you can see in Figure 10, the Ozeki Chat is now open. You can start chatting by selecting a conversation.
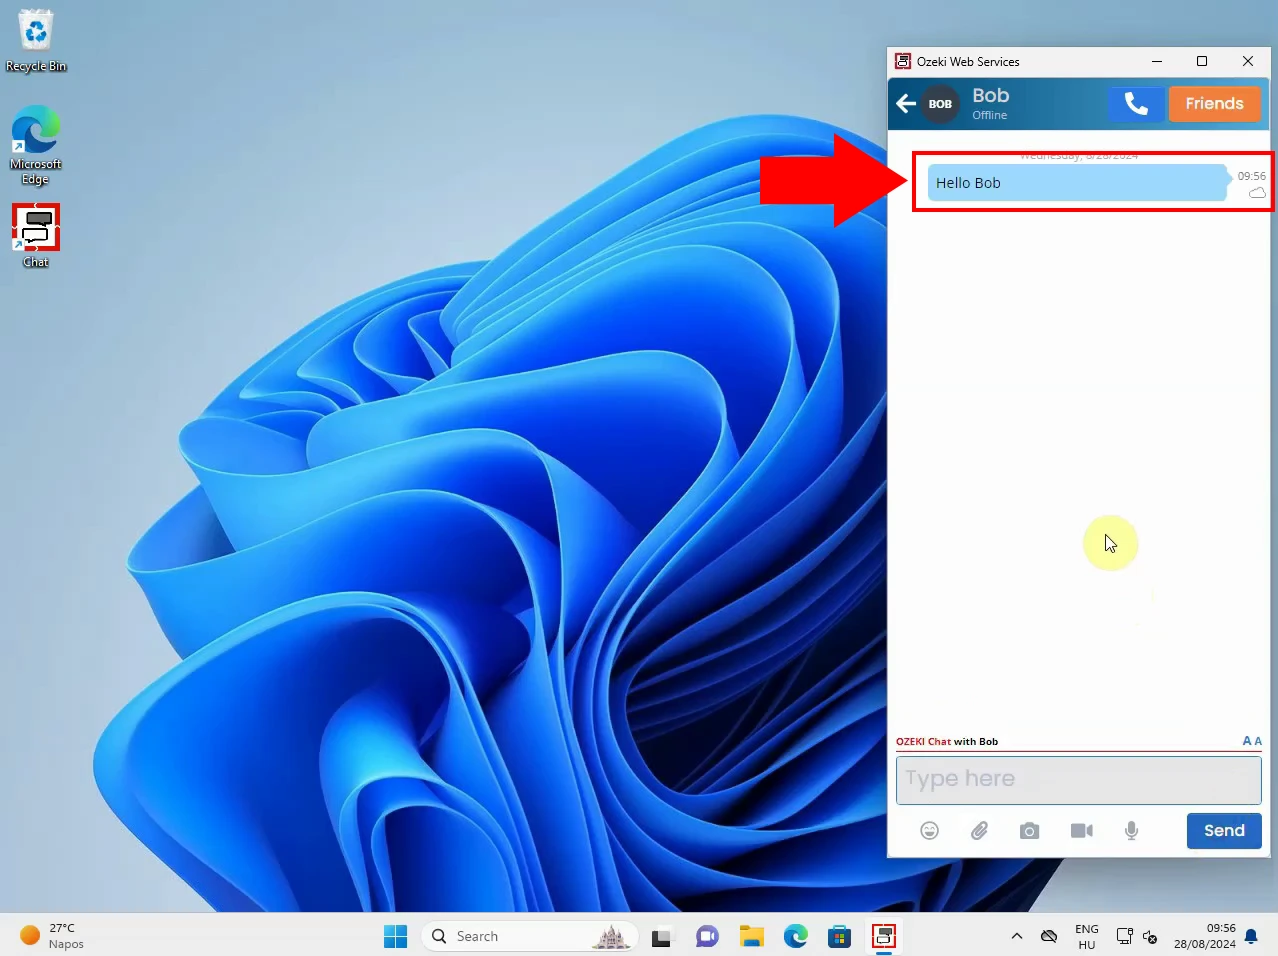
After opening the chat conversation you can send chat messages without any problem just like it is shown in Figure 11.
Summary
Knowing how to install the Windows Chat Client is important because it lets you set up a reliable chat system on your computer. This chat client can be used for small group chats or large networks with many users. It works on Windows 10, 11, and Windows Server, so you can install it on the most modern Windows computers. When you understand how to install the chat client, you can quickly get started with your own secure communication network. Also, knowing how to properly installation also helps you avoid problems and makes it easier to manage your chat system.

