How to install Ozeki Chat Client on MacOS
On this page, we are going to walk you through the most important steps when it comes to installing Ozeki Chat Client on MaOS. Knowing how to install Ozeki Chat Client is vital for your Ozeki experience to be complete. Experience an effective secure and private way of communication by using Ozeki Chat Client.
Installing Ozeki Chat Client on MacOS (Video guide)
In this short, and easy-to-follow video tutorial, we are going to show you the most important steps you need to take to be able to install Ozeki Chat Client on your MacBook. The video begins with downloading the latest version of Ozeki Chat and ends with successfully being able to log into your workspace.
Installing Ozeki Chat Client on MacOS (Step-by-step guide)
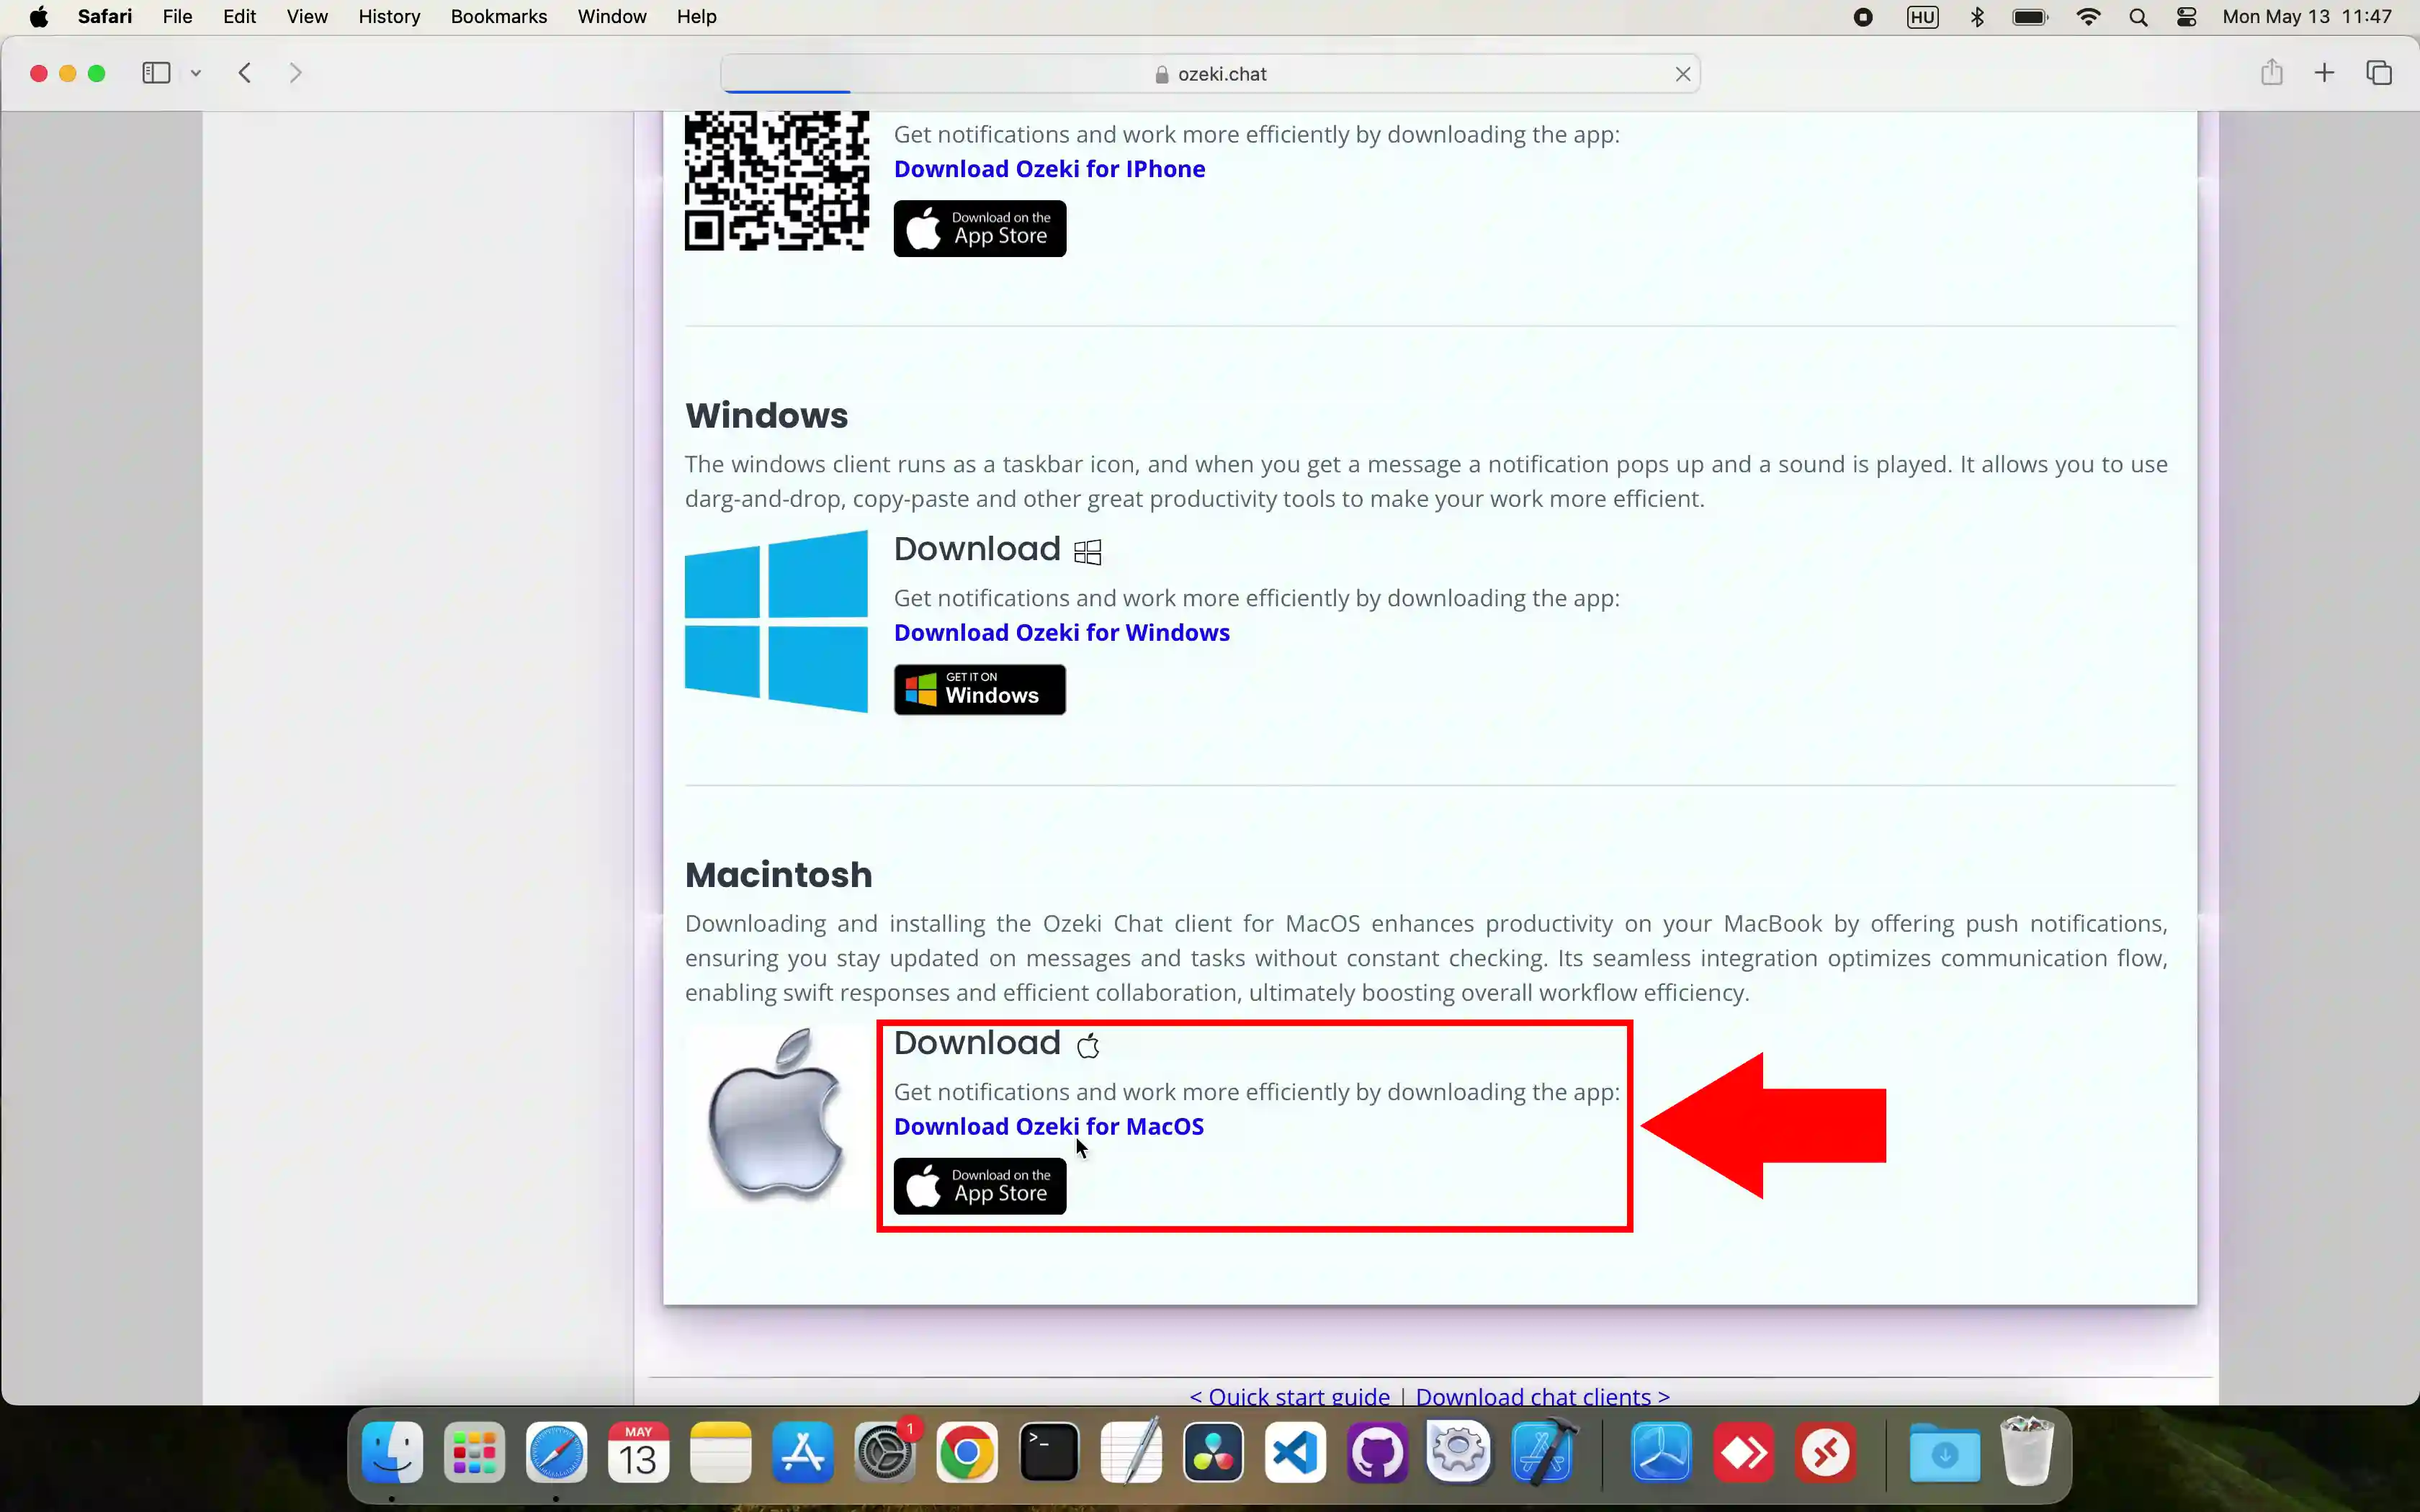
The very first step you need to take is to download Ozeki Chat. Scroll down on your page and click on the 'Download Ozeki for MacOS' sign as represented in Figure 1.
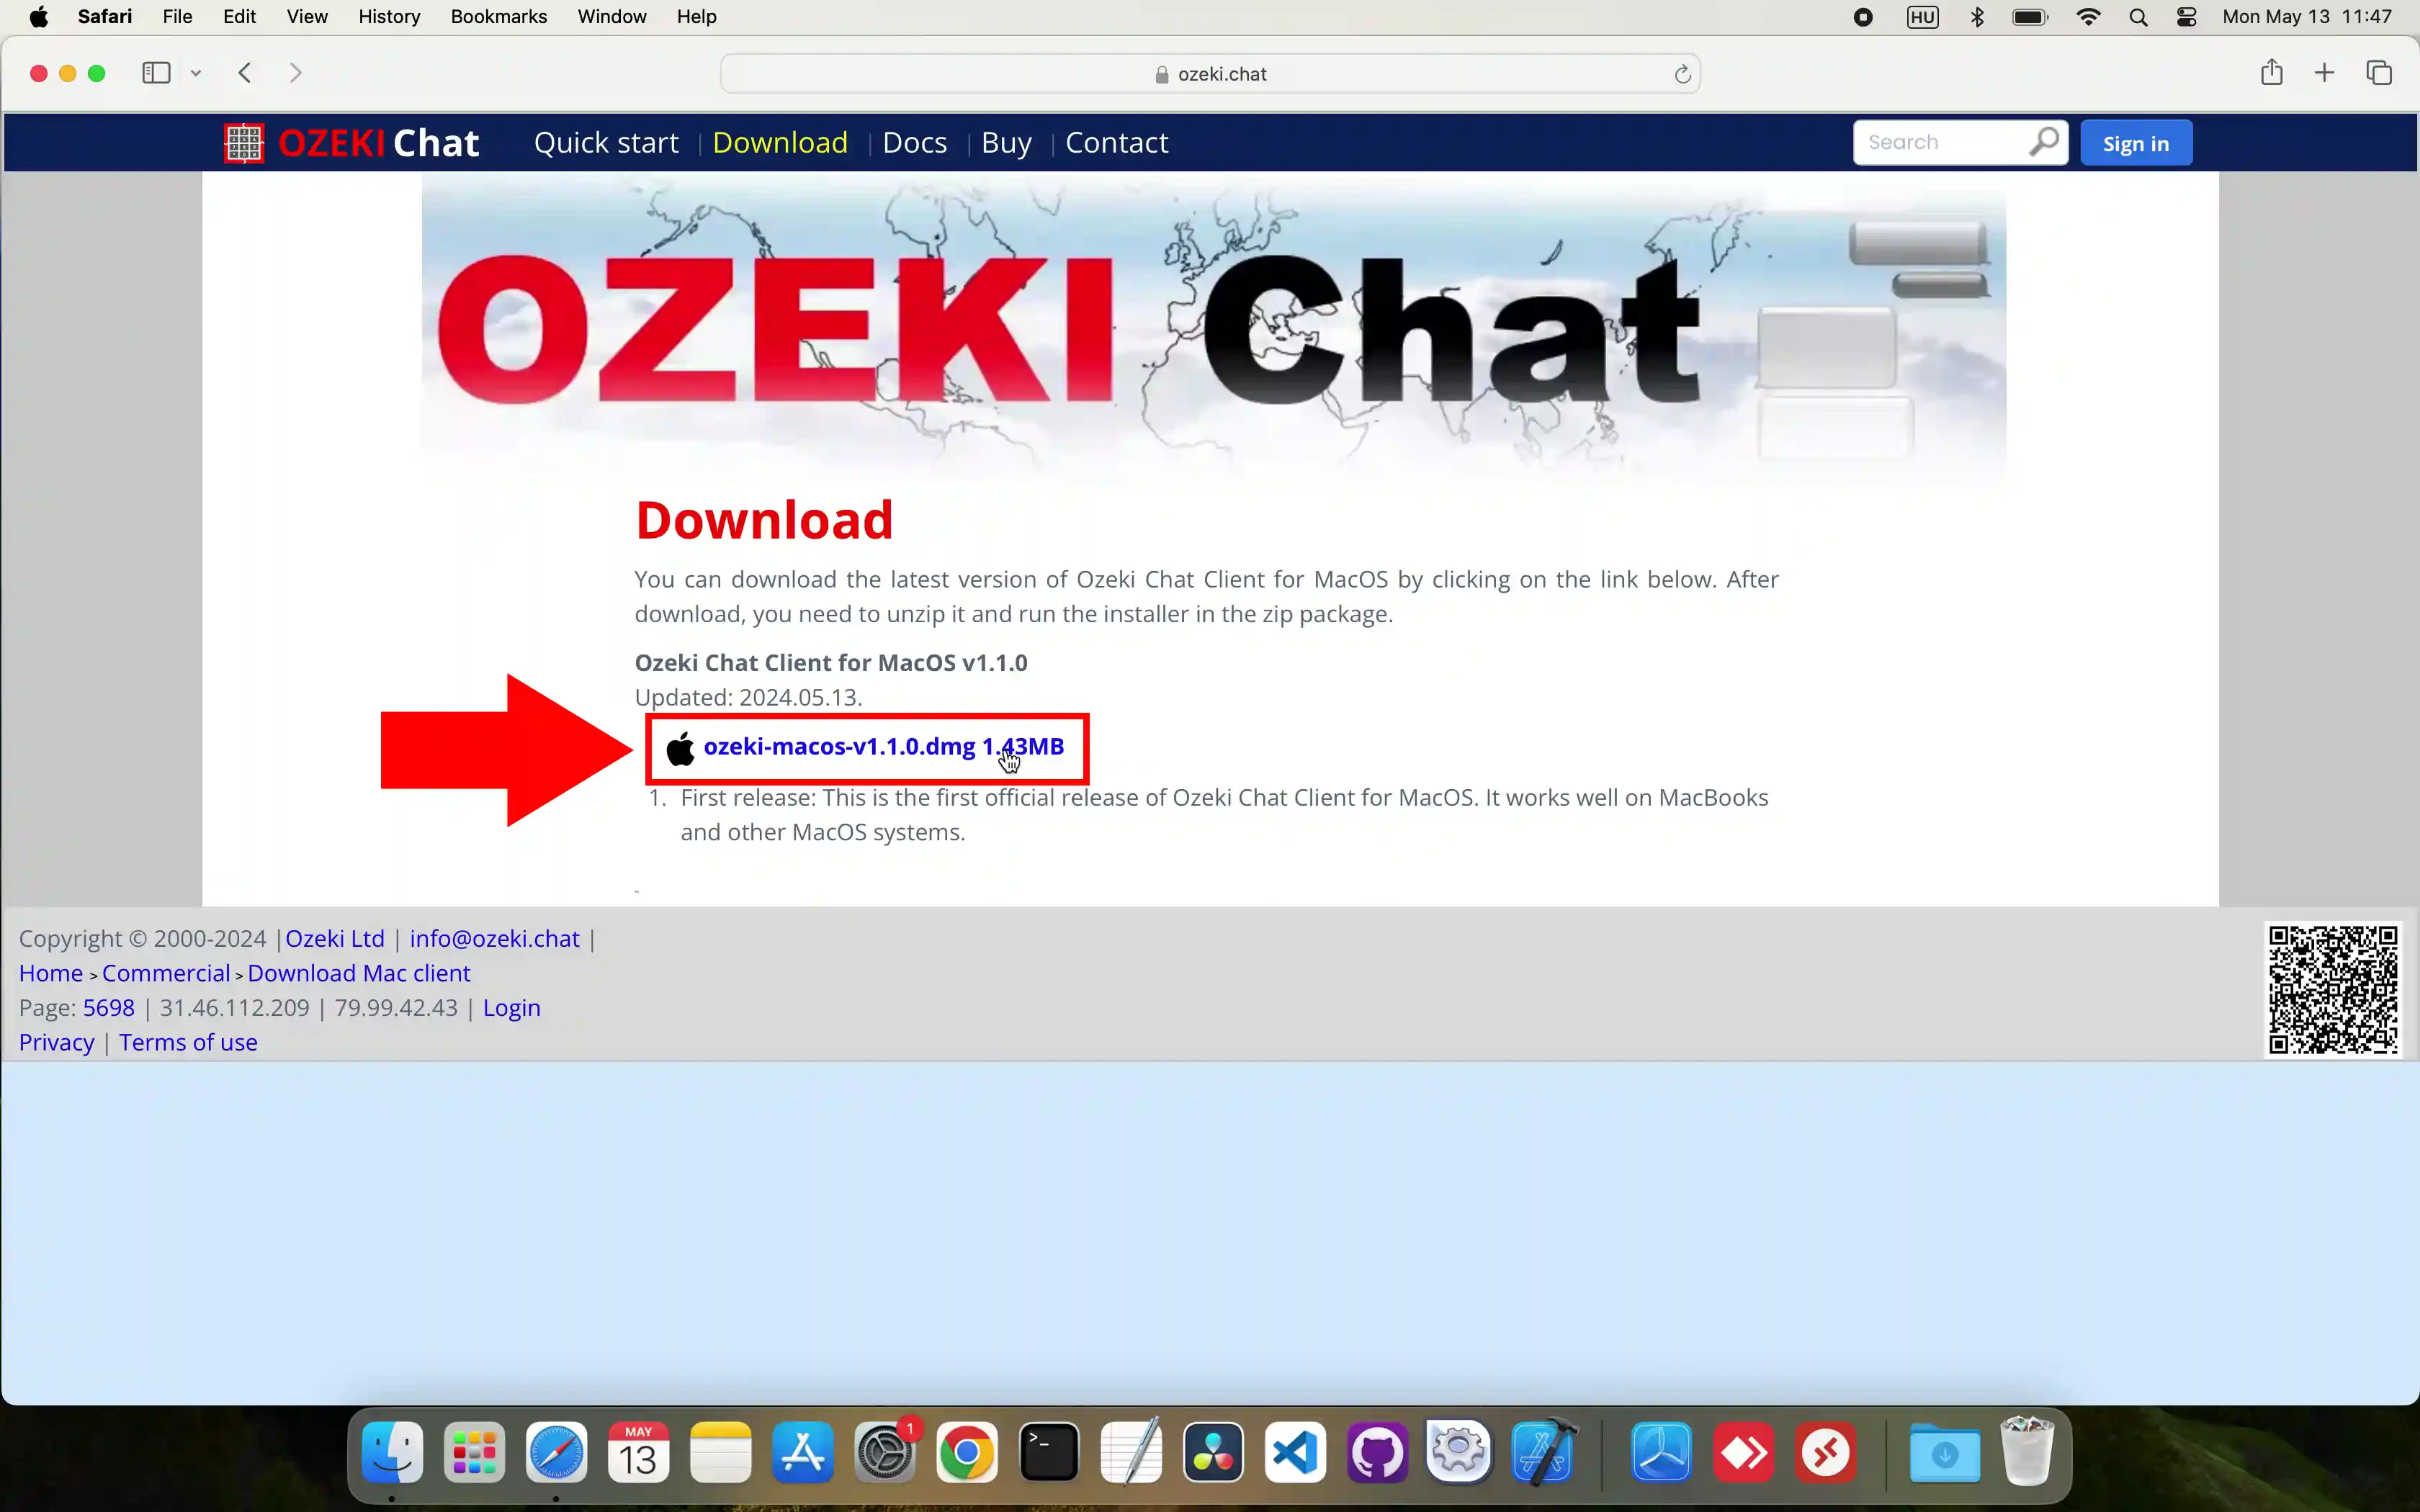
After clicking on the link you will automatically be navigated to another page where you will have the opportunity to download the installer .dmg. Click on the highlighted link shown by the red arrow in Figure 2 to begin the installation process.
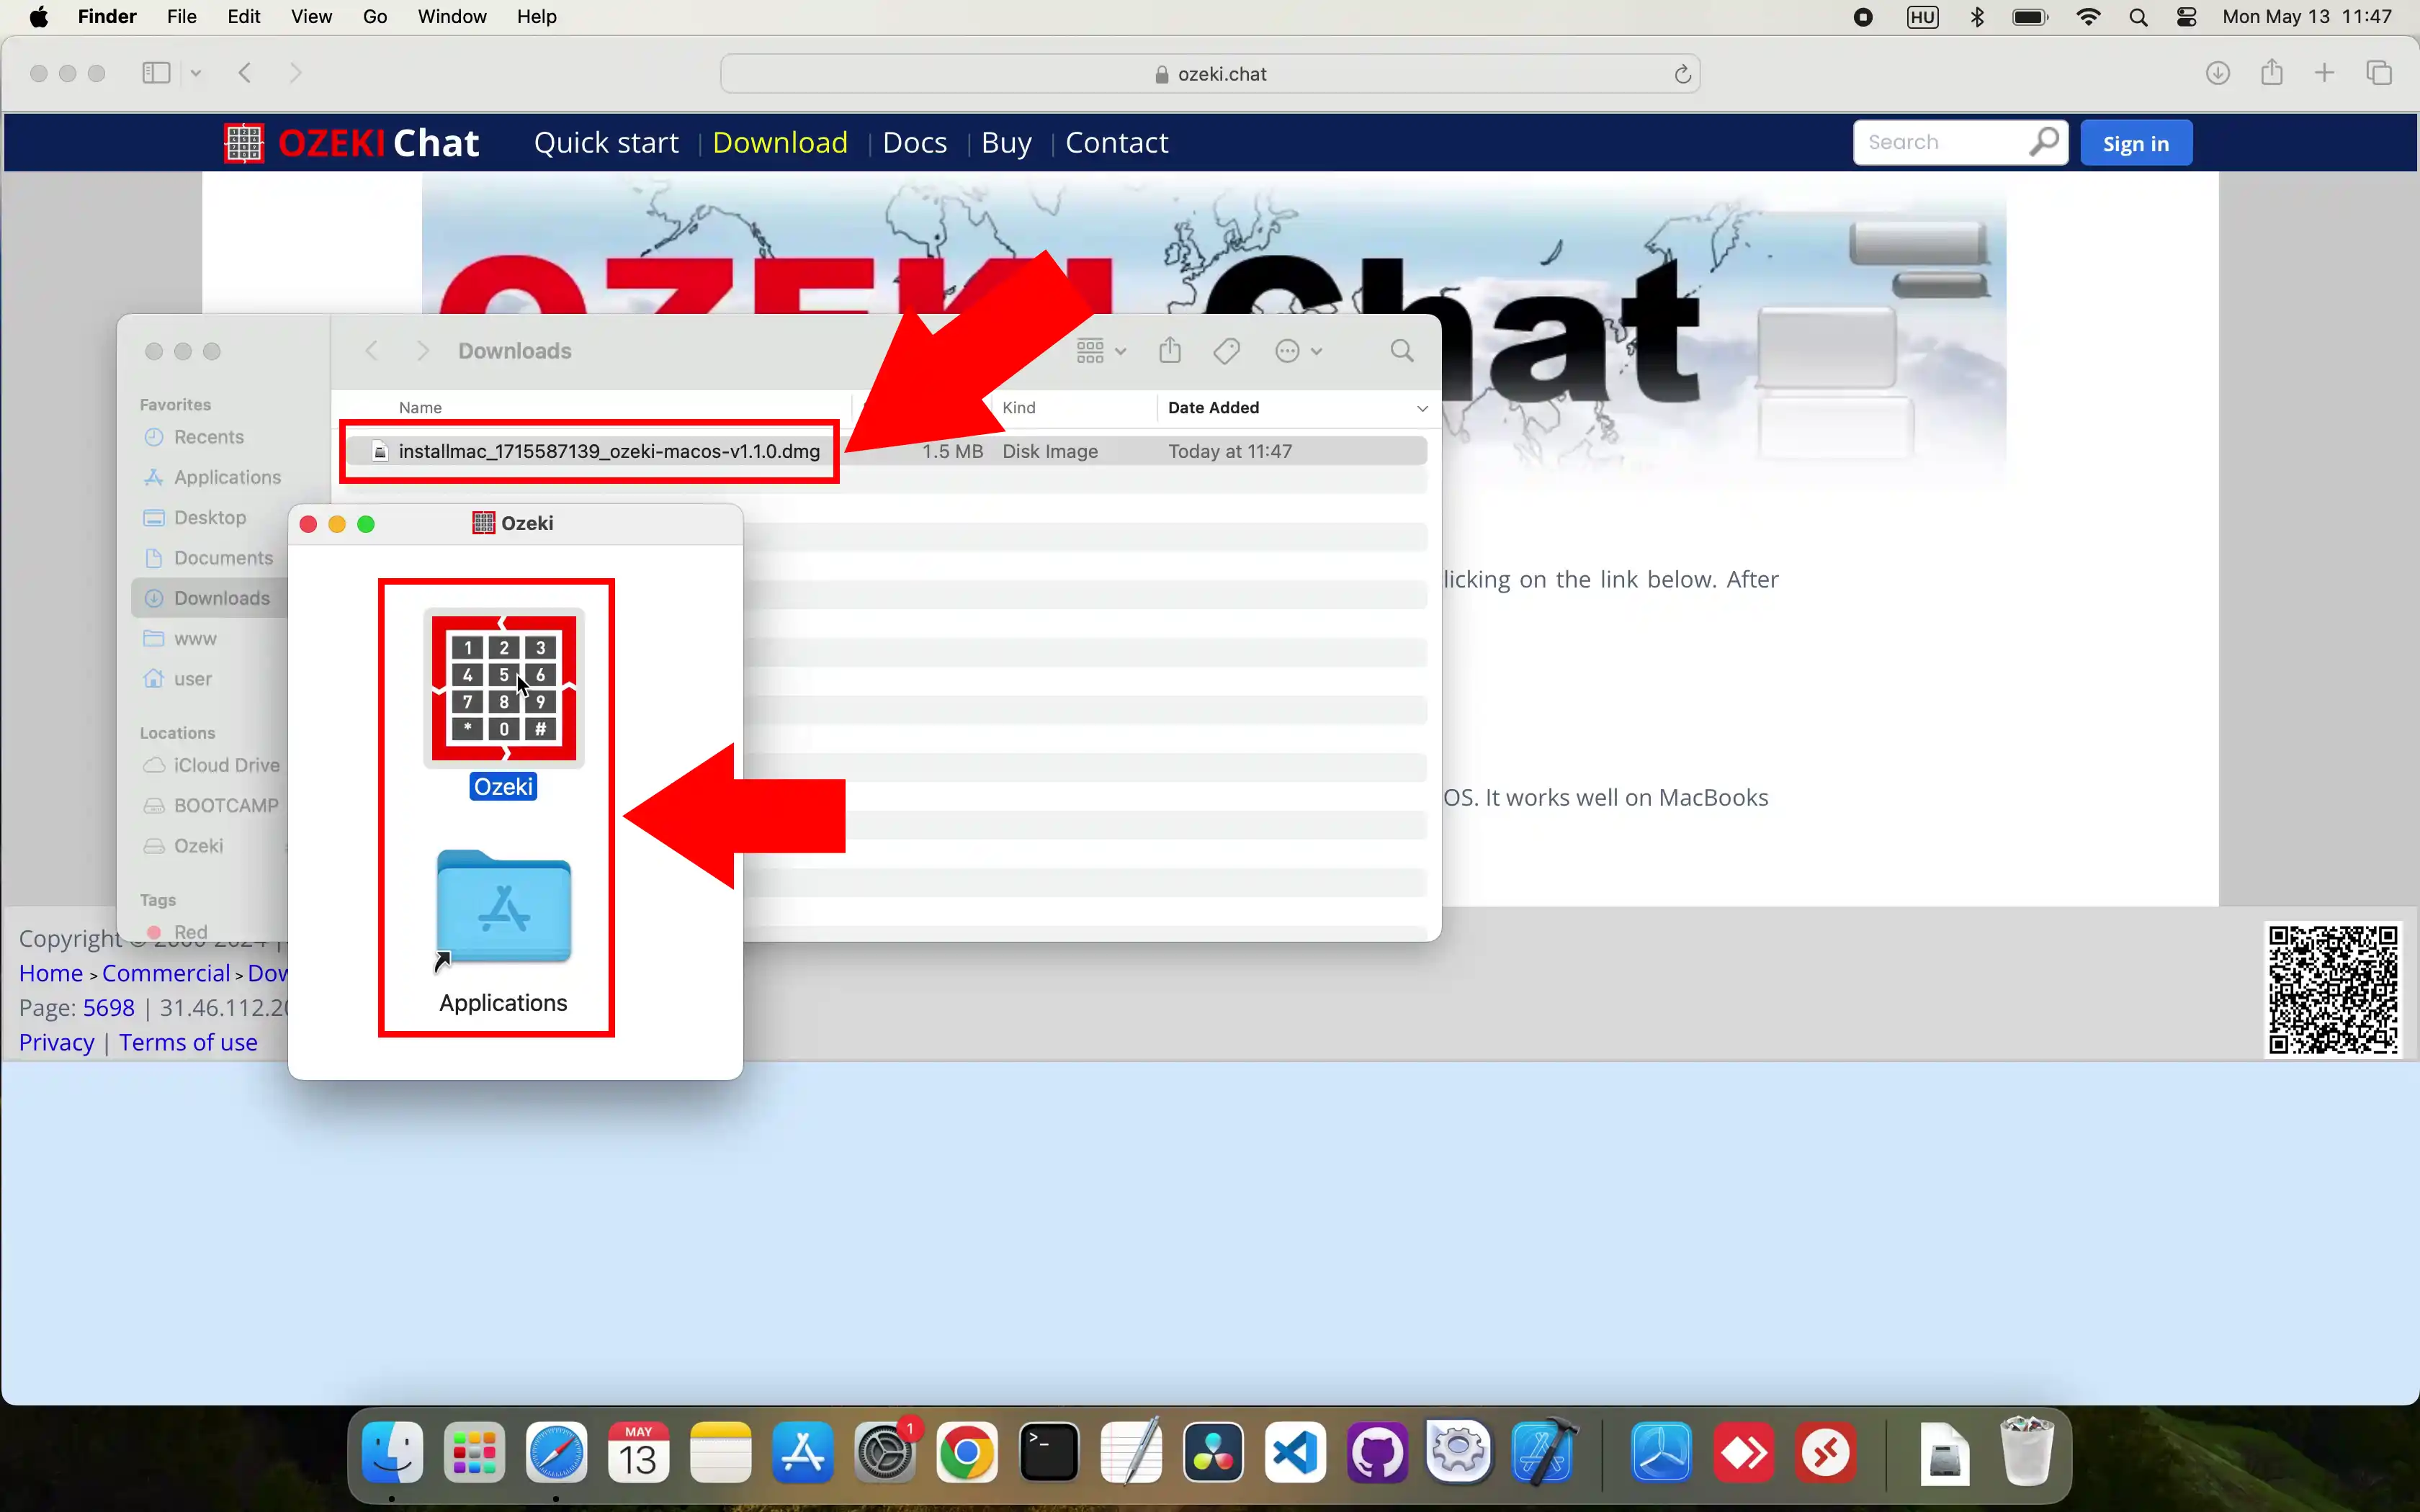
Open your downloads and then open the Ozeki installer. Click on the Ozeki logo, grab it and navigate it into the 'Applications' map as demonstrated in Figure 3.
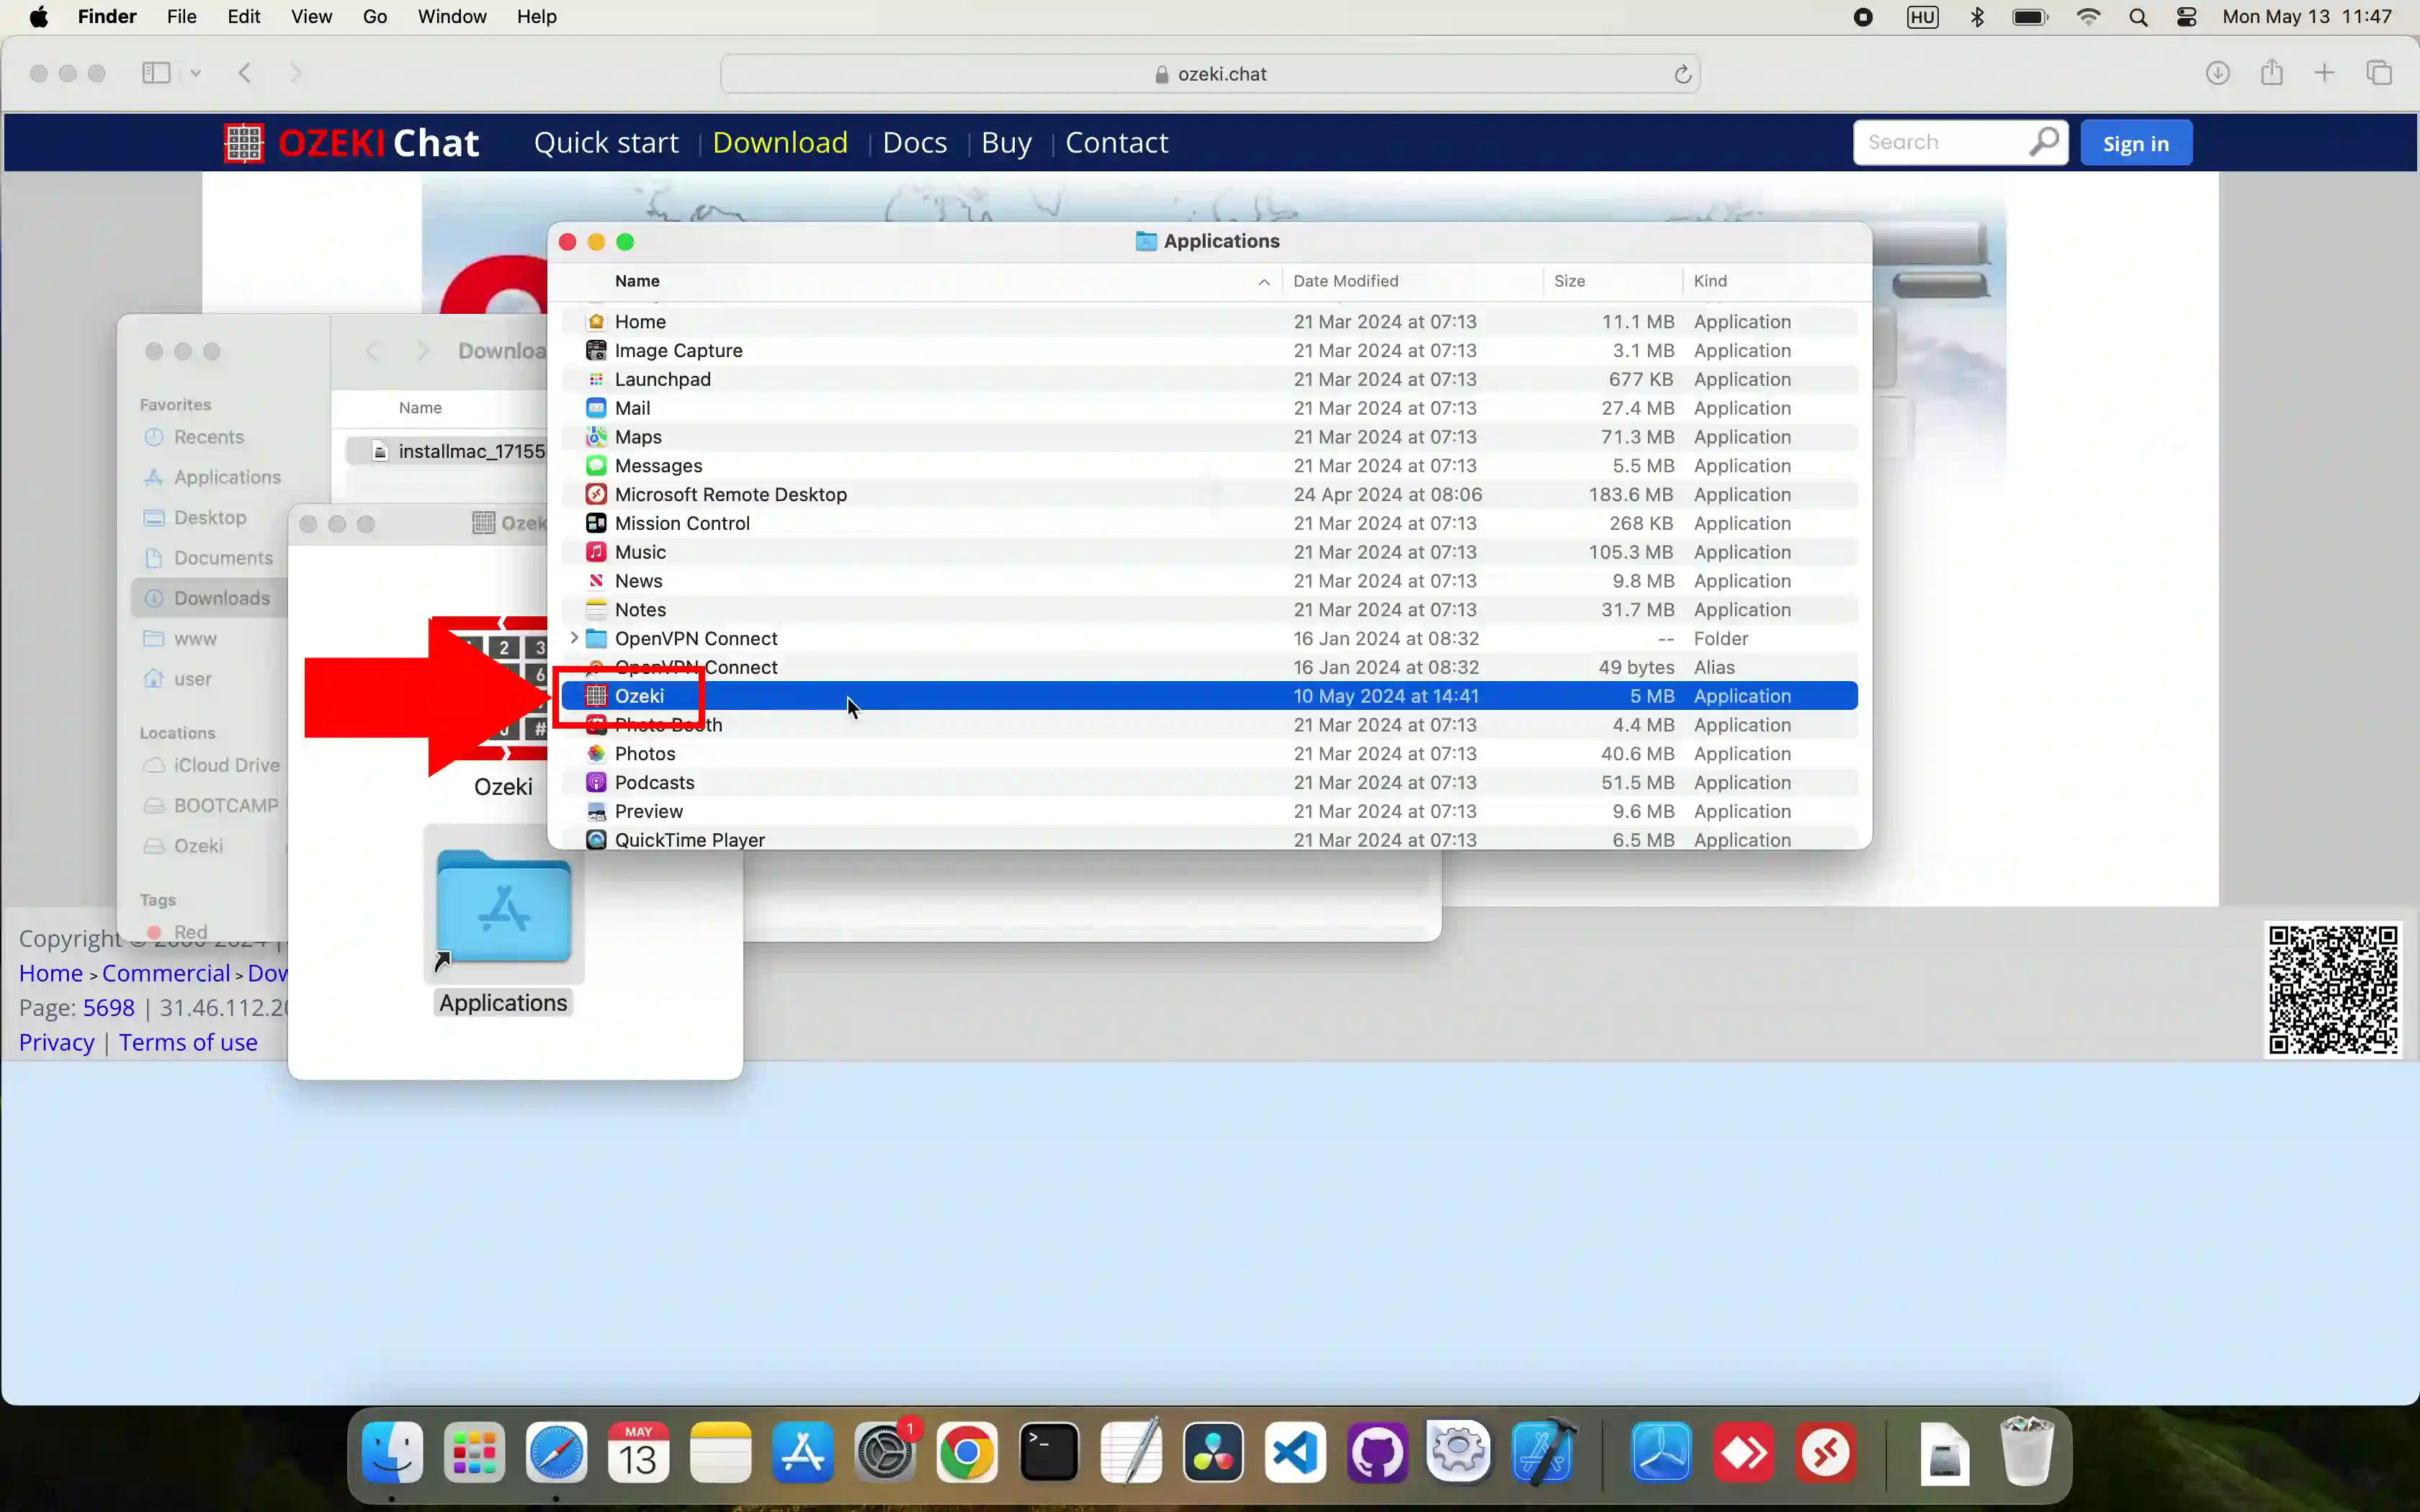
Now that you have installed the Ozeki application, you need to open it. Do this by searching for it among the 'Applications' and clicking on its title as you can see in Figure 4. The system will ask you if you are sure about wanting to open the app. Click on 'Open' to move on with the process.
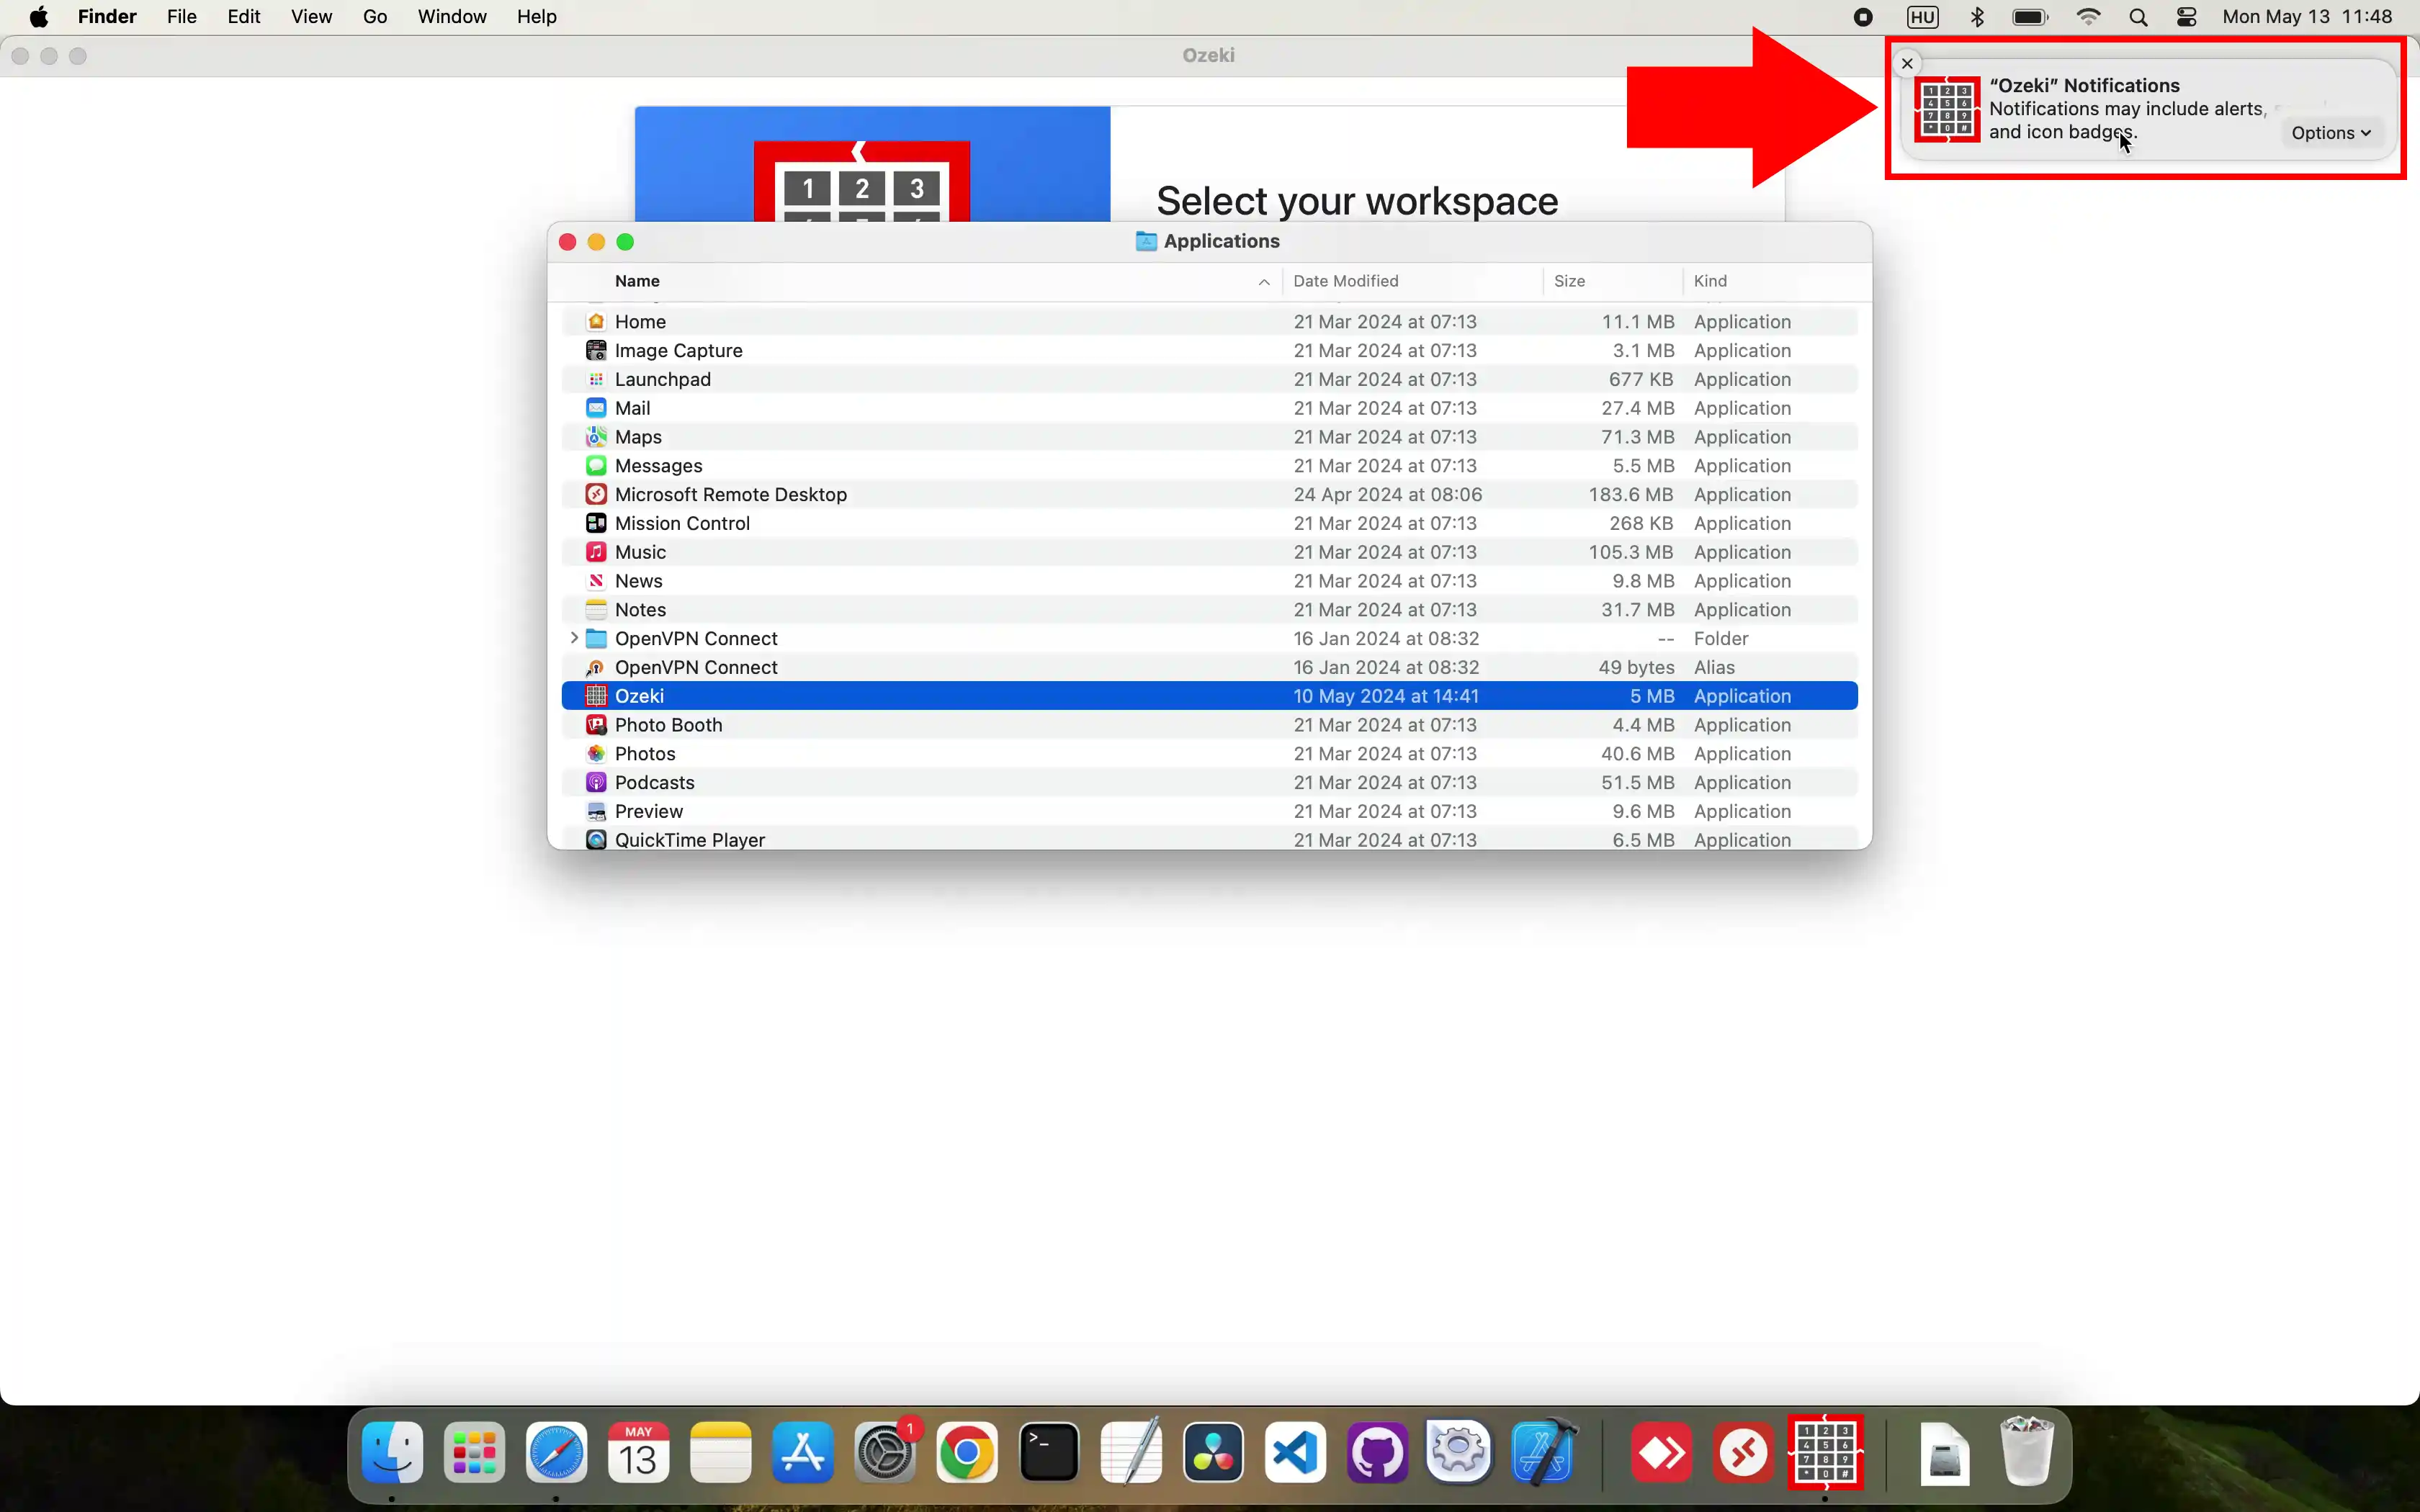
After opening the Ozeki application an "Ozeki" Notifications window will appear in the upper right corner of your screen just like it is shown by the red arrow in Figure 5. You have to enable the notifications so that Ozeki is able to send you notifications. Click on the window to manage notification settings.
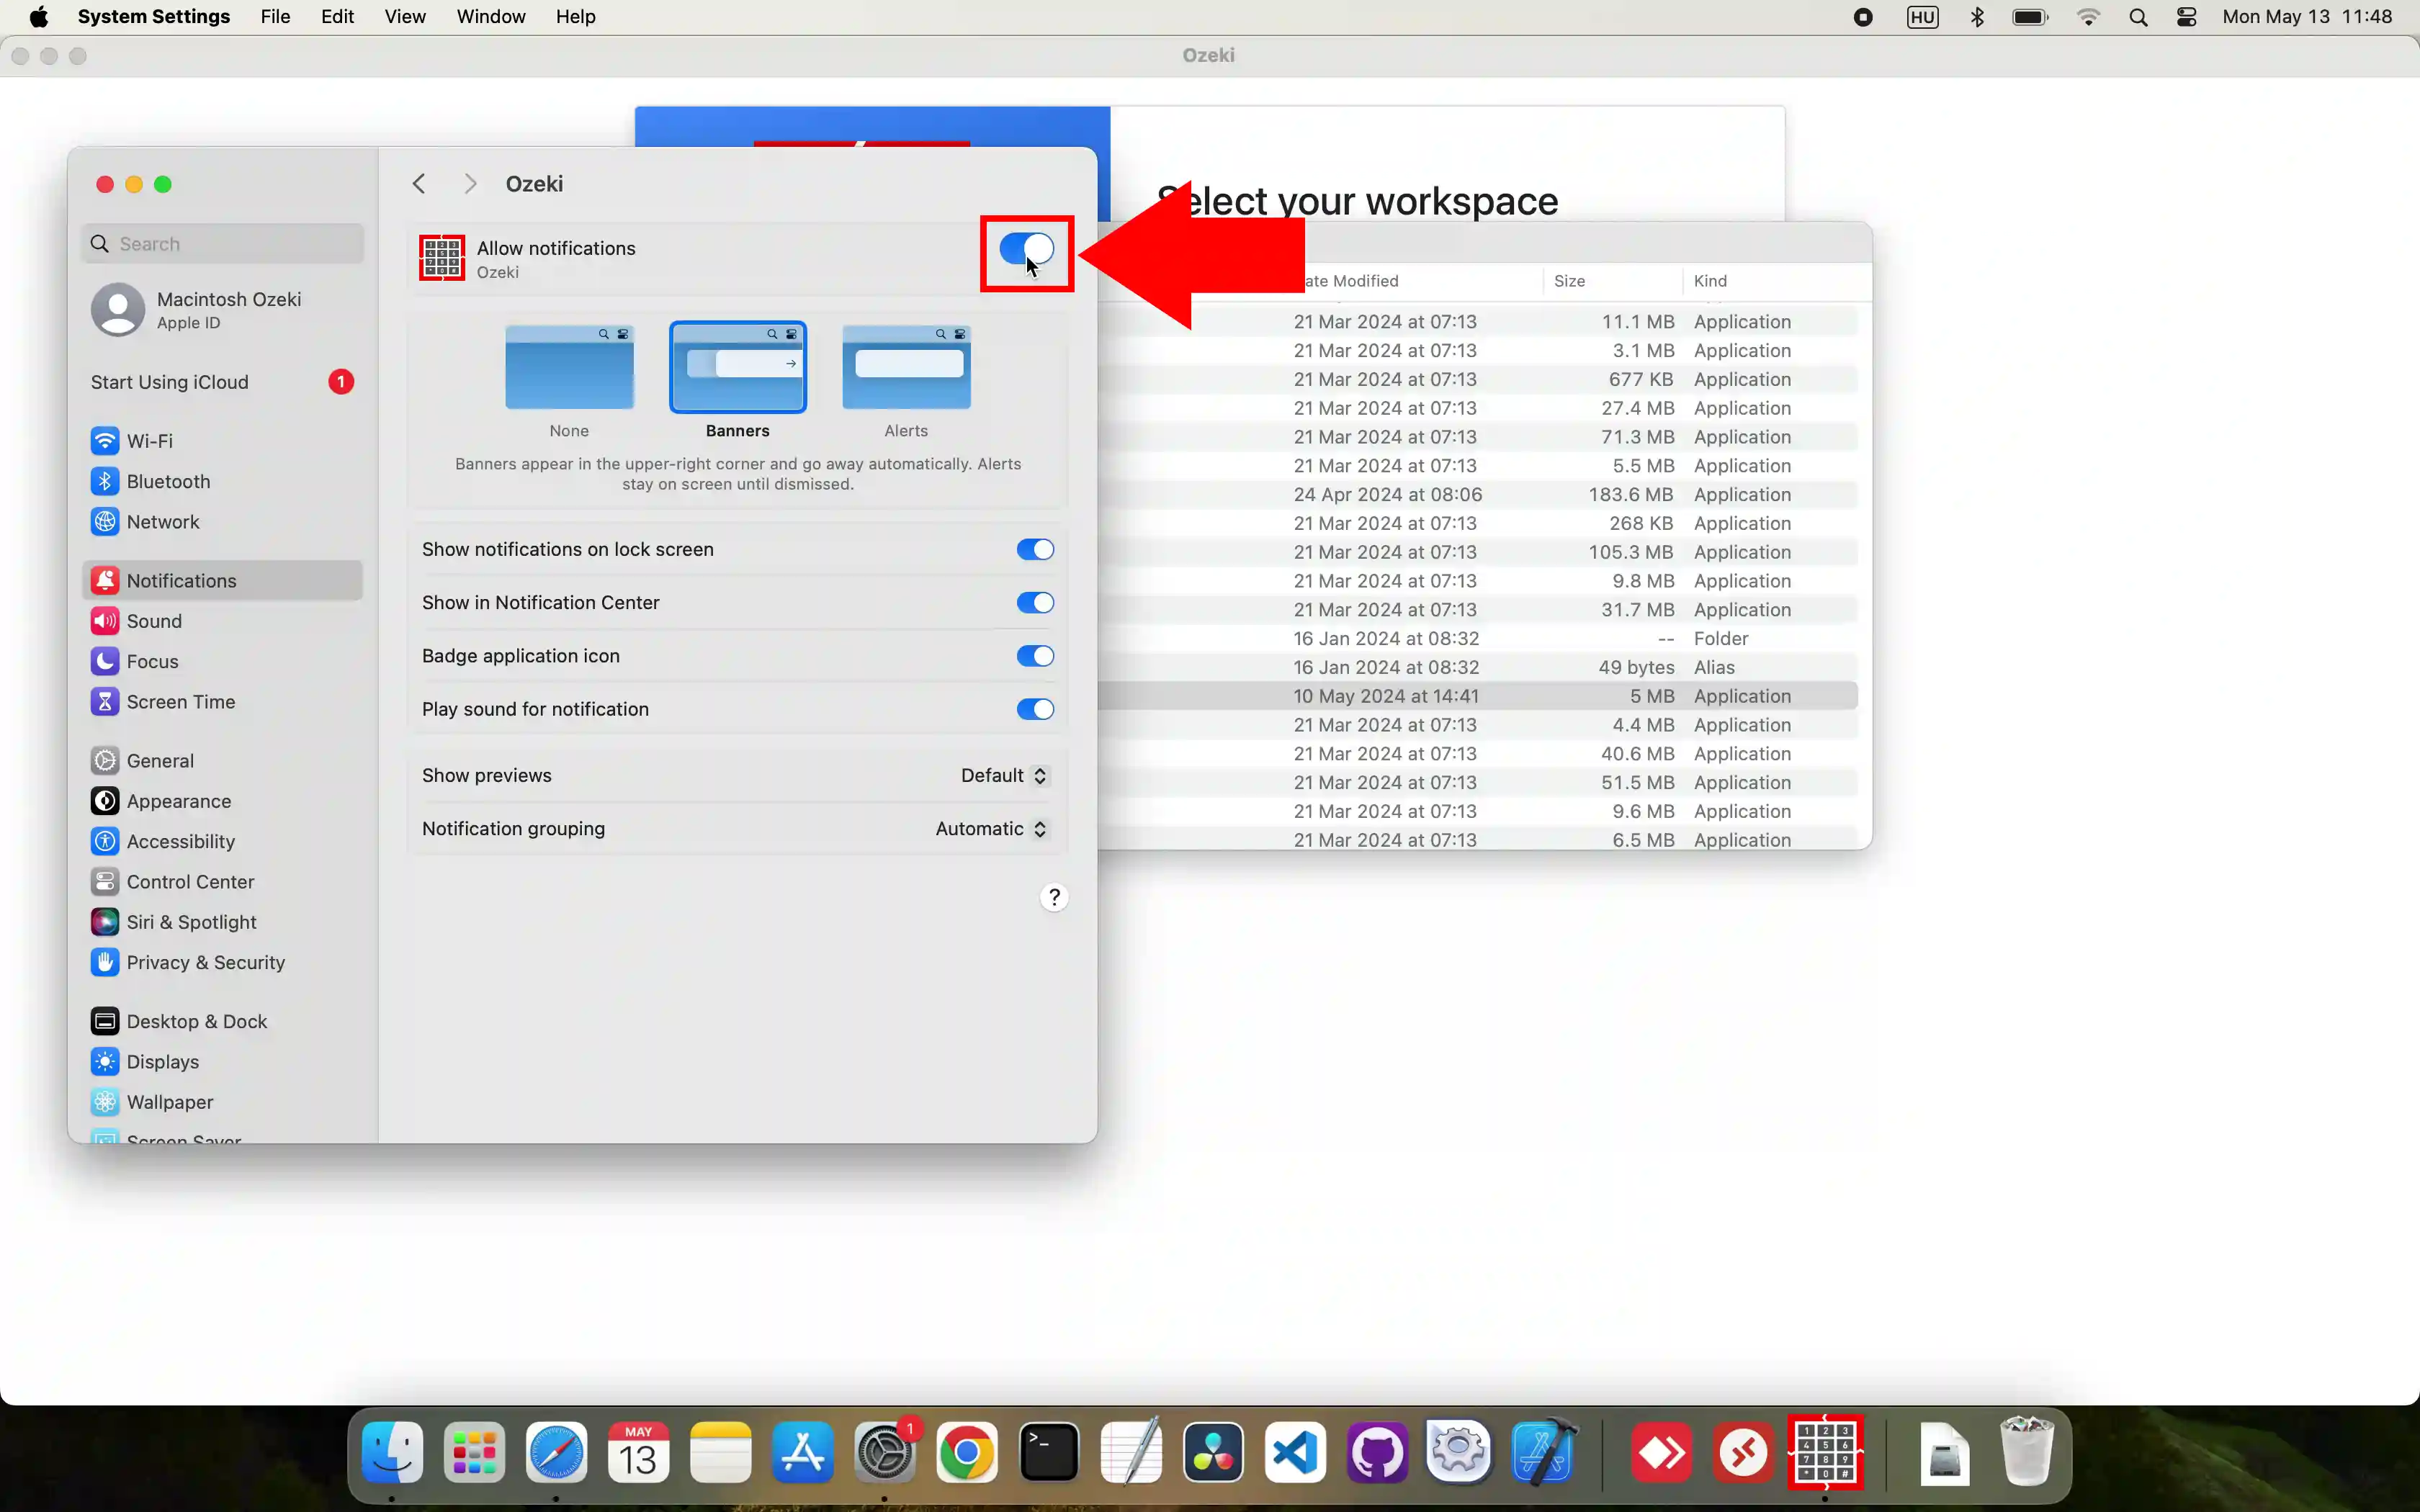
Clicking on the window will open another window where you will have the chance to enable notifications. As you can see in Figure 6 you need to switch the button on to allow notifications for the Ozeki application.
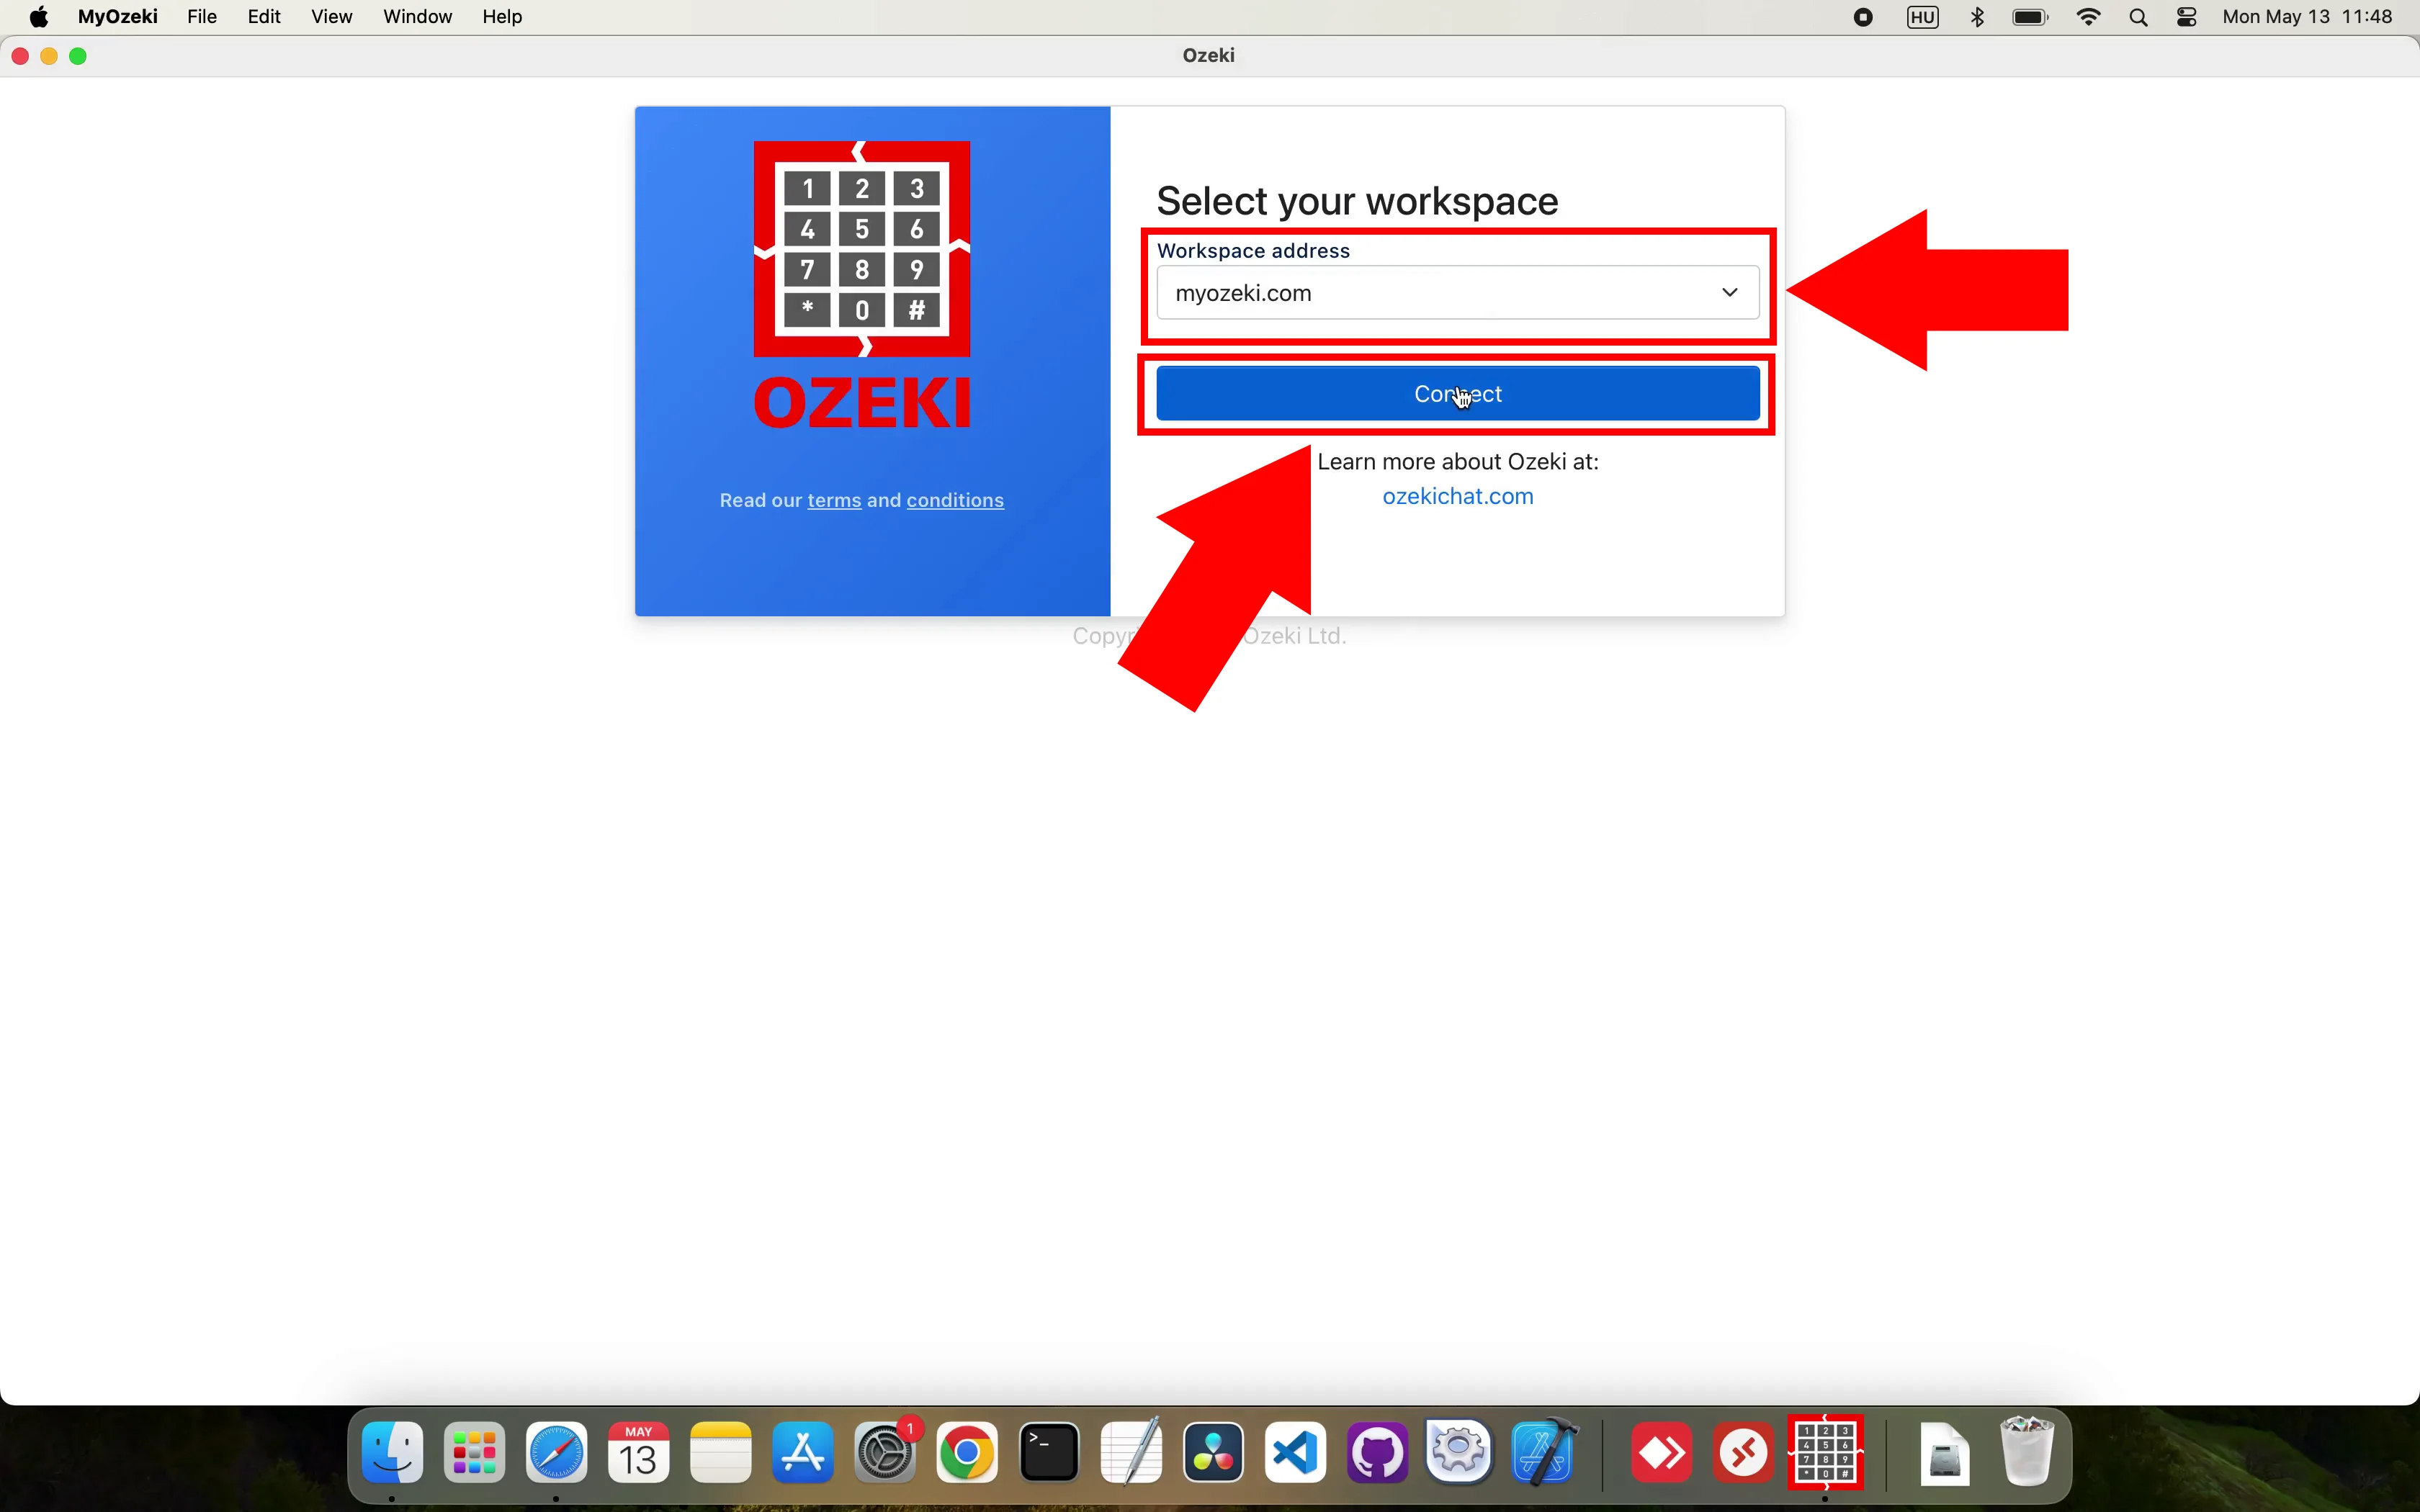
Now that everything is ready to use the Ozeki Chat Client on MacOS, you need to log into your account. As represented in Figure 7, select your workspace from the drop-down list and click on 'Connect'.
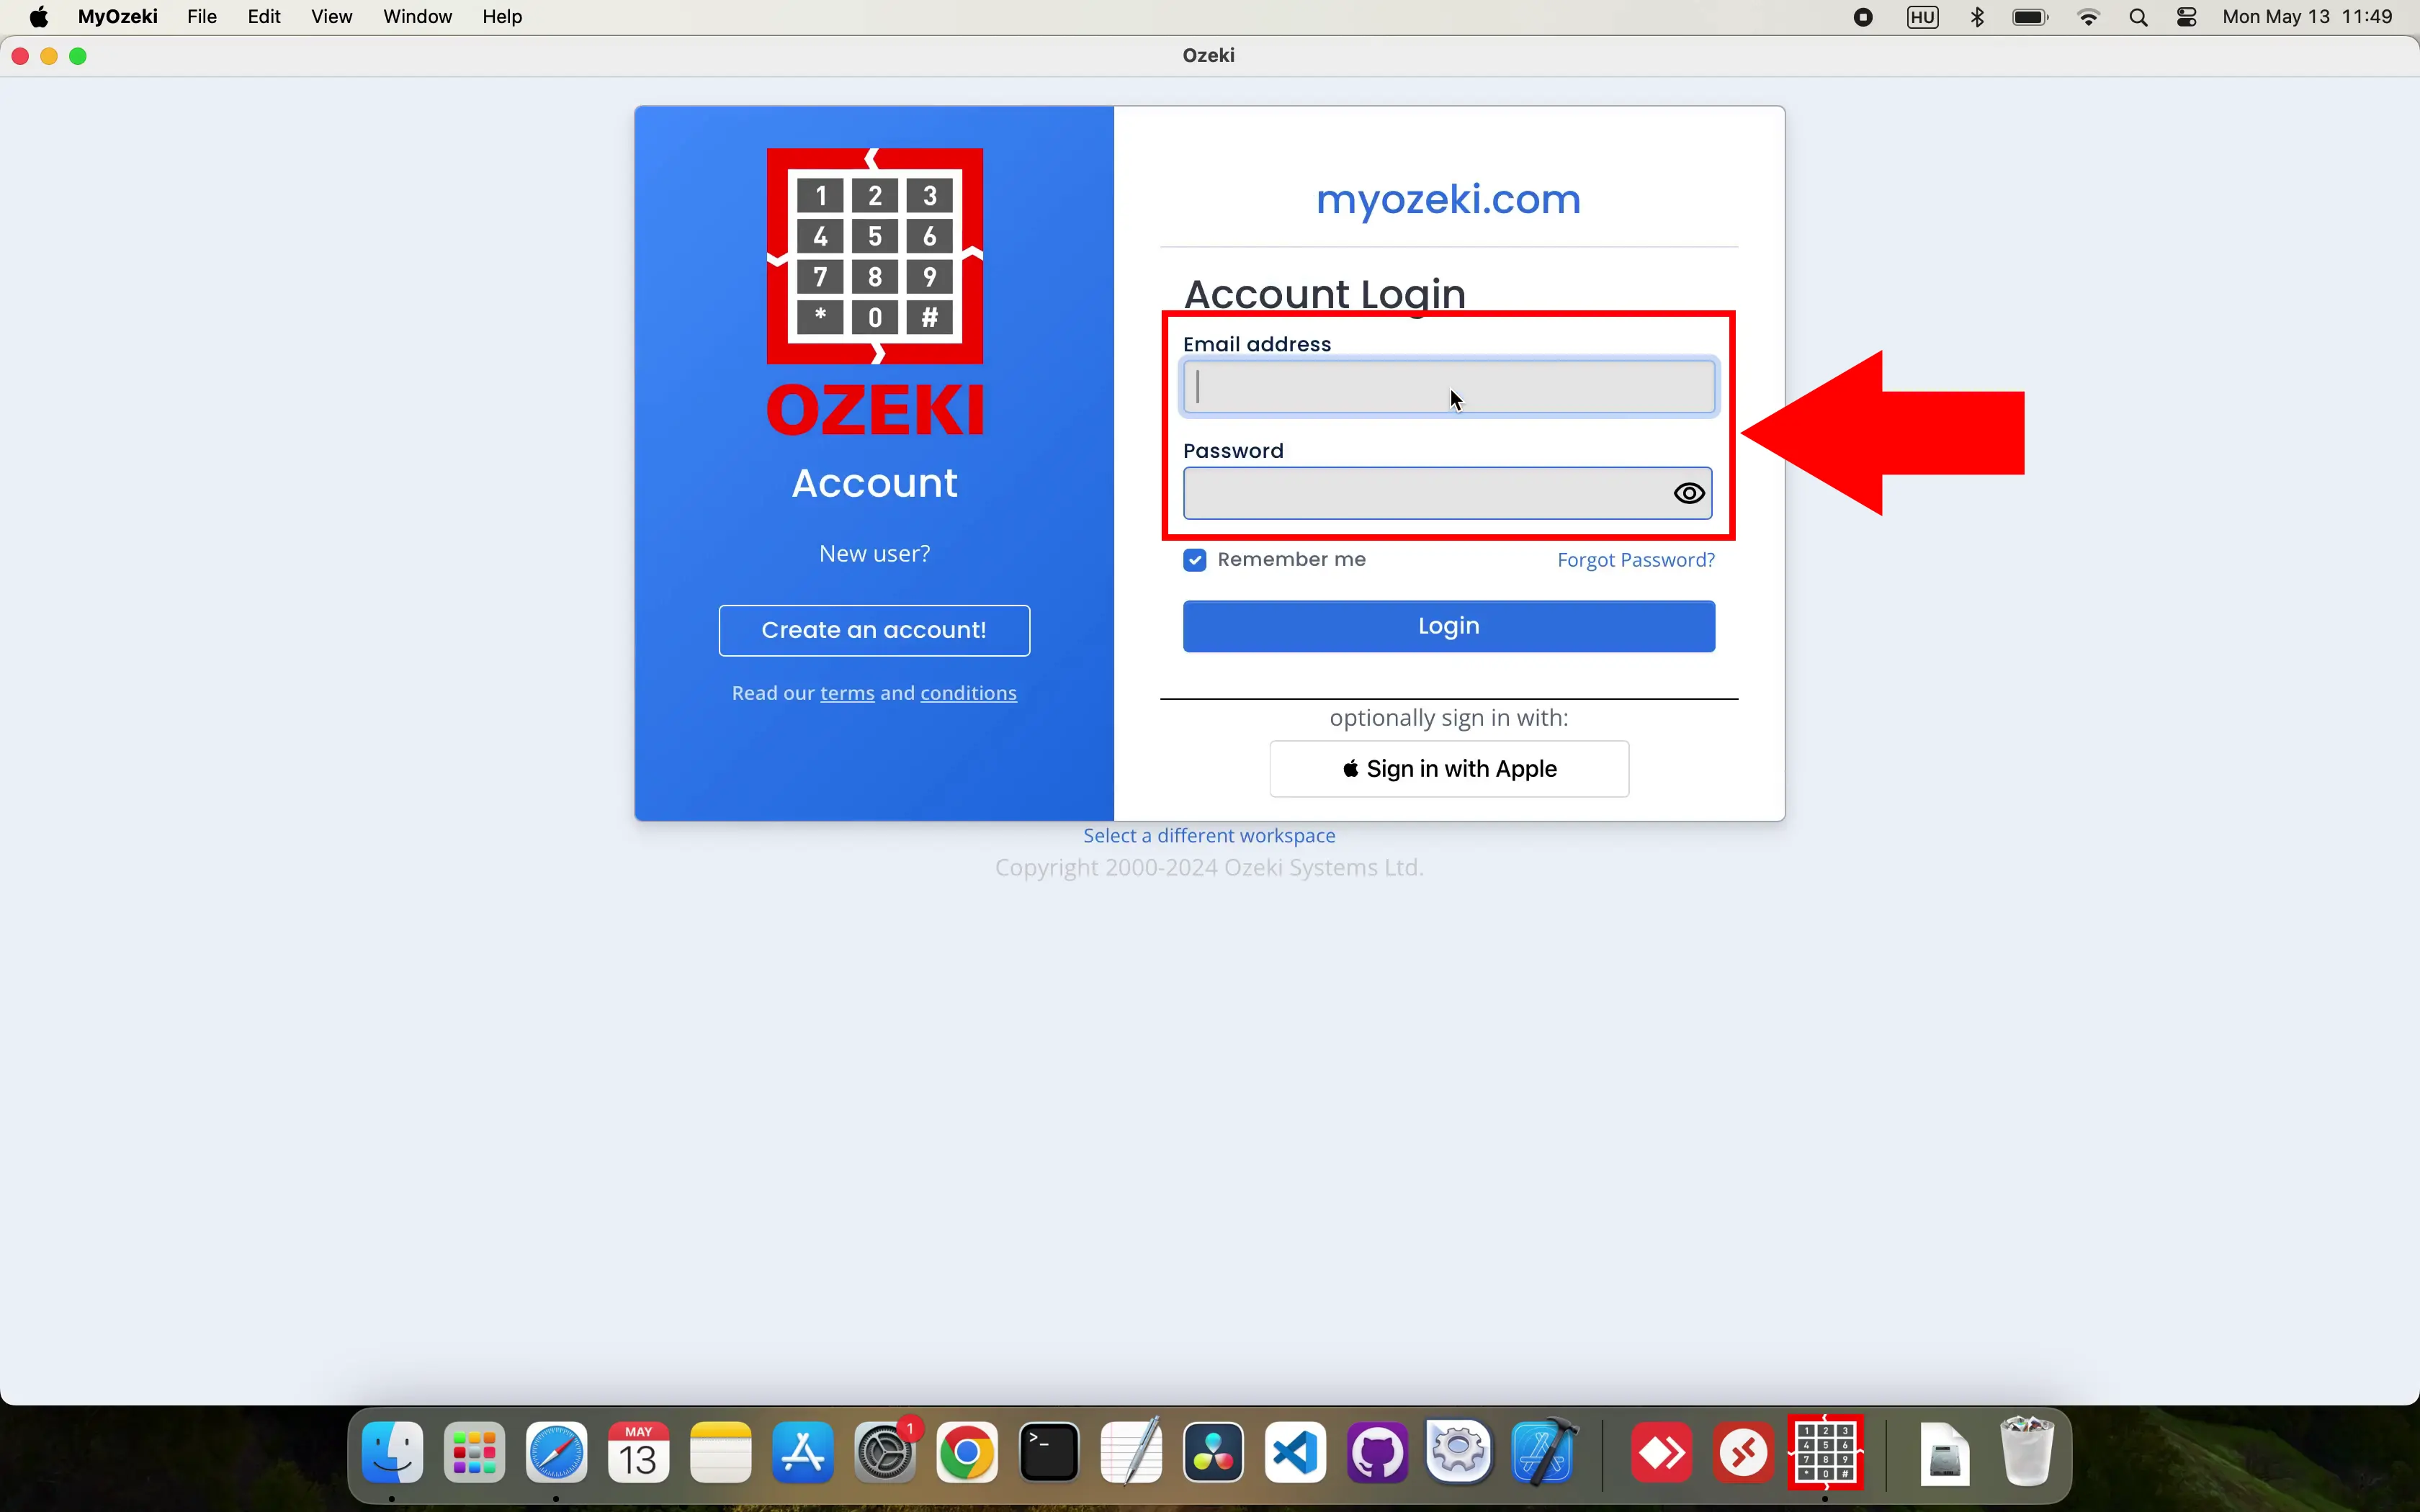
After connecting your workspace you can start the logging in process to the myozeki system. As you can see in Figure 8 you will be required to enter your E-mail address and password connected to the workspace you have previously selected. You also have the opportunity to choose the option 'Remember me' to make the login process easier for next time.
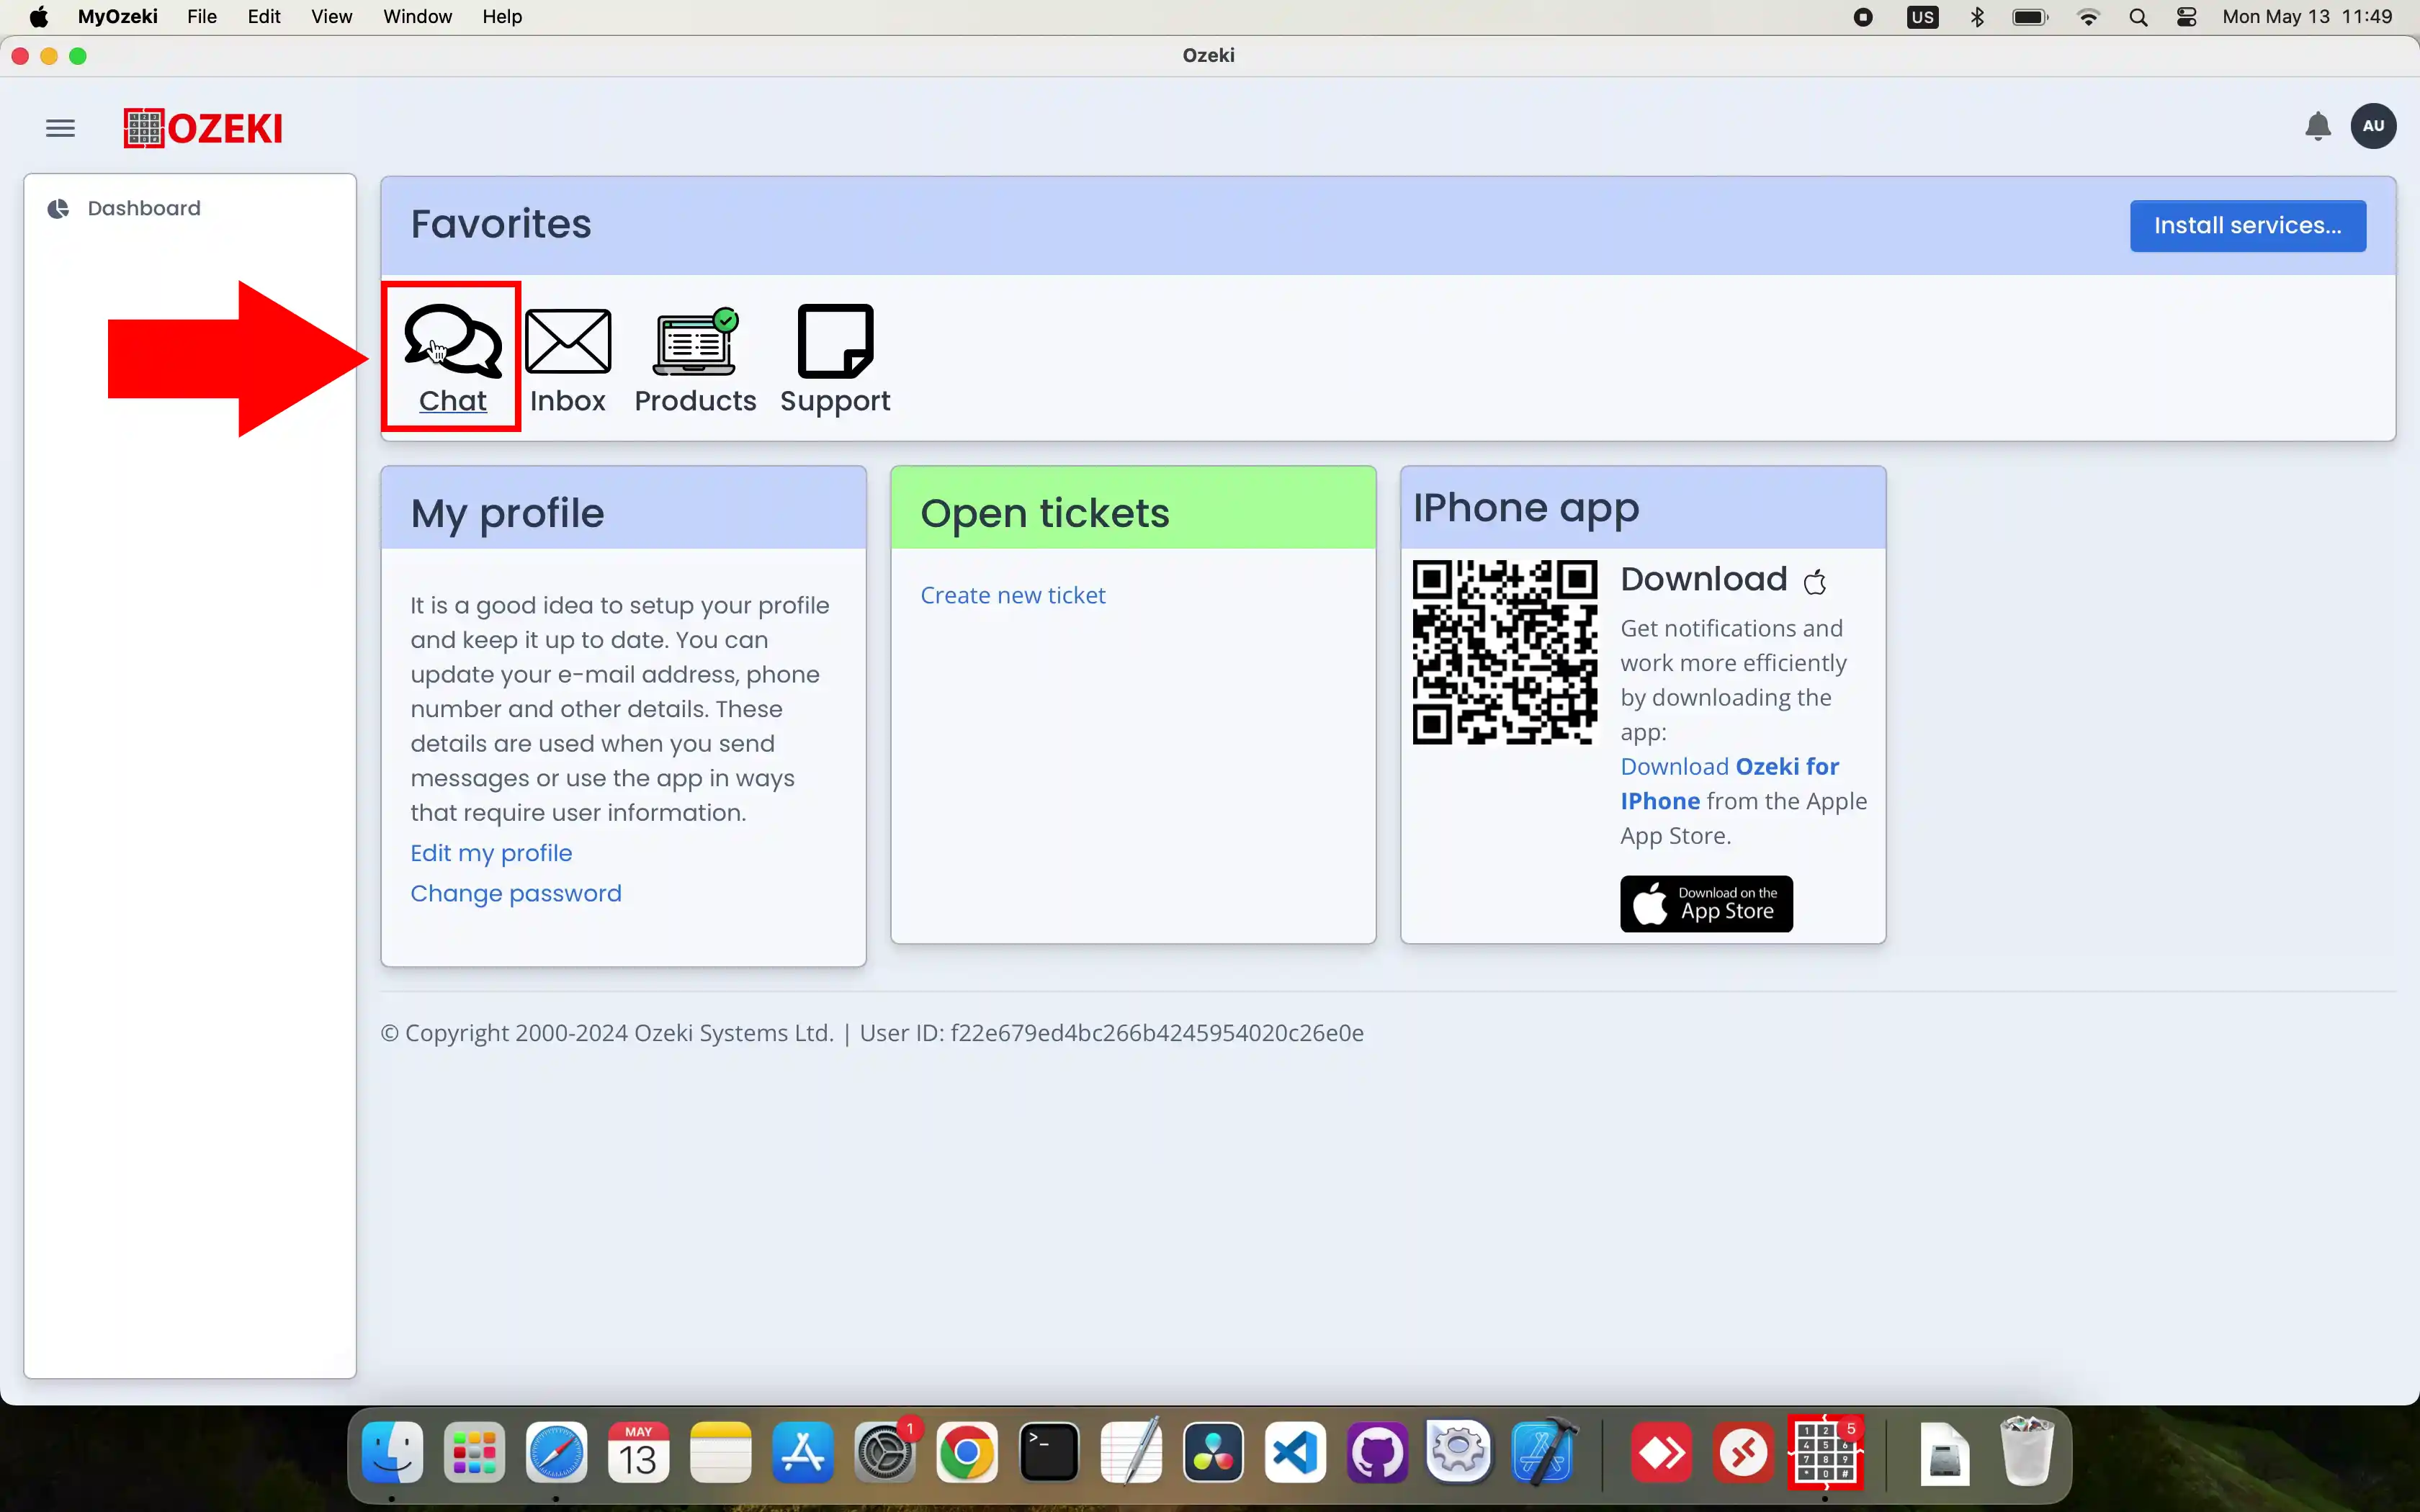
Once you are successfully logged into your myozeki account, you have to open the chat. Do this by clicking on its icon as shown by the red arrow in Figure 9.
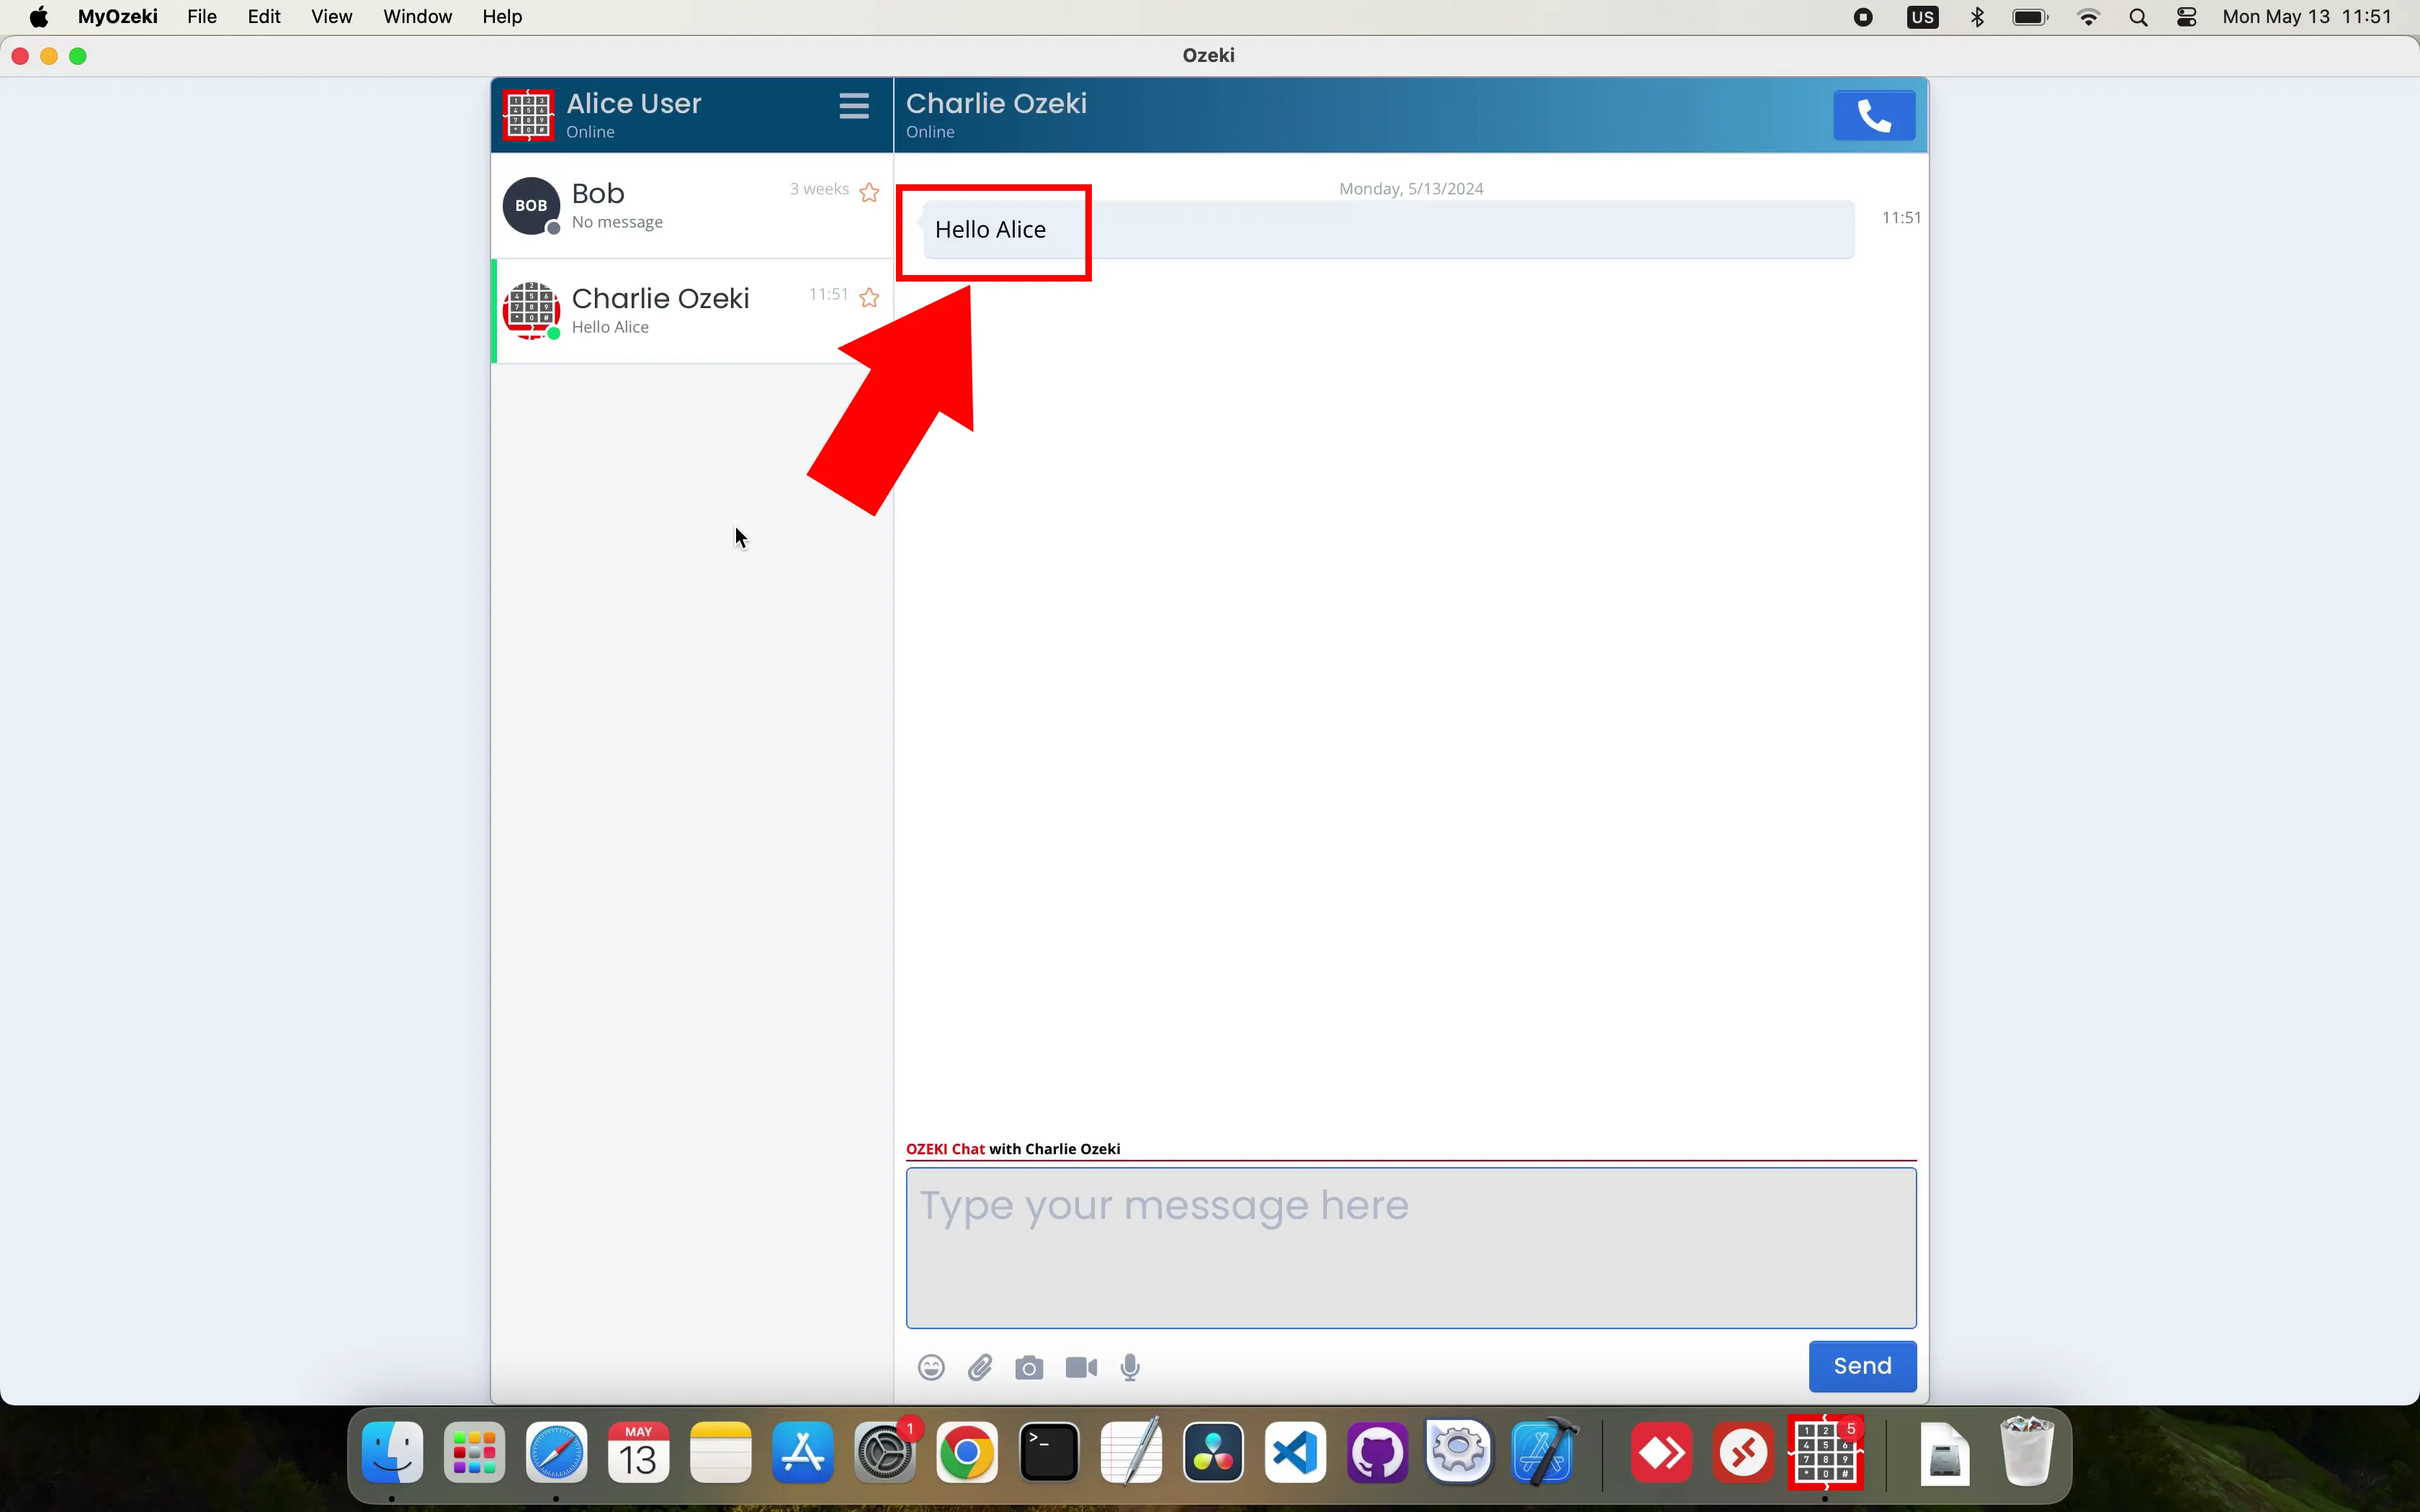
After opening the chat you will see that you receive chat messages without any problem just like it is shown in Figure 10.
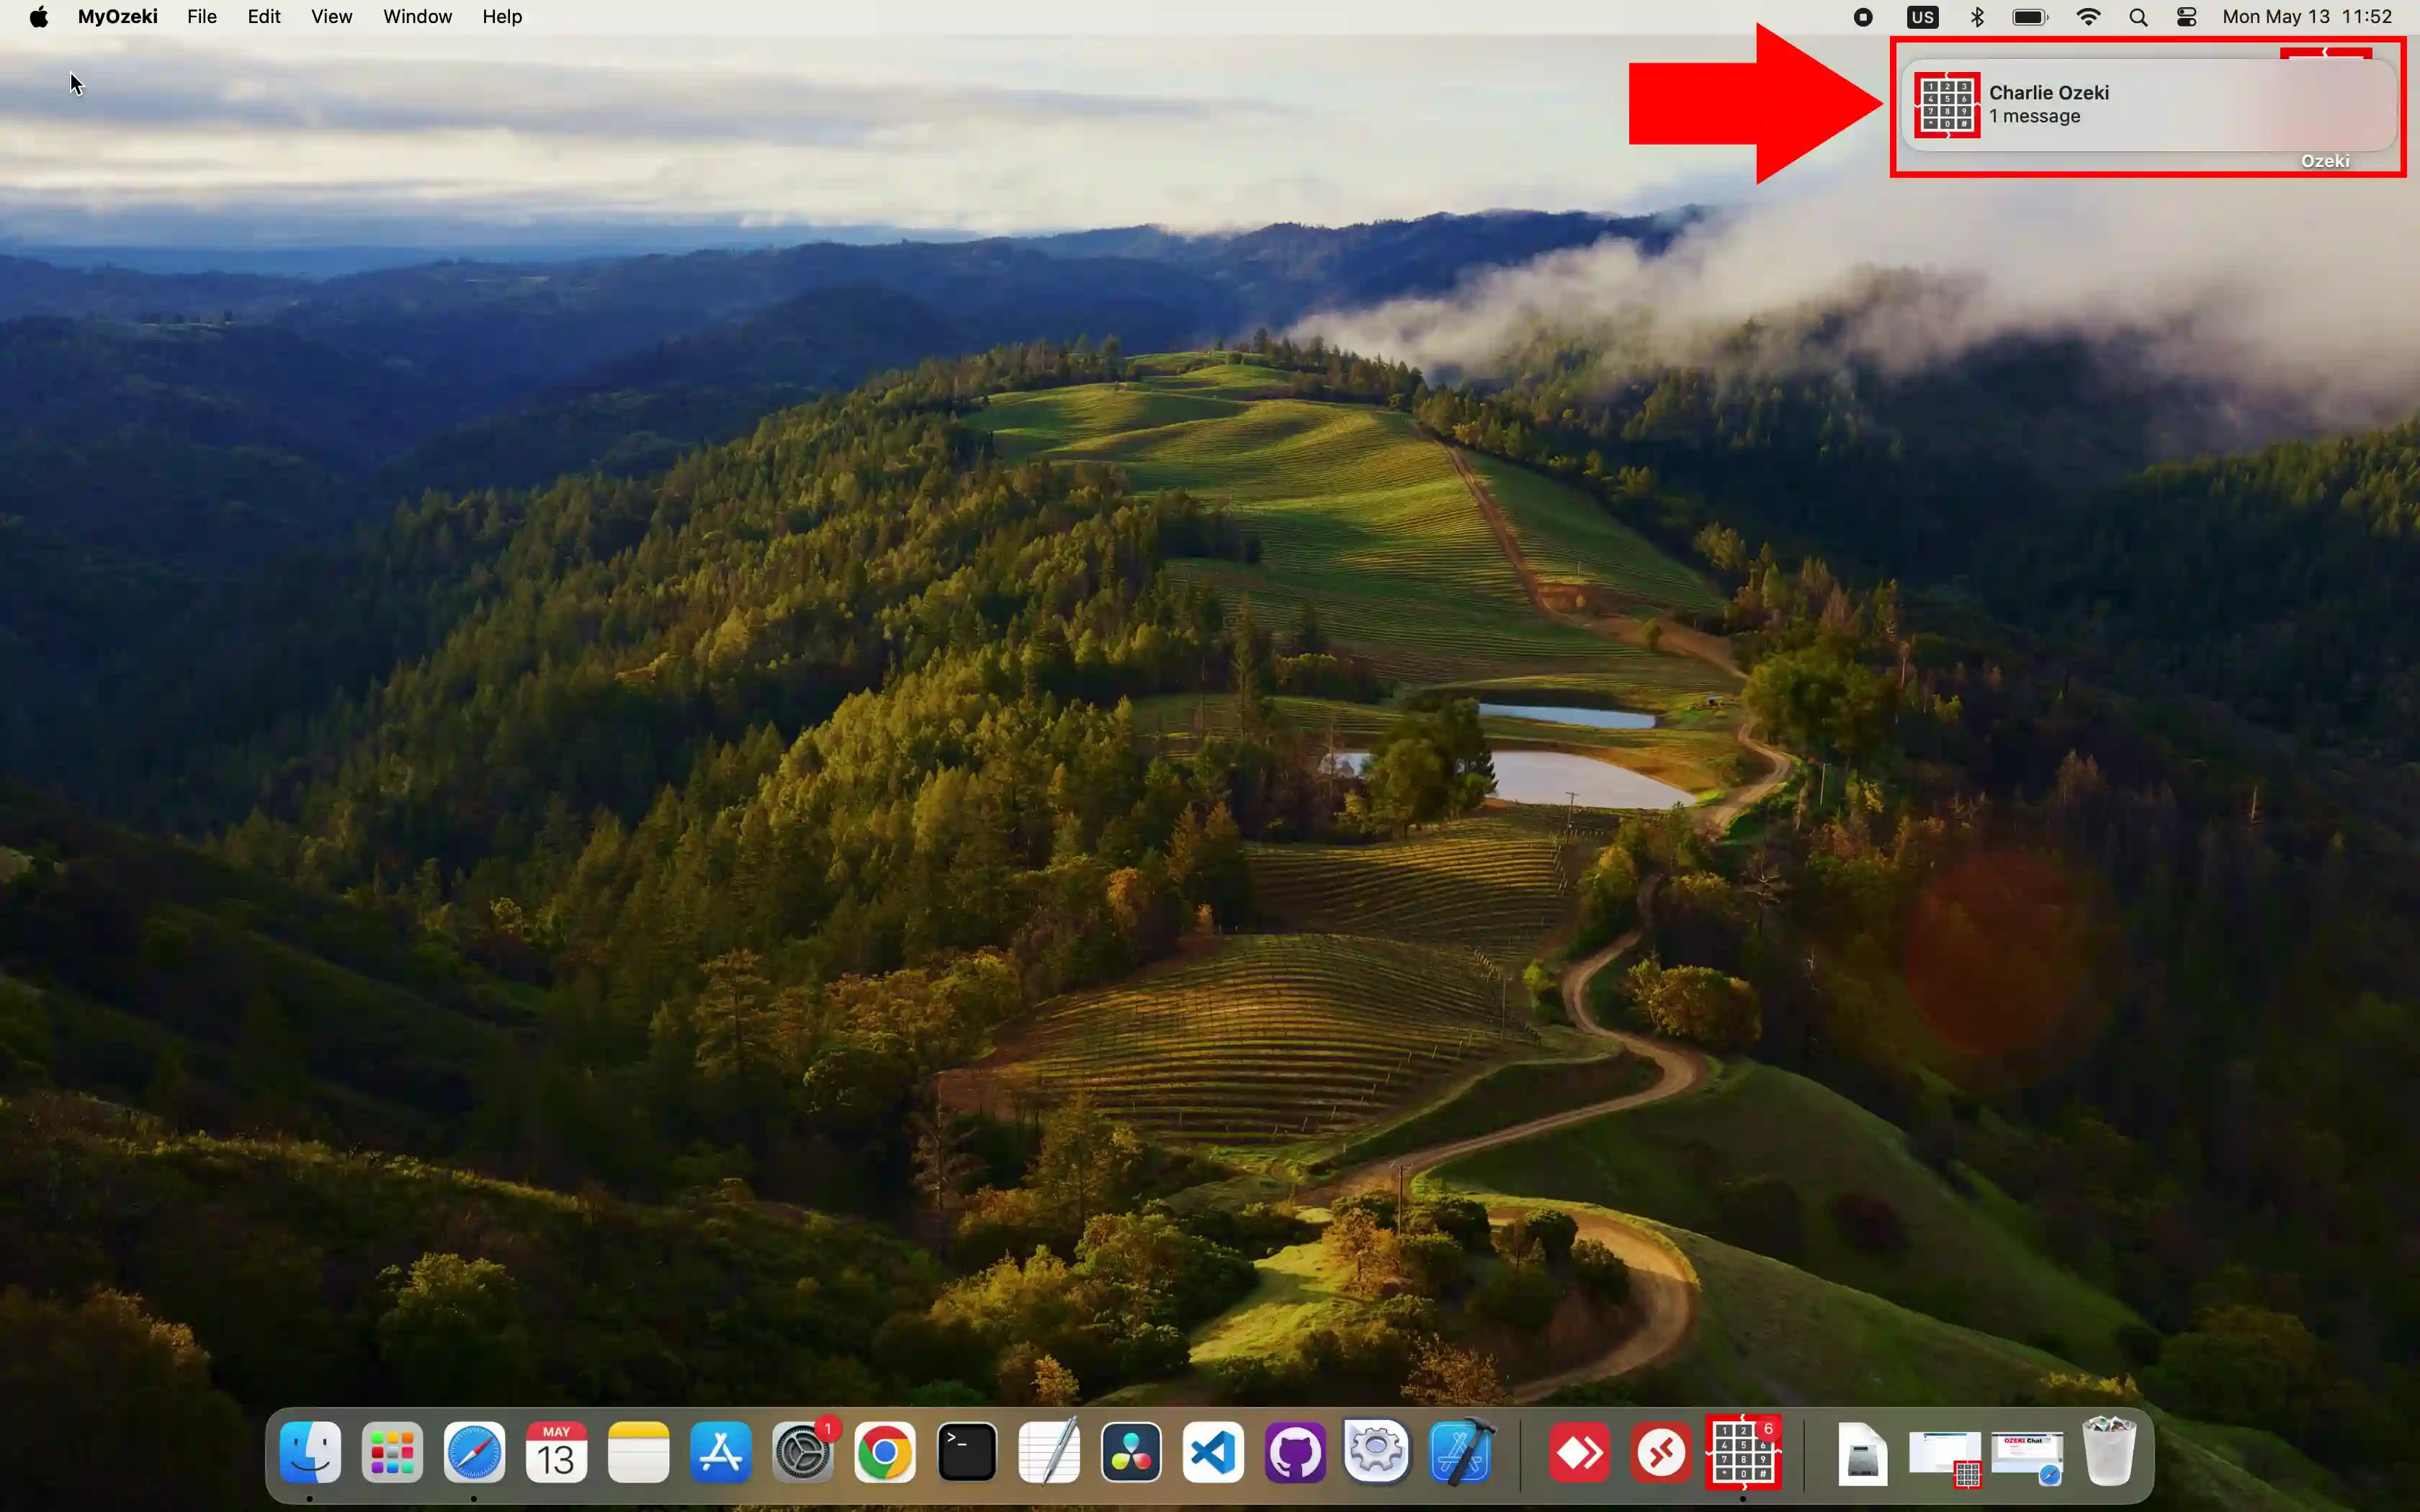
You will also see that if you leave the Ozeki application without logging out of it, you will receive notification messages the way it is shown in Figure 11. This way you will know if someone has messaged you on the chat without constantly having it open.
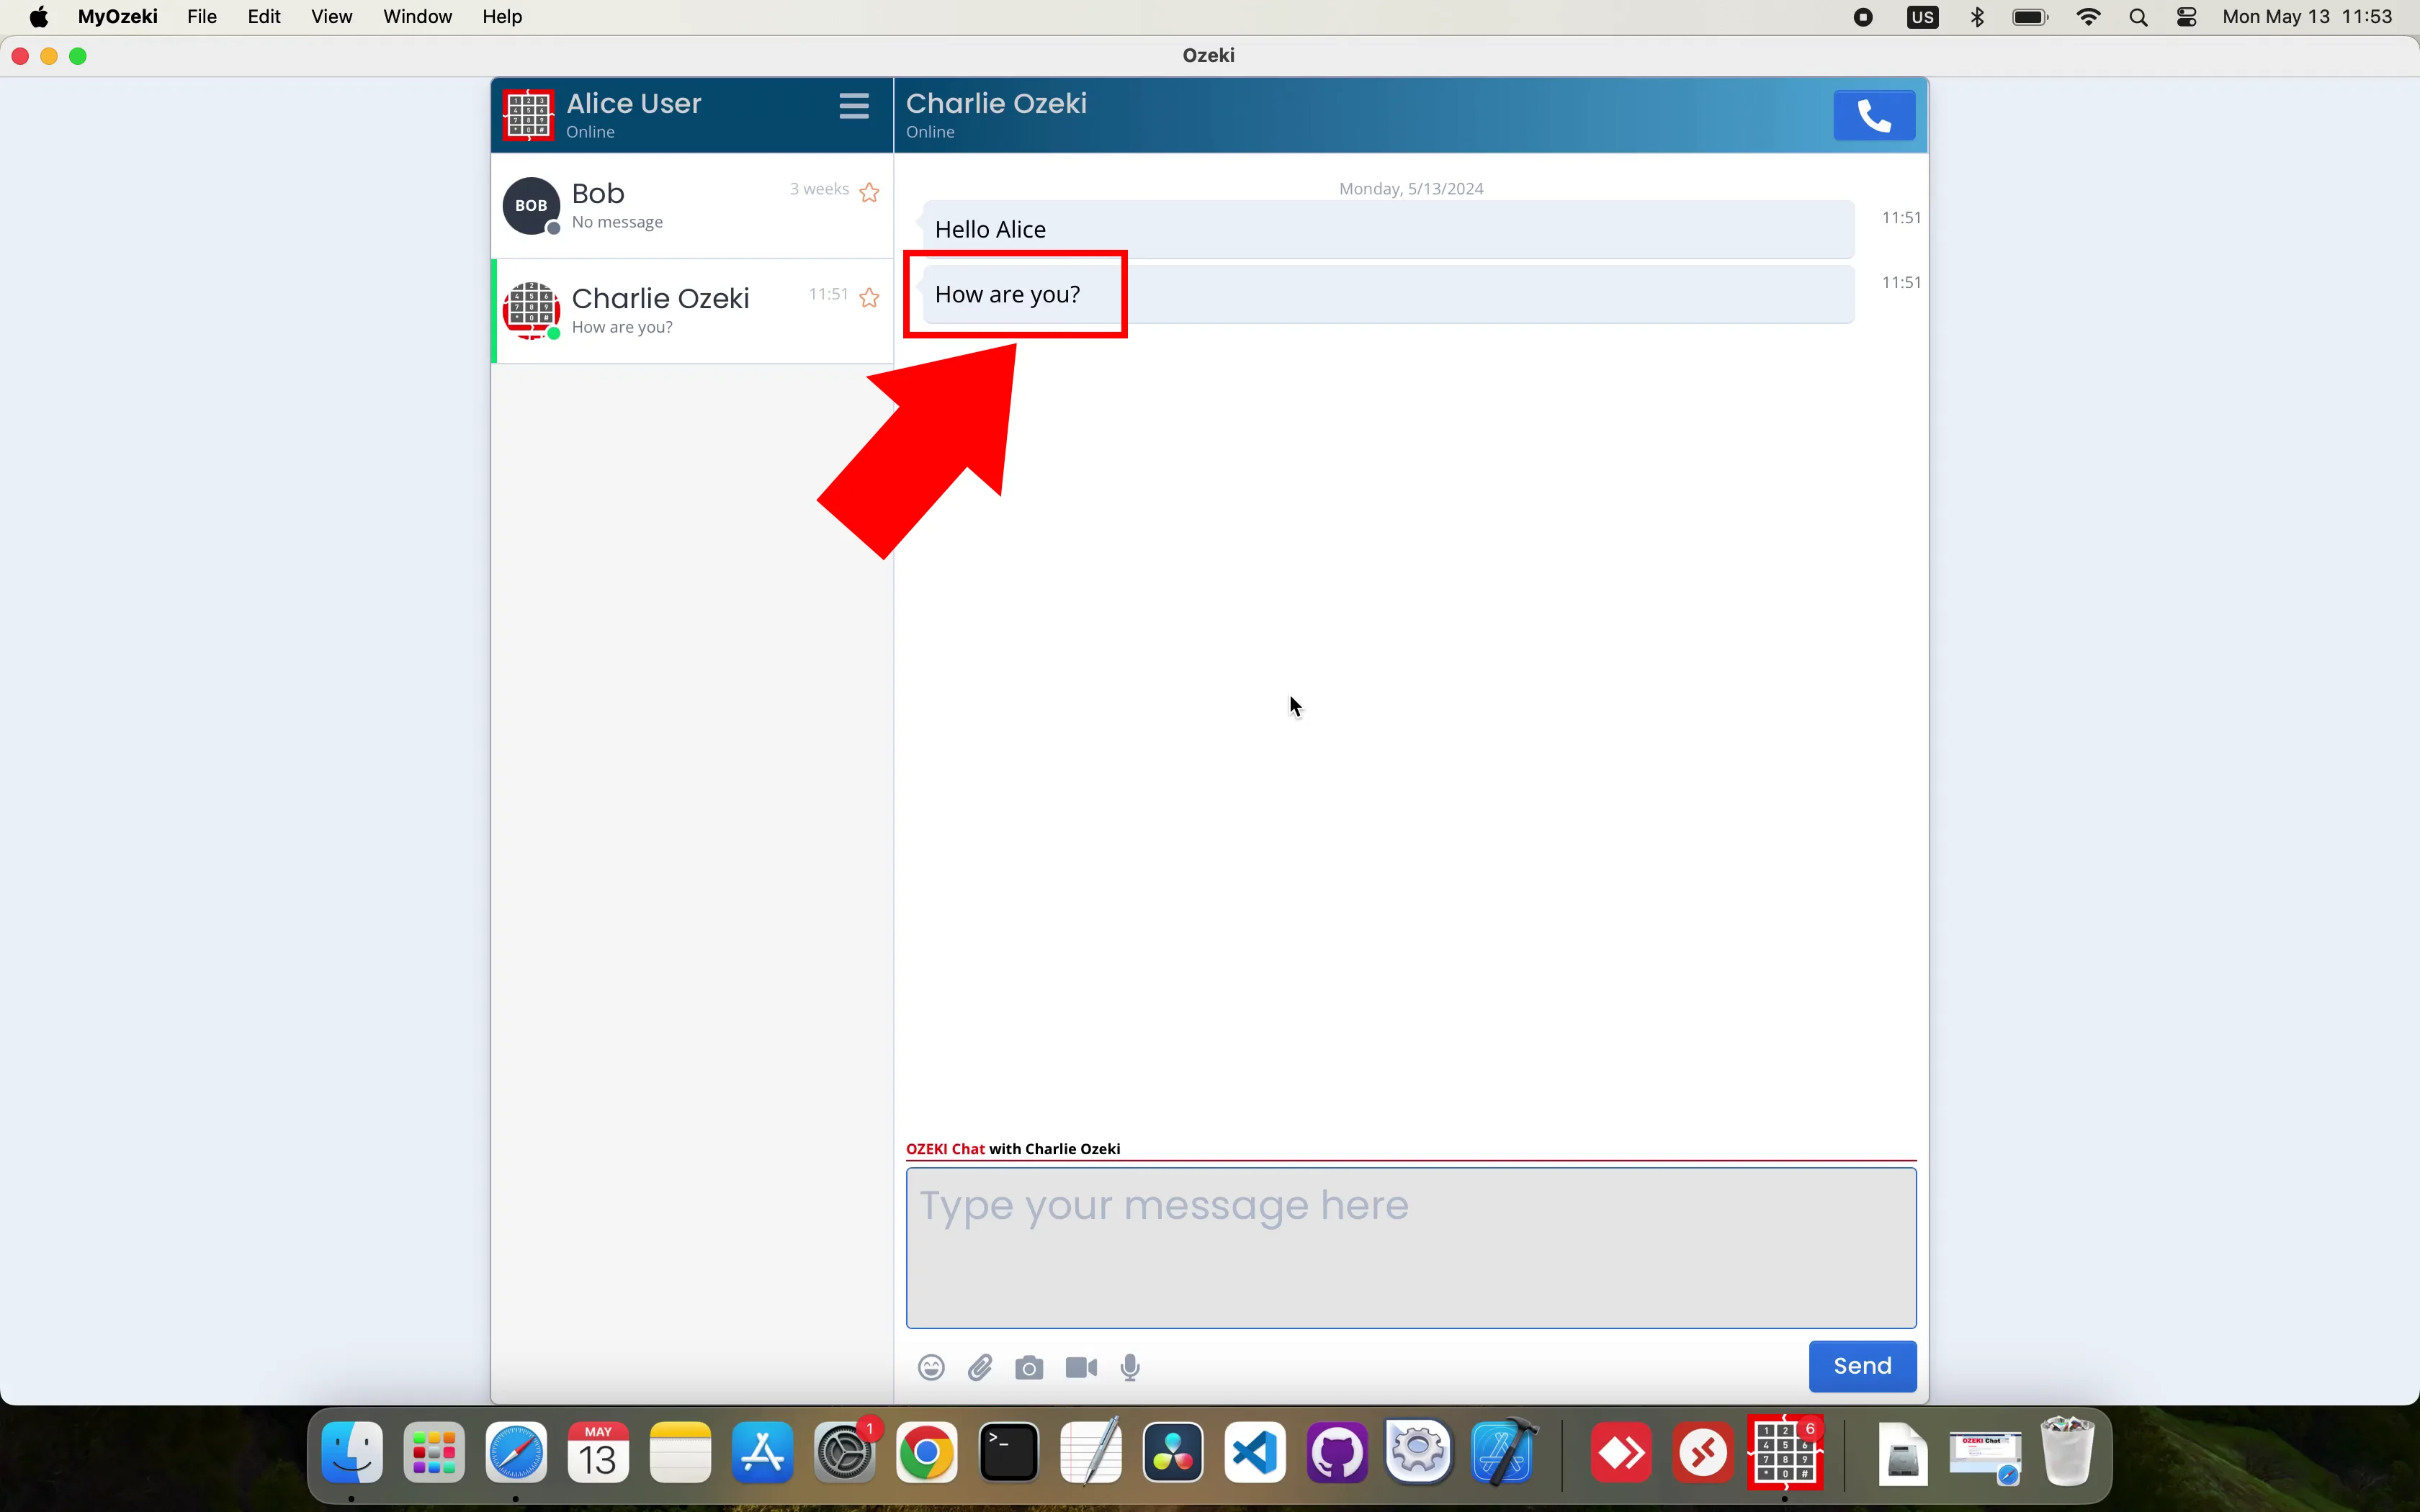
As in Figure 12, if you open the chat again, you will see that you have indeed received a chat message.
Frequently Asked Questions (FAQs)
Is Ozeki Chat Client free to download and install?
Yes, Ozeki Chat Client is free to download and install on MacOS or any other operating system from the official Ozeki website.
Can I uninstall Ozeki Chat Client from my MacOS if I no longer need it?
Yes, you can uninstall Ozeki Chat Client from your MacOS if you no longer need it. Simply locate the application, drag its icon to the Trash, and then empty the Trash to permanently remove it from your system.
Summary
Understanding how to install the Ozeki Chat Client on MacOS is essential to fully experience all that Ozeki has to offer. By mastering this installation process, you ensure that your Ozeki experience is seamless and comprehensive. With the Ozeki Chat Client installed, you can enjoy effective, secure, and private communication, enriching your overall messaging experience.

