How to Restore your Ozeki Chat System from Backup
The following article is all about teaching you to restore a previous state of Ozeki Chat Server using a backup file. It will about 5 minutes to read through and follow along. In order to be successful, you need to have an already created backup file and know your way around Windows's built-in file manager. Look no further to restore those corrupt files - let's get started!
What does "backing up" mean in this context?
A backup a copy of your important data, like documents or system settings, that is stored separately from the original. This way, if your system/server crashes or your files get corrupted, you can restore them from the backup and get back on track.
And what does "restoring" mean?
Restoring means using the aformentioned safety copy of your files and restoring your system/server to its original, usable state. It is essentially a way to undo data disasters and get your information working again.
Video tutorial: Restoring Ozeki Chat Server from backup
This video will teach you the entire process of restoring your Ozeki Chat Server from a backup. Ozeki Chat is known for its reliability, but having a backup plan is an extra layer of security, and this guide shows every step necessary from stopping the Ozeki service to overwriting the corrupt data to restarting the service all in a little more than 120 seconds.
Restoring Ozeki Chat Server from backup (quick steps)
- Open Windows Services
- Select Ozeki service from the Services list
- Click Stop the service on the left
- Delete the Ozeki Data folder from Program Files
- Extract Data.zip file by select Extract all from context menu
- Move the extracted Data folder to the Ozeki folder
- Start the Ozeki service in Windows Services
- Check the restored configuration in Ozeki Chat Server
Restoring Ozeki Chat Server from backup (detailed tutorial)
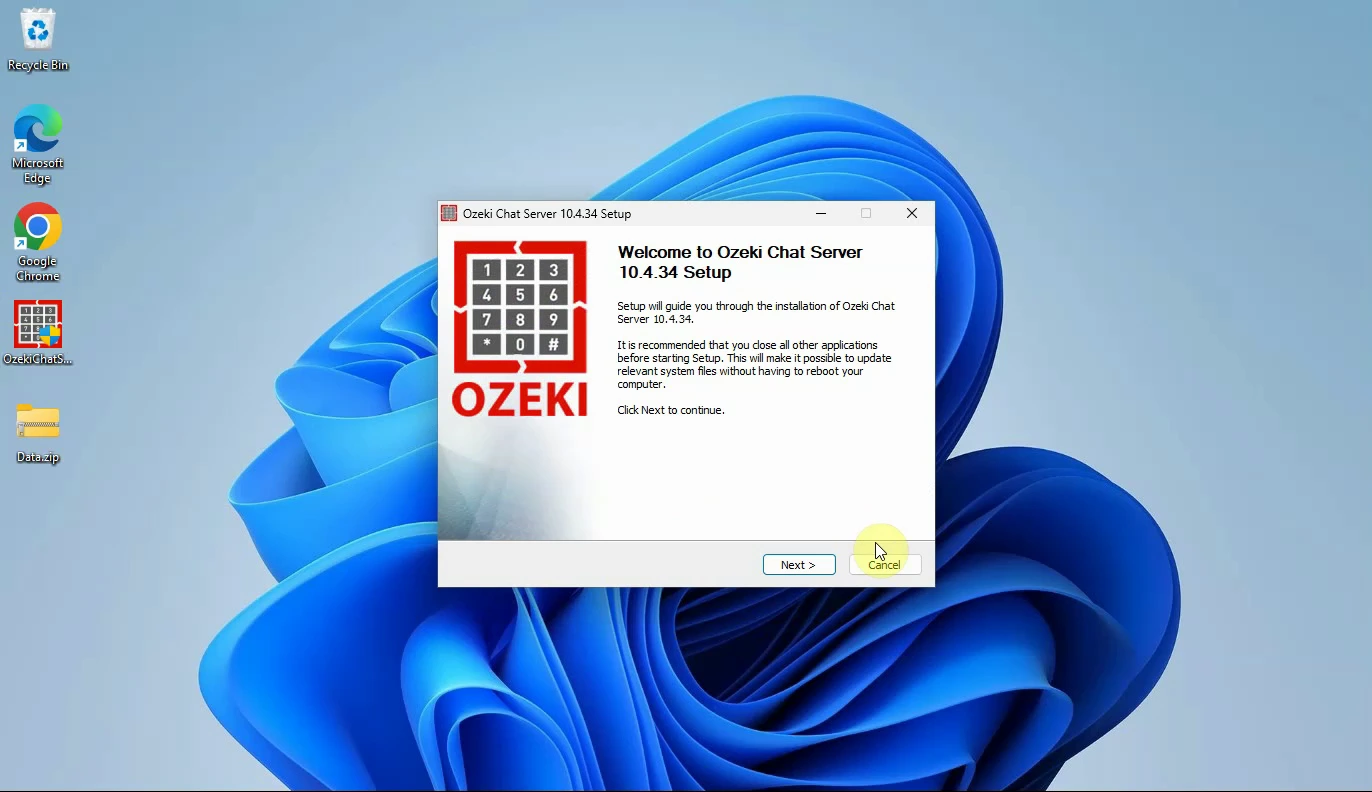
The first step is to install the Ozeki software on your PC, as seen in Figure 1. You can find a detailed installation guide in the Ozeki Chat Server Offline Installation page.
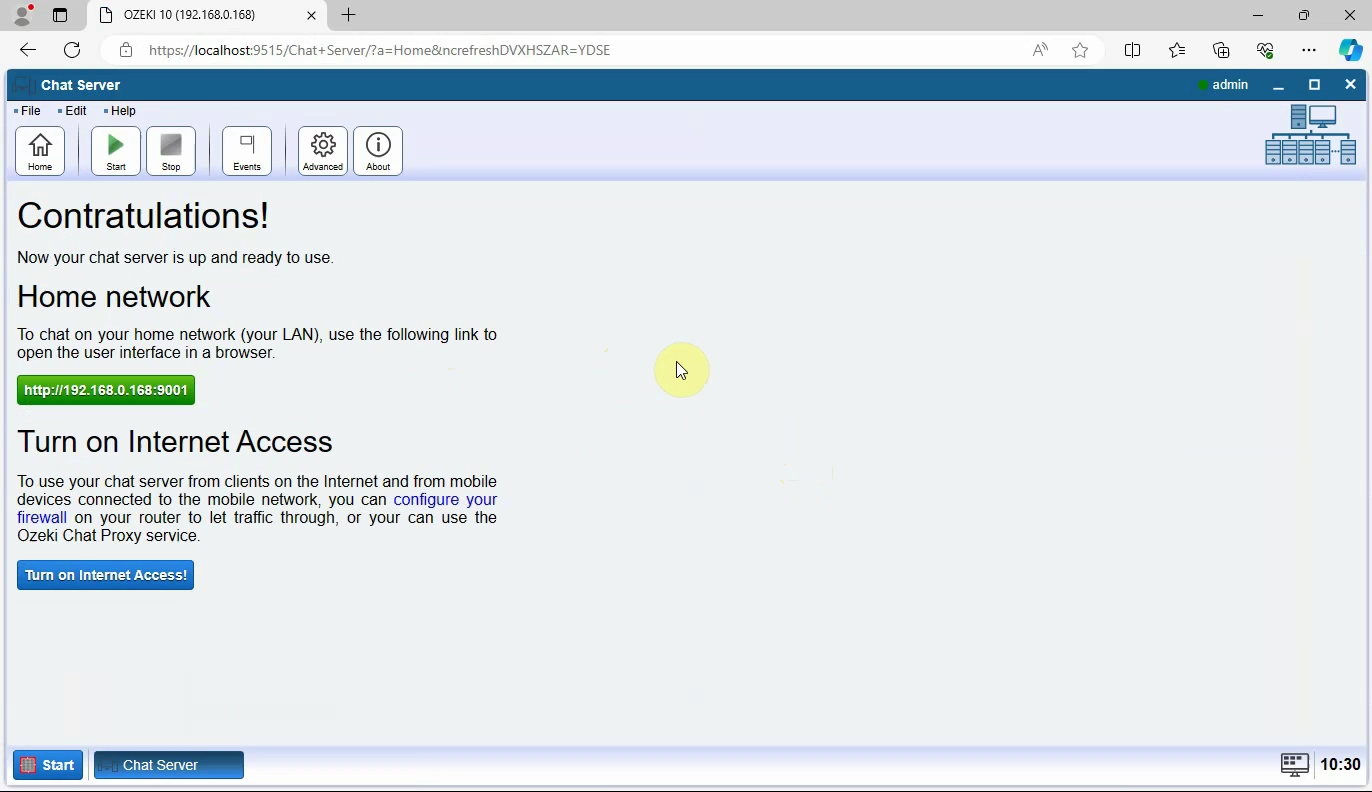
After the installation you can see that the Ozeki Chat Server has no configuration yet, similarly to Figure 2.
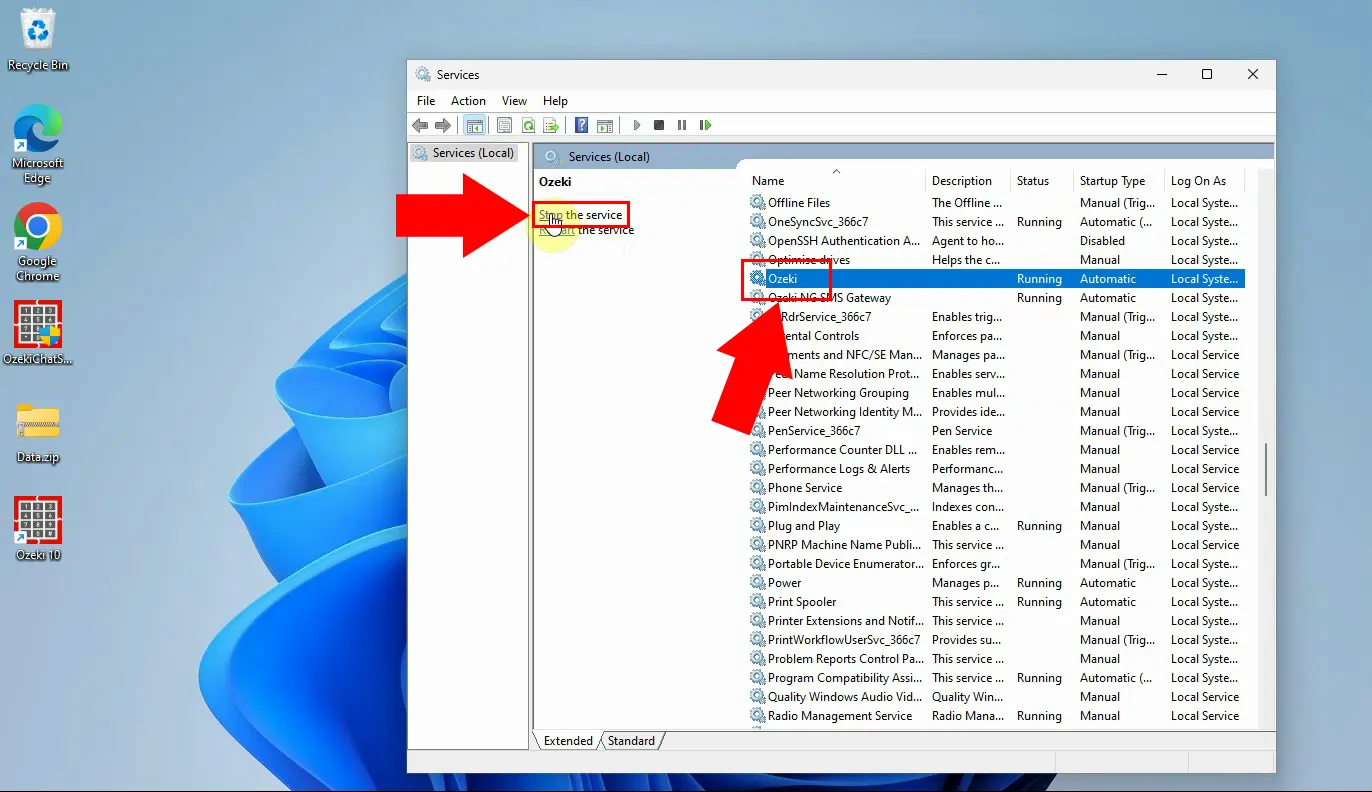
To restore the configuration you need to stop the Ozeki service under the services.msc. Select the Ozeki service from the list and click Stop on the left side, highlighted in Figure 3.
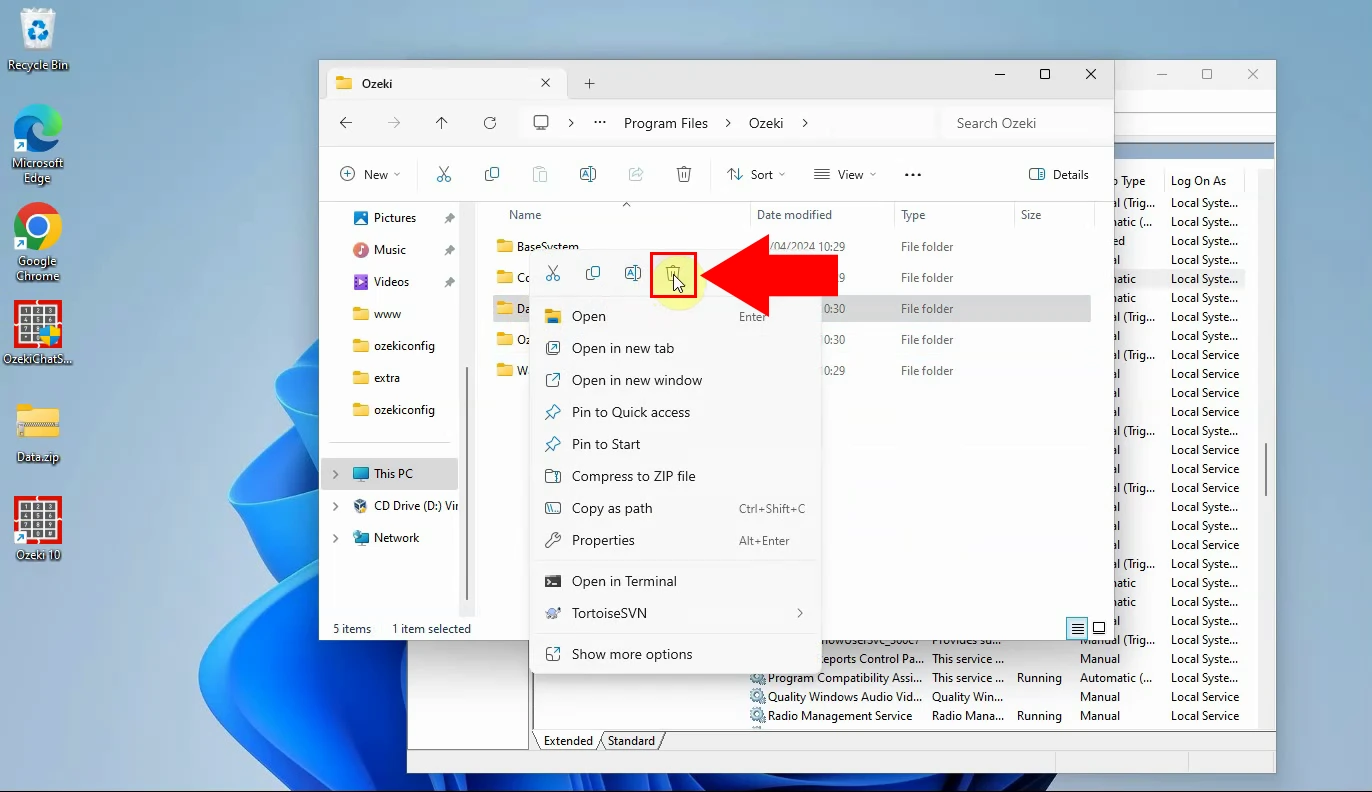
Now delete the existing data folder. This folder can be found at C:\Program Files\Ozeki\Data (Figure 4). This is the default config that came with the Ozeki installation package.
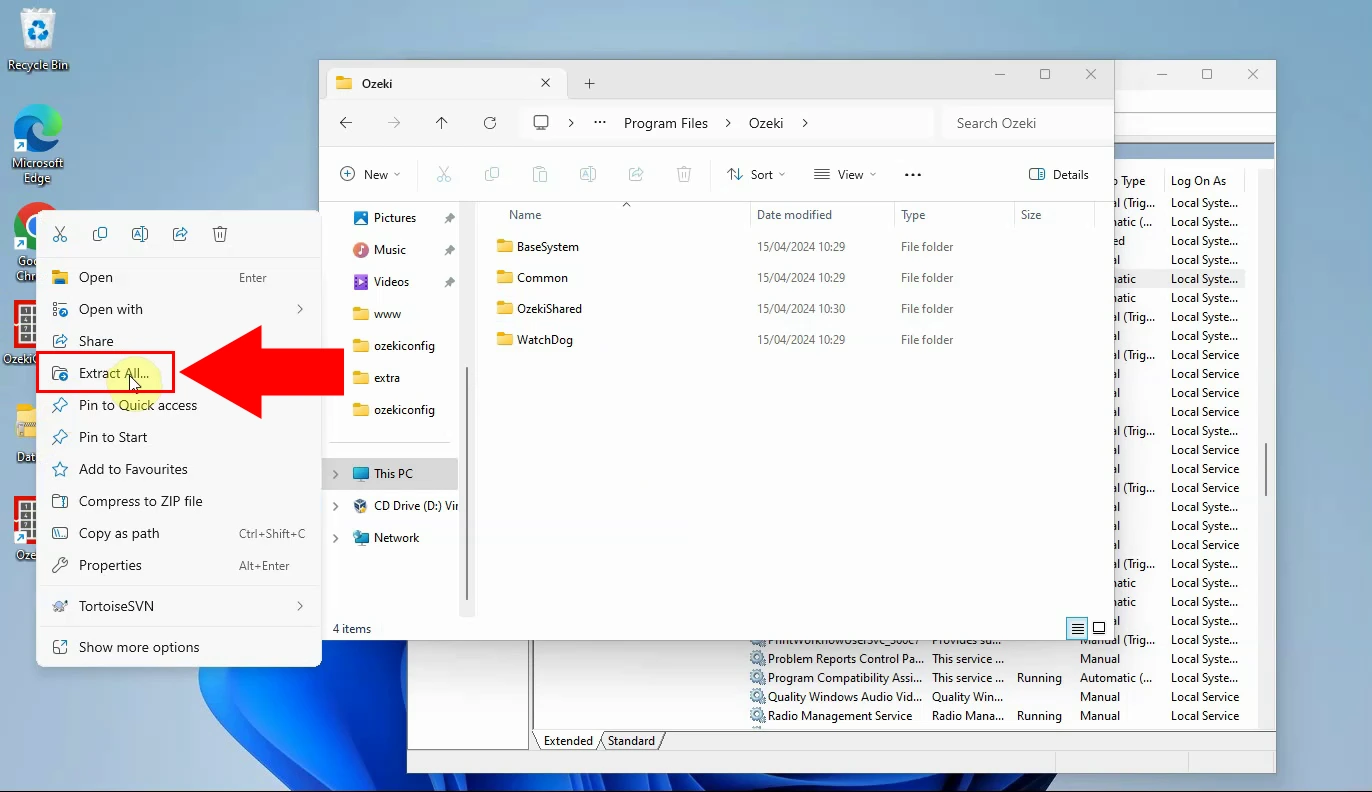
Next extract the backup data zip by right clicking on the Data.zip and by selecting "Extract All...", as illustrated in Figure 5.
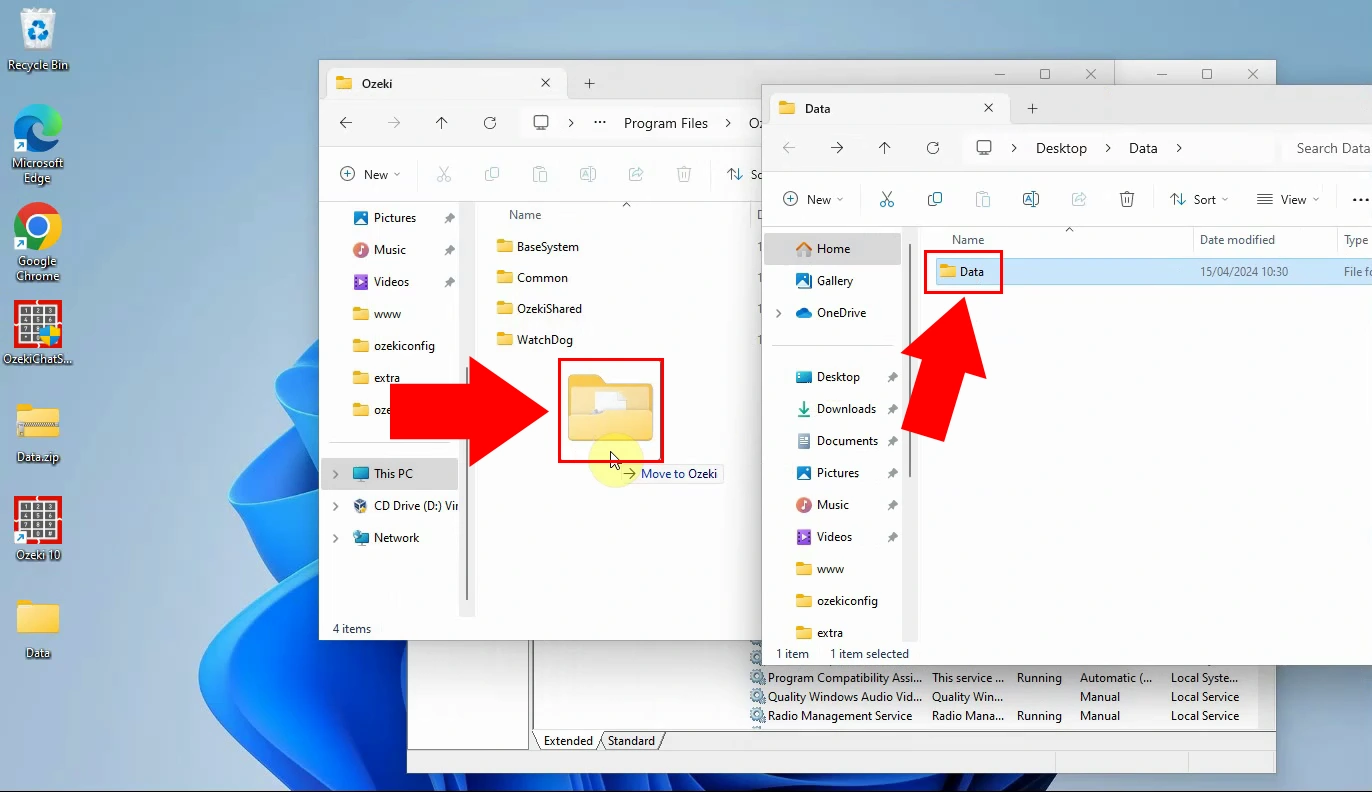
After the zip file was successfully extracted, move the extracted Data folder to the C:\Program Files\Ozeki folder (Figure 6).
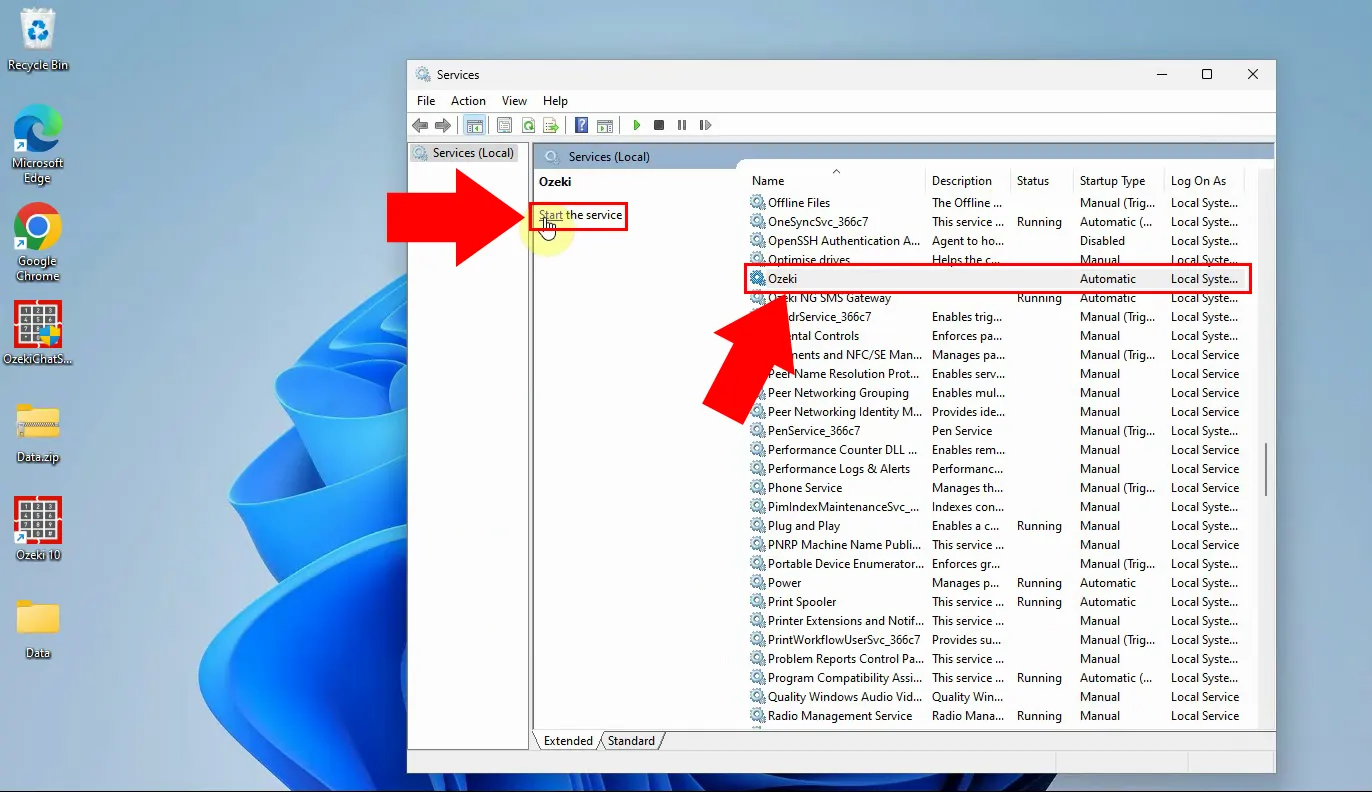
Finally you need to start the Ozeki service again under the services.msc. Select the Ozeki service from the list and click Start on the left side, the same way you see it in Figure 7.
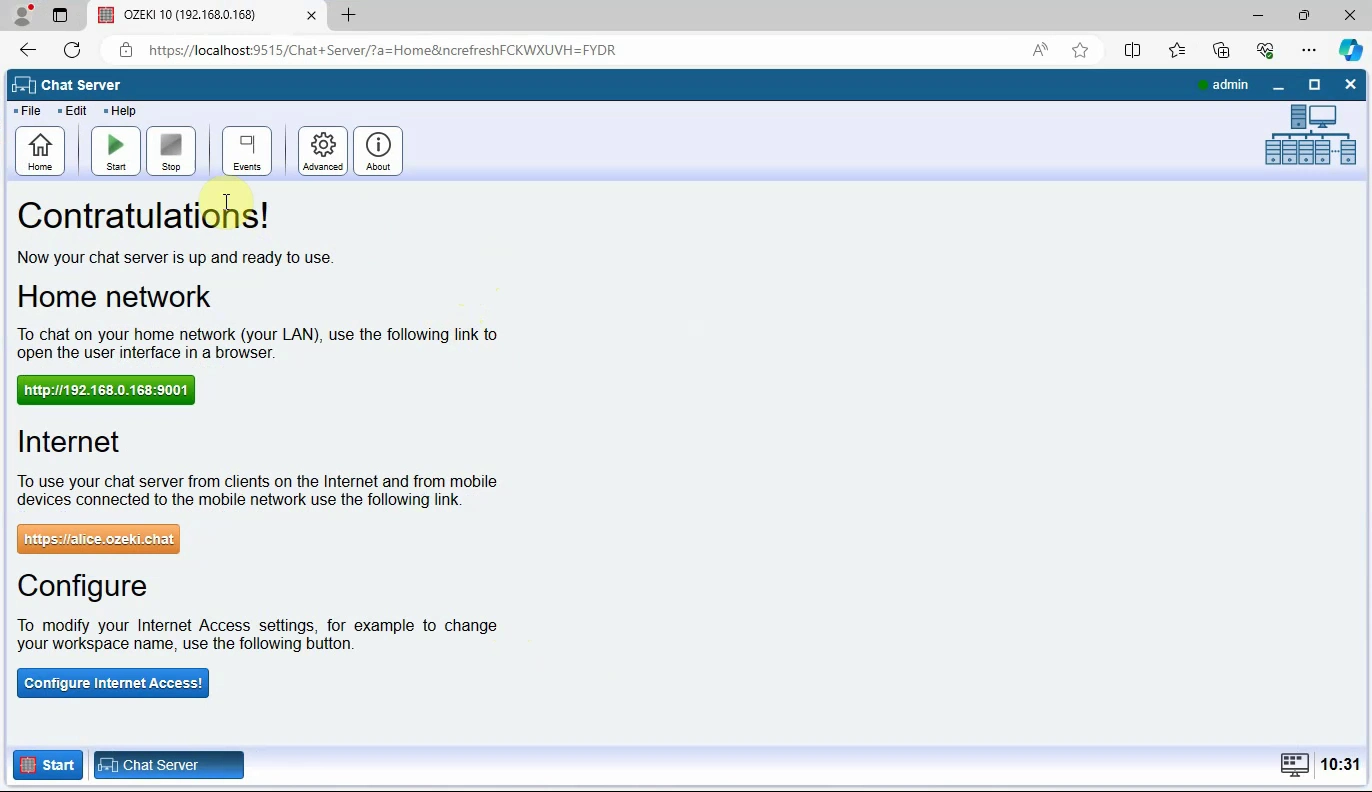
If the service is started you can see that the configuration is restored successfully, and you should see a similar screen to Figure 8.
What other uses are there for this method?
Besides restoring corrupt files, you may also do this when you wish to move to a new system, or to re-install Windows without losing your Ozeki Chat Server settings.
Is there a guide on backing up Ozeki Chat Server?
Yes, by clicking on this link you will be taken to the backup guide where you can learn more.

