How to create a chat user account
Communication is one of the most important aspect which distinguishes a successful company from a struggling company. Ozeki chat is a versatile and easy to use chat software, which will make communication with your chat partners carefree. It can send messages and files to any platform fast. To use this software, you need to register as a new Chat User. This guide will give you every information you need to have a working chat user account.
What is Ozeki Chat?
Ozeki Chat is a secure, self-hosted messaging platform designed for internal and external communication within organizations. It allows users to exchange text messages, files, and multimedia content across various devices and networks. Ozeki Chat supports real-time communication, user management, and integration with other Ozeki systems, making it an ideal solution for businesses seeking fast, reliable, and private chat functionality without relying on third-party cloud services.
How to create a chat user account (Quick Steps)
- Open the Users menu
- Click "Add new user"
- Enter user details
- Click "Create"
- User is ready
How to create a chat user account (Video tutorial)
In this video, you will learn how to create a new chat user account in Ozeki Chat. The tutorial guides you step by step through accessing the user management menu, selecting the option to add a new user, filling in the required details such as username and password, and finalizing the account creation. By the end of this video, you will have a working chat user account ready to send and receive messages and files across platforms with ease. This setup is essential for enabling communication within your Ozeki Chat system.
Step 1 - Open users menu
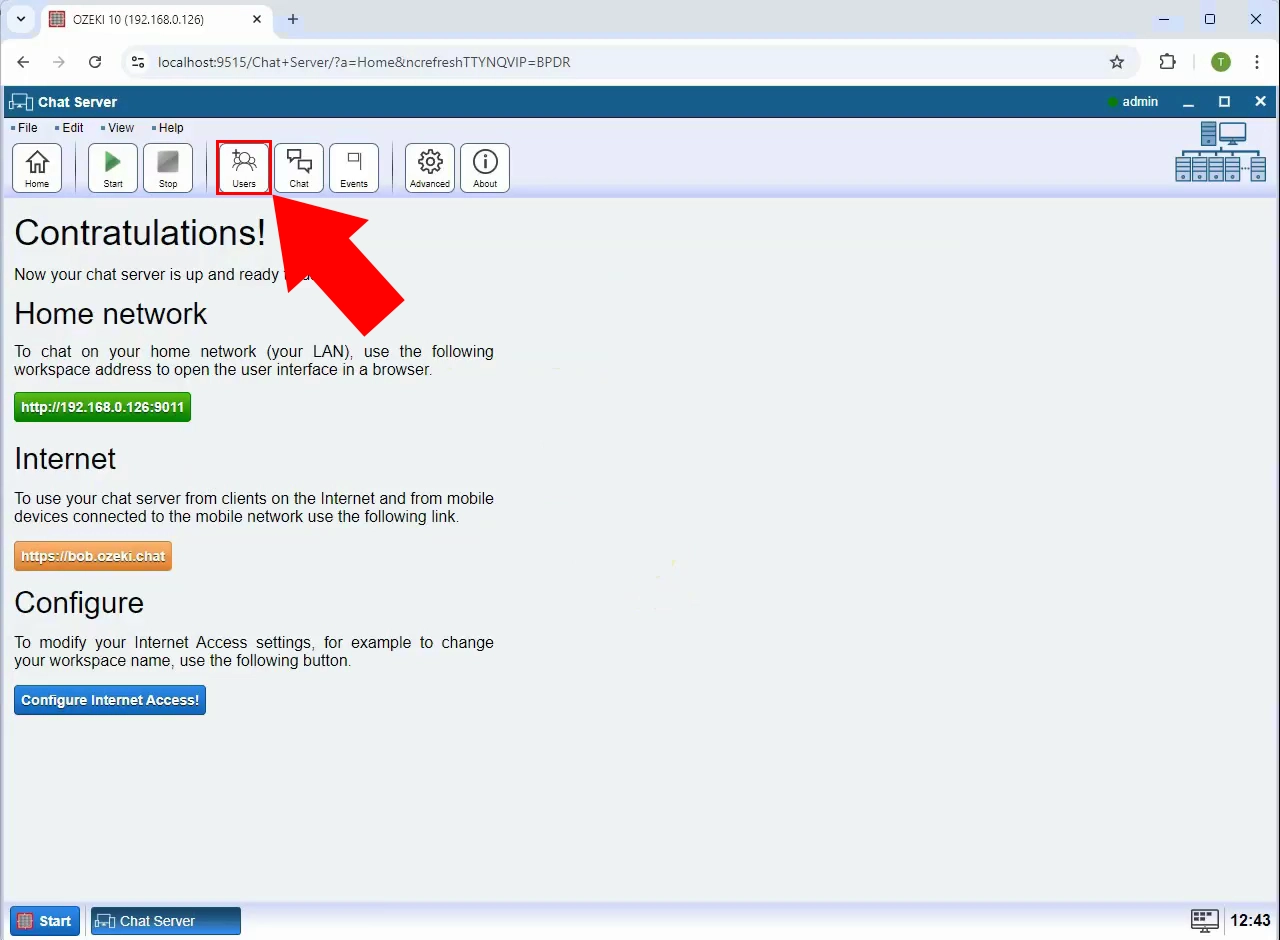
Navigate to the Ozeki Chat interface and click on the "Users" menu at the top. This menu provides access to all user management options (Figure 1).

Step 2 - Select add new user option
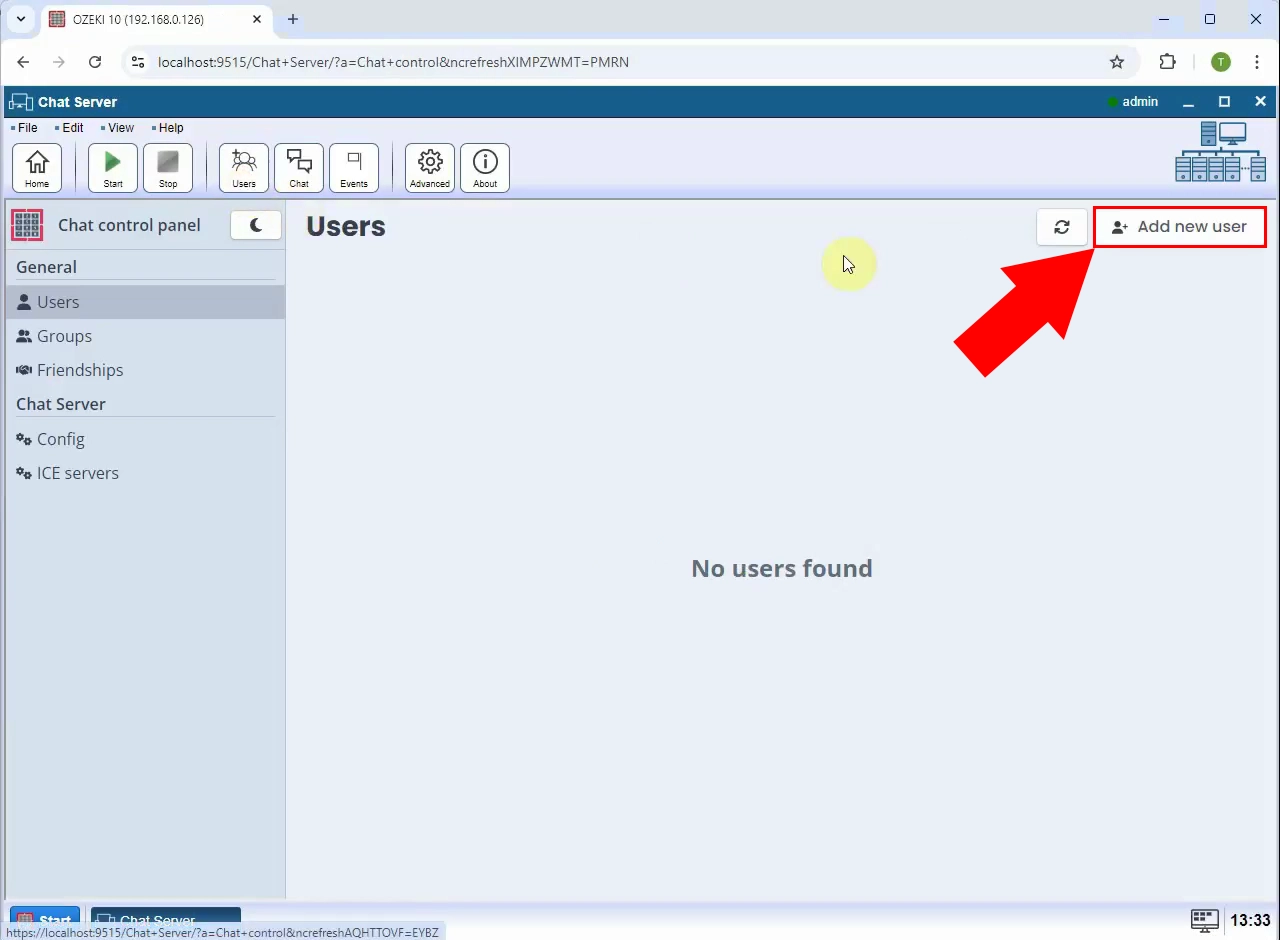
Click the "Add new user" button to begin the process of creating a new chat user account. This will open the user registration form (Figure 2).

Step 3 - Provide user details and click create
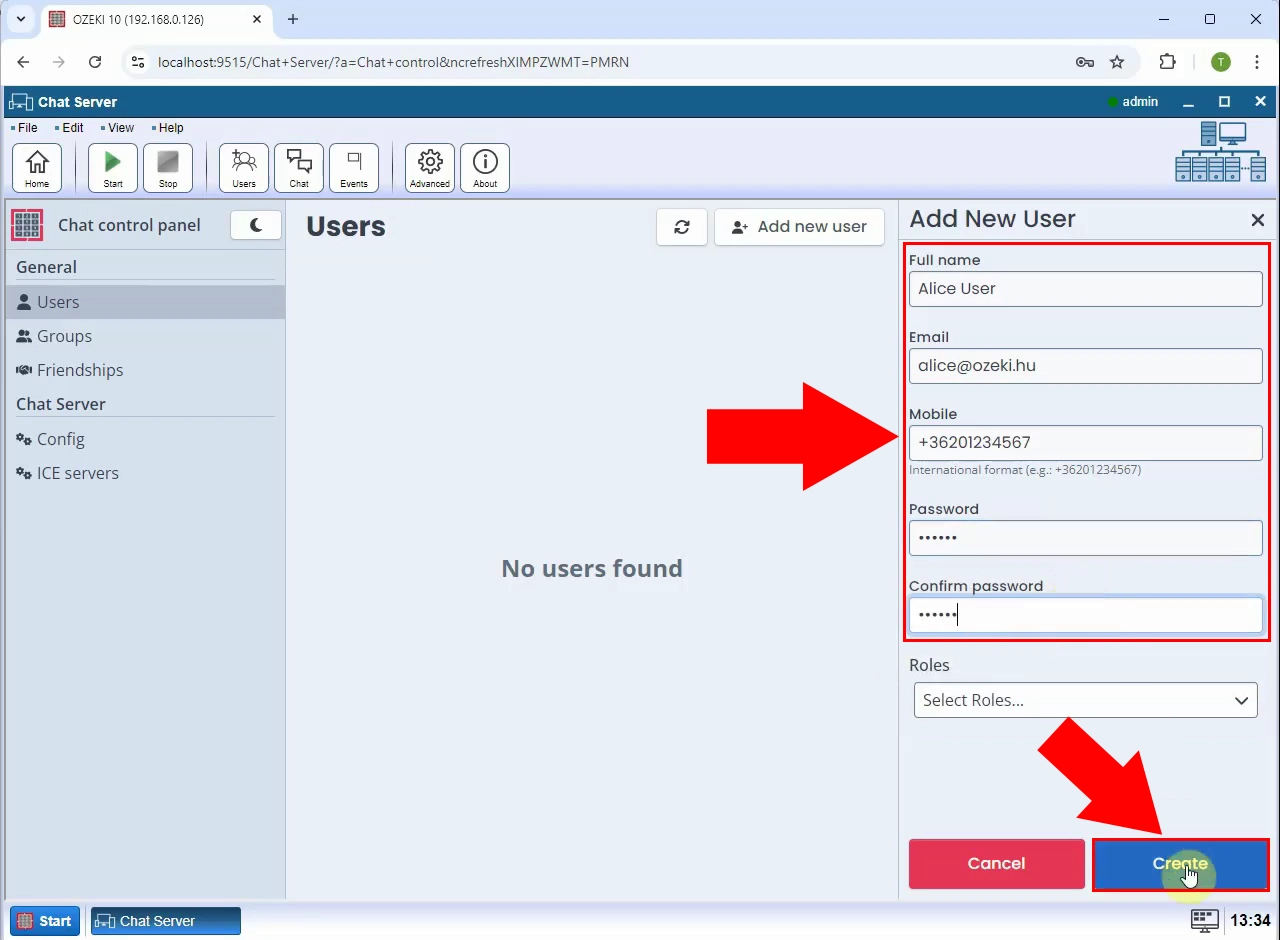
Fill in the required information such as full name, email, mobile, password and optional role. Once completed, click the "Create" button to register the new user (Figure 3).

Step 4 - User created
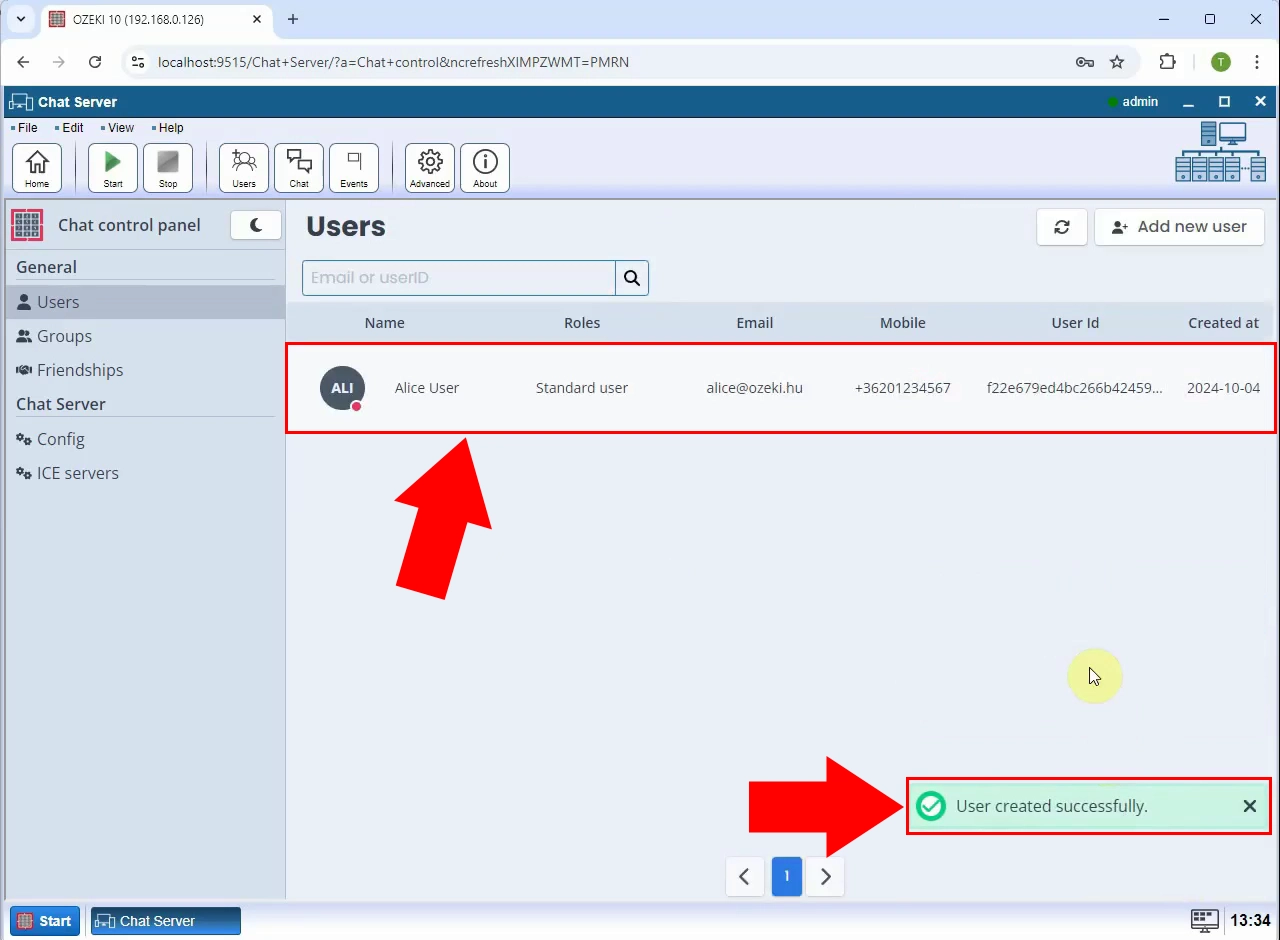
The new chat user will now appear in the list of users. The account is ready for use in sending and receiving chat messages (Figure 4).


