How to create table structure in Access 365
Before you start to configure your database connection in Ozeki 10 SMS Gateway, you need to create two database tables in the Microsoft Access 365: "ozekimessagein" and "ozekimessageout". From this guide you can learn how these tables should be created.
Download the database used in the example: ozeki_database.accdb
After opening an blank database file, click the View button in the upper left corner to switch to the Design view of the table. A window will appear where you need to enter the name of the table. In this case, it will be ozekimessagein (Figure 1).
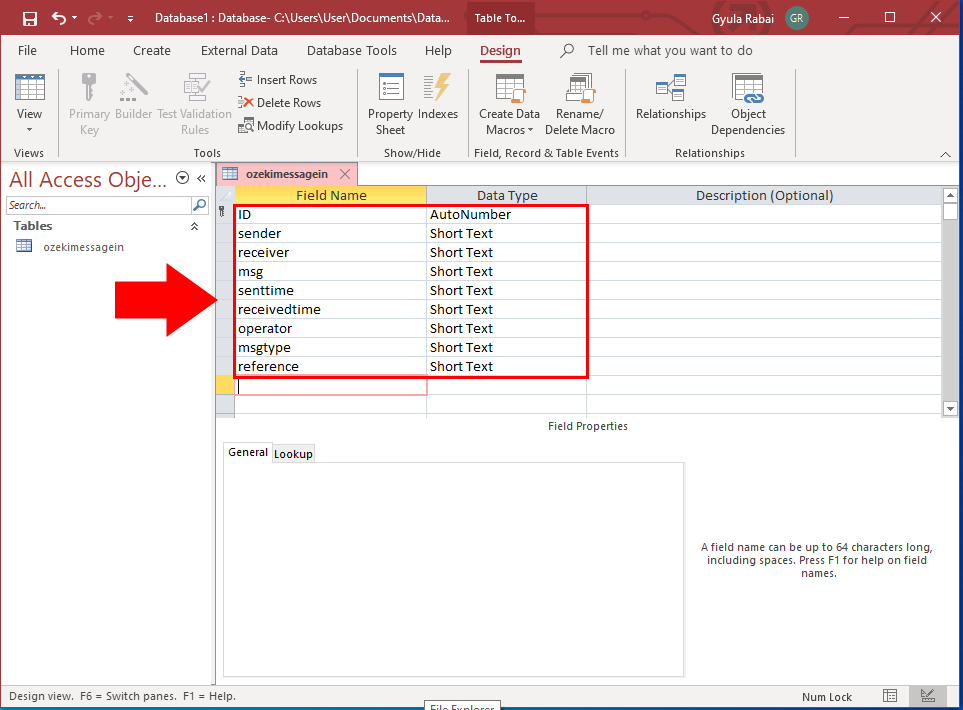
Next, enter the Field Names shown in Figure 2 with the appropriate Data types.
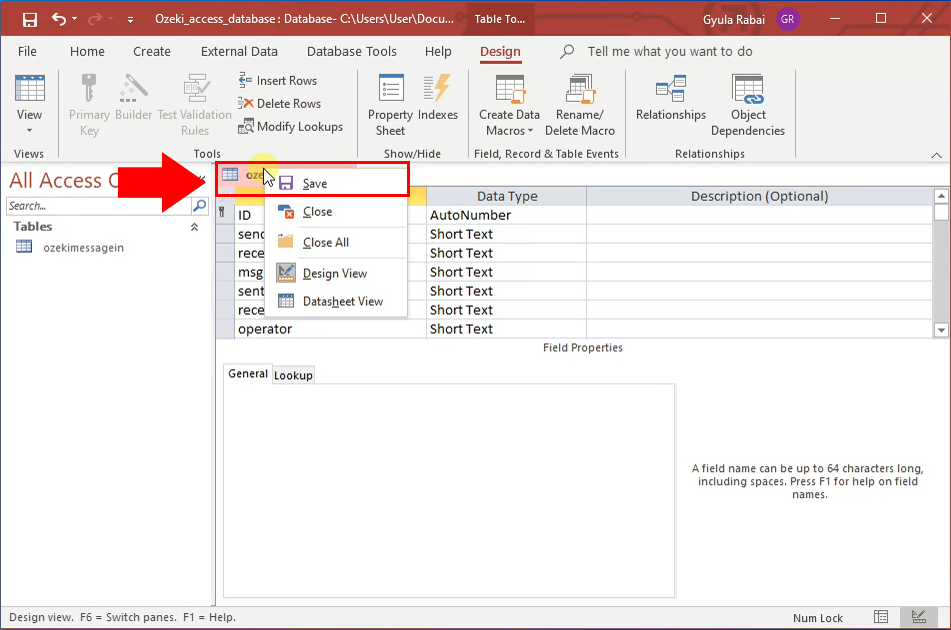
You can save the table settings by right-clicking on the table name as you can see in the Figure 3.
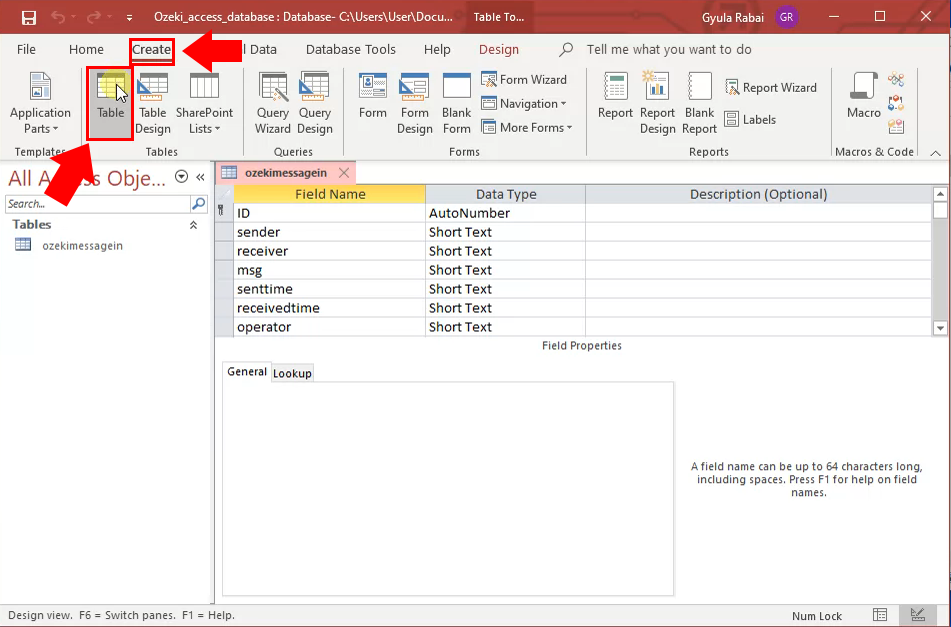
You will also need another table to use Ozeki SMS Gateway. Select the Creat menu and within it Table as shown in Figure 4.
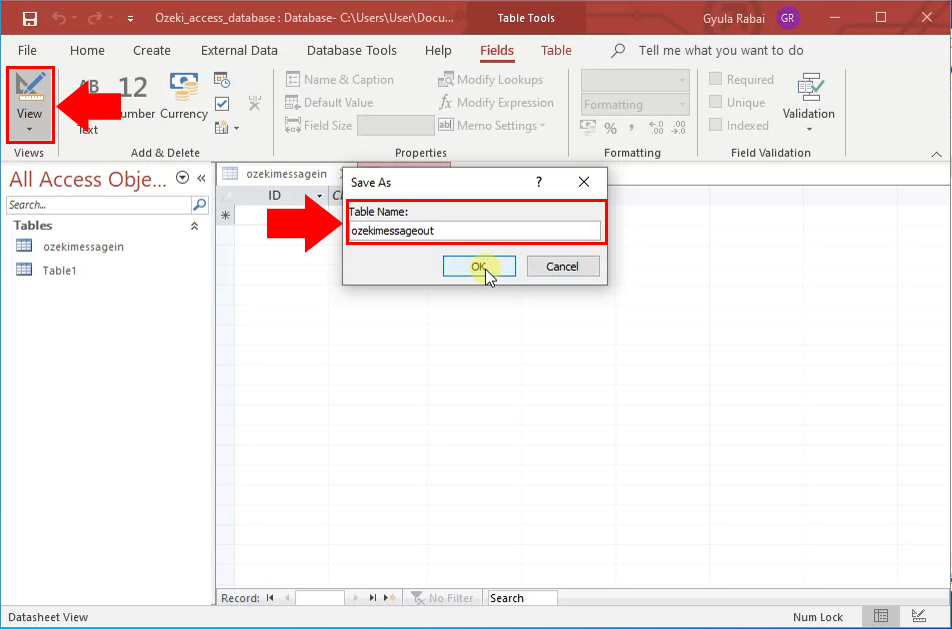
Click again the View button in the upper left corner to switch to the Design view of the table. A window will appear where you need to enter the name of the table. In this case, it will be ozekimessageout (Figure 5).

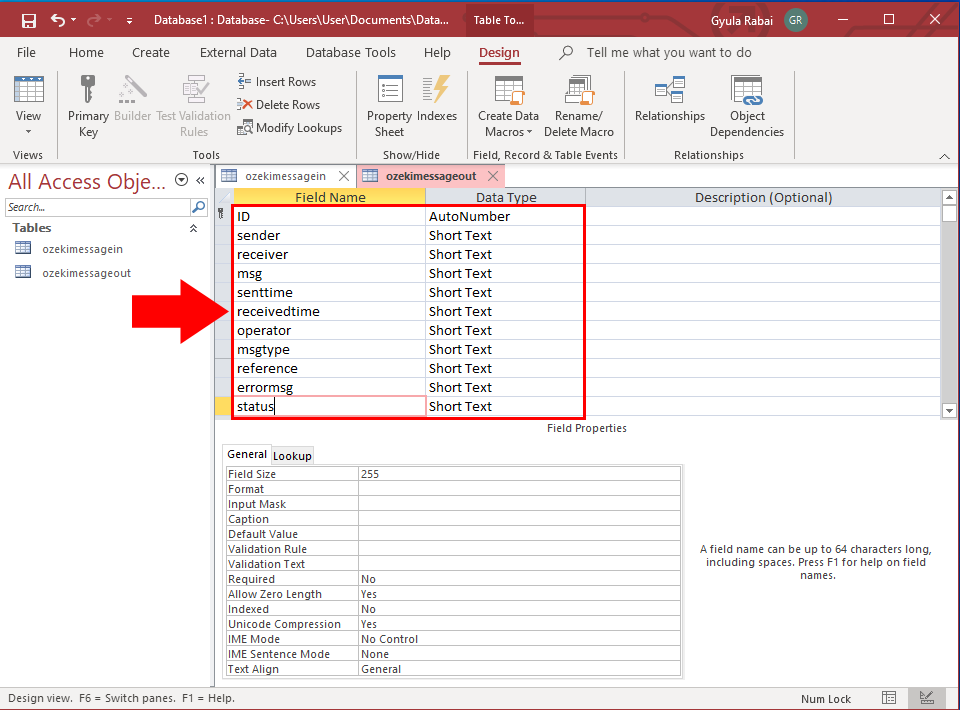
Here, enter the Field Names shown in Figure 6 with the appropriate Data types.
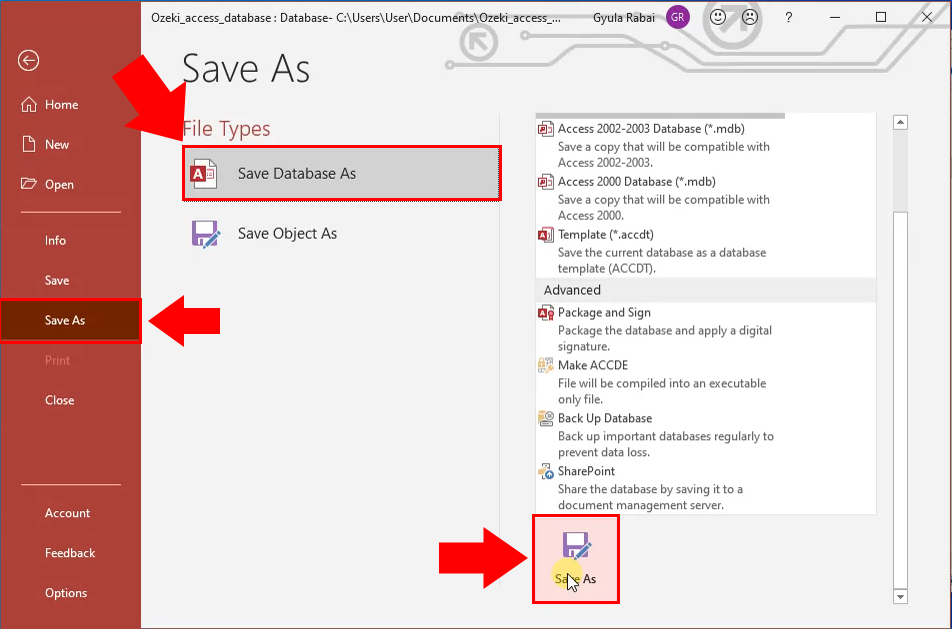
Finally, save the entire database file on the File menu. Select Save as section and then Save Data as option. You can then use the Save as button to save the file with the file name of your choice (Figure 7).
