How to find the local IP address of my computer on Windows 11
Knowing your computer's local IP address is essential for tasks like troubleshooting network issues, setting up a home network, or sharing files and printers. This guide provides a straightforward, step-by-step method to find your local IP address on a Windows 11 system. Follow our easy steps or watch our detailed video tutorial, and you'll be able to locate your IP address quickly and efficiently. Whether you're a beginner or an advanced user, these instructions will make the process simple and hassle-free.
How to find the local IP address of my computer on Windows 11 (Easy steps)
To find the local IP address of my computer on Windows 11
- Find the Command Prompt application on your computer
- Start running the Command Prompt
- Type the command "ipconfig"
- Look through the Command Prompt window
- Find the section IPv4 Address
- Look for your local IP
Find your computer's local IP address on Windows 11 (Video tutorial)
The following video will be about to show you the method of finding the local IP address of your computer on Windows 11 system. We give you detailed instructions about the process. You only need to follow them step-by-step. By the end of the video, you will get a knowledge about this method, so it will not cause any difficulties in the future to find a computer's IP address.
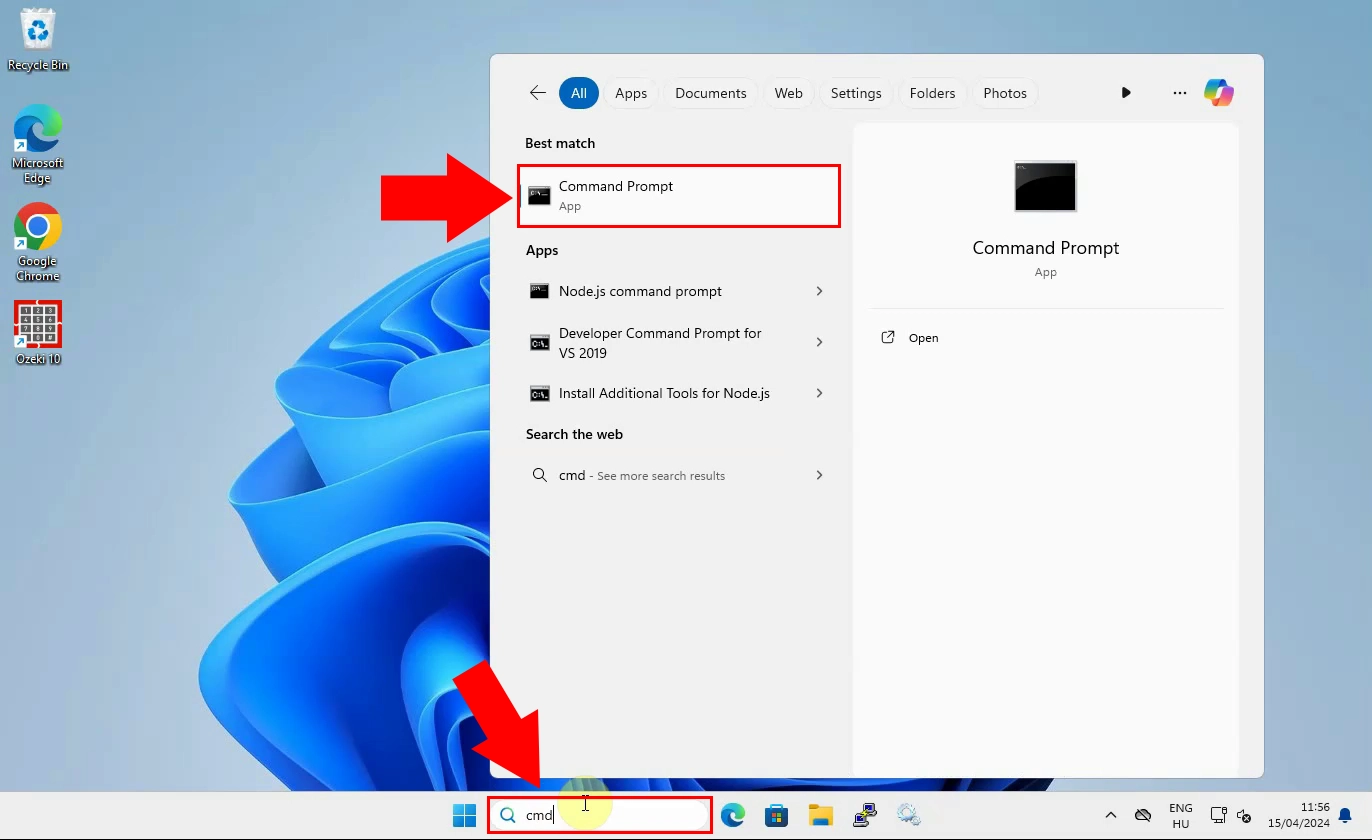
As the first step, you need to launch the Command Prompt application on your computer. You can find this applaication easily, by entering it's name into the windows search field. Start entering the name of Command Prompt, and it will appear as a result. (Figure 1) After finding the application, start running by double-clicking on it.

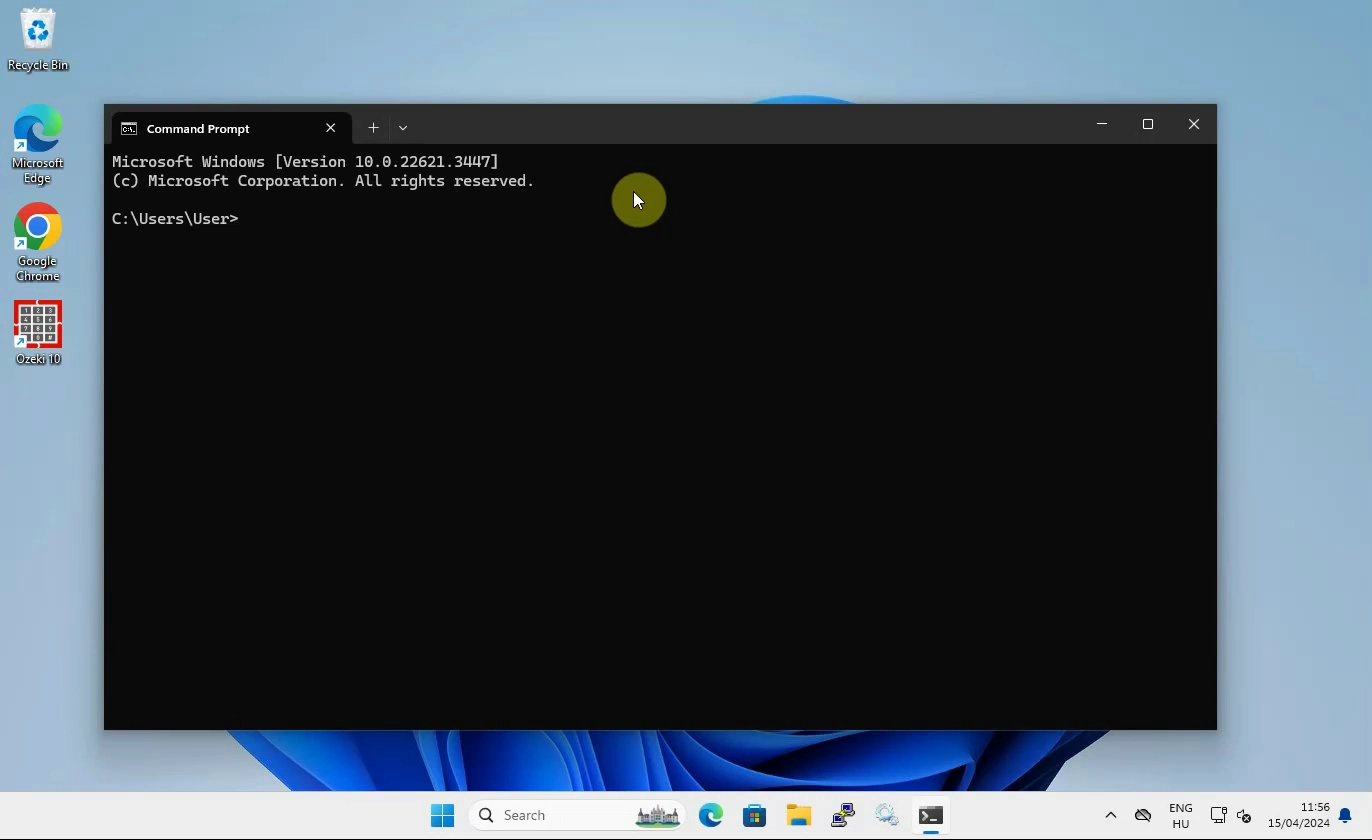
A new Command Prompt window is shown, indicating successful access to the Command Prompt application. (Figure 2) This window is where you can input commands to interact with your computer's operating system. It serves as a powerful tool for executing various tasks, troubleshooting issues, and accessing system information quickly and efficiently.

Now that you have the Command Prompt window open, you can proceed to find your
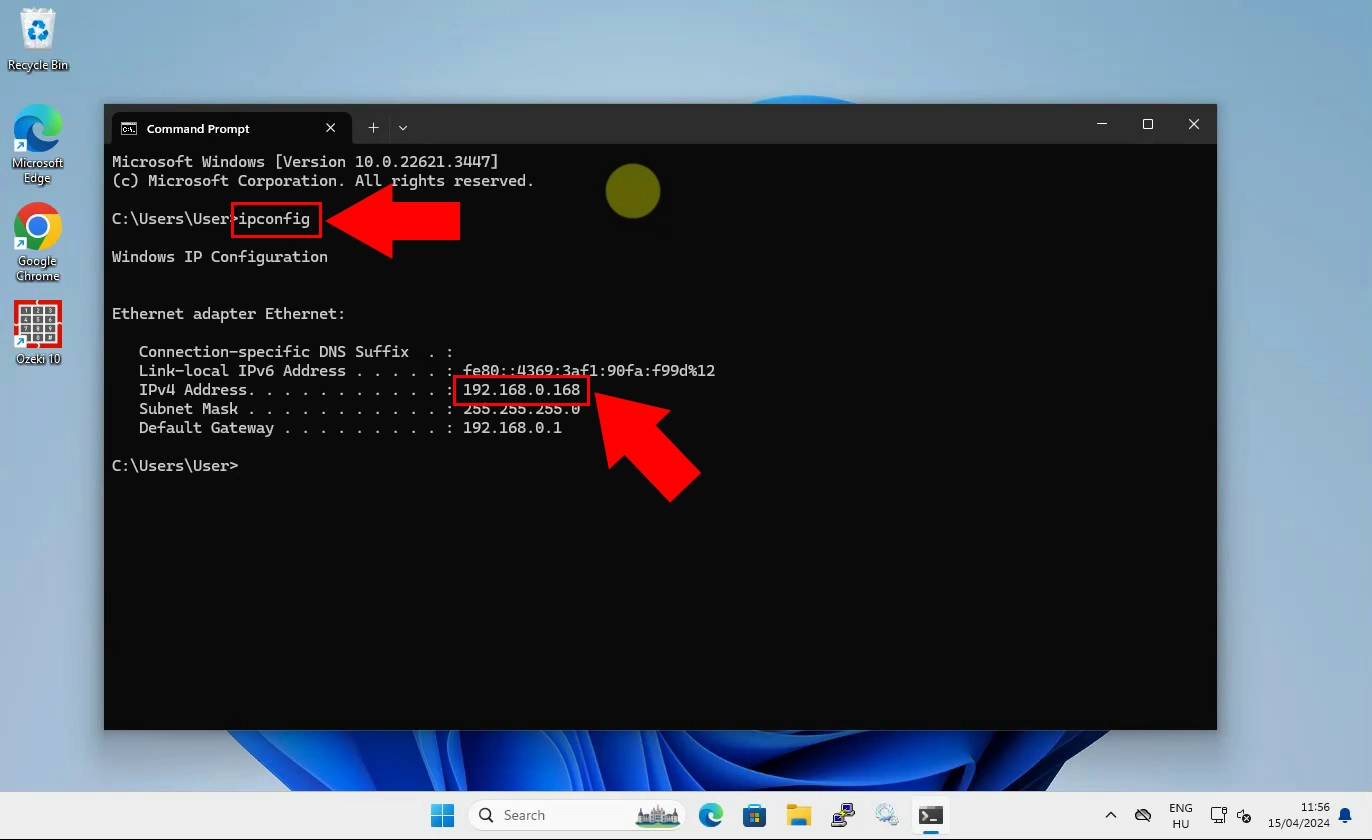
local IP address. In the Command Prompt window, type the following command:
ipconfig (Figure 3)
Then press Enter. This command will display detailed information about your network
connections, including your local IP address.

FAQs
Why do I need to know my local IP address?
Knowing your local IP address is essential for troubleshooting network issues, setting up a home network, sharing files and printers, and accessing certain devices and services on your network.
What is the difference between a local IP address and a public IP address?
A local IP address is used within your private network to identify devices. A public IP address is assigned by your internet service provider and is used to identify your network on the internet.
What should I do if I encounter problems while trying to find my local IP address?
If you encounter problems, make sure you have followed all steps correctly. You can also refer to our detailed video tutorial.
Is the process of finding the local IP address the same on other versions of Windows?
The process is similar on other versions of Windows, but the exact steps may vary slightly. This guide specifically addresses Windows 11.
Conclusion
Finding your computer's local IP address on Windows 11 is a simple process that can be accomplished using the Command Prompt. This guide has provided a clear, step-by-step method to locate your IP address, which is crucial for troubleshooting network issues, setting up a home network, or sharing resources. By following these instructions or watching our comprehensive video tutorial, you'll be able to find your local IP address with ease.

