How to send chat message using an HTTP API user
A HTTP API is any API that makes use of HTTP as their transfer protocol. In order to use it, you need to create an HTTP API user in the Ozeki Chat. In this process, you will create a username and a password. You can use the login credentials to connect to the HTTP API service of the Ozeki Chat server and start sending and receiving messages with the User.
Step 1 - Add new HTTP user
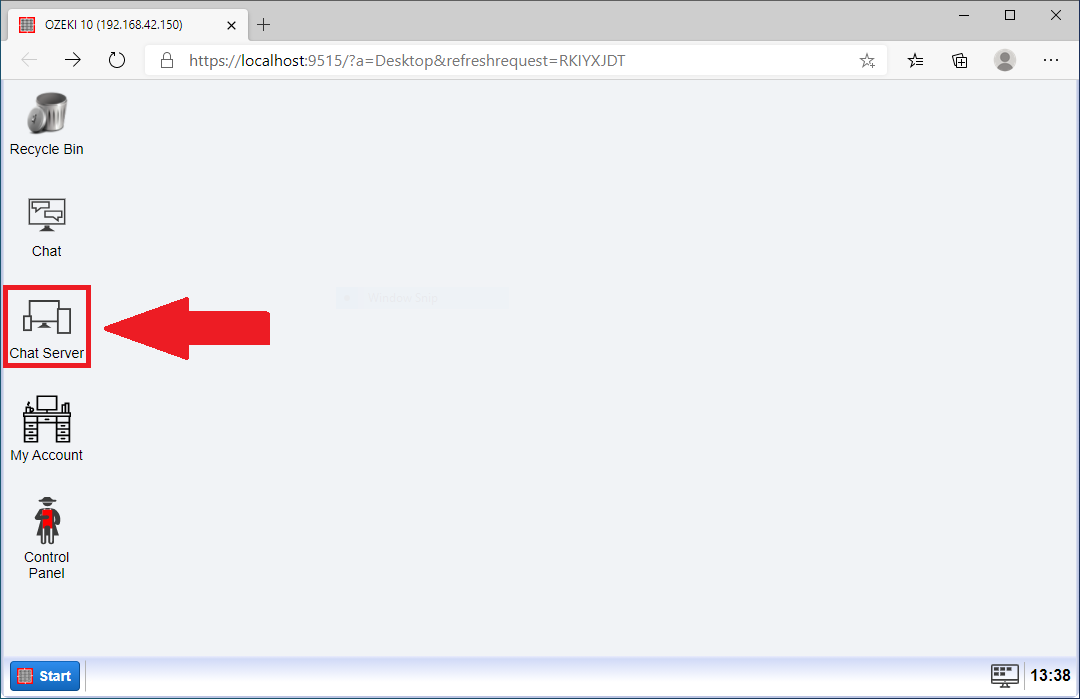
The first thing you need to do to configure a new user service is to open the Chat Server application from the desktop of the Ozeki OS, as you can see on Figure 1. Click it and it will open the Chat Server configurator.
Here now you need to have access to the User list. To do that, please click the Users button located on the top of the Chat Server window. You can find the button you need to click on Figure 2.

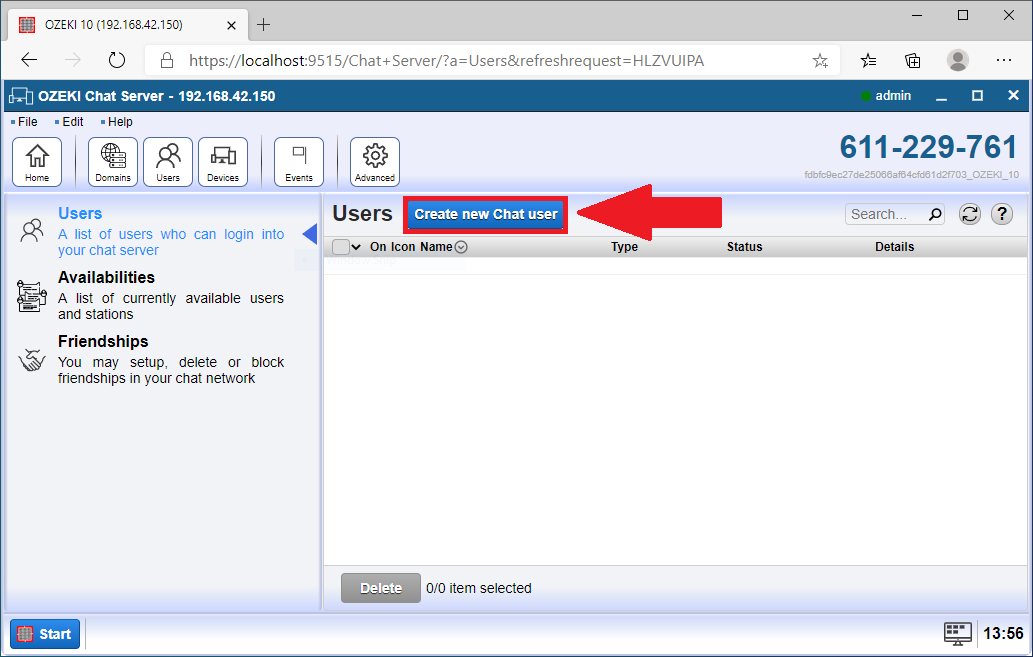
Now here is the users list. Above it there is a Create new Chat user button. Click it and it will open the New User details panel on the right. You can see the button on Figure 3.
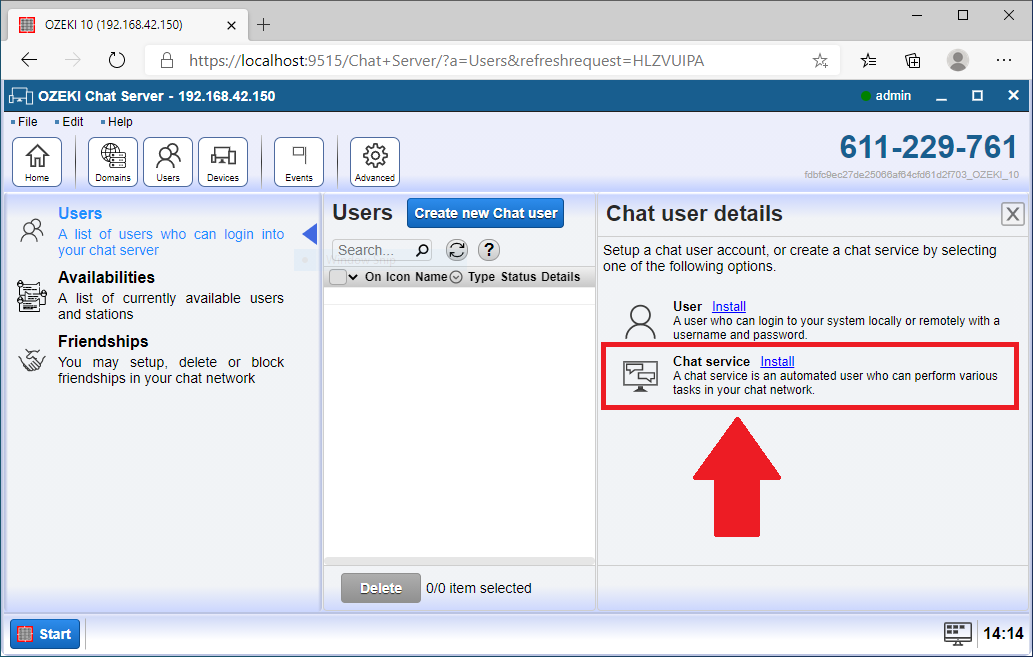
You can choose between two type of users. The User can login with a username and a password and have a conversation with the chat partners. The Chat service is a non-human service that can be used to automate chat messages and perform various tasks. You can get more information about both of them on Figure 4.
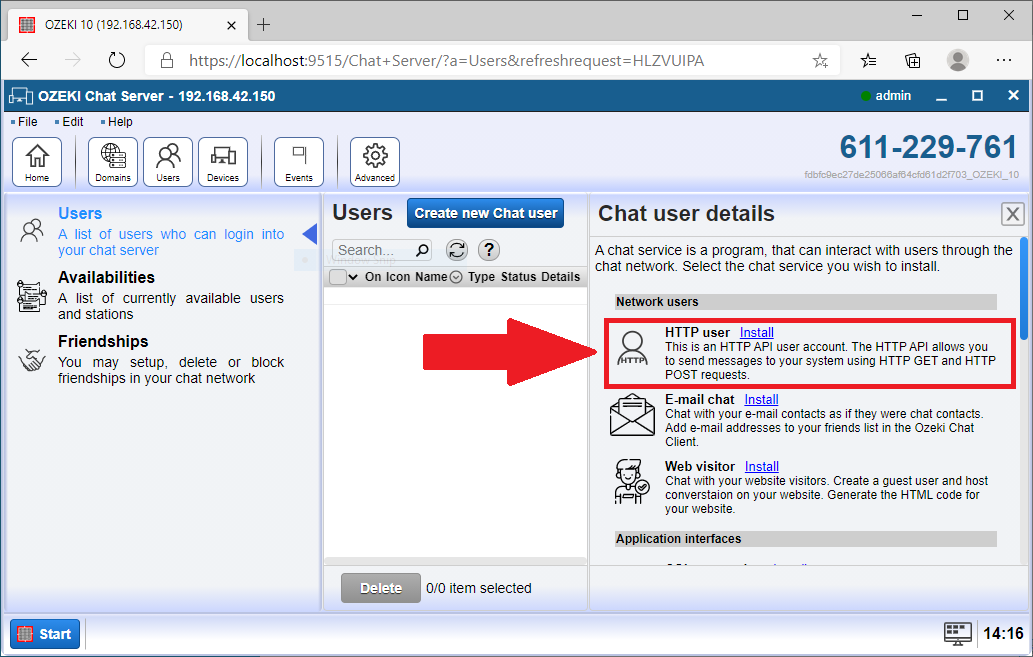
Now you can pick which kind of user you wish to install. You have three options: HTTP user, E-Mail user or Web visitor. In this case, please choose the HTTP User option. You can see which one to choose on Figure 5.
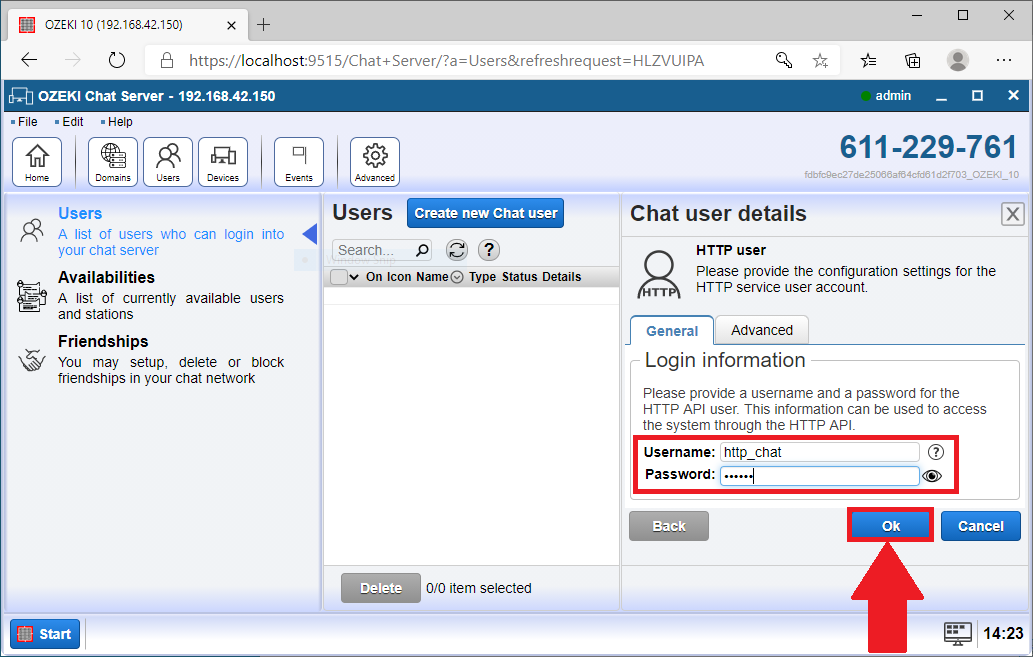
Now you need to provide a username and a password for your chat user. The username will be used to differentiate the http user from other users. The password serves security reasons. Type in both of them and click the Ok button. You can see the process on Figure 6.
Step 2 - Add HTTP user to chat client
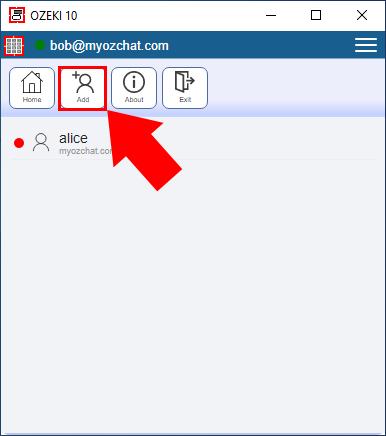
Now you need to add the newly created user to your chat partner list. To do that, please click the Add button on the top of the Chat panel. You can see the button on Figure 7.
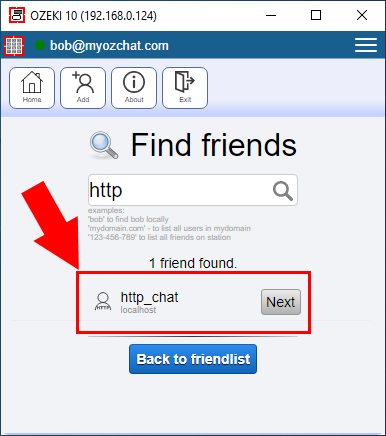
The Find Friends feature can find your friend on your chat server. Start typing in the username you gave it, and it will find you user. Click the next button and it will be on your friend list. You can see the process on Figure 8.
Step 3 - Send Chat message using HTTP Request
With all connections set up properly in Ozeki Chat server, now you can start sending chat messages from HTTP Requests. Now, you will be able to see, how you can send a chat message by using only one HTTP Request.
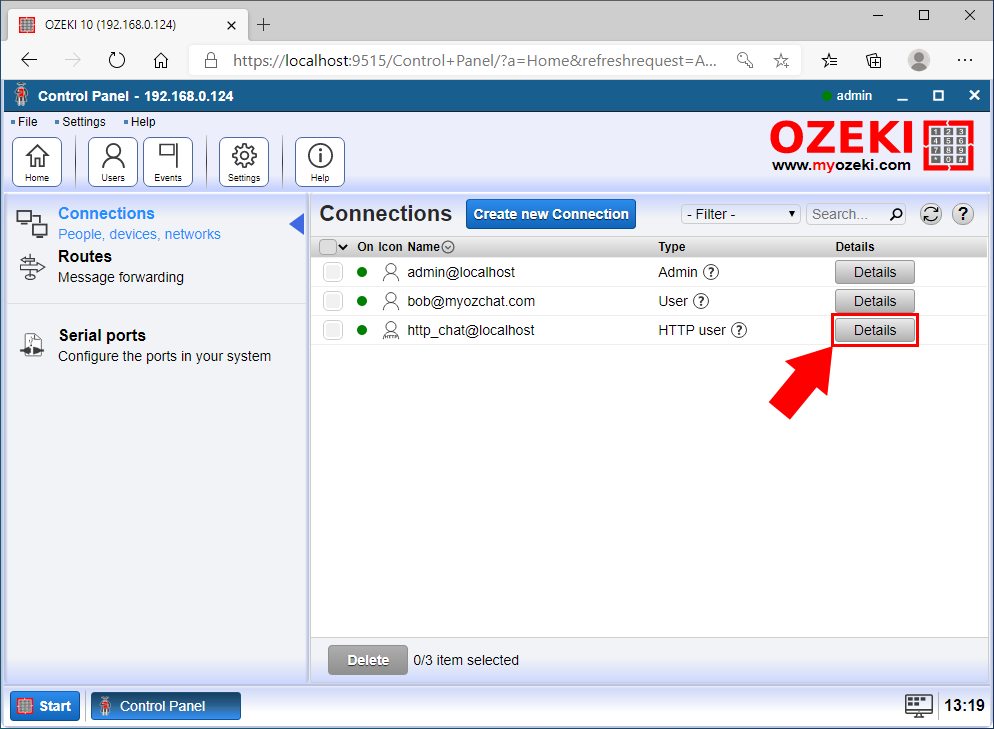
The HTTP API service is capable of receiving HTTP requests from your application. However, due to testing in the current documentation, we will use the HTTP API user as it has a test interface from which it is possible to send an HTTP request. To do this, open the HTTP User Details page from the Control panel, as you can see on Figure 9.
On the details page, open the Test tab from where it is possible to send an http request. At the request URL, you can specify the IP address and port of the Ozeki Chat server. By default, the HTTP port is 9509, as you can see on Figure 10. If you want to use HTTPS, set port 9508. In the Post data field, enter the command.
command=SendMessage&Username=http_chat&Password=abc123&Recipient=bob@myozchat.com@%
&MessageData=Hello+World
When sending a Chat message, the format of the receiver is very important. The most important point you can discover is that it has two @ character in it. This is because the address is as follows: user@domain@station . In the current example, you can see that we use the % character instead of station, which means that the message will be sent to all stations of the user. So if a user is logged in on more than one device, all of them will receive the message.
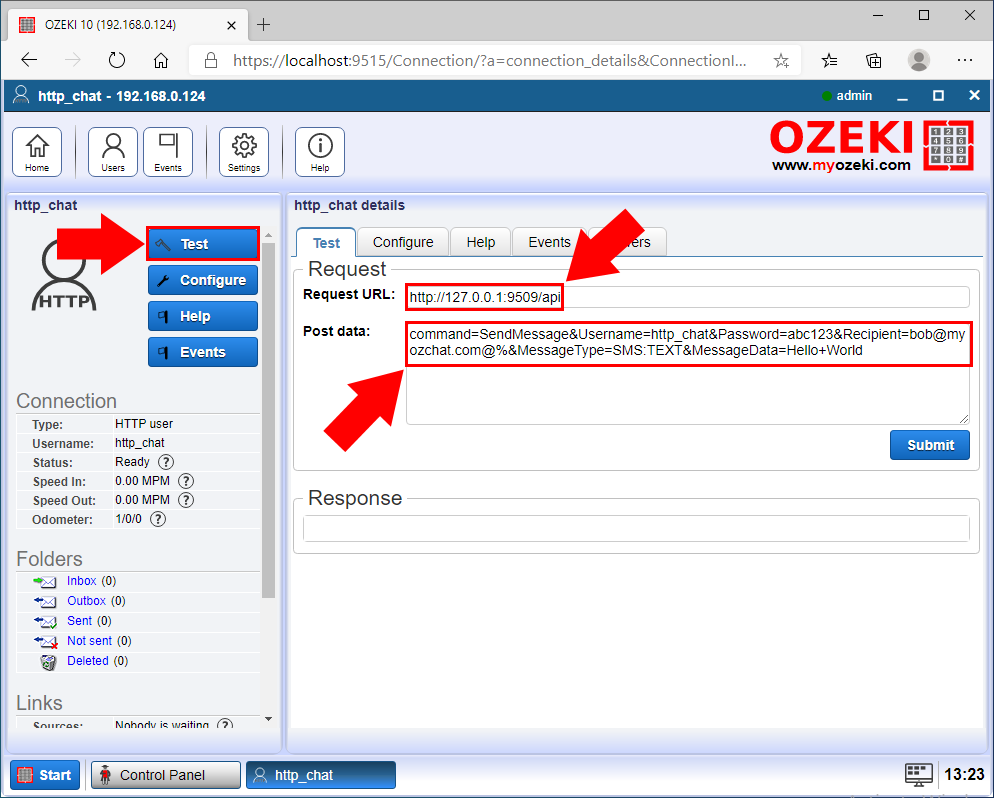
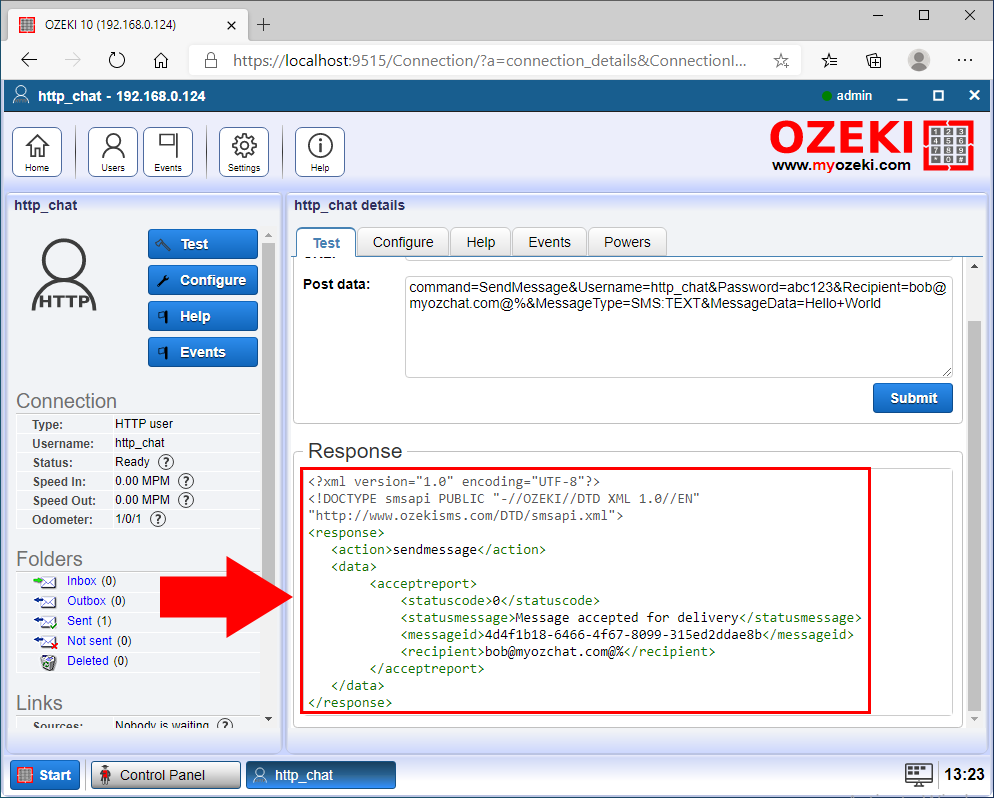
After you have submitted the code, you can see on Figure 11, that the http user will respond to your message.
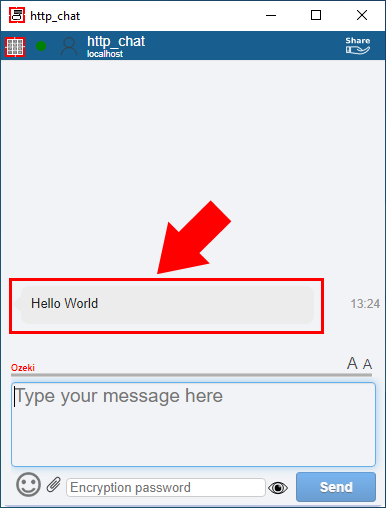
As the final step, you can see that the message arrived in the chat conversation.
We hope that this guide was helpful. If you have any problem with any of the steps, feel free to contact us at info@ozeki.hu

